Archive for April, 2010

Loving Leeks

April 19, 2010

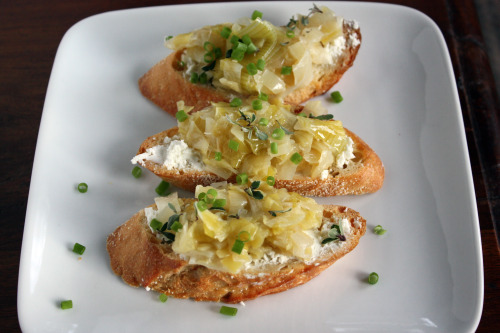
I don’t know about you, but I have a very small part of my brain that I think of as the “that recipe looks amazing, don’t forget about it” section.  I never know what is going to stick in there.  There are a lot of recipes that I think look amazing but a very select few make it into this precious section of my brain.  Thankfully, these leeks have been holding a spot for a while.

This recipe comes to us by way of Molly Wizenberg, a.k.a Orangette.  We all know about Orangette, right?  I first found her through Bon Appétit where she writes a column.  From there, I made it to her blog and like so many other people, I fell in love with her writing style and her food.  I had the good fortune to be seated across from Molly and her adorable husband (and talented chef) Brandon at a dinner recently.  Let me tell you, she is as lovely in person as she appears in print.

In the fall of 2008, she wrote about these leeks and luckily enough, even though that was a long ago, this is one of those recipes that went to that precious part of my brain.   A lot of people don’t know that they love leeks but that is probably because they haven’t tasted them – or they haven’t had them cooked the right way.  For me there has never been any question.  If you are unsure about leeks, or have never cooked with them before, this is a great place to start.  Very simple, highly adaptable, incredibly delicious.

There are two things you want to remember when working with leeks.  First, the usable part is the white and pale green closer to the root end.  As you get up toward the dark green top, they get very woody.  Those tops are terrific for using in stock, but you don’t want to eat them.  So, when buying leeks, look for ones that have a long white part.  Sometimes you will see them with just an inch or so of white and that is the time to just pass them by, or be prepared to buy double the number you thought you needed.  The other thing to know about leeks is they tend to be very sandy.  To avoid having grit in my food, I always wash them whole, then split them down the middle and wash the cut sides well.

So, what can you do with leeks that have been cooked down in a bit of butter, a dash of salt, and a couple of tablespoons of water?  (I added some fresh thyme because it grows in my yard and I love leeks and thyme together.)  If you are a leek lover like me, you might be tempted to eat them by the spoonful.  But I suggest you hold off and do one of the following.  Make the original recipe these leeks were made for – this spectacular tart.  I made it for a dinner party this past Friday and I have to say I was really proud to serve it.  Beautiful and incredibly tasty.  Or you can take those same leeks and incorporate them into a brunch frittata (recipe coming soon).  You could also toss them with hot cooked pasta and a little of the cooking water along with any manner of cheese for a light Sunday supper.  Or you can make a delicious and simple appetizer like this one.

Do yourself a favor.  Make extra and use them throughout the week.  They keep well and you will want to put them on everything.

One Year Ago:  Mississippi Mud Cupcakes

Crostini with Goat Cheese and Leek Confit
Inspired by Orangette
Makes 8 Crostini

¼ stick unsalted butter
4 large leeks, white and very pale green part only, cut in half lengthwise and then sliced into ¼-inch thick slices
1 tbsp. chopped fresh thyme leaves
2 tbsp. water
½ tsp. salt
8 thin slices French bread, cut on a diagonal
Olive oil
2-3 oz. fresh goat cheese, such as Montrachet
Fresh chives, for garnish (optional)

For the Leek Confit:
Melt the butter in a large skillet over medium-low heat.  Add the leeks along with the salt and stir to coat.  Add the thyme and cook until starting to soften, about 4 minutes.  Add the water and reduce heat to low.  Cover the skillet and cook, stirring occasionally, until the leeks are meltingly tender, about 25 minutes.  If there is still liquid in the skillet, remove the top and allow it to cook off.  Remove from heat and set aside.

To Finish the Dish:
Place the bread slices on a baking sheet and drizzle lightly with olive oil.  Place in a 350ºF oven for 10-12 minutes, or until crisp around the edges but still a little soft in the middle.  Spread each toast with a bit of goat cheese and then top with the leek confit.  Garnish with chives if desired.

(You will have leftover confit, but I think I have made it clear that is not a bad thing.  Cover it and it will keep in the refrigerator for up to 5 days.)



Tabasco and Asparagus Quinoa

April 16, 2010

You know when you get a new accessory – say, a pair of earrings or some awesome shoes – and you just want to wear them with everything?  Or a new lipstick shade that looks just right no matter what you have on?

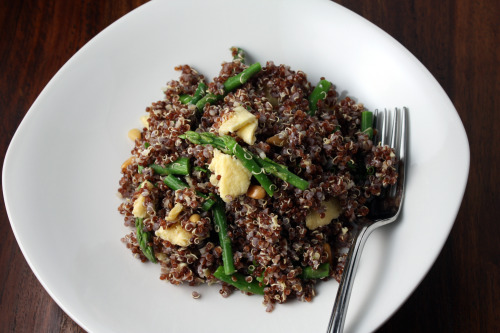
That is kind of how I feel about this quinoa dish.  I want to eat it everyday.  I want to eat it straight out of the bowl and I also want to gussy it up by filling giant portabello caps with it, and roasting it in the oven with a sprinkling of cheese.  I want to feed it to the people I love.  There are a lot of people I love but that’s okay because this recipe gives you a lot of quinoa.  And it keeps beautifully.

This dish comes to you by way of 101 Cookbooks, a lovely site and one I turn to when I want über-healthy food or when I just need more whole grains in my life.  That Heidi knows her way around quinoa, let me tell you.  Let me also tell you what I love about this dish.  If you have tried quinoa, you probably like it.  It has a mild nutty flavor and a delightful little pop under the tooth.  Here it is tossed, while still warm, with a little butter that has been mixed with Tabasco, lemon juice, salt and mustard.  An intoxicating combination if there ever was one.

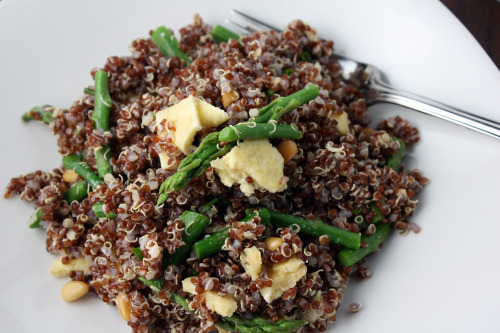
I had a lonely little bag of red quinoa sitting on my “grains” shelf (yes, I am annoying – I have a large pantry) so I used that but regular old quinoa is fine, of course.  (Although I have to say I really liked that red stuff and since I have a grains shelf, I plan to buy more.)  Heidi mentioned that she ate this dish the next day fried rice style with some egg added in.  I decided to add it from the start since we can always use more protein around here and, being a baker, I always have eggs in my refrigerator.

As I mentioned up top, this makes a lot of quinoa.  We ate it three nights in a row and the third night I shared it with three other people.  It tasted as good the third day as the first and because I shocked the asparagus in ice water so they would keep their lovely green color, it looked as good too.  We doused ours with extra Tabasco one night, spooned on a tomatillo salsa the next, and dabbed it with an Asian sweet chile sauce the third.  Very adaptable – just like the perfect pair of shoes.

One Year Ago:  Gruyère Gougères

Tabasco and Asparagus Quinoa
Adapted from 101 Cookbooks
Serves many

2 cups quinoa
3 cups water
¼ cup (½ stick) unsalted butter, room temperature
1 tsp. Dijon mustard
15 drops Tabasco sauce
Juice of half a lemon
¼ tsp. salt
1 pound asparagus, cut into 1-inch segments
1/3 cup pine nuts, toasted
¼ cup plain whole milk yogurt (optional)
3 eggs, beaten

Rinse the quinoa in a fine mesh sieve.  Bring the 3 cups of water to a boil in a medium saucepan along with a large pinch of salt.  Add the quinoa, allow  it to return to a boil, then cover and reduce heat to a simmer.  Cook for about 25 minutes, until the quinoa is tender and the water is absorbed.

Place the butter in a medium bowl and mash it with a fork.  Add the mustard, Tabasco, lemon juice and salt and mash well to combine.  Add to the pot of quinoa and stir to combine well.

Boil the asparagus in a large pot of salted water for just a minute or so.  Immediately remove them to a bowl of ice water.  Once they are completely cool, drain well.

Heat a small non-stick pan over medium heat.  Melt a bit of butter in the pan and then add the eggs.  Allow them to cook, occasionally lifting up the edges and allowing the raw egg on top to go to the bottom of the pan.  Once the eggs are cooked, slide the omelet onto a cutting board and cut into 1-inch pieces.

Add the asparagus, pine nuts, eggs, and yogurt to the quinoa and stir well to combine.


The First and Most Recent Cake

April 13, 2010

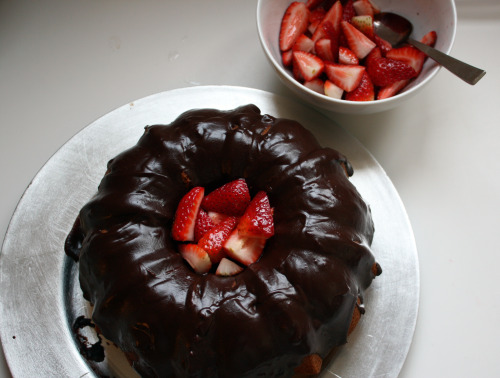
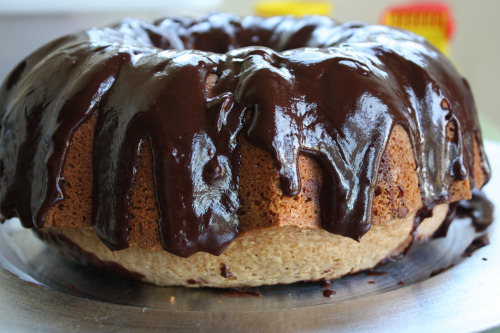
I think when you are good at something, or at least experienced at something, it can be easy to forget the path you took to get there.  I am a good baker (not great – good) but there was a time when I had never baked a cake.  I was 22 and the very first cake I baked, my first time so to speak, was this one.  I found it intimidating.  I was overwhelmed by the recipe, by the number of bowls, by the swirling technique of the two batters.  Plus there was a glaze to worry about.  But I made it and it turned out.  The people I baked it for oohed and aahed and it gave me confidence to take on another baking project.  After a few successes, I truly fell in love with baking.

Bear with me as I tie this back to yoga.  I have been practicing yoga for twelve years, with a couple of breaks due to pregnancy, children, life, etc.  From 2001 to 2003, I taught a vigorous flow class.  Just as I was always challenging myself in my own practice, I challenged my students.  As my body slowly opened up and became stronger, I encouraged my students that theirs would too.  Along the way, I now realize, I lost the feeling of being a beginner.  I think I was always a sensitive teacher, offering modifications, encouraging people to listen to their body.  “Do only what feels right for you today, don’t think about yesterday, and don’t worry about what your neighbor is doing”, is something I said regularly.  But I think my passion for the practice always moved me forward rather remembering what it was like in the beginning.

This past July, I came back to my yoga practice after a three year hiatus.  I felt as though I had never been on a mat before.  Things that used to be fluid became clunky.  My body was different after two pregnancies and two c-sections had zapped any core strength I once had.  Over time, I had lost most of my flexibility and strength that I had worked so hard for.  The simplest poses felt awkward.  My mind knew what to do, but my body would not obey.  I was thrust into the role of a beginner and it made me so appreciate all the lovely people who came to my class and watched me demonstrate poses that they probably thought they would never master.  I felt the practice as I probably never had.  I had to re-learn.

Fortunately, what they say is true.  The body does have a memory.  After committing to going to yoga three times a week every week, the fluidity slowly came back.  The strength came back.  Some of the flexibility came back.  (I was always more strong than flexible.)  A sun salutation feels like a dance again rather than a chore.  I flow without thinking – finding my body doing things without my mind coming along for the ride.  Yoga is for me, at the best of times, truly a moving meditation.  It is a wonderful place to be and it makes me want to keep going.

Feeling this way also makes me want to teach again.  Because now I think I have a much better appreciation for those who are just starting out.  I want to teach the joy of yoga again.  I always found joy in my teaching but, especially toward the end, I may have focused a little too much on mastering – and teaching – tricky arm balancing postures and other more advanced poses.  I want to teach people to love yoga as I do.

Back to baking.  I made this cake on Saturday for the first time in 17 years.  Between that first cake and this latest one, I have made hundreds of cakes, pies, tarts, mousses, cookies, bars, and other treats.  Actually – 17 years?  Probably thousands.  I have learned a lot about baking and about myself as a baker.  I have learned shortcuts and ways to cut down on dishes, and I have learned that it is important to always have everything out and at the ready.  And, for me at least, to always follow the recipe.

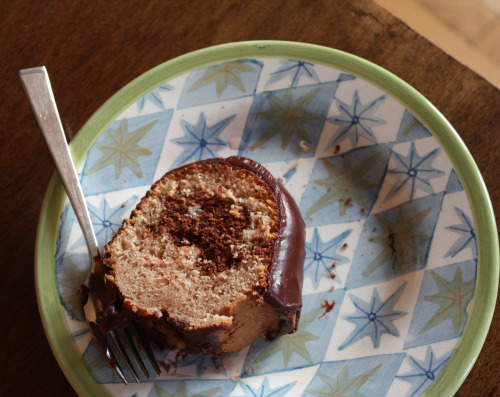
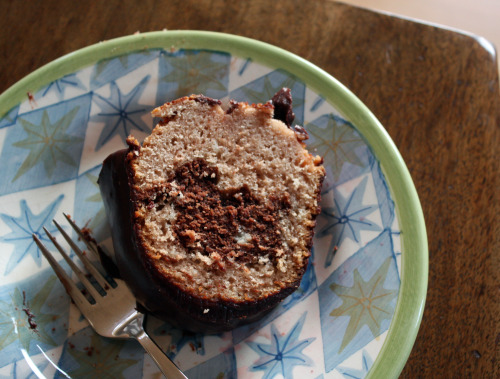
Coming back to this cake made me smile.  It was so easy.  In my 39-year old mind, it’s just a simple batter, some of which gets mixed in to some melted chocolate to make another batter, then the two are layered in a cake pan, swirled and baked.  The glaze is about as simple as it gets.  I now know that, if you are careful, you can melt chocolate in a microwave rather than in a double boiler, and if you melt it in a big enough bowl, you can mix the batter right into the bowl, rather than dirtying another bowl.  When I made this cake the first time, I actually went and bought an angel food cake pan because that is what the recipe said to do.  I now know that a bundt pan will work fine and makes a much more attractive cake.

Usually when I bake, I am not aware of how far I have come.  But because I could compare Saturday’s experience directly with my newbie experience, I did realize how much I have learned.  It has been a long slow and joyful process.  It makes me appreciate people who are new to baking, just as – when I do teach again someday – I will appreciate students new to yoga.  So, if you have never baked a cake, why not follow my lead and try this one?  Don’t be intimidated, don’t be scared.  Go for it.

One Year Ago:  Southwestern Sweet Potato Gratin

Cinnamon-Chocolate Ribbon Cake
Adapted from Bon Appétit
Serves 12

Cake
4 ounces semi-sweet chocolate, chopped
3 cups cake flour
1½ tsp. baking powder
½ tsp. salt
3 large eggs
2 cups sugar
1 cup vegetable oil
1 cup whole milk
1 tsp. vanilla extract
4 tsp. ground cinnamon

Glaze
1/3 cup whipping cream
¼ cup (½ stick) butter
2 tbsp. light corn syrup
6 ounces semisweet chocolate, chopped

For Cake
Position rack in center of oven and preheat to 325ºF.  Grease a 12 cup bundt pan and set aside.  Place chocolate in a medium microwave-safe bowl.  Heat in 30-second intervals, stirring in between each one, until the chocolate is almost melted.  Allow the residual heat to melt the rest of the chocolate and set aside.  (Alternatively, you can set the bowl over simmer water.  Do not allow the bottom of the bowl to touch the water.)

Sift flour, baking powder and salt into medium bowl.  Using electric mixer, beat eggs in large bowl until foamy.  Add sugar and beat until thick and fluffy, about 3 minutes.  Gradually beat in oil.  Beat in milk and vanilla.  Add dry ingredients and beat until just blended.

Transfer 1½ cups batter to bowl with the melted chocolate.  Stir to combine.  Mix cinnamon into remaining (non-chocolate) batter.  Spread half of cinnamon batter in prepared pan.  Spoon chocolate batter over.  Top with the remaining cinnamon batter.  Using small knife, swirl batters together to marbleize slightly.

Bake cake until tester inserted near center comes out clean, about 1 hour to 1 hour 10 minutes.  Cool cake in pan on rack 10 minutes.  Using a thin knife, carefully loosen the cake from the pan.  Turn cake out onto rack and allow to cool completely.

For Glaze
Combine cream, butter, and corn syrup in heavy medium saucepan.  Stir over medium heat until mixture simmers.  Remove from heat; add chocolate.  Stir until chocolate melts and glaze is smooth.  Let cool until glaze thickens slightly but is still spreadable, stirring occasionally, about 30 minutes.

Place cake on platter.  Slide waxed paper strips under edges of cake (this will catch drips).  Spread glaze over cake.  Remove paper.  Chill until glaze sets.  Serve at room temperature.  (Can be made 2 days ahead.  Cover and keep chilled. DT: In my experience, you do not need to chill this cake – it keeps well at room temperature, but be sure to cover it.  Also, cakes like this freeze beautifully – without the glaze.  Just wrap it well in foil and it will keep for about a month.  Give it plenty of time to thaw at room temperature and then glaze it.)


Black Bean Tostadas

April 11, 2010

I’m going to be brief and to the point.  It’s Monday.  Some of you are going meatless.  I tried to get this posted in enough time for you to run to the grocery store and gather up the ingredients because it is SO good.  But if not, make it next Monday.

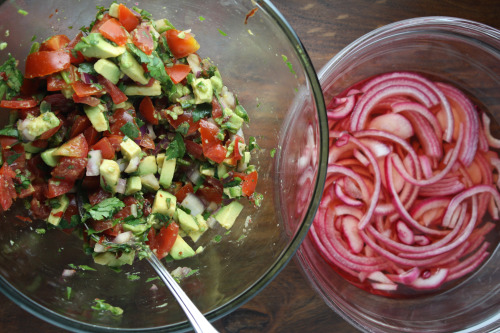
Why?  How about a crispy corn tortillas topped with a cumin-y black bean mixture, topped with a vinegar-y cabbage slaw, topped with an avocado-y salsa, topped with pickled onions?  If you add an extra sprinkle of queso fresco cheese, it takes this dinner from a “Top 10 of All Time” to a “Top 5 of All Time” according to my list-loving husband.  I actually opted to take all those delicious toppings and put them over this rice but Randy had no problem eating 3 tostadas on his own and rejoiced to know that there were leftovers.

A couple of notes.  If you are not familiar with epazote, it is an herb often found in Mexican cooking.  I have never tasted it fresh – dried it reminds me of a cross between oregano and dill.  I think it is delicious but it can be hard to find.  I’ve ordered it from Penzey’s but you can also just substitute dried oregano.  The cabbage slaw can be made hours ahead of time and stored, covered, in the refrigerator.  The beans can be made hours ahead too – you just may need to add a little water to loosen them up when you reheat them.  I would wait to make the salsa until right before serving because otherwise it gets a little watery.  Finally, yes, those are the same onions found on the Fideos.  Why not make a big batch and have a double meatless Mexican week?

One Year Ago:  Butterscotch Spiral Coffee Cake

Black Bean Tostadas with Slivered Cabbage, Avocado, and Pickled Onions

Adapted from Vegetarian Suppers from Deborah Madison’s Kitchen
Serves 4

Don’t let the length of this recipe or all the different parts scare you off.  Each part is fast and easy.  If you prefer, you can heat the tortillas on the stovetop in a skillet or griddle.  I prefer to use the oven method because you can use less oil (you can really use none) and you can heat more of them at once.

Pickled Onions (recipe follows)

The Beans
2 tsp. vegetable oil
1 small onion, diced
1 tsp. ground cumin
1½ tsp. dried epazote
1 garlic clove, minced
1 15-oz. can black beans, rinsed and drained
Sea salt

The Cabbage Slaw
6 cups finely sliced green cabbage
Sea salt
4 scallions, thinly sliced
2 pinches of dried oregano
2 tbsp. chopped cilantro
1/3 cup white wine vinegar or lime juice (DT: I used a combination)
1/3 cup boiling water

The Tortillas and Garnishes
8 corn tortillas
Vegetable oil
2 small avocados, peeled and sliced
Crumbled queso fresco or feta cheese
½ cup sour cream, thinned with a little milk
Salsa Cruda (recipe follows)

1.  Make the pickled onions and let them stand while you get everything else ready.  (Remember, they can be made up to 5 days in advance.)

2.  Heat the oil in a skillet and add the chopped onion, cumin, and epazote.  Cook over medium-low heat, stirring frequently, until the onion starts to brown, 3 to 4 minutes, then add the garlic and cook for 1 minutes more.

3.  Add the beans and a bit of water and cook, mashing the beans slightly until they are somewhat smooth but still have plenty of texture and are not soupy.  Season with salt and keep warm, or reheat as necessary.

4.  Toss the cabbage with a few pinches of salt and the scallions.  Add the rest of the salad ingredients, toss well, and refrigerate until ready to use.

5.  Lightly brush the tortillas with oil and bake in a 400°F oven until crisp and starting to brown, 6 to 8 minutes.

6.  Put 2 tortillas on each plate and spread the warm beans over each.  Mound the cabbage on top, add the avocado, cheese, a drizzle of sour cream, and the pickled onions.  Pass salsa at the table.

Pickled Onions

1 small red onion, thinly sliced into rounds
Sea salt
1 tsp. sugar
Apple cider vinegar or rice wine vinegar

Toss the onion rounds with a pinch of salt and the sugar.  Put them in a bow with vinegar to cover; they’ll turn bright pink in about 15 minutes.  They will keep for about 5 days in the refrigerator.

Salsa Cruda with Avocado
Makes about 1 cup

5 plum tomatoes or 3 ripe medium tomatoes
¼ cup finely diced red or white onion
1 jalapeño chile, finely diced and seeded if you want less heat
12 cilantro sprigs, chopped
1 avocado, finely diced
Finely chopped chipotle chile to taste (optional)
Juice of 1 lime or splash of beer
Sea salt

Halve the tomatoes lengthwise, squeeze out the seeds, then chop the flesh into small pieces.  Put the tomato in a bowl with the onion, chile, cilantro, and avocado.  Add lime juice or a splash of beer and season with salt to taste.


Side Dish for Mexican Food

April 8, 2010

The problem with being a self-described “cookbook cook” is that it takes a little more oomph for me to step outside the assurance of my books and just create a recipe.

The other night, while making Black Bean Tostadas (recipe coming soon), I started imagining a good hearty rice dish as a side.  I almost started to go through the tedium of looking up “rice” in my cookbooks when I realized I had a very clear idea of what I wanted, why not just make it?

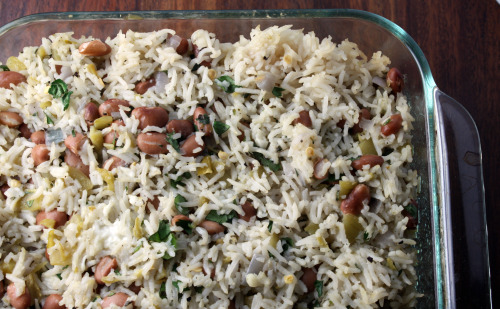
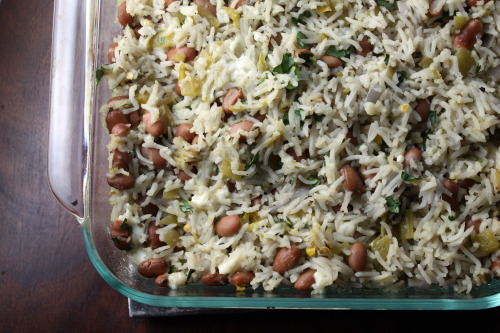
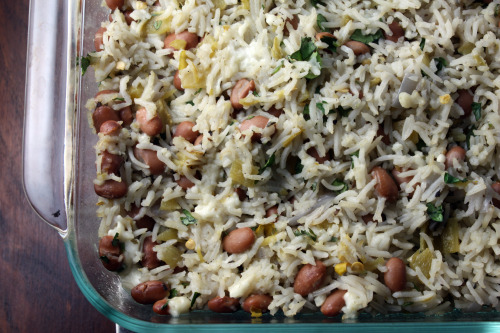
So I did.  And as with most things I have made without a recipe, I was very pleased with how it turned out.  (Note to self: cook more often without a recipe.)  I included some of my favorite flavors in here but, of course, this dish is infinitely adaptable.  I happen to love the slight punch and tang of canned green chiles, but if you like more spice, by all means add a fresh jalapeño or two.  I used queso fresco partly because I also needed it for the tostadas, but partly because I love how mild it is.  But you could certainly use Cheddar or Monterey Jack.  Like more cheese?  Add more and sprinkle some over the top before baking.

A rice note.  Unless I am making risotto or something where I specifically want brown rice (or if I am using sushi rice for this dish), I almost always use basmati rice.  I think it fluffs up beautifully and has terrific flavor.  Trader Joe’s has nice big (and affordable) bags of it.

One Year Ago:  Pasta with Broccoli Rabe and Chickpeas

Baked Rice with Chiles and Pinto Beans
Dana Treat Original
Serves 4-6

Canola or other neutral tasting oil
Small red onion, diced
3 garlic cloves, minced
1 tsp. dried oregano
1 cup white rice
2 cups water or vegetable stock
Salt
1 15-oz. can pinto beans, rinsed and drained
1 7-oz. can diced green chiles
¼ cup chopped cilantro
¾ cup queso fresco, crumbled

Heat a medium saucepan over medium heat.  (I used a 3 quart.)  Add just enough oil to coat the bottom, then add the onion and a healthy pinch of salt.  Sauté until softened, then add the garlic.  Cook for another 3 minutes, then add the oregano.  Sauté for another minute.  Add the rice and toss to coat with the fat and herbs, then pour in the water or stock.  Bring to a boil, then turn the heat down to low, cover and cook for 20 minutes.

Preheat oven to 400ºF.  Oil an 8×8 baking dish.  Once the rice is done cooking, allow it to sit, off the heat, for 5 minutes.  Remove the lid and, using a fork, carefully fluff the rice.  Add the chiles and the beans and, without mushing the rice, carefully stir them in.  Sprinkle on the cheese and cilantro and stir them in.

Scrape the rice mixture into the prepared pan, cover with foil, then bake until the cheese is starting to melt and the dish is hot throughout, about 20 minutes.  Remove the foil and allow to sit for 5 minutes before serving.

(This is totally the kind of dish you could make a day ahead.  Prepare up through putting the finished rice in the baking dish, allow the whole thing to cool, cover with foil, then refrigerate overnight.  From there, just put it directly into the oven and you will need to add 5-10 minutes to the baking time.)


« Older Posts Newer Posts »