Category: Side Dish

I Give You Sweet Potatoes

April 2, 2009

img_17732

Friends, it’s been a week.

First of all, I had no monitor until late last night.  I felt so utterly disconnected from the outside world and so bummed to not be able to share some really great recipes with you.  Thankfully, Dell, Federal Express, and my husband came through.

Second of all, I did indeed have a flat tire and it could not be repaired.  Because I have a four wheel drive car, that means having to replace all four tires.  Now that is NOT what I want to spend money on.

Third of all, my original client – the one who got me started as a personal chef and the one who has remained constant all along – laid me off two weeks shy of our three year anniversary.  She is in sales and her commission structure changed drastically.  Drastically enough that having a personal chef became an unnecessary luxury.  I completely understand this.  A personal chef is not a good thing to be during a recession.  I can’t help but feel very sad about the whole thing because, in addition to being great clients, they are good friends.  The friendship will continue but the job will not.

I still have two clients and will continue cooking for them on Tuesdays.  I am thankful to have them.

Onward to good news!

First of all, we are going to San Francisco this weekend, just the two of us.  I can’t even believe it and I can’t tell you how excited I am.  Since I almost never fly without my kids, I am even excited about the flight.  Magazines!  Airline food!  Airline wine!

We are staying at a lovely hotel and plan to just walk the city and eat well the whole time we are there.  We had a weekend away for my birthday last year and this is just as needed.  It is an incredible luxury to have time just with your spouse when you have young children and I can’t wait!

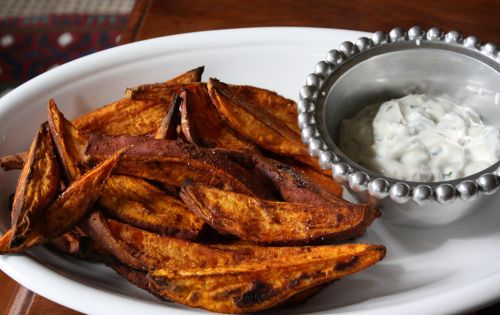
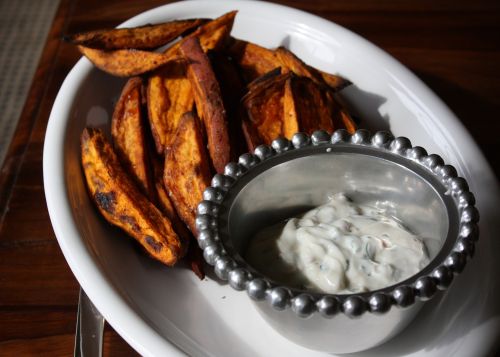
Second of all, finally she gets to the food, sweet potatoes.  This is a recipe I truly adore and have made many times, including for parties I have catered.  When I tested out the macaroni and cheese recipes, I also tested these out as a possible catering item.  They got devoured.  You know you have something good when it disappears from the table.  I decided to make them for my clients along with homemade veggie burgers and homemade buns.  I had high hopes for those burgers, but alas, they did not turn out quite the way I wanted them to.  The sweet potatoes did though.  Sadly, due to the tire episode (see above) I was not able to get this dinner to two out of three clients.  We were able to enjoy it with a lovely friend who I reconnected with on Facebook.  There were lots of extra sweet potatoes for us to eat.
img_17831

Spicy Sweet Potatoes with Lime
Adapted from Martha Stewart’s The New Classics
Serves 6

Strange as it may sound, the sauce really makes this recipe, so don’t skip it!

4 medium sweet potatoes (about 2 1/2 pounds)
2 tbsp. olive oil
2 tsp. ground cumin
1 tsp. hot paprika (DN: I used smoked paprika.)
1 tsp. ground ginger
Coarse salt and freshly ground black pepper
Lime wedges, for serving
Yogurt Dipping Sauce (recipe below)

1. Preheat the oven to 425 degrees.  Heat a baking sheet in the oven until hot, about 15 minutes.  Meanwhile, slice the sweet potatoes in half lengthwise; slice each half into 3 wedges.  Place in a medium bowl, and toss with the oil, cumin, paprika, and ginger.  Season with salt and pepper.

2.  When the baking sheet is hot, remove from the oven.  Arrange the sweet potatoes in a single layer on the sheet.  Return to the oven; cook until the potatoes are crisp and golden on the bottom, about 15 minutes.  Turn, and contiue cooking until golden all over, about 15 minutes more.

3.  Remove from the oven; season with salt and pepper.  Serve with lime wedges and sauce.

Yogurt Dipping Sauce
Makes about 1 cup

1 cup plain yogurt
3 tbsp. roughly chopped fresh cilantro
2 tbsp. chopped toasted walnuts
1 tbsp. fresh lime juice
1/2 tsp. ground cumin
Coarse salt

Combine all the ingredients in a small bowl.  Cover with plastic wrap, and refrigerate until ready to use, up to 1 day.


An Ina Kinda Day

March 18, 2009

picnikcollage

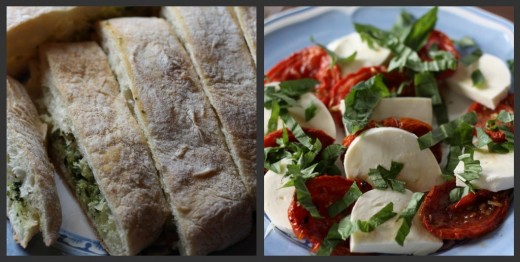
I have four of the Barefoot Contessa cookbooks in my collection and I use them with surprising regularity. If you are new here, I am a vegetarian – something Ina definitely is not. Like not even close. But I love her books and love her recipes. I use many of the dessert ones and also get a lot of mileage out of the soup, salad, and vegetable chapters.The dinner I made last night contained two recipes from her latest book, Back to Basics.

img_1585

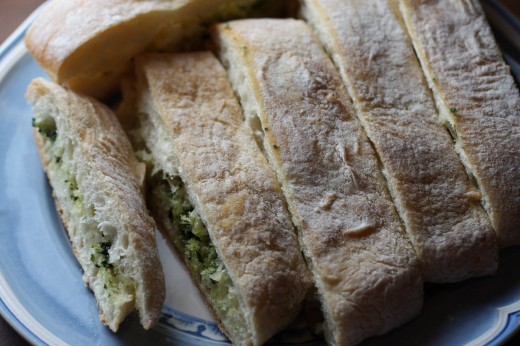
Do you remember the garlic bread from your childhood? The one I remember is from some “Italian” restaurant in the suburb of Seattle where I grew up. My parents are transplanted New Yorkers and I think the hardest part about moving West was the loss of good Italian food and good bagels. (It has gotten better, but we are by no means close to what NY has to offer.) We would go to this restaurant and my brothers and I would chow on garlic bread which consisted of styrofoam-like bread, slathered with butter, and liberally sprinkled with garlic salt. There may have even been some green can Parmesan cheese on there for good measure. Needless to say we loved it, but there is no way I would eat that now.

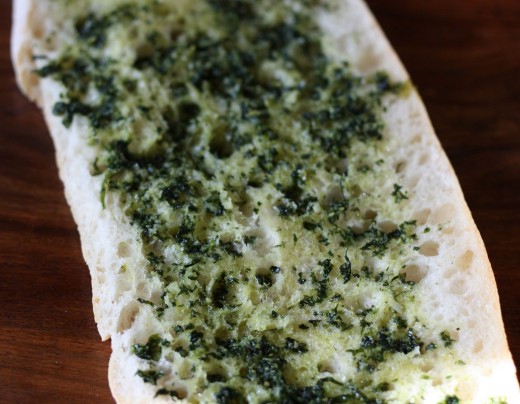
This is real garlic bread. Ciabatta bread, a heady concoction of lots of garlic, parsley, and fresh oregano sauteed with salt and pepper in a good amount of olive oil, and a very restrained amount of butter – especially for Ina. This is baked in the oven for only 10 minutes – just enough for the all the flavors to mingle and for the bread to get nice and warm – not enough to toughen the bread. In true Ina form, this recipe is found in the Vegetables section of the book!

img_1637

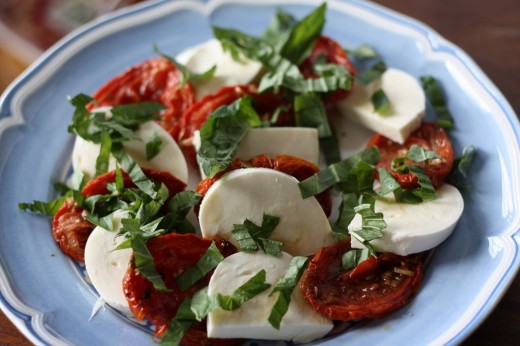
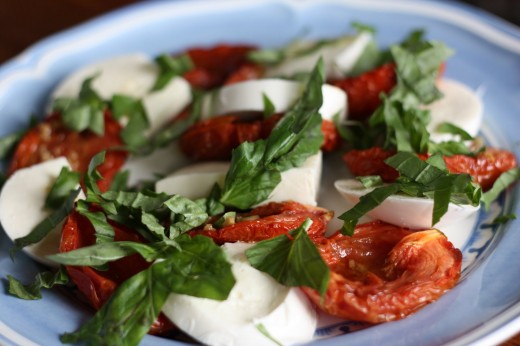
The other recipe I made yesterday was for this Roasted Tomato Caprese Salad. For me it was one of those – why didn’t I think of that?! – moments. Here in Seattle, we are fortunate to have amazing produce. We get incredible spring asparagus and peas, summer berries that people all over the country would pay a fortune for, and wild mushrooms all fall. We do not, however, get good tomatoes. If you grow them yourself, you can get a decent tomato now and then, but I have never experienced the New Jersey tomato. If I did, I think I would cry.

I love tomatoes so I eat them anyway. But Caprese salad never did much for me. Mozzarella doesn’t have that much flavor, so if your tomatoes are tasteless, why exactly would you eat it? Enter Ina and her good idea to roast the tomatoes. That way, you can concentrate the flavor and give it a little boost with olive oil, salt, pepper, a little sugar, and a little balsamic vinegar. Eating this last night really was a revelation and a recipe I will make again and again.

img_1574

Garlic Ciabatta Bread
Adapted from
Barefoot Contessa Back to Basics
Serves 8

To make my cooking healthier, I always add a minimal amount of oil when I am sauteing. For this recipe, you will want to add more – perhaps not the full 1/2 cup called for in the recipe, but at least 1/4 cup. You want the garlic and herbs nice and moist so they can be easily spread on the bread.

6 large garlic cloves, roughly chopped
1/4
cup fresh parsley
2 tbsp. fresh oregano leaves

1 tsp. kosher salt

1/2
tsp. freshly ground black pepper
1/2
cup olive oil
1 large ciabatta bread

2 tbsp. unsalted butter, at room temperature

Preheat the oven to 350 degrees.

Place the garlic, parsley, oregano, salt, and pepper in the bowl of a food processor fitted with the steel blade and process until finely minced. (DN: A mini food processor is perfect for this if you have one.) Heat the olive oil in a medium saute pan over low heat. Add the garlic and herb mixture and cook for 3 minutes, until the garlic is tender but not browned. Remove from the heat and set aside. (DN: You can leave this for several hours if need be.)

Cut the ciabatta in half horizontally, running a serrated knife parallel to the board. Spoon the garlic mixture onto the bottom half and spread the btuter on the top half and place together.

Bake the bread for 5 minutes, then unwrap and discard the foil. Bake for another 5 minutes. Slice crosswise and serve warm.

img_1639

Roasted Tomato Caprese Salad
Adapted from
Barefoot Contessa Back to Basics
Serves 6

This is essentially a simple salad so the components are very important. If you have access to very fresh mozzarella, now is the time to splurge. If you live in Seattle, DeLaurenti makes their own and it is amazing. Also, use your best olive oil and Balsamic vinegar, even your best sea salt. You will taste the difference.

12 plum tomatoes
1/4 cup quality olive oil, plus more for drizzling

1 1/2 tbsp. balsamic vinegar

2 garlic cloves, minced

2 tsp. sugar

Kosher salt and freshly ground black pepper

16 oz fresh mozzarella

12 basil leaves, julienned or chopped

Sea salt

Preheat oven to 275 degrees.

Arrange the tomatoes on a sheet pan, cut sides up, in a single layer. Drizzle with the olive oil and balsamic vinegar. Sprinkle with the garlic, sugar, 1 1/2 tsp. kosher salt, and 1/2 tsp. pepper. Roast for 2 hours until the tomatoes are concentrated and begin to caramelize. Allow the tomatoes to cool to room temperature. (DN: These can be made up to 1 day in advance. Allow to cool and then store in the refrigerator. Allow to come to room temperature before serving.)

Cut the mozzarella into slightly less than 1/2 inch thick. If the slices of mozzarella are larger than the tomatoes, cut the mozzarella slices in half. Layer the tomatoes alternately with the mozzarella on a platter and scatter the basil on top. Sprinkle lightly with sea salt and pepper and drizzle lightly with olive oil. Serve at room temperature.


One of the Best Things I Have Made

February 23, 2009


I love when people tell me I am a good cook. It is so nice to be complimented about something that is really important to me, and that is such a big part of who I am. I have to admit though, there is a part of me that feels not quite right taking the compliment. 90% of what I cook comes from recipes that others have written. Yes I found a good recipe, yes I actually cooked it, yes I put together a menu that worked well. But I didn’t write the recipes. Is that a glimmer of over-achiever in me? I don’t know, the over-achievers out there would have to let me know as I am certainly not one.


Last summer, while I was looking through a Food and Wine issue, this flatbread recipe jumped out at me. It seemed so different and I was intrigued by the play of salty and sweet. (I know that I’ve said I don’t like those two tastes to mingle, but I think I was lying.) I showed the picture to Randy, told him what was in it, and he said it sounded weird. I told him I really thought it would be great. No, I didn’t write the recipe, but I could tell a good one when I read it.

So, I made it and it was, without question, one of the best things I made in 2008. Everyone at the table raved about it and all were sorry that there was not a sliver of it left. It was so good that I made it again the next week. Then I promptly misplaced the recipe and forgot about it. When I found it early last week, I knew I had to make it for a special group of women I invited over for dinner last night.

There is nothing hard about this recipe, but it does require last minute cooking – something I usually insist on not doing for a party. Once it cools, it is still delicious but it loses some of its charm so I would suggest eating it right out the oven. The recipe tells you to use a pizza peel and stone, but if you don’t have one, don’t let that stop you from making it. You can just put in on a baking sheet lined with parchment paper. Your crust won’t be as crisp but the flavors will still shine.


Rosemary Flatbread with Blue Cheese, Grapes, and Honey
Adapted from
Food and Wine
Makes one 13-inch flatbread

1 envelope active dry yeast
2 tbsp. sugar

2 cups bread flour

3/4
cup warm water
2 tsp. chopped fresh rosemary

1/2
tsp. fine salt
1/4
tsp. freshly ground black pepper
Cornmeal

1/2 pound red grapes (1
1/2 cups)
Coarse sea salt

3 oz. blue cheese, crumbled (
1/2 cup)
1 tbsp. honey

1 tbsp. snipped chives

1. In a large bowl, whisk the yeast and sugar with 1/4 cup of the flour. Stir in 1/4 cup of the warm water and let stand until slightly foamy, about 5 minutes. Add the rosemary, fine salt, pepper, and the remaining 1 3/4 cups of flour and 1/2 cup of water; stir until a dough forms. Turn the dough out onto a lightly floured work surface and knead until smooth, about 5 minutes. Transfer the dough to an oiled bowl, cover and let rise in a draft-free spot until billowy and doubled in bulk, about 1 hour.

2. Meanwhile, place a pizza stone in the bottom of the oven, and preheat the oven to 450 degrees. Make sure the oven has preheated for at least 30 minutes.

3. Turn the dough out onto a lightly floured work surface. Sprinkle a little cornmeal on the pizza peel. Press and stretch the dough into a 13-inch round, then transfer the dough to the pizza peel. Make sure the dough is not stuck anywhere on the peel. Press the grapes into the dough and sprinkle with sea salt.

4. Slide the flatbread onto the hot stone and bake for 12 minutes, until the crust is golden and the grapes have begun to release some of their juices. Sprinkle the blue cheese on top and bake for about 2 minutes longer, until the cheese melts. Slide the flatbread onto a work surface and drizzle with honey and sprinkle with chives. Cut into wedges and serve.


Memories of France

January 29, 2009


My husband Randy is a master finagler. Everything he finagles is above board but he is just one of those amazing people who can ask for things and get them. He spent many years in the Navy and was able to do some incredible things (spend time with the Norwegian Navy, travel in Israel, study in France), all because he asked and they said yes.

This quality served us well the year we lived in London. We went to Euro-Disney for a conference (and a weekend in Paris), we went to Israel for a week so he could meet with a company his employer was thinking of buying. Oh yes, and he got us to London for a year!

Before we moved back to Seattle, and after he had been recruited to work for another company, he finagled a trip around northern Europe so he could “meet the teams.” If you know my husband, you know that he worked hard on that trip. He never doesn’t work hard. But he also got us to Tallin (Estonia), Stockholm, Brussels, Amsterdam, and Paris in the week and a half after we left London.

Once he was done with meetings in Paris, we rented a car and took our time driving south to Provence to meet up with some friends. I will always remember this trip for many different reasons. First, obviously, I got to see cities in Europe that I had never seen which is always thrilling. I was on my way back home to the States which I felt really excited about. I was going to see a part of my beloved France that I had heard so much about but never seen. We were going to witness parts of Llance Armstrong’s historic 6th win of the Tour de France. But perhaps most of all, I was hyper aware of the baby growing in my belly.

Right before we left London, I had an ultrasound (at 16 weeks) which told us that we were going to have a boy. The incredible joy I felt seeing that little fully formed person is difficult to describe – if you have witnessed an ultrasound for your baby-to-be, you know what I am talking about. We were beyond thrilled that he was going to be a boy and over the moon to see that he looked healthy. About a week later, once we had gotten to Stockholm, I started to bleed. Of course, it happened on July 4th, so I was unable to reach a doctor back in the States and the Swedish doctor we spoke to just told me to hang in there and if the bleeding increased, to go immediately to a hospital. My first thought when I woke up, the last thought I had before I drifted off to sleep, and every other thought in between was whether or not I was going to lose that precious baby for days. Once we got in touch with our doctor back home, she told me to stay off my feet as much as possible which is difficult in small European cities where you really just need to walk everywhere.

I did notice that when I took it easy, the bleeding stopped. Once I started walking too much, it would pick back up again. So, as much as I enjoyed the travel on that trip, when we finally made it to Provence, I could breathe easy. We were staying at a property where we had a wonderful room with lots of communal living space and a pool. We weren’t near anything except tiny perfect French towns. I pretty much just took it easy for the first few days. As my fear began to subside, I began to explore the paradise that is Provence. I did see Llance Armstrong come through Nimes (although I was sitting on the sidewalk). I did see countless vineyards and walk through the markets of Arles. I also sat in the sun poolside and got lots of sleep.

Once home, I had another ultrasound and everything looked fine with our baby. Just 17 weeks later he was born and showed himself to be perfect.

So what on Earth does all this have to do with lentils?? This incredible dish (one of my absolute favorites – like take it to a desert island favorites) comes from Patricia Wells’ The Provence Cookbook. It is the one cookbook I took with me on our trip there. Not only did I use it to cook lots of delicious food for our friends that week, but I also used it as a reference. Wells details out where the best markets are, where the best pottery is, and profiles some of her favorite farmers. It is an amazing cookbook but also a resource for traveling in her beloved Provence. Because this book really is a love letter to Provence. I cannot open this lovely cookbook with its sunny cover and inviting prose without thinking of my incredible son, now 4 years old. How worried I was! I had no idea that really, as a mother, you just keep worrying…

Lentils with Capers, Walnuts, Walnut Oil, and Mint
Adapted from
The Provence Cookbook
Serves 4-6

You could use regular lentils in this recipe, but Le Puy lentils are worth seeking out for their firm texture and density. Toasting the walnuts really brings out their flavor so don’t skip that step. The method of cooking the lentils may seem overly fussy here, but I trust Wells implicitly, so I always follow her advice when making this dish.

2 tbsp. freshly squeezed lemon juice
Sea salt to taste

6 tbsp. walnut oil

1
1/2 cups (8 oz.) French lentils, such as Le Puy
2 cups vegetable stock

1 carrot, peeled and cut into thirds

1 onion, peeled and stuck with a clove

1 cup walnuts, toasted and coarsely chopped

1/2
cup capers in vinegar, drained, rinsed, and chopped if large
1 cup fresh mint leaves

Freshly ground pepper to taste

1. Place the lemon juice and a pinch of salt in a jar with a screw top (such as a jam jar). Cover and give it a good shake. Add the oil and shake to blend. Taste for seasoning and set aside.

2. Place the lentils in a fine mesh sieve and rinse under cold running water. Tranfer them to a large saucepan, cover with cold water, and bring to a boil over high heat. When the water boils, remove the saucepan from the heat. Transfer the lentils back to the sieve and drain over a sink. Rinse the lentils under cold running water again. Return the lentils to the saucepan, add the stock, season with salt, and bring just to a boil over high heat. Reduce the heat to a simmer and add the carrot and onion. Simmer gently, uncovered, until the lentils are cooked but not mushy. Taste to
make sure. Remove the onion and carrot and discard. If there is still liquid in the pot along with the lentils, drain them once again in the sink.

3. Transer the lentils to a large bowl. Add the walnuts, capers, and a few grinds of pepper. Add the vinaigrette to taste – you may not need all of it. Toss well. Once the lentils have cooled a bit, add the mint and toss again. Can be served warm or room temperature. Keeps 2 days, covered, in the refrigerator.


Pea Salad

January 19, 2009

This may sound funny, but I think side dishes are tough for vegetarians. They seem to often include potatoes or another kind of starch, or they are really just vegetables. Often my main courses are very starch heavy or vegetable heavy and a traditional side just doesn’t sound right. When I find a good one, I hang on to it and use it with a variety of different dishes.

I love this pea dish because it can do double duty. It can be served as a side (as I did last week with a healthier version of mac and cheese), or it can be a salad. The original recipe calls for pea shoots which can be hard to find unless you hit a farmer’s market in the spring (their season), or live close to an Asian market. If I want this dish to be more salad-like, I will either toss some arugula leaves into the salad itself (as I for the party I catered), or I will serve the peas on a bed of arugula.

I suppose this dish would be simple incredible with fresh peas, but we are months away from that luxury here in Seattle and I think using fresh would make it incredibly expensive and time consuming. Frozen are fine here. The original recipe tells you to cook them, but I just allow them to thaw for a good few hours and use them that way to save time and dishes to wash!

Pea Salad with Radishes and Feta Cheese
Adapted from
Bon Appetit
Serves 4-6

1 tsp. ground cumin
2 tbsp. fresh lime juice

2 tsp. honey

1/4 cup olive oil

3 tbsp. chopped fresh dill

1 pound frozen peas, thawed

1 bunch radishes, trimmed, halved, thinly sliced

1 cup crumbled feta cheese (about 4 oz.)

3 cups arugula (optional)

In a small bowl, whisk together the cumin, lime juice, and honey. Gradually whisk in olive oil; stir in dill. Season to taste with salt and pepper. (Can be made 1 day ahead. Cover and refrigerate. Bring to room temperature before using.)

In a large bowl, place the peas, radishes, and feta cheese. Add the dressing and toss to coat. If desired, add the arugula and toss again. (Note: If you are not going to serve the salad right away, wait until serving time to toss in the arugula, otherwise it will wilt.)


« Older Posts Newer Posts »