Category: Dana Treat Original

Cleaning out the Fridge

August 23, 2011

By the time you read this post, I will be long gone.  It’s the end of August and that means, every other year, that we are in Sun Valley with my parents.  This is a sweet trip for me.  I have been going to that lovely mountain town since I was 11 years old.  When I was younger, it was hot days and cold nights, hours spent at the pool, horse back riding, river rafting, time spent with camp friends, and teenage boys who were my crushes.  Nowadays it is hot days and cold nights, hours spent at the pool, going on slides at the playground, splashing in the town fountain, time spent with my family, and very young boys who are my children.  My life has changed plenty, Sun Valley is mostly the same.

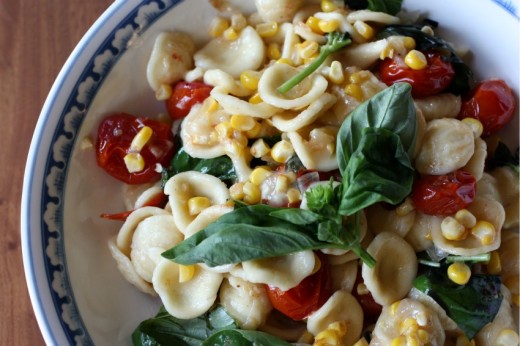
Leaving town means leaving a refrigerator and that means doing your very best to make sure that refrigerator is next to empty.  I had some goodies to use up and I came up with a truly delicious pasta to do so.  I see posts like this frequently and I wonder, why on earth would I make your dish?  I am never going to have those same odds and ends on hand.  But this is a dish worth shopping for.  As Spencer, my four-year-old, is fond of saying, “For reals life.”


Orecchiette with Roasted Tomatoes and Corn

Dana Treat Original
Serves 3-4

The inspiration for this dish was ingredients on hand, plus a long-ago cut out recipe for a pasta with Brie cheese to make it creamy.  It is best to remove the rind in this dish.  If you Brie is super soft, just pop it in the freezer for about 10 minutes and it will slice right off.  I also had a blue cheese in the refrigerator and I contemplated using that in the pasta instead of the Brie.  Finally, the “stuff” to pasta ratio is high here – you could bulk up the pasta to feed more people and leave the “stuff” the same.

2 cups cherry tomatoes
Olive oil
Kosher salt and freshly ground black pepper
1 large shallot, finely diced
1 tbsp. fresh thyme leaves
1½ cups fresh corn kernels (from 1 large cob)
2 ounces Brie cheese, rind removed, cut into ½-inch cubes
½ cup fresh basil leaves, torn
8 ounces orecchiette

Preheat the oven to 400ºF.  Place the cherry tomatoes on a small baking sheet and drizzle with a bit of olive oil.  Sprinkle with a pinch of kosher salt and a few grinds of pepper and, using your hands, mix well.  Pop in the oven and roast for 20 minutes.  Remove and scrape into a large bowl.

Meanwhile, heat a medium skillet over medium heat.  Pour in just enough olive oil to coat the bottom of the pan and add the shallots along with a large pinch of salt.  Sauté, stirring frequently, until soft, about 4 minutes.  Stir in the thyme, followed by the corn.  Continue to cook until fragrant and the corn is soft, about another 3 minutes.  Remove and scrape the corn mixture into the same bowl with the tomatoes.  Put the cheese and the basil in there as well.

Bring a large pot of salted water to boil.  Pour in the orecchiette and cook until al dente, according to the package directions.  Taste to make sure.  Using a slotted spoon, scoop the pasta into the bowl with the other ingredients.  Stir gently, adding some of the pasta water if it seems to dry.


Soba Noodle Bowl

June 28, 2011

If you define summer as “school is out”, then this is the first week of summer in our house.  If you define summer as “sunshine and warm temperatures”, then we are still waiting.  This year, summer looks a little different for us.  Spencer’s preschool, the one Graham attended until he started kindergarten, goes all year.  There is no summer break except for a few days in August just before the official school year begins.  Which means that I have never had to make alternate summer plans for my kids – they just kept to their schedule at that sweet little school.

This year, Spencer will spend the summer in the beloved orange room of his school and I have found a fabulous day camp for Graham.  They go outside three times a day, go swimming twice a week, and go on a field trip every week.  (This week he will go to the Pacific Science Center which Spencer calls the Terrific Science Center and Graham calls the Perfect Science Center.  I don’t bother to correct them.)

Unlike during the school year, I will have both boys home with me on Tuesdays and Thursdays.  There are so many fun things to do in Seattle during these long days and I hope we get to a bit of everything.  I know we will have lots of lunch dates.

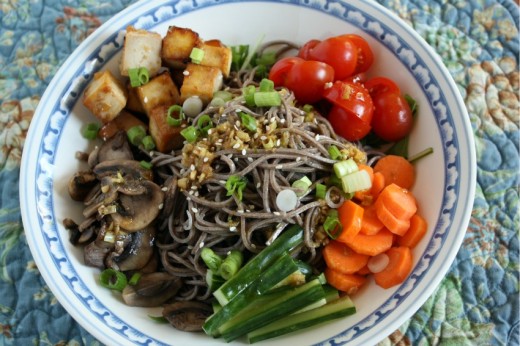
We don’t take our kids out for dinner that often but we do lunch out quite a bit.  One of their favorite places is a noodle joint called Boom Noodle.  The kids menu stars a bento box with fruit, rice, edamame, and tofu (or meat).  The boys get a huge kick out of it and usually clean their plate, er, box.  I always get the same thing there – a soba noodle salad with a super spicy wasabi kick.

I’ve been meaning to make this at home for a long time and when I found mizuna at the farmers’ market, I knew it was time.  I have no idea how to recreate that spicy dressing – it’s really more like a wasabi relish that is dabbed over the top, so I just left it off.  This tofu comes from another noodle bowl creation and I have to say, it is my very favorite way to eat tofu.  Even if you think you don’t like it, give it a try.

Three Years Ago: Turnip and Leek Gratin

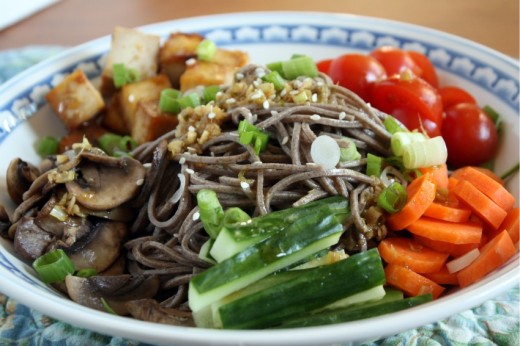
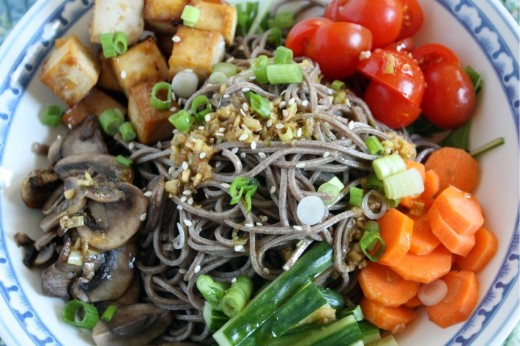
Soba Noodle Bowl with Lemongrass Tofu
Dana Treat Original, Inspired by Boom Noodle
Serves 3

I would have preferred shiitake mushrooms in this dish but I used what I had on hand.

For the marinade:
2 inch pieces of fresh ginger, peeled and grated
1 garlic clove, minced
2 stalks lemongrass, outer leaves removed, minced
6 tbsp. soy sauce
3 tbsp. honey
3 tbsp. rice wine vinegar
1½ tbsp. mirin
Zest and juice of 1 lime
1 tbsp. sesame oil
2 tbsp. canola oil
2 tbsp. water
½-1 tsp. red pepper flakes

12 ounces extra-firm tofu, blotted dry and cut into 1-inch cubes
8 ounces soba noodles
1 tbsp. sesame oil
Canola oil
8 ounces mushrooms, thinly sliced
2 medium carrots, thinly sliced
½ an English cucumber, seeded, cut into 1-inch matchsticks
6 ounces cherry tomatoes, halved
3 scallions, thinly sliced
1 tbsp. sesame seeds
2 ounces mizuna, or other soft lettuce

Prepare the marinade and tofu:
Mix together all the ingredients except the tofu in a medium size bowl.  Taste for flavor balance and add more soy, honey, or lime juice to taste.  Put the tofu in a shallow baking dish (an 8×8-inch pan is perfect) and pour about 1/3 of the marinade over top.  Allow the tofu to sit for at least half an hour, turning the pieces periodically.  You can also refrigerate the pan, covered, for up to one day.  Reserve the rest of the marinade.  This will be your dressing.

Preheat the oven to 375ºF.  Place the baking pan in the oven and bake until the marinade is absorbed and the tofu is developing a bit of outer crunch, 30 to 40 minutes.  Turn the tofu once during baking.  Set aside.

Prepare the rest of the ingredients:
Bring a large pot of water to a boil.  Add the soba noodles and cook until just al dente, tasting to make sure, 5 to 6 minutes.  Pour the noodles into a colander and then immediately rinse with cold water.  Drain well, then toss with the tablespoon of sesame oil.  Set aside.

Heat a medium sauté pan over medium heat.  Drizzle in just enough canola oil to coat the bottom, then add the mushrooms along with a large pinch of salt.  Sauté, stirring occasionally, until the mushrooms are nice and browned and there is no liquid in the pan.  Set aside.

Distribute the mizuna across the bottom of three serving bowls.  Divide the noodles between the bowls and then add small piles of the mushrooms, carrots, cucumbers, and tofu to each bowl.  Scatter the scallions and sesame seeds across the top and drizzle the reserved tofu marinade over everything as a dressing.  Pass additional sesame oil and soy sauce at the table.


Double Quinoa Salad

June 23, 2011

A couple of weeks ago, I went to Scottsdale to learn about Thermador and the amazing range they are unveiling in August.  I expected, with about 20 food bloggers coming, that they would feed us well.  And then I remembered the lunch I was served at BlogHer Food a couple of years ago.  If you were reading this or any blog around that time, you might recall that lunch was a three course meal put together by Bertolli’s Pasta.  Yes, they served food bloggers frozen pasta.  So, while I hoped Thermador would have planned a bit better, I was cautious.

It turns out there was no need for worry.  Our dinners out and the breakfast and lunch they served us on site were nothing short of amazing.  In addition to incredibly delicious and well-prepared food, there was plenty on hand for the two vegetarians in the group and also for our vegan.  I was very impressed.

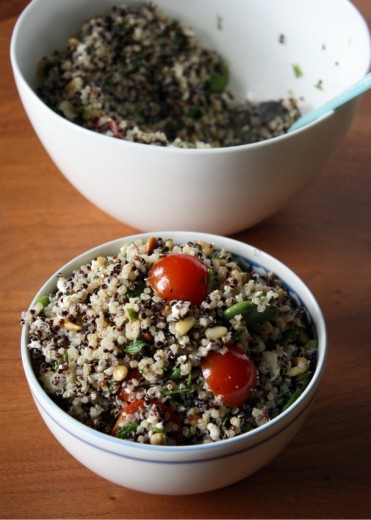
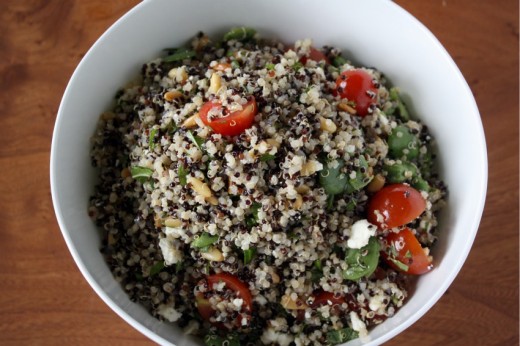
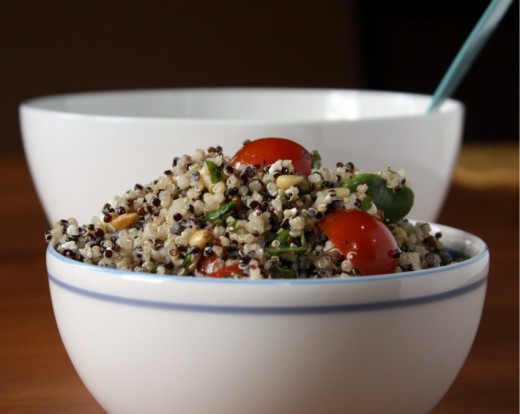
One of the salads that the group prepared for lunch starred perfectly plump edamame and red quinoa, things that I would never have put together.  I took some on my plate with about 10 other things and truly enjoyed each thing I tasted.  I came home with that salad in my head and determined to recreate it.  But, seeing as I only had a few bites, I had to rely on my insufficient memory which put pine nuts in there as well as feta cheese.  (It seems neither of which were in the original.)  I found fresh fava beans in my market so opted to use those instead of edamame and I also decided to make the salad more focussed around the quinoa than the beans.  I also put in very little in the way of the dressing and added tomatoes for color and acid.

The result?  Basically nothing like what I had in Scottsdale but incredibly tasty.  Sometimes all you need is a little inspiration to create something delicious.

One Year Ago: Flo’s Chocolate Snaps
Two Years Ago: Feta Radish Spread
Three Years Ago: Chocolate Dulce de Leche Bars

Quinoa Salad with Fava Beans, Pine Nuts, and Feta Cheese
Dana Treat Original
Serves 6-8 as a side

I always toast my pine nuts in the toaster oven.  Regardless of how you do it, you will need to watch them very carefully because they burn in an instant.

1 pound fava beans
½ cup black quinoa
½ cup white quinoa
2 tbsp. olive oil
Juice of 1 lemon
3 tbps. fresh mint, chopped
1/3 cup pine nuts, toasted
6 ounces feta cheese, cut into small cubes
6 ounces cherry tomatoes, cut in half

Using a paring knife, split open the fava bean pods and extract the beans.  Discard the pods.  Bring a small pot of water to a boil and add the fava beans.  Boil for 2 minutes, then drain.  When cool enough to handle, pop open the skin and take out the bright green bean.  Place in a large bowl.

Bring 2 cups of salted water to a boil in a medium saucepan.  Add both of the quinoas, give a quick stir, then cover the pot and reduce the heat to low.  Cook for 20 minutes, then check the pan.  If there is still liquid in the pan, cover and cook for another 5 minutes.  Allow to cool to room temperature, then add to the bowl with the fava beans.

Stir in the olive oil, lemon juice, and mint along with a large pinch of salt and a few grinds of pepper.  Gently stir in the pine nuts and the feta cheese, followed by the tomatoes.  Mix just to combine.  Adjust the seasoning by adding more olive oil, lemon juice, salt or pepper to taste.

(Will keep for at least 3 days, covered in the refrigerator.  The mint will lose its color but the flavor will improve.)


Very End of Spring Pizza

June 21, 2011

I want, need, and crave variety in my diet.  I can’t eat the same thing over and over again and usually if I do repeat a recipe, it’s been months between versions.

However, writing a food blog means that sometimes repeating a dinner is necessary.  I make something I intend to write about and then, for one reason or another, I don’t photograph the meal, or I don’t write down a crucial ingredient, or I don’t keep notes as I am cooking, and presto! I’m making the same meal two days later so I can share it with you.
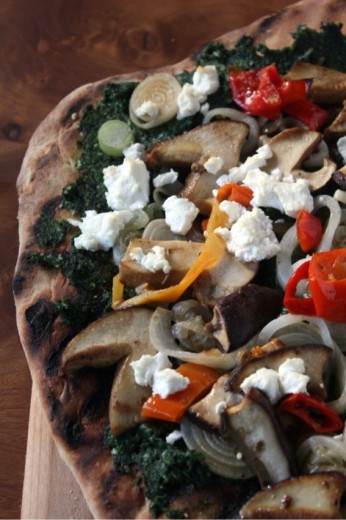
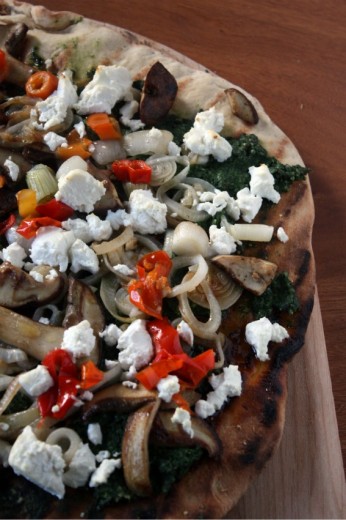
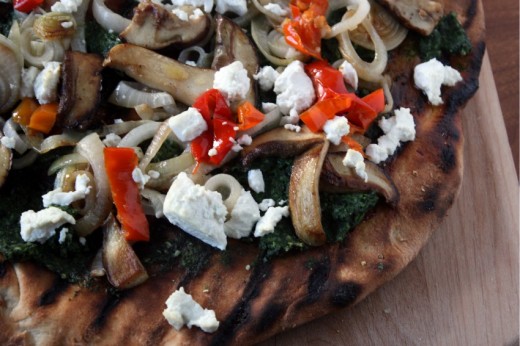
Last week when I had those friends over, I made this pizza.  It is a super seasonal, super local pizza and I loved it.  I was so proud of it.  I got a photo of it, I kept notes, everything I needed to share with you, my wonderful readers.  No need to make it again.  But I wanted to.  I wanted to eat it again.  Randy had been out of town that night and I wanted him to taste it.  I wanted to share it with a different group of friends and so I made it again.

The first time I got fresh porcini mushrooms at the farmers’ market, the second time I had to settle for morels.  (Poor me.)  Now, I recognize that in regions other than the Northwest, you are probably aren’t able to find either fresh porcinis or morels, stinging nettles, spring onions, or perhaps even Mama Lil’s peppers.  I could offer you a million different substitutions and variations.  But then it wouldn’t be this pizza.  The one I ate twice in a week.  I call this an original recipe but I am indebted to Mark Bittman for his fabulous dough recipe and to Jess Thomson for her nettle pesto.

Yes, I made pesto from nettles.  Those things that used to sting me while playing in the woods in 6th grade.  It sounds crazy but everyone who has tasted it (and there have been quite a few since I am currently obsessed with it), thinks it rocks.
One Year Ago: Perfect Chocolate Chip Cookies (make these now)
Two Years Ago: White Chocolate Almond Chunk Cookies and Strawberry Sour Cream Ice Cream
Three Years Ago: Spicy Lime and Herbed Tofu in Lettuce Cups

Late Spring Pizza with Nettle Pesto and Wild Mushrooms

Dana Treat Original
Serves 4-6

For the dough, I always use my stand mixer instead of the food processor but I’ve included his complete recipe.  I’ve made this pizza on the grill and in the oven and it works both ways.  I’m partial to the grill.

For the dough
3 cups all-purpose or bread flour, plus more as needed
2 teaspoons instant yeast
2 teaspoons coarse kosher or sea salt, plus extra for sprinkling
2 tablespoons extra virgin olive oil

For the pizza
Olive oil
4 spring onions, thinly sliced
6 ounces fresh porcini mushrooms, thinly sliced
Kosher salt and freshly ground black pepper
3 tbsp. nettle pesto (recipe follows)
½ cup Mama Lil’s peppers
4 ounces goat cheese, broken into small chunks

Make the dough
Combine the flour, yeast, and salt in a food processor. Turn the machine on and add 1 cup water and the oil through the feed tube.

Process for about 30 seconds, adding more water, a little at a time, until the mixture forms a ball and is slightly sticky to the touch. If it is still dry, add another tablespoon or two of water and process for another 10 seconds. (In the unlikely event that the mixture is too sticky, add flour a tablespoon at a time.)

Turn the dough onto a floured work surface and knead by hand for a few seconds to form a smooth, round dough ball. Put the dough in a bowl and cover with plastic wrap; let rise until the dough doubles in size, 1 to 2 hours. (You can cut this rising time short if you’re in a hurry, or you can let the dough rise more slowly, in the refrigerator, for up to 6 or 8 hours.) Proceed to Step 4 or wrap the dough tightly in plastic wrap or a zipper bag and freeze for up to a month. (Defrost in the bag or a covered bowl in the refrigerator or at room temperature; bring to room temperature before shaping.)

When the dough is ready, form it into a ball and divide it into 2 or more pieces if you like; roll each piece into a round ball. Put each ball on a lightly floured surface, sprinkle with flour, and cover with plastic wrap or a towel. Let rest until they puff slightly, about 20 minutes.

Make the pizza
Preheat the oven to 500ºF.  Have a pizza stone set on the bottom rack.  Alternatively, preheat an outdoor grill to high.

Heat a large sauté pan over medium heat.  Add just enough olive oil to coat the bottom, then add the spring onions along with a large pinch of salt.  Sauté, stirring occasionally, until softened and just starting to brown, about 6 minutes.  Remove to a plate and set aside.  Turn up the heat to medium-high and drizzle in more olive oil.  Add the mushrooms and another pinch of salt.  Allow to cook without disturbing for a few minutes.  You want the mushrooms to really sear.  After about 3 minutes, give them a toss and allow them to cook for a few minutes more.  Remove to the same plate as the onions and set aside.  Season both to taste with salt and pepper.

Coat a pizza peel with cornmeal or flour.  Roll the pizza dough out onto a floured surface until it is the desired thickness.  (I like mine thin.)  Transfer the dough to the peel.  Spread the Nettle Pesto over the surface of the dough.  Scatter the spring onions and the mushrooms over top.  Fill in the gaps with the peppers, then finally, crumble the cheese over top.  Carefully slide the pizza on to the stone.  Cook until the crust is browning and the cheese is starting to melt, about 10 minutes.

If you are using a grill, place the dough (with nothing on it) on the grill.  Cover and allow to bake until marks appear and the bottom is golden, about 5 minutes.  Carefully turn the dough over and slide it back on the peel.  Place the toppings on as described above, then slide the pizza back on the grill.  Cover and cook for another 5 minutes then remove and serve.

Nettle Pesto
Adapted from Jess Thomson
Make 1 generous cup

The main change I made here is to use less olive oil.  I don’t like my pesto too oily but you can add up to a cup or more of olive oil if you prefer.

½  pound nettles
2 large garlic cloves, smashed
½ cup toasted pine nuts
½  teaspoon salt
Freshly ground pepper
1 tablespoon freshly squeezed lemon juice
½ – ¾ cup extra virgin olive oil
1/3 cup grated Parmesan cheese

Bring a large pot of salted water to a simmer for the nettles.  Add the nettles directly from their bag and cook, stirring continuously, for 2 minutes. (This denatures their sting.) Dump into a colander to drain.  When the nettles are cool enough to handle, wrap them in a clean dishtowel and wring out as much moisture as possible, like you would for spinach.  You’ll have about a cup of cooked, squished nettles.  (DT: If you use a light colored dish towel, it will be stained brownish green afterward.  I would recommend using either a dark colored towel or paper towels.)

In the work bowl of a food processor fitted with the paddle attachment, whirl the garlic, pine nuts, salt, and pepper to taste until finely chopped.  Add the nettles, breaking them up as you drop them in, and the lemon juice and whirl until finely chopped.  With the machine running, add the oil in a slow, steady stream, and process until smooth.  Add the cheese, pulse briefly, and season to taste with additional salt, pepper, or lemon juice.


A Need for Something Green

June 4, 2011

Friends – once again it has been a crazy week.  In a very good way.  We spent last weekend on Lopez Island (more on that with cute boy photos on the way), came home to a birthday party for my brother on Sunday, spent a relaxing Memorial Day doing not much of anything, and then Tuesday I flew to Scottsdale to talk about ovens and cooktops. Thermador, a brand I am now officially simultaneously in love with and coveting, has come out with an incredible new option for your stove/oven and I was lucky enough to get a first peek.  I have lots more to say and will do so in my next post.

I returned from Scottsdale on Thursday afternoon and, gulp, catered a party that night.  Recently I have been getting a lot of questions along the lines of “how do you get it all done?”  I think that is a good subject for – you guessed it – an upcoming post.  Within two paragraphs, I have promised you three new posts all having nothing to do with the food you probably come here for.  So, for now, let’s talk food, shall we?

For Thursday night’s party, I had to do most of the work in advance since I had a very short window between the time I landed and the time the party started.  As I was sitting on the plane going through the food I had planned, I realized that there would be a lot of brown and red.  I made those amazing peppers, Muhummara dip, gougères (which I forgot to bring – damn!), nuts, and a couple of other things.  I needed something green.  I’ve had this pea and ricotta tart in my head ever since seeing it on Stacey’s site a few weeks ago and I figured I could work out something with a similar feel.

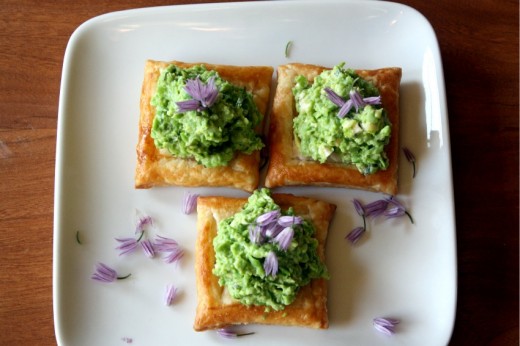
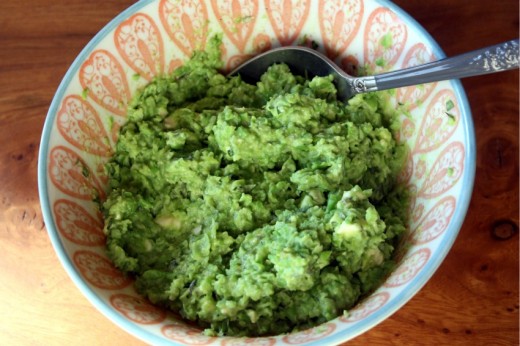
Alas, no ricotta in my refrigerator and no time to go to the store meant that I had to work with what I had.  I won’t bore you with what my original vision was vs. how it turned out.  I feel confident that my made-up appetizer turned out much better than the imaginary one I started off with.  In the end, I pulsed peas, a bit of cream cheese, olive oil, salt, and pepper in the food processor, stirred in some chopped tarragon and finely crumbled feta cheese, and spooned it into little pastry cups that, miraculously, were waiting for me in my pantry.  They were only about 1 inch across and were perfect for party food.  I got more questions about those little morsels than anything else I brought.  Sadly, the only other thing I forgot besides the gougères, was my camera.

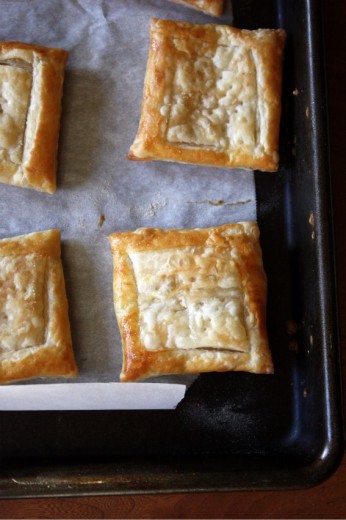
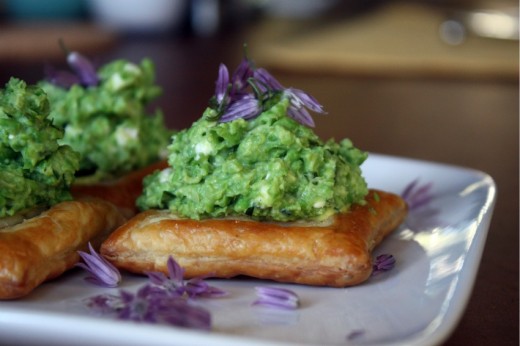
So, I made them again.  This time I used a square biscuit cutter on puff pastry for a more fork and knife-type appetizer.  You could certainly make them even larger and serve them as more of a main course.  In this second go-around, I was out of feta and used a bit of Gorgonzola instead.  I really liked both cheeses and I know a very finely chopped Pecorino would taste terrific too.  I also swiped the bottom of each pastry square with the dreamiest French tarragon mustard.  That little spicy bite made all the difference.

One Year Ago: Pull-Apart Cheesy Onion Bread, Holly B’s Rhubarb Bette, Radishes with Butter and Chive-Sage Salt
Two Years Ago: Greek Pasta Casserole, Green Bean and Fennel Salad, Rosemary Raisin Pecan Crisps
Three Years Ago: Gazpacho (still the recipe I use)

Puff Pastry Squares with Pea and Tarragon Purée
Dana Treat Original
Makes 12 appetizer portions

You could, of course, just put this purée on crostini  instead of the puff pastry to make it simpler.  Or serve it with pita chips as a dip.  If you choose the latter, I would thin it with more olive oil when you are making it in the food processor.

12 ounces puff pastry
1 egg beaten with 1 tbsp. water (for egg wash)
Tarragon mustard or other Dijon mustard (optional)
6 ounces frozen peas
2 tbsp. cream cheese
2 tbsp. olive oil
Kosher salt and freshly ground black pepper
2 stalks tarragon, leaves stripped and chopped
2 ounces feta or blue cheese, crumbled into small bits
Chive blossoms, for garnish (optional)

Preheat the oven to 400ºF.  Dust a work surface with flour and lay unfold the puff pastry onto the surface.  Using a floured rolling pin, gently roll the puff pastry just enough to flatten the seams.  Using a biscuit cutter, a cookie cutter, or a paring knife, cut out 12 squares and transfer each to a parchment paper lined baking sheet.  (You want about 3-inch squares.)  Brush each square with the egg wash.  Using a paring knife, score a border, about ½-inch wide without cutting all the way through the pastry.  Using a fork, dock holes in the bottom of each pastry, inside the border.  Place the baking sheet in the freezer for 15 minutes.

Place the baking sheet in the oven for 15 minutes, or until the pastry squares are nice and golden brown.  You might need to poke your fork back into the bottoms of the pastry to deflate them a bit as they bake.  Remove from the oven and allow to cool.

Bring a small saucepan of water to boil.  Add the peas and cook for 1 minute.  Drain and immediately rinse with very cold water.  Place the peas in a food processor fixed with the steel blade.  Add the cream cheese, olive oil, and pinch each of salt and pepper.  Keep in mind that the cheese you add will be pretty salty so use a light hand with the salt.  Pulse the mixture until it is combined but still chunky.

Place the mixture in a bowl and gently stir in the cheese and tarragon.  Taste for seasoning and add more salt and pepper if necessary.  Swipe just a bit of mustard across the bottom of each square.  Scoop the purée onto each and garnish with chive blossoms if you like.


« Older Posts Newer Posts »