Category: Cake

Another Look at a Favorite

August 6, 2011

At the bottom of each of my posts, just before the recipe, I offer to you what I was making one, two, and three years ago.  Why do I do this?  Partly because other blogs I like do it, partly because I want to offer you other seasonal recipes that you might not have seen when I originally wrote about them, partly as a reminder to myself of the things I have made.  Truthfully, it’s kind of a pain in the neck.  Do you care?  Do you click back to those old recipes?

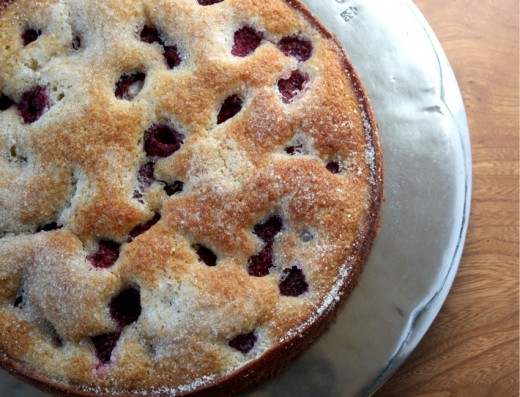
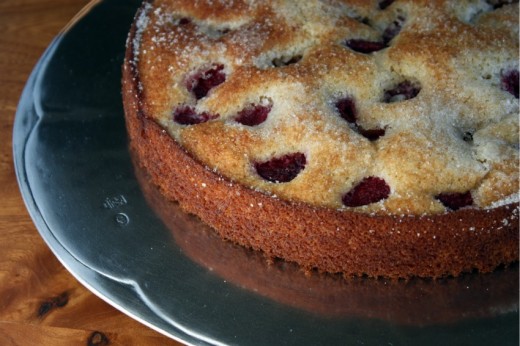
In my last post, as I was scrolling through my three years ago recipes, I came across this cake.  It was no surprise to see it there – I make it every August and have for the past nine years.  As soon as decent raspberries show up in the market, I make this cake, usually multiple times.  Looking at the old sad photo from that three years ago post, I knew I had to write about it again, this time with a better photo.

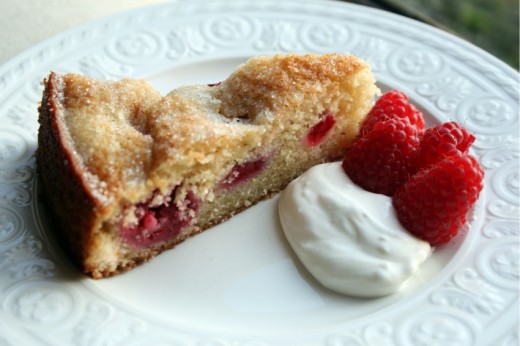
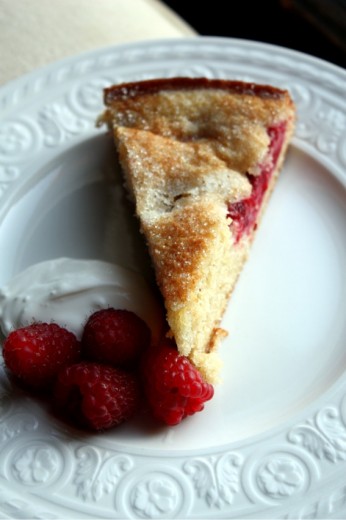
This cake is so simple and it shows off the raspberries beautifully.  I find raspberries to be a delicate berry, you don’t want to overwhelm them in either taste or texture.  This cake is sturdy but not dry and it has a subtle and yet diffrent (from the Marsala) flavor that allows the berries to shine.  I’ve made the delicious side cream with both crème fraîche and sour cream and I have to say, unless you have made your own crème fraîche, save yourself a few bucks and just use sour cream.

One Year Ago:  Rice Noodles with Marinated Tofu and Shiitake Mushrooms
Two Years Ago:  Grilled Potato Slices with Salt and Vinegar
Three Years Ago:  Olive and Jarlsberg Sandwich

Raspberry Cake with Marsala
Bon Appétit
Makes one 10-inch cake

I have made this cake in both a 9-inch and a 10-inch springform pan.  Both work fine.  I usually bake with a superfine sugar but used a coarser one for this cake and really liked how the top got a little crunchy.

1 ½ cups all purpose flour
1 teaspoon baking powder
1 teaspoon salt
¼ teaspoon baking soda
¼ teaspoon ground nutmeg
½ cup Marsala
¼ cup fresh orange juice
14 tablespoons (1 ¾ sticks) unsalted butter, room temperature, divided
1 cup plus 4 tablespoons sugar
2 large eggs
1 teaspoon vanilla extract
1 teaspoon grated lemon peel
4 cups fresh raspberries, divided

2 cups crème fraîche or sour cream

Position rack in center of oven and preheat to 400°F.  Butter 10-inch-diameter springform pan.  Whisk first 5 ingredients in medium bowl to blend.  Combine Marsala and orange juice in small bowl.  Beat 12 tablespoons butter and 1 cup sugar in large bowl until well blended.  Beat in eggs, vanilla, and lemon peel.  Beat in Marsala mixture in 2 additions alternately with flour mixture in 3 additions.  Transfer batter to prepared pan.  Sprinkle with 1 1/2 cups raspberries.

Bake cake until top is gently set, about 20 minutes.  Reduce oven temperature to 375°F.  Dot top of cake with 2 tablespoons butter and sprinkle with 2 tablespoons sugar.  Continue baking until tester inserted into center of cake comes out clean, about 15 minutes.  Cool in pan on rack.  Release pan sides; transfer cake to platter.  Cool to room temperature.

Mix crème fraîche and 2 tablespoons sugar in small bowl.  (Cake and crème fraîche mixture can be made 8 hours ahead. Let cake stand at room temperature. Cover and chill crème fraîche mixture.)  Cut cake into wedges.  Top each with dollop of crème fraîche and fresh raspberries and serve.


Reunion

June 16, 2011

When I was about 8 months pregnant with Graham, my oldest child, Randy and I did a Lamaze weekend out of town.  Most OB’s recommend you do some kind of class to prepare you for childbirth and the hospital where we ultimately delivered offered a six week course.  Randy had just started working at Microsoft and was spending a ridiculous number of hours there trying to get up to speed.  The thought of trying to get back across the lake in time for a class stressed him out, so we opted to cram all those classes into one weekend instead.

Sometimes things happen for a reason and I think we ended up going this Lamaze route so we could meet an incredible group of people.  There were 12 couples, all due within a few months of each other, and over the course of the weekend and talking about things like contractions and bed-rest and colostrum, we got to know each other.  We were all in this incredibly heady time in our lives – about to have our first baby.  Scared, excited, scared and um, scared.  The weekend ended and we drifted away from each other and back to our lives.

The first couple had their baby just days before we had Graham.  The husband emailed their news out to the group and, now that we were connected, all the rest of the couples followed suit.  Through this email connection, the women started bonding.  Once all of us had our babies, we began to get together with our brand new babies.

At the time I was in a PEPS group (Program for Early Parenthood Support), an organization I believe in and support.  I even lead a group myself when Graham was a year old.  But my particular group was a little funny.  Everyone was nice but there were some big overachievers in there and everyone seemed to have it together.  No one cried, everyone’s baby seemed to be sleeping, nursing was going well for all the moms – in short, no one was real.  I went to those meetings making sure I had showered, did not cry, bit my lip the whole time, and left feeling like a failure.  It was the weekly gathering of Lamaze ladies where I could be myself.  It was my lifeline.  Being able to walk out of the house unshowered, crying baby in tow, get to a friend’s house who was in a similar mental and emotional space as me, and be able to cry myself – out of exhaustion, frustration, fear, and hormones – is what saved me in those first few months.  One in our group gave us this quote: “You make friends for a reason, a season, or a lifetime.”  It seemed we had made lifelong friends.

Sadly, within a couple of years, 6 of the 12 couples moved away.  We all got busy with our lives, husbands, work, second children.  I have remained extremely close with two of the women – I consider them two of my closest friends.  I wish I saw everyone else more frequently but busy lives and distance makes it difficult.  Donna was one of our true gems and she had the nerve to North Carolina before we knew it.  Donna and I have been keeping in intermittent touch on Facebook and I will occasionally get a comment from her on this blog.  She emailed last week to say that she and the family were heading to town and could we gather?  Of course!
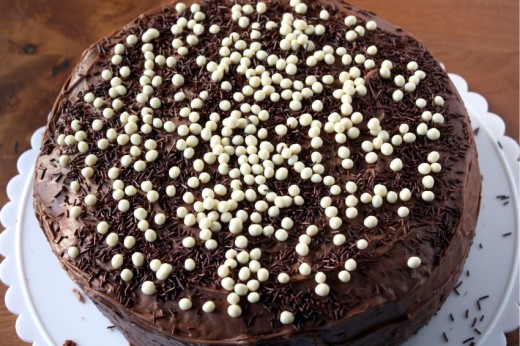
6 adults, 10 kids, 2 pizzas, 2 salads, and 1 cake makes for a rocking good time.  Graham was in heaven because all the six-year-olds were girls.  Spencer was in heaven because there were so many people to play with.  It was so nice seeing them all as such big kids and seeing how truly far we have come.  In true Lamaze group fashion, we shared some of the joys and some of the frustrations we are experiencing.  And we got to sing “Happy Birthday” to one of our group whose birthday is Friday.

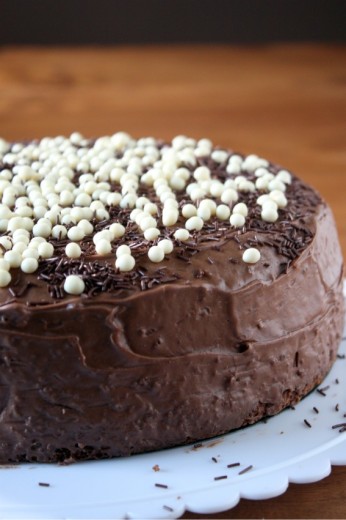
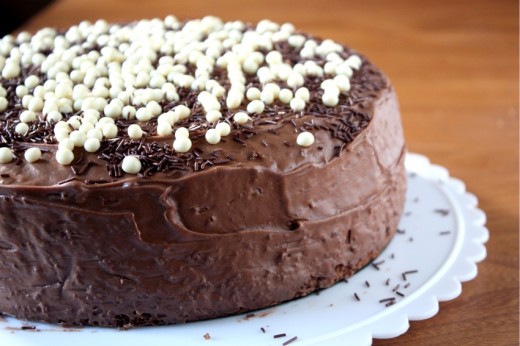
I have been wanting to practice my layer cake technique ever since watching this incredibly helpful video.  A friend’s birthday is the perfect excuse for practice.  This is a Holly B’s recipe and it’s hard for me to believe I have never made it.  Holly mentions in her book that this is the standard birthday cake in her family and now I know why.  It’s a perfect chocolate cake.  The cake itself is moist, the frosting is to die for and the whole thing is incredibly easy and quick to make.  Yes, really.  My only quibble is that there was not enough frosting.  The cake is very crumbly so it needs a crumb coat, but there was not enough for me to do that.  No matter, sprinkles cover a lot of error.  But next time I will one and a half the frosting recipe to make sure there is enough to really cover the cake and for little fingers to dip into.
One Year Ago: Chile Cheese Gratin Sandwiches
Two Years Ago:
Grilled Vegetable Quesadillas
Three Years Ago:
Feta and Ricotta Cheese Pie (ignore the bad photo, this is a terrific recipe)

Sour Cream Chocolate Cake

With Love & Butter

Makes a 9-inch double layer cake

I‘m giving you the recipe as written in the book.  Remember, I would at least one and a half the frosting recipe – even double it and do a crumb coat.  To do so, spread a thin layer of frosting all over the cake and place it in the freezer for about 15 minutes.  Then frost the rest of the cake.  This will keep little crumbs from marring the smooth appearance of your masterpiece.

Cake
1 cup (2 sticks) unsalted butter, at room temperature
½ cup unsweetened cocoa
½ cup boiling water
1 cup granulated sugar
2/3 cup brown sugar, firmly packed
2 tsp. vanilla extract
3 eggs
1 cup sour cream
2 cups flour
1½ tsp. baking powder
1 tsp. baking soda
¼ tsp. salt

Chocolate Sour Cream Frosting
¾ cup sour cream
4 cups powdered sugar
1 tsp. vanilla extract
¼ tsp. salt
1/3 cup (2/3 stick) unsalted butter, melted
¾ cup unsweetened cocoa powder

Make the cake
Preheat the oven to 375ºF with the rack in the center position.  Butter and flour 2 9-inch round cake pans.

Melt ¼ of the butter (½ of one stick) and combine with the cocoa powder and boiling water in a small bowl.  Stir until smooth and set aside.

In the large bowl of an electric mixer, cream the remaining butter with the granulated and brown sugars and vanilla.  Add the eggs and beat until smooth.  Mix in the sour cream, then the reserved cocoa mixture.  Finally, dump in the flour, baking powder, baking soda, and salt and mix just until combined.  Divide the batter between the 2 pans and smooth the tops with a rubber spatula.

Bake the layers for 10 minutes, rotate the pans and bake for 10 to 15 minutes more or until a toothpick just comes out clean.  Don’t overbake – moistness is your goal.  Cool the cakes on a rack.

Make the frosting
Put the sour cream, powdered sugar, vanilla, and salt in the bowl of a mixer.  Whip to combine.  Stir the melted butter and cocoa together.  If the mixture begins to harden, dribble in a little more melted butter and beat until free of lumps.  Add to the sour cream mixture and beat until smooth.

Put one cake layer top-side-up on a serving plate and spread frosting generously to within ½-inch of the edge.  Place the second layer on top, bottom-side-up.  Smooth the remaining frosting over top and sides.

(DT: I made this cake a day ahead frosted and all.  I waited until the frosting had hardened slightly and loosely covered the whole thing with foil.  I think it improved both the flavor and texture of the cake so don’t hesitate to do the same.  You could probably even make it two days ahead, but then I would refrigerate it, covered, and bring it to room temp before serving.)
It’s All About the Topping

April 26, 2011

Dessert at my summer camp was taken extremely seriously.  Actually, seeing as we were outside all day running around and breathing in good island air, food in general was taken seriously.  But dessert, well, fights broke out over dessert.  It is not that anything was particularly special, just that it was sweet.  We were each allowed 35 cents worth of candy a week at the camp’s little store and other than that, sugar came after dinner and you had to share it with the seven other people at your table.

Very often dessert was peach crisp.  Sounds good, right?  Knowing what I do now I can tell you that it was canned peaches covered with crushed up leftover granola mixed with maybe a tiny bit of butter.  I didn’t care.  I thought the topping – so crisp! so sweet! – was one of the most marvelous things I had ever tasted.  It is definitely camp that started me on a lifelong love of crumb topping.  There was once a time that I didn’t like pie because I had only ever tasted pumpkin (still don’t like) or pecan (ditto).  Then one summer, my mom made a blueberry pie with, you guessed it, a crumb topping and hey what do you know?  I like pie!

Crumb topping followed me into my first baking experiences.  As a newbie, I tried to keep it simple and I made a lot of apple crisps.  It turns out I am not alone in my love for crumb topping.  A good crisp is really just a pie without a bottom crust and I still like my fruit better this way.

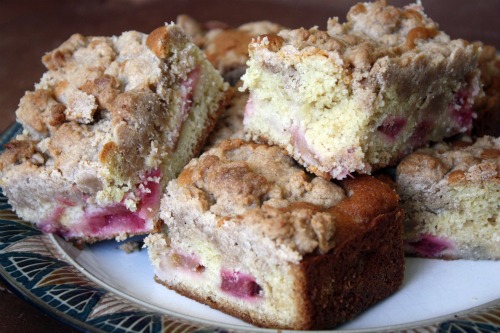
What I love about this cake is that it does not pretend to be something that it’s not.  It’s a crumb topping disguised as a cake.  The cake part is thin and nicely sweet, there is a layer of tart rhubarb on top of that, and then a thick ceiling of crumb topping.  Just the way it should be.

I brought this to a brunch for Easter and it really is perfect brunch cake.  It could also be pretty amazing after dinner with a big scoop of vanilla ice cream.  Whichever you choose, I would try to serve the cake the day it is made.  It loses a little bit of its crunch as it sits.

One Year Ago: Strawberry Ricotta Tartlets
Two Years Ago: Miso Soup with Wakame

Rhubarb “Big Crumb” Coffee Cake
In the Kitchen with a Good Appetite
Makes one 8-inch cake

For the rhubarb filling
½ pound rhubarb, trimmed
¼ cup granulated sugar
2 tsp. cornstarch
½ tsp. ground ginger

For the big crumbs
1/3 cup dark brown sugar
1/3 cup granulated sugar
1 tsp. ground cinnamon
½ tsp. ground ginger
1/8 tsp. salt
½ cup butter, melted
1¾ cup cake flour

For the cake
1/3 cup sour cream
1 large egg
1 large egg yolk
2 tsp. vanilla extract
1 cup cake flour
½ cup granulated sugar
½ tsp. baking soda
½ tsp. baking powder
¼ tsp. salt
6 tablespoons softened butter, cut into 8 pieces

1.  Preheat oven to 325ºF.  Grease an 8-inch-square baking pan.

2.  For the filling, slice the rhubarb ½-inch thick and toss with the sugar, cornstarch, and ginger.  Let macerate while you prepare the crumbs and cake.

3.  To make the crumbs, in a large bowl, whisk together the sugars, spices, salt, and butter until smooth.  Stir in the flour with a spatula.  It will look like a solid dough.

4.  To prepare the cake, in a small bowl, stir together the sour cream, egg, egg yolk, and vanilla.  Using a mixer fitted with the paddle attachment, mix together the flour, sugar, baking soda, baking powder, and salt.  Add the butter and a spoonful of the sour cream mixture and mix on medium speed until the flour is moistened.  Increase the speed and beat for 30 seconds.  Add the remaining sour cream mixture in two batches, beating for 20 seconds after each addition, and scraping down the sides of the bowl with a spatula.  Scoop out about ½ cup of the batter and set aside.

5.  Scrape the remaining batter into the prepared pan.  Spoon the rhubarb over the batter.  Dollop the remaining batter over the rhubarb (it doesn’t have to be even).

6.  Using your fingers, break the topping mixture into big crumbs, about ½-inch to ¾-inch in size.  They don’t have to be uniform; just make sure the majority are around that size.  Sprinkle the crumbs over the cake.  Bake the cake until a toothpick inserted into the center comes out clean of batter (it might be moist from the rhubarb), 45 to 55 minutes.  Cool completely before serving.


Brown Sugar Pound Cake

April 18, 2011

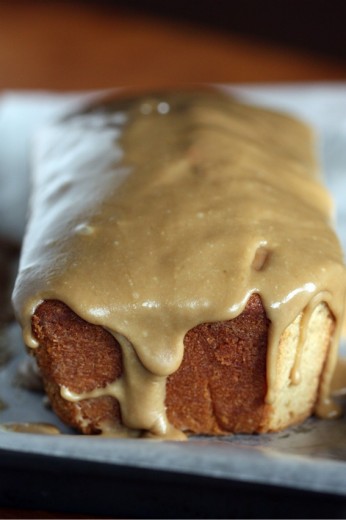
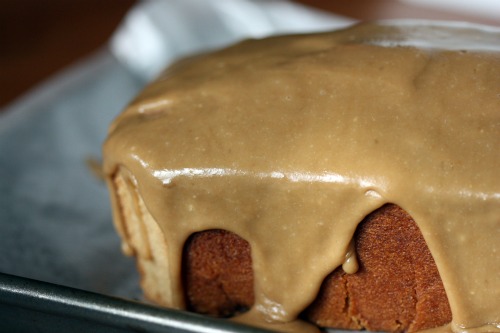
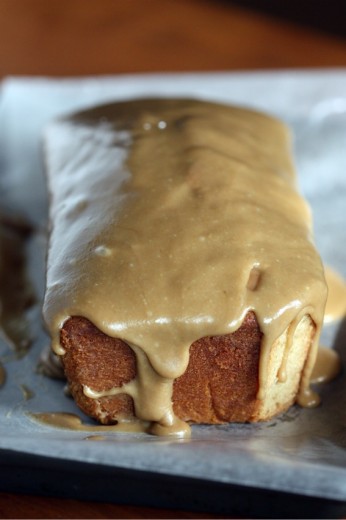
It is a shame I didn’t get a shot of a slice of this cake.  I could have, should have, but I didn’t.  Sorry about that.  If I had, you would have seen the glorious tight and dense crumb.  In my opinion, it is a tight and dense crumb that makes a pound cake great.  That and lots of butter.

This recipe comes by way of a memoir.  Normally, I am a little suspect of recipes in memoirs (unless we are talking about a food memoir like Cooking for Mr. Latte or A Homemade Life).  My thoughts are along the lines of “who is this person and why does he/she think she can just include a recipe at the end of each chapter?”  My friend Cheryl gave me a copy of Cakewalk last summer and it has been sitting on my “to read” pile for far too long.  It  is the story of a very interesting and troubled family.  It is well-written and although food is not the subject, the author does write about tantalizing treats.  Many of the end-of-chapter recipes spoke to me but I made this one because I had all the ingredients on hand.

(OK, so you may notice a small bit of the corner cut off.  For scientific purposes only!)

Sometimes I just want to bake.  If you like to bake, I’m sure you are familiar with this feeling.  For me, it isn’t even so much for the end result although ending up with a homemade baked good is nice.  Sometimes it is just the act of pulling out the flour and sugar, turning on the mixer, preheating the oven, anticipating the smells that will soon perfume my house…  When I just want to bake, I don’t want to fuss.  Cookies are too much trouble – all that shaping and switching baking sheets in the oven.  This is why I love simple cakes.

I did a little dessert party last night – a reception for a very moving play currently running at the New City Theatre in Seattle.  Sick tells of one woman’s struggle with pain and medication and the cracks we can all fall through in the American medical system.  You can read more about the play here.  Randy and I wanted to support the playwright and actress and we decided to invite some of our friends to attend.  We lured them with the promise of a compelling story and with treats afterward.

I made butterscotch pudding tarts and chocolate friands (recipes coming soon).  I made the most favorite chocolate chip cookies.  But several people pulled me aside to tell me this cake was their favorite.  It is comfort food at its most comfortable.  And the glaze!  Swoon.


Brown Sugar Pound Cake
Adapted from Cakewalk
Makes two 8×4-inch loaves

You can make this cake in one 9 or 10-inch tube pan, but I love the idea of having two cakes out of one recipe.  I served one cake the day I made it and wrapped and froze the other one.  The cake should be frozen unglazed, so if you do this, be sure to cut the glaze recipe in half.

3 cups all-purpose flour
1 tsp. baking powder
½ tsp. salt
1½ cups (3 sticks) unsalted butter, at room temperature
3 cups firmly packed light brown sugar
5 large eggs, at room temperature
1 cup whole milk
1 tsp. vanilla

Preheat oven to 325ºF.  Butter and flour two 8×4-inch loaf pans, knocking out excess flour.  Mix the flour, baking powder, and salt together in a bowl.  Set aside.

Beat the butter in the bowl of an electric mixer on medium speed for 3 minutes, until whipped looking.  Slowly add the sugar and beat for another 3 minutes, increasing the speed to medium-high.  The mixture should look very light and fluffy.  Add the eggs one at a time, beat well after each one.  Scrape down the sides of the bowl and beat again.

Combine the milk with the vanilla.  Add the flour in 3 portions alternately with the milk, beginning and ending with the flour.  Fold the last flour addition in by hand with a rubber spatula.  Turn the batter into the prepared pans.  Bake for 1 to 1½ hours, checking after 55 minutes and every 5 to 10 minutes thereafter, until a toothpick inserted near the center of the cake comes out with just moist crumbs attached.  If the cake is very brown after 55 minutes but not yet fully baked, cover the top with a sheet of aluminum foil.  When done, the cake will be springy to the touch and pulling away from the sides of the pan.  Let cool in the pan for 10 minutes, then turn out onto a wire rack to cool completely before glazing.

Brown Sugar Glaze

Remember, this amount will glaze both cakes.  If you are only glazing one, cut the recipe in half.

½ cup (1 stick) unsalted butter
½ cup firmly packed light brown sugar
¼ cup whole milk
¼ tsp. salt
1 tsp. vanilla
1 to 1½ cups confectioners’ sugar

Melt the butter in a heavy-bottomed saucepan over low heat, then add the brown sugar and raise the heat to medium.  Boil, stirring constantly, for 2 minutes.  Add the milk and return to a boil, stirring constantly.  Remove from heat and stir in the salt and vanilla.  Let cool for 10 minutes.

Sift 1 cup of the confectioners’ sugar over the mixture, stirring with a whisk until smooth.  If the glaze is thick enough for your liking, you can stop there.  If not, sift the additional ½ cup sugar in.  Place the cake (still on the wire rack) over a wax paper lined baking sheet.  Pour the glaze over the cooled cake and allow it to drip down the sides.  Allow the glaze to set completely before slicing and serving.  Wrapped carefully, this cake will keep for several days at room temperature.  If you happen to have some homemade caramel sauce on hand, it is amazing poured over top.


Banana-Date Tea Cake

April 13, 2011

Periodically, I want to make banana bread.  I can’t really explain why since I’m not even that fond of banana bread.  Maybe it is the ease of preparation, the ingredients seemingly always on hand, the satisfying and great smelling loaf that comes out of your oven after so little effort.  There is one problem with my desire to make banana bread.  We never have any bananas.

I buy bananas each week and my kids devour them.  Spencer (4) has been known to eat three in a day.  No matter how many I buy, they are eaten.  We never get close to over-ripe bananas.  I read about people who freeze bananas that are too brown to eat for future banana bread making days.  All I have to say is, can I have some of your stash?

Paging through Tartine, I came across this recipe.  Instead of a banana bread, this is a banana tea cake, made different by the use of butter (rather than oil), and the addition of chopped dates.  Immediately I glanced at my fruit basket.  For some crazy reason, I had not one, not two, but eight ripe bananas.  Meaning I could double the recipe and have two cakes.   How did this happen?  Clearly this recipe was meant to be made in my kitchen.  I even had dates in the refrigerator from some catering last week.

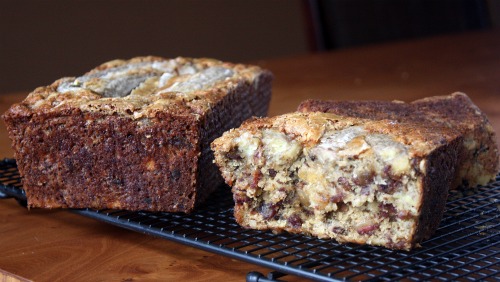
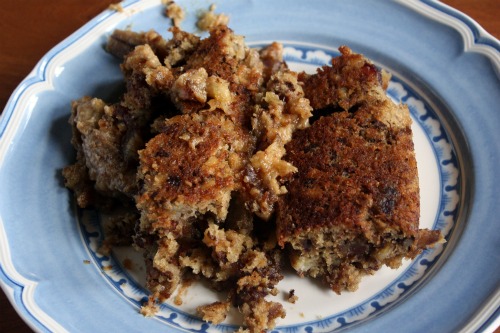
So, also periodically, I like to keep it real here.  I have disasters in my kitchen.  They usually involve cake.  Cake that either decides to stay in a pan because of an insufficient grease job, or cake that seems like it is baked through, only to have the middle of it puddle out after being removed from the pan.  I had a bit of both with one of these cakes.  And here is where I will tell you that sometimes equipment does matter, and that paying a bit more is worth it.  I have two 9×5 loaf pans.  One is really old and one is brand new.  The old one I bought in a grocery store years ago for about $7.  The new one came to me from the King Arthur Flour web site and set me back $16.95.  I baked my two loaves side by side in my oven, both were filled with the same amount of batter, and one turned out perfectly.  The other gave me this for a middle.

I will let you guess which was which.

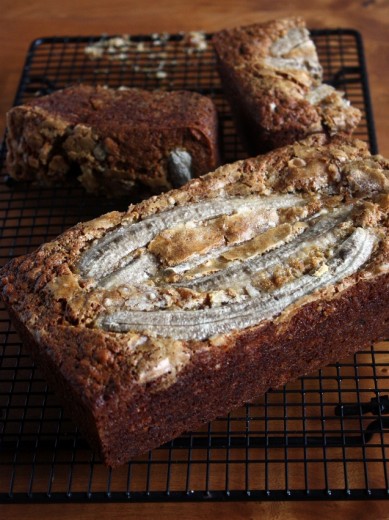
Here is my pretty cake with the two salvageable ends of the ugly cake behind it.  Disasters do happen.

The cake, no surprise, was delicious – even the mushy part.  I served slices to four children, ages 6, 5, 4, and 3 (my boys and their two best buddies).  I don’t really think of this as kid cake or kid dessert but it was all I had and I have a reputation for my treats not only with adults, but with kids as well.  All four of them cleaned their plates.  So did the adults.  Kendall, age 5, was dismayed that she didn’t get to take the leftovers home with her, as they were destined for Randy’s office.  “But you always send us home with treats!”

One Year Ago: Cinnamon Chocolate Ribbon Cake
Two Years Ago: Orange Cinnamon Biscotti

Banana-Date Tea Cake
Tartine
Makes 1 large loaf

1 cup + 2 tbsp. all-purpose flour
2 tbsp. cornstarch
1 tsp. ground cinnamon
2 tsp. baking powder
1 tsp. baking soda
3 medium bananas, very ripe
2 large eggs
1½ tsp. vanilla extract
½ tsp. salt
6 tbsp. (¾ stick) unsalted butter
¾ cup + 2 tbsp. sugar
1 cup walnuts, lightly toasted and coarsely chopped
1¾ cups (about 8 oz.) dates, pitted and coarsely chopped

Topping
1 medium banana
2 tbsp. sugar

Preheat the oven to 325ºF.  Lightly butter the bottom and sides of a 9-by-5-inch loaf pan.

This recipe is easily mixed by stand mixer fitted with the paddle attachment on medium speed or by hand with a wooden spoon.  In a mixing bowl, combine the flour, cornstarch, cinnamon, baking powder, and baking soda and stir too  mix.  Set aside.  Peel the bananas and place in a second bowl.  Mash with a fork until you have a chunky purée.  Add the eggs, vanilla, and salt to the bananas and stir to mix well.  Set aside.

In a third mixing bowl, beat the butter until light and creamy, about 2 minutes.  Slowly add the sugar and beat until light in color and fluffy, about 2 minutes.  Scrape down the side of the bowl with a rubber spatula.  Slowly add the banana mixture and beat until incorporated.  Again scrape down the sides of the bowl, and then mix for anther 30 seconds to make sure all the ingredients are incorporated.

Using a rubber spatula, fold the dry ingredients into the banana mixture.  Then fold in the nuts and dates.  Scrape down the sides of the bowl and mix again, making sure all the ingredients are fully incorporated.

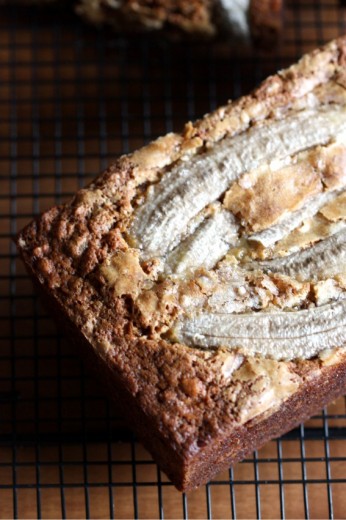
Transfer the batter to the prepared loaf pan and smooth the surface with an offset spatula.  To top the cake, peel the banana and cut in half lengthwise.  Then place each half cut side down and cut in half lengthwise, to yield 4 long slices.  (DT: I didn’t do this quite right.)  Lay the slices on top of the batter.  Sprinkle with sugar.

Bake until a cake tester inserted in the center comes out clean, about 1 hour.  Let cool in the pan on a wire rack for about 20 minutes, and then invert onto rack, turn right side up, and let cool completely.  Serve the cake at room temperature.  It will keep, well wrapped, at room temperature for 2 days or in the refrigerator for about 1 week.


« Older Posts Newer Posts »