Category: Vegan

Feels Like the First Time

August 19, 2012

I don’t know about you, but I feel like the first time I cook something is always the best.  Not bake, cook.  When I bake something more than once, it is almost always better the second or third time than it was the first.  Baking can be tricky and I usually am able to fix any little glitches in a recipe or my technique after I have already made a dessert or a bread.

There have been so many times that I have repeated a recipe merely for the sake of this blog.  I cook first and foremost so that I can eat and feed family and friends.  Photographing and blogging about food is secondary.  But often I am midway through a meal and I think to myself, “I really should write about this” or someone at the dinner table asks me, “Are you going to write about this?”  So then I repeat the recipe the next week and I can say, almost without exception, that it was better the first time.

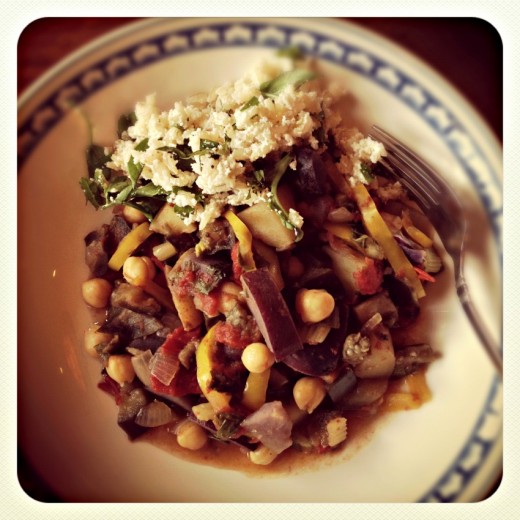
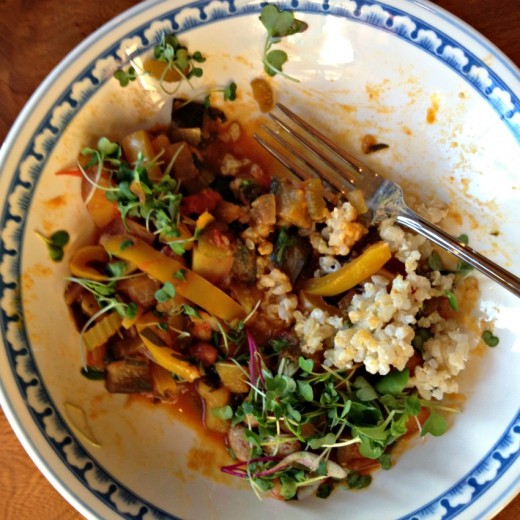
This was a lovely Italian stew the first time I made it.  I was thinking about how good it tasted and my parents and brother were ooohing and aaahing and asking when it would be on the blog, so I stood up and snapped a photo with my phone.  And then I realized that that photo would not do and I was going to have to make it again.

So I made it again.  And I didn’t pay as careful attention to the recipe, I forgot the saffron, and I used dried beans because I didn’t have any more fresh shelling beans stashed away in my freezer and the stew that was so mind blowingly tasty – the kind of thing where you sit back and ask yourself how vegetables can taste so good and maybe there is something to that vegan thing after all – was just a good dinner.

Make it.  Follow the recipe.  Use fresh shelling beans if you can, this is their season and they can pretty easily be found at farmers’ markets.  If you don’t have access to fresh, soak some dried beans overnight and cook them separately from the stew, then add them once they are cooked.  As much as I love their convenience, this is not the place for canned beans.

One Year Ago:  Double Chocolate Peanut Butter Pie, Corn Pudding
Two Years Ago:  Green Bean Salad with Mustard Seeds and Tarragon,
Three Years Ago:  Tortellini Skewers, Bocconcini (Marinated Mozzarella)

Country-Style Vegetable Stew (Cianfotta)
Adapted from Verdura, Vegetables Italian Style
Serves 4

Whenever I use saffron, I always allow it to “bloom” in liquid before adding it to the dish.  It helps bring out the delicate flavor of the saffron.  I served the stew, both times, with a brown rice tossed with ricotta and lots of herbs.  It was nice but not necessary.

1 small pinch of saffron
Olive oil
1 onion, peeled and chopped
2 celery stalks, sliced crosswise
2 garlic cloves, minced
1 tbsp. thyme leaves
1 small eggplant, trimmed and cut into medium dice
1 large yellow pepper, seeded, membranes removed, cut into medium dice
4 medium peppers, a mix of colors if possible, cut into medium dice
4 ripe tomatoes, seeded, cut into chunks
1 pinch red pepper flakes
Kosher or sea salt and freshly ground black pepper
8 ounces cooked beans
2 tbsp. chopped fresh parsley
2 tbsp. chopped fresh basil

Pour a few tablespoons of hot water into a bowl.  Add the saffron and set aside.

Place a wide shallow pan over medium heat.  Drizzle in just enough olive oil to coat the bottom, then add the onion and celery and a large pinch of salt.  Sauté until starting to soften, then add the garlic, saffron, and the thyme.  Cook for another 2 minutes, then add the rest of the vegetables.  Add another pinch of salt and a few grinds of pepper, stir well, and cover.  Turn the heat down to low.  Stir the mixture occasionally and if it seems too dry, add a few tablespoons of water.  Repeat if necessary.  Add the beans during the last 5 minutes of cooking.  Stir in the herbs just before serving and season to taste with salt and pepper.


Pike Place Market Memories

June 6, 2012

Have you visited Seattle? Then you have probably visited the Pike Place Market. I know it is always first on my list as a stop for visitors. There is something very unique about that special place. It is a market filled with tourists, especially on a sunny August Saturday, but it is also a place that the locals flock to. Everyone has their favorite produce stand, favorite fish market, favorite place to buy flowers, favorite cup of coffee, favorite place to grab a quick bite.

My family moved to Seattle in the summer of 1975. I know this because I remember having my 5th birthday party on the back porch of our house with a bunch of kids from the neighborhood who I didn’t know. We had a tree growing in our backyard that the builders did not want to cut down, so there was a perfect hole cut in our deck for the tree to grow through. That oddity and a birthday cake was enough of a draw for the neighborhood kids to celebrate with someone they didn’t know.

My parents are both from New York and in some ways, Seattle was a tough move, especially in 1975. They fell deeply in love with the beauty, the access to nature, the (then) low housing prices, and the quality of the air. They missed the culture, food, and community that they left on the East coast. Seattle did not have the bakeries they were used to, decent Italian food, or any good bread; but it did have great coffee, seafood, Chinese food, and the Pike Place Market. I have so many memories of visiting the Market (as the locals call it) all the way from being a very young child to just last week.

The floor of the Market is lined with tiles, each bearing names of families. We have one of those somewhere in the maze of corridors. I remember trudging down to the original Starbucks to buy bags of coffee to bring back to the friends who stored my boxes of clothes and books in the college town 3,000 miles away from what was then, the only Starbucks in the country. I remember buying pounds and pounds of English peas and eating them, straight from the pod, as we jostled through the crowds. Every year through high school, I gave my mom the gift of flowers once a week for a month for Mother’s Day, and I delighted in the huge bouquets that my babysitting money could buy at the Market.

Now I love to take the boys with me on my Market forays. It is just busy enough there that they stay close to me, a tiny bit timid in the crowds. We have to stop for donuts at the little place where they can watch them come out of the fryer, and we have to avoid the fish-throwing guys because the boys are terrified that they might get hit with a fish. They stand (mostly) patiently waiting at my favorite produce stand, hoping they will get a taste of grapefruit or plum, or whatever is on offer that day. And they negotiate with me about how many honey sticks we can buy.

It is a special place to be sure. Recently, a new Pike Place Market cookbook came out, called Pike Place Market Recipes. My friend Jess Thomson wrote the book and she did a fantastic job of telling the Market’s story. She profiles purveyors, stands, and the building itself. It is the true kind of cookbook that you can take to bed with you and read as a novel. But the best part, truly, is the recipes. Jess is a terrific cook, a terrific recipe writer, and her food is amazingly delicious.  This book truly does her talents justice as it features sweet and savory, meat and vegetarian.  My experience with Jess’ recipes is that they are tested to perfection.  This is a cook you can trust.

One Year Ago:  Shaved Spring Vegetable Salad, Puff Pastry Squares with Pea and Tarragon Purée
Two Years Ago:  Rhubarb Bette, Asparagus with Grilled Shiitake and Soy Vinaigrette
Three Years Ago:  Oven-Fried Rice Balls with Gruyère, Mexican Pizza with Corn, Tomatillos, and Chipotle

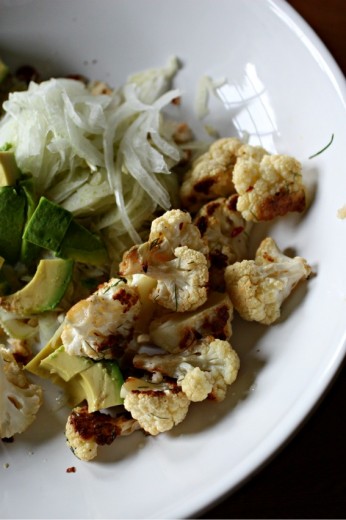
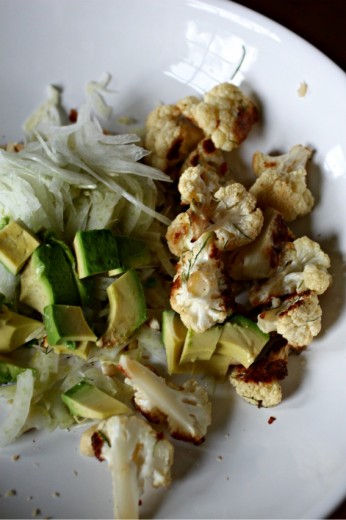
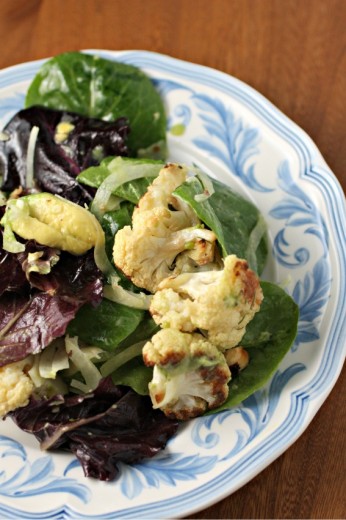
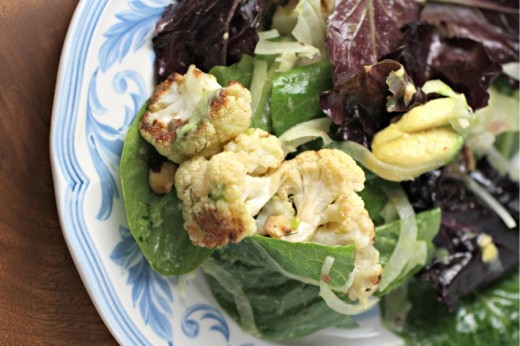
Roasted Pickled Cauliflower Salad
Adapted from Pike Place Market Recipes
Serves 4

The only changes I made to this glorious recipe is reducing the amount of onion (raw onion is too abrasive for me – even it is a sweet one), and adding a bit of avocado.  I used a mandoline to slice the fennel and the onion – thin is key.  Roasting the cauliflower before pickling it is genius.  Softer texture, mellower flavor.  Finally, Jess suggests making the cauliflower a day ahead but I found it was perfect after just a few hours.

 For the roasted cauliflower:
1 large head cauliflower, cut into bite size florets
2 tbsp. extra-virgin olive oil
Kosher salt and freshly ground black pepper

For the pickling brine:
1 cup warm water
2 tbsp. sugar
1 tbsp. kosher salt
1 tsp. red pepper flakes
2 garlic cloves, minced
1 cup white wine vinegar
½ cup fennel fronds

For the dressing:
1 tsp. Dijon mustard
1 tsp. minced garlic
2 tbsp. orange juice
2 tbsp. white wine vinegar
½ cup extra-virgin olive oil
Kosher salt and freshly ground black pepper

For the salad:
¼ cup toasted hazelnuts, coarsely chopped
1 small fennel bulb, very thinly sliced
½ small sweet onion, very thinly sliced
½ ripe avocado, cut into bite size pieces
3 cups mixed salad greens
Freshly ground black pepper

Preheat the oven to 400ºF.  Line a baking sheet with parchment paper or a silicon mat, and set aside.

Place the cauliflower in a large bowl, drizzle with the olive oil, and season to taste with salt and pepper.  Stir the cauliflower to each floret well, then transfer to the prepared sheet.  Roast the cauliflower until lightly browned, about 20 minutes.  Transfer cauliflower to a bowl and allow to cool completely.
While the cauliflower cools, make the pickling brine:  Stir the water, sugar, salt, red pepper flakes, and garlic together in a large pickling jar (or a similar container that can hold all the florets) until the sugar and salt dissolve.  Add the white wine vinegar and the fennel fronds.

When the cauliflower has cooled to room temperature, add it to the pickling brine.  Refrigerate for a few hours or overnight.

Make the dressing:  In a small bowl, whisk together the mustard, garlic, orange juice, and vinegar.  While whisking, add the olive oil in a slow, steady stream whisking until emulsified.  Season to taste with salt and pepper.

To serve the salad, mix together about a cup of the pickled cauliflower (drained) with the hazelnuts, fennel, onion, avocado, and salad greens.  Add dressing to taste and serve immediately, garnished with pepper.


Sunday Night Chinese Food

April 17, 2012

My parents are both Jewish and both from New York.  That means that, on a lot of Sundays, we ate Chinese food.  There were different places we went, some in Seattle proper, some on the little island suburb where I grew up.  No matter which restaurant we went to, several things remained constant.

First it was the tea.  My parents would let us drink tea with as much sugar as we wanted in it.  I think it was the late 70’s/early 80’s version of an iPad.  Something to distract us three kids so that they could attempt to have a conversation.  We would pour and pour and pour that sugar until it was a thick slurry at the bottom of the little tea cups, and then we would spoon it up like soup.  And then there was soup – wonton soup to be exact.  Those little perfect parcels in burn-your-tongue hot broth, just waiting for my teeth to burst them open.  I was always disappointed by the small ratio of wontons to broth.  I could have eaten 50 of them.  My parents always ordered “bean curd” which only they enjoyed since we three thought it was disgusting.  If only my ten-year old self had known how much I would grow to love tofu!  And finally, pork fried rice.  (Yes, Jews eating pork.  We were far from the only ones.)

Here is where I admit that I had never, until last night, made fried rice.  Here is also where I admit that the word “fried” scares me.  You will not find much fried stuff here.  I don’t make donuts and I can count on one hand the number of times I have deep fried.  I am scared of the technique, the mess, and the amount of fat in the food that is fried.  That last reason is why I never order fried rice in a Chinese restaurant, truthfully why I don’t often eat in Chinese restaurants.  (This is a gross generalization but I find Chinese food, in Seattle anyway, to be much greasier than other Asian food.)

Here is why I went for it.  I’ve been making this tempeh for my Spanish cooking classes.  It goes in the paella.  It is so good that, after the class is over and I am washing countless dishes, my fingers keep sneaking into the almost empty pot, hoping that some previously uncovered piece of tempeh will appear.  Doing this search reminded me of the pork fried rice of my childhood and how I would clumsily attempt to get as much of that pink-hued pork with my chopsticks.  I also realized that I sometimes have cold rice in the refrigerator and making something new with it is much more interesting than sprinkling it with water and microwaving it.  And finally, when you make something yourself, you can control how much oil goes into it.

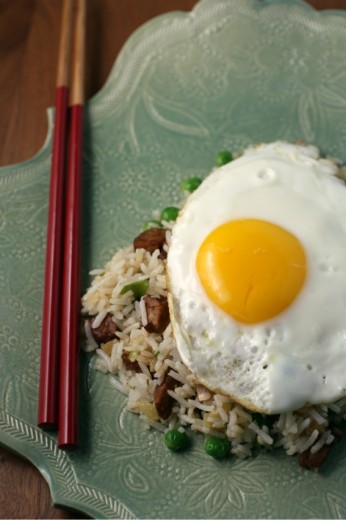
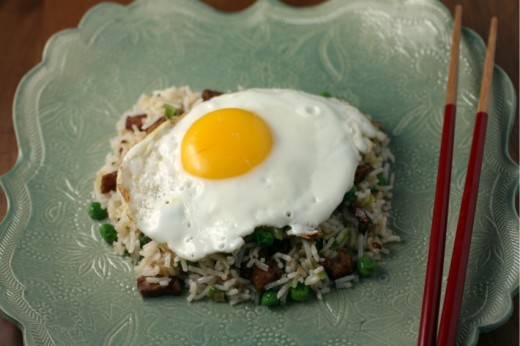
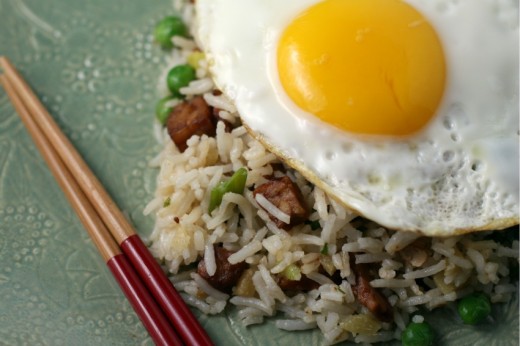
I made this version with a bunch of scallions, a much-more-than-what-you-might-think amount of ginger, cold rice (every recipe you look at will tell you it has to be cold), my magical tempeh, frozen peas, a bit of sesame oil, and a fried egg on top.  The fried rice I remember had bits of scrambled-then-cut eggs throughout the rice, but I have finally realized that, since I go a little swoony every time a dish is described as being topped with a poached/fried/soft-boiled egg, it’s time to do more topping with eggs.

Want to know a little more about tempeh?  Check out this post.
One Year Ago:  Pane con Formaggio (Cheese Bread), Banana-Date Tea Cake
Two Years Ago:  Cinnamon Chocolate Ribbon Cake (I really like this post), Tabasco and Asparagus Quinoa
Three Years Ago:  Orange Cinnamon Biscotti, Southwestern Sweet Potato Gratin

Ginger Fried Rice with Roasted Tempeh
Dana Treat Original
Serves 3-4

I know some people like to grate their ginger on a microplane rasp, but I think it works best here to just chop it really fine.  Don’t skip the steaming step for the tempeh, it can taste bitter if it is not steamed first.

For the tempeh:
1 8-ounce package of tempeh (any flavor)
2 tbsp. soy sauce
1 tsp. sesame oil
2 tbsp. olive oil
1 tsp. smoked paprika

For the rice:
3 tbsp. canola or peanut oil, divided
1 bunch of scallions, white and green parts, thinly sliced
¼ cup fresh ginger, peeled and minced
Kosher or sea salt
About 4 cups cold rice
2 tsp. sesame oil
½ cup frozen peas, unthawed
3-4 eggs

Make the tempeh:
Preheat the oven to 375ºF.  Cut the tempeh into ½-inch dice.  Place in a steamer and steam for 10 minutes.  Meanwhile, whisk the soy sauce, the oils, and the paprika together in a small baking dish.  Pour the steamed tempeh into the same pan and place in the oven.  Roast, stirring occasionally, until the tempeh has absorbed all the marinade and it is starting to get browned in spots, about 25 minutes.  Set aside.  (The tempeh can be made up to 1 day ahead.  Allow to cool, then store in the refrigerator.)

Make the rice:
Place a large shallow pan over medium heat.  Drizzle in 2 tablespoons of the canola or peanut oil, then add the scallions, ginger, and a large pinch of salt.  Sauté until softened and starting to brown, about 4 minutes.  Add the rice, breaking up any clumps with your hands.  Cook, stirring occasionally, for 5 minutes.  Drizzle in the sesame oil, give the rice a good stir, then add the peas and the tempeh (you may not want to add all the tempeh).  Cook for another 5 minutes while you make the eggs.

Place a large non-stick pan over medium heat.  Drizzle in the last tablespoon of the oil.  Crack the eggs one at a time into the pan and cook until the whites are set but the yolks are still soft, about 4 minutes.

Serve the rice in bowls and top each with a fried egg.


Dinner or Post?

April 11, 2012

As a food blogger, I have a choice.  I can make getting the shot and documenting the meal the priority, or I can make interacting with my guests and eating the meal the priority.  Guess which way it went last night.

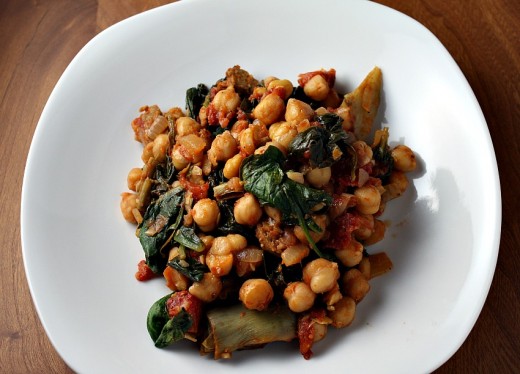
When this mind-blowingly delicious dish first made it into the bowl, it was gorgeous.  A riot of color.  My friend Deb was here with kids and we had spent the early part of the evening catching up, dishing out pasta and chickpeas and carrots and hummus to our tribes while we drank white wine.  On the stove, our chickpeas were bubbling away in a pot of water and the onions and (veg) sausage were in a sauté pan making us hungry with their smell.  (There are few things in this world that smell better than onions sautéing, in my opinion.)  The kids, having not seen each other in a long time (a month is a long time when you are seven, six, five, and four), ran downstairs to play and I put the finishing touches on our dinner.

You know when you just know something is going to be good?  This recipe comes from Gail Simmons’ book Talking with My Mouth Full which is a memoir with just a few recipes.  I think she is very interesting and intelligent but the book just doesn’t do her justice (sorry Gail!).  However, if the rest of the recipes are as good as this one, I will recommend you buy the book anyway.  A quick glance at the ingredients list told me this would be a winner.  Lots of chickpeas, fresh artichokes, smoked paprika, spinach – some of my very favorite things.  I have been using more vegetarian sausage products so I knew swapping the kielbasa for Tofurkey would not be a problem.  I spooned us each a healthy portion and then paused.  Should I take a photo?  I’m hungry.  Deb is waiting for me in the dining room.  Where is my light?  Where is my memory card?  Which lens do I have on my camera?  Oh, look at all that steam – hard to capture that in a photo.  Screw it.  I’ll take one after we are done.

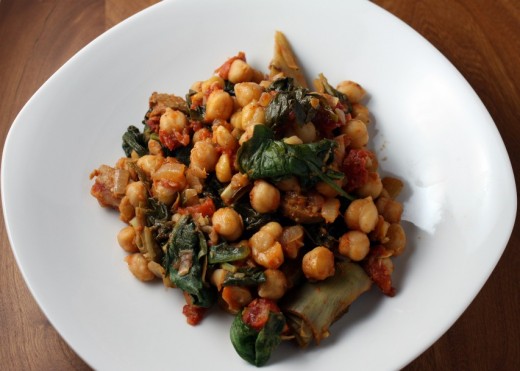
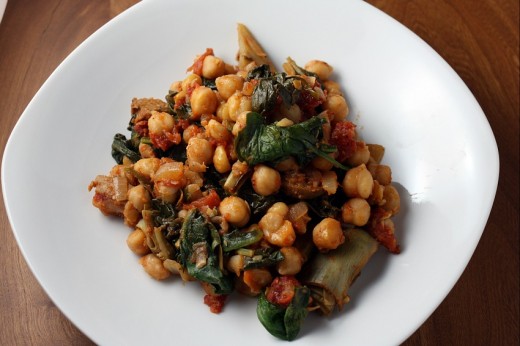
So this happened.  A picture that does not do this dish justice.  A kind of wilted flabby picture.  One you might very well pass by.  Don’t!  This stew has such a smoky hearty flavor and so many wonderful textures that I kind of fell in love with it.  I had planned to make it with frozen artichokes but then found some fresh beauties at the store and went that way instead.  I hear that frozen artichokes are a pretty acceptable substitute but when fresh are available, I always buy those.  I find breaking them down to be oddly meditative.  I know, there is so much waste! with fresh artichokes.  I’ll tell you what I tell my classes – get over it.

Finally, I used dried chickpeas in this dish because I really prefer them and I don’t think they take nearly as long to cook as most directions say.  With even a quick soak (2 hours), they cook up nice and tender in about 45 minutes.  But I’m sure canned would be fine here.  Use 2 15-ounce cans.

One Year Ago:  Lemon Cream Tart
Two Years Ago:  Black Bean Tostadas with Slivered Cabbage, Avocado, and Pickled Onions
Three Years Ago:  Butterscotch Spiral Coffee Cake

Chickpea, Artichoke, and Spinach Stew

Adapted from Talking with My Mouth Full
Serves 6-8

Gail says this serves 4 but it makes a HUGE amount of stew!  She adds 2 cups of stock to the dish, which would probably yield even more servings, but I opted to leave it out for a less liquid-y stew.  Next time I might add ½ a cup or so.

2 cups dried chickpeas, soaked overnight and drained
Olive oil
1 large onion, finely diced
2 garlic cloves, minced
½ pound vegetarian sausage (I like Tofurkey brand Italian style – use half a package)
One 28-ounce can diced Italian tomatoes
2 large artichokes, trimmed, chokes removed, hearts quartered and reserved in lemon water
2 tsp. smoked paprika
1 bay leaf
Kosher or sea salt
Freshly ground black pepper
10 ounces fresh spinach

In a medium saucepan, cover the chickpeas with 2 inches of water and bring to a boil.  Reduce the heat to low and simmer until the chickpeas are tender 45-60 minutes.  Add water as necessary to maintain level.  Drain the chickpeas and set aside.

Place a large heavy pot (like a Dutch oven) over medium heat.  Drizzle in just enough olive oil to coat the bottom of the pot, then add the onions and a large pinch of salt.  Cook until the onion begins to turn translucent, about 5 to 7 minutes, then add the garlic.  Cook for another 2 minutes, then add the sausage.  Continue to cook until the sausage starts to brown, about 10 minutes.  Add the tomatoes with their juices and cook until sizzling, about 4 minutes.  Add the artichoke hearts, smoked paprika, and bay leaf; cook for 5 minutes.  Add the drained chickpeas and bring to a boil.

Reduce the heat so that the stew simmers, then cover the pot and allow the artichoke hearts to cook through and the flavors to meld.  Check periodically to make sure nothing is sticking and add a bit of water as necessary.  When you can easily pierce an artichoke heart with a fork, remove the cover and start adding the spinach in batches.  Cook until all the spinach is wilted – this will take another 5 to 7 minutes.  Taste and adjust the seasoning as necessary.


Green Curry Noodles

February 10, 2012

Last weekend, the boys and I went to the West Seattle farmer’s market.  It is one of the three markets that stay open all year.  Although it is a bit of a hike from our house, I like this market because it is food only, some of the very best vendors are there, it doesn’t feel crowded, they often have music and little seats set up for children, and it’s in the middle of a thriving business district.  The weather last week was glorious and it almost felt like spring was just around the corner.  A trip to the market made me realize that winter is definitely still here.

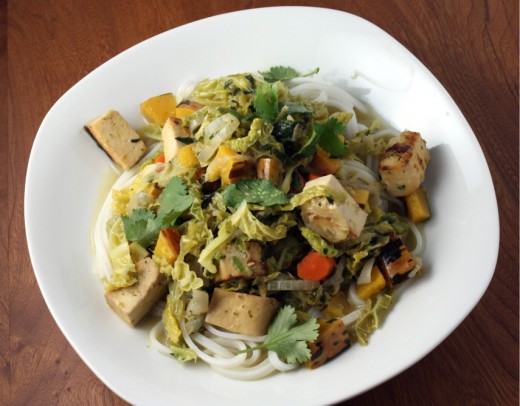
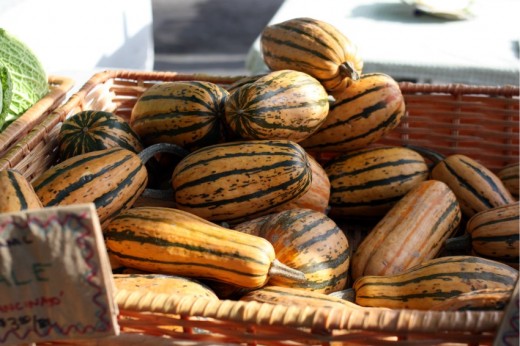
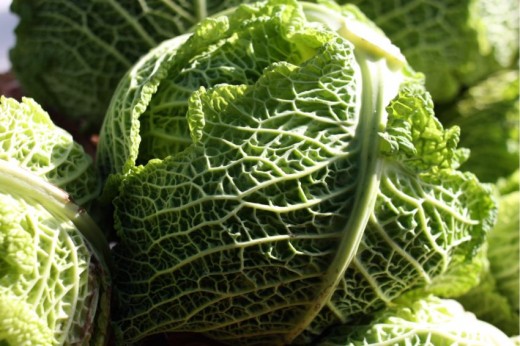
I find the farmers’ market inspiring, even in February.  After making that amazing Sweet Winter Slaw five times in two weeks, I had seen a lot of Savoy cabbage – but not like this one.  How could I not buy this beauty?  And with delicata squash in the basket right next to it, a dish began to form in my mind.  Green curry, lots of shallots, rice noodles, sweet squash, cabbage cooked down to wilted.  Sounds good, no?

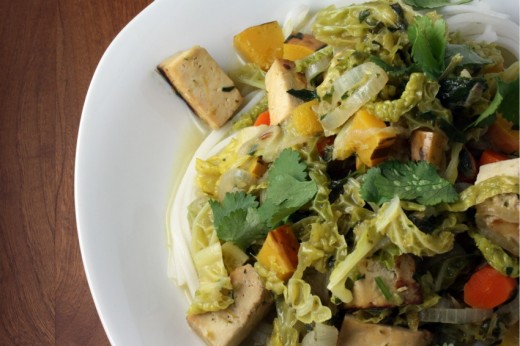
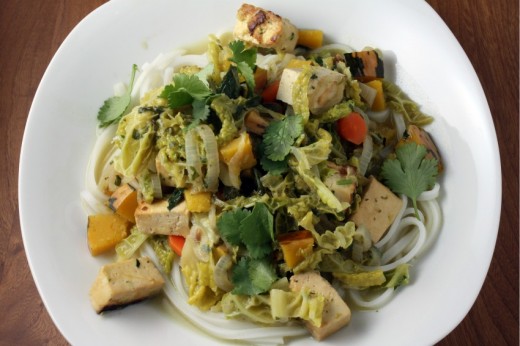
It was good.  Lovely really.  Warming, hearty, healthy.  I think those three words are magic in the wintertime.  If you can find or create a dish that warms your toes, fills your belly, and doesn’t weigh you down, life is pretty good.

Allow me to try to convince you to make your own curry paste.  Yes, I know that you can buy a nice little jar of it that lasts almost indefinitely in your refrigerator.  I have two of those jars myself, one green and one red.  The problem is that the consistency is similar to cement, so it can be a little difficult to incorporate into a dish.  It also has essentially two flavors.  Hot and salty.  There is no nuance there.  Just spicy and savory.  Nothing wrong with that if you are having a curry crisis.  But homemade is quick to make, has much more subtle flavor, a much looser consistency, and will also keep for a while in your fridge.  (I would say a  month.  You can freeze it for up to six.)  The ingredients are all natural – lemongrass, jalapeño peppers, cilantro, shallot, garlic.  If you love these ingredients, please give the curry a try.

One Year Ago:  Spicy Sweet and Savory Cauliflower
Two Years Ago:  Pesto Parmesan Cornbread
Three Years Ago:  Red Curry with Winter Vegetables and Cashews (recipe for red curry in this one!  coincidence!)

Green Curry Noodles with Cabbage and Squash

Dana Treat Original
Serves 4

While you should never rinse your Italian style noodles, rice noodles do need a good rinse.  This step will keep them from sticking together.  Both Savory and Napa cabbage would work here.  I wouldn’t use green as it will take to long to soften and purple will turn your whole dish a crazy color.  Finally, if you do decide to use a commercial curry paste, I would start with one tablespoon and add more later to your taste.

10 ounces extra firm tofu, blotted dry and cut into 1-inch pieces
4 tbsp. soy sauce, divided (I like tamari)
8 ounces rice noodles, linguine width
Canola, peanut, or coconut oil
6 ounces shallots, peeled and thinly sliced
Kosher or sea salt
½ medium delicata squash, seeded, and cut into 1-inch chunks
1 carrot, peeled and cut into thin rounds
2-3 tbsp. homemade Green Curry Paste (recipe follows)
½ head Savoy cabbage, cored and thinly sliced
1 14-ounce can coconut milk (can be “lite”)
1 cup vegetable broth
½ cup chopped cilantro, plus a few whole leaves for garnish

Place the tofu in a large ziploc bag.  Sprinkle in two tablespoons of the soy sauce and give the bag a vigorous shake.  Allow the tofu to marinate while you prepare the noodles.

Bring a large pot of water to a boil.  Turn off the heat and add the rice noodles to the pot.  Allow to sit for ten minutes, stirring occasionally, then taste.  The noodles should be al dente.  Allow them to sit for another few minutes if they are too firm, then drain.  Immediately rinse very well with cold water.  Run your hands through the noodles to make sure the water reaches the ones on the bottom.  Allow to drain well.  Set aside.

Heat a large skillet over medium-high heat.  Drizzle in just enough oil to coat the bottom of the pan.  Carefully add the tofu to the pan, making sure that all the pieces are touching the bottom of the pan.  Allow to cook for about 3 minutes on one side then, using tongs, turn all the pieces over.  They may stick a little and that is ok.  If you have the patience, you can brown all sides of the tofu, but I usually stop at two.  Scrape the tofu to a plate and sprinkle with salt.  Set aside.

Return the skillet to the heat.  Drizzle in a bit more oil and then add the shallots and sauté, tossing occasionally, until the shallots are soft and starting to brown in places, about 6 minutes.  Add the squash and the carrot, then spoon in the curry paste.  If you are nervous about the heat, just use two tablespoons to start.  Give everything a good stir.  Add the cabbage and toss until the cabbage starts to wilt, about another 5 minutes.  Pour in the coconut milk and the broth and the other 2 tablespoons of soy sauce.  Toss to coat well, reduce the heat to medium-low and cover.  Cook for about 15 minutes, stirring occasionally.

Remove the lid and taste the broth.  You might want to add more curry paste or more soy sauce.  Once it is to your liking, add the tofu and chopped cilantro and cook for another 5 minutes.  Check the squash and carrot to make sure they are tender and also adjust the liquid amount to your taste.  If you prefer a saucier dish, add more stock.  If you want it drier, allow the mixture to cook without the lid to allow some of the liquid to evaporate.

To serve, place a bundle of noodles in the bottom of a shallow bowl and ladle on the vegetables and tofu in their sauce.  Garnish with cilantro leaves.

Green Curry Paste
Adapted from Real Vegetarian Thai
Makes about 1½ cups

1 tbsp. whole coriander seeds
1 tsp. whole cumin seeds
½ tsp. freshly ground black or white pepper
3 stalks lemongrass
4 fresh green jalapeño chilies, seeded for a milder heat, roughly chopped
¼ cup coarsely chopped fresh cilantro leaves and tender stems
2 medium shallots, chopped
3 cloves garlic, chopped
2 tbsp. chopped or grated fresh ginger
Zest of 1 lime
1 tsp. kosher or sea salt

In a small skillet over medium heat, dry-fry the coriander and cumin seeds until they turn a shade or two darker, shaking the pan and stirring often, about 3 minutes.  Turn out onto a plate to cool.  Grind the spices in a coffee grinder or with a mortar and pestle.  Set aside.

To prepare the lemongrass, trim away and discard any root section below the bulb base, and cut away the top portion, leaving a stalk about 6 inches long, including the base.  Pull off the out layer and then thinly slice the rest.

Combine the lemongrass, chopped chilies, cilantro, shallots, garlic, ginger, lime zest, salt, and spices in a mini food processor or a blender.  Pulse to combine to a smooth paste, scraping down the sides of the bowl as necessary.  You might need to add just a couple tablespoons of water to keep the blades moving.  Store in an airtight container in the refrigerator for up to one month.


« Older Posts Newer Posts »