Category: Side Dish

Mushroom Redemption

November 9, 2010

Before we had children, one of our very favorite things to do was go to the theatre.  Each year we would get season tickets to either the Seattle Rep or the Intiman and see incredibly high quality shows.  One year, we did a special deal where, in addition to the tickets, we got a fixed price dinner (with a deep discount) and a restaurant right nearby.  The place is nice inside and the food was fine and we always enjoyed our evening.

This year, after only seeing a show here and there for the past four years, we got season tickets to the Rep.  We will see eight plays over the course of their season.  We have already been to two and I have to say it is so nice to have this part of my life back.  The other night, Randy and I went to see Edward Albee’s Three Tall Women and, for old time’s sake, decided to eat at that old restaurant.

It’s still a sweet place but the menu is almost exactly the same as when we last dined there, about four years ago.  That is never a good sign.  Worse, my food – which was always passable before – was pretty terrible.  My salad was soggy and there is not much I like less than soggy salad.  My main course, a wild mushroom risotto, was nearly inedible.  It was barely warm, chalky and mushy, with bits of undercooked sweet potato (huh?) scattered throughout and bits of brown that I could only guess were mushrooms.  As a nod to the “wild” part of wild mushroom risotto, there were a couple of chanterelles charred almost beyond recognition sitting atop the mush as a garnish, along with a giant sprig of tarragon (again, huh?).

Eating such a terrible dish made me want to give mushrooms a better experience.  Allow them to shine all their glory instead of hiding them throughout overcooked rice.  When I was planning to make the fregola the other night, I had a sense that it was going to be on the lighter side.  I felt like our dinner could use a more substantial side than just the green beans I had in my refrigerator.

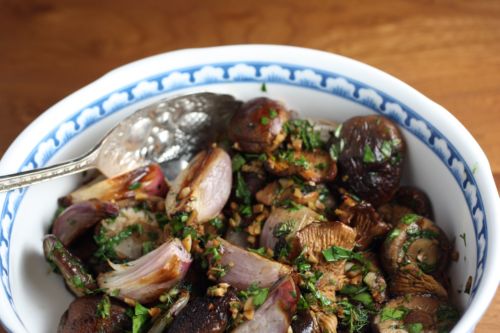
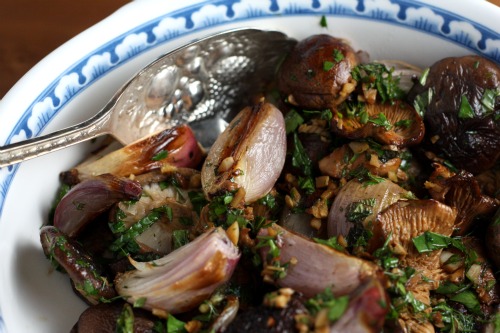
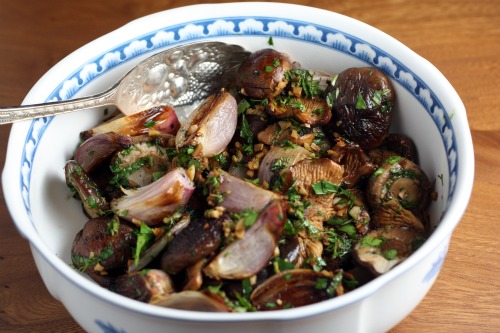
This flavor packed side dish stars some Asian ingredients but it really would go with just about anything.  It’s the kind of thing that you keep picking up pieces to taste, long after you have decided that the seasoning is spot on.  I used cremini, shiitake, and chanterelle mushrooms, but any would be good here.  If you are going to roast whole shallots, as the recipe instructs you to do, I would use very small ones.  If yours are large, I would slice them into rounds and roast them that way instead of cutting then into quarters like I did.

Mushroom Sides Previously on Dana Treat: Asparagus and Grilled Shiitake with Ginger Soy Vinaigrette, Mushrooms with White Wine
One Year Ago:  Tomato & Goat Cheese Tarts
Two Years Ago: Eggplant Rollatini with Capellini

Roasted Mushrooms and Shallots with Fresh Herbs
Adapted from Food & Wine
Serves 4 to 6

2½ tbsp. dark sesame oil
4 garlic cloves, minced
3 tbsp. minced fresh ginger
2 tbsp. soy sauce
1¼ pounds mixed mushrooms (DT: I left mine whole, but you can cut in half)
Salt
10 small shallots, peeled
1/3 cup chopped fresh mint
1/3 cup chopped fresh parsley
1 tbsp. chopped fresh dill

Preheat the oven to 400ºF.  In a small bowl, combine 2 tablespoons of the sesame oil with the garlic, ginger, and soy sauce.  Spread the mushrooms on a baking sheet and drizzle with the sesame oil mixture; toss to coat.  Season with salt.  (DT: be very careful with the salt since soy sauce is so salty.)  Roast the mushrooms for about 30 minutes, until tender and glazed.

Meanwhile, on a second rimmed baking sheet, drizzle the shallots with the remaining ½ tablespoon of sesame oil; toss to coat.  Season with salt and roast for about 25 minutes, turning once, until golden brown and tender.

Place the mushrooms and shallots together in a bowl and add all the herbs.  Toss well to coat the vegetables with the herbs.  Serve warm.


Moules et Frites

November 1, 2010

One of the questions I get most often is whether or not I make meat for Randy.  The answer is not.  I have never cooked meat or poultry.  Or lamb or pork or rabbit – do those count as meat or are they in another category?  Anyway, no I don’t make meat for him.  I wouldn’t know the first thing about cooking it.  I stopped eating meat when I was 16 and started cooking when I was around 22, so I have never cooked meat of any kind.  I also really like to taste my food – if for no other reason than to make sure it is properly seasoned – so I would not feel comfortable making something I won’t eat.

However, once in a great while, I make fish.  In the summer, Randy likes to grill salmon outside but occasionally I am moved to do something with it in the oven (but not moved enough to eat it).  I’ve made these crab cakes a number of times and even though I have never tasted them, I know they are great because people go absolutely crazy for them.  Theirs is always the first empty platter.

The non-vegetarian thing I make most often is mussels.  Why?  I don’t eat them.  But Randy loves them and they are, by far, one of the easiest and quickest meals I make.  I also make mussels because mussels are moules in French and you can’t have moules without frites.

French fries are my favorite food in the entire world.  Hands down, no questions asked.  I always told Randy that whenever I found out I was pregnant, I would have french fries for dinner that night.  And I did.  Both times.  For me, two of the most wonderful things about being pregnant were eating dessert after dinner every single night (real dessert – like cake) and ordering my veggie burger with fries instead of salad every single time.  And not feeling guilty about it.

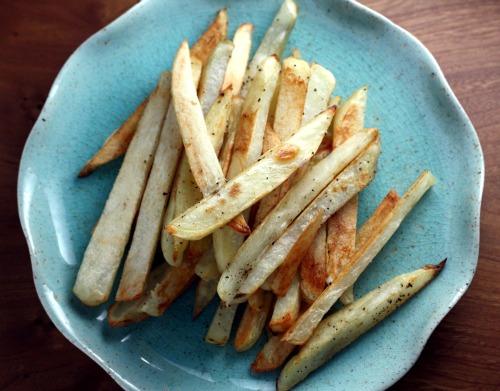
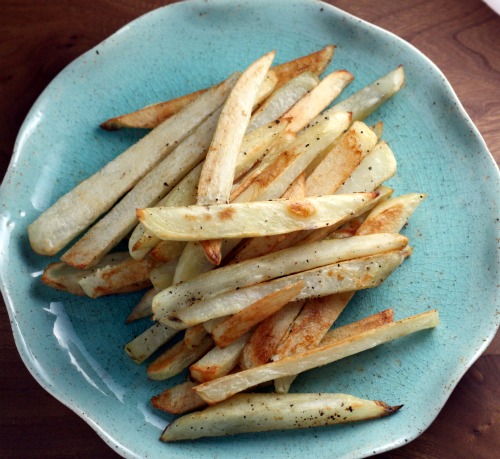
So yes, I love my fries but I also love my skinny jeans and the two do not go together.  Believe me.  That is why I love making them in the oven.  Some people would say that they are not technically fries since they are not, um, fried.  I really don’t care.  For me, they are just as satisfying and really even more so, since I can truly enjoy them without a second thought.  Lots of ketchup is key for me too.

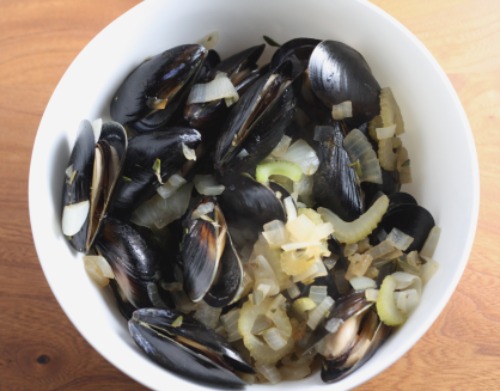
So before I tell you how I make my frites, allow me to tell you how I make my moules.  This recipe is for one (since I don’t eat them) and I adapt it depending on what I have in my refrigerator.  Someone from the onion family, someone aromatic, someone herby, and white wine are the keys here.

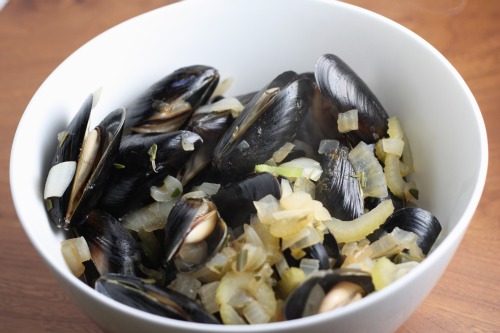
Moules for One
Dana Treat Original

Just so you have an idea of how versatile this recipe is, I have swapped out leeks, onions, scallions, fennel, thyme, and sherry for the ingredients you see listed here.  Randy always loves them.

Olive oil
1 large shallot, diced
1 stalk celery, thinly sliced
Kosher salt
1 pound mussels, rinsed well and beards pulled off
¼ cup white wine (preferably one you would drink)
1 tbsp. fresh rosemary, chopped

In a medium Dutch oven with a lid, heat just enough olive oil to coat the bottom.  Add the shallot and celery and adjust the heat to medium.  Add a large pinch of salt and sauté just until the vegetables start to get soft, about 5 minutes.  Carefully pour in the mussels and give them a good stir.  Pour in the wine and then sprinkle in the rosemary.  Give it another good stir, then lower the heat to medium-low and cover the pot.  Allow to cook for six minutes, giving the pot a good shake a couple of times.  Remove the lid and discard any mussels that haven’t opened.  Pour into a shallow bowl and serve with grilled bread.  And frites.

I have made these countless times and believe it or not, it is a little tricky getting them to turn out right.  If you love potatoes as much as I do, these will never be bad but use my tips to make them great.  For two people I would start with 2 large russet potatoes, 1½ tablespoon of olive oil, at least a teaspoon of salt and a lot of black pepper.  You will want your oven at 400ºF.  They will bake anywhere from anywhere from 20 to 30 minutes for the first leg.  It all depends on how brown you like them, how thin you cut your potatoes, your oven, etc.  After I do the flip, it’s just another 5 minutes or so to completely warm them through.  Here are my tips to get the most out of your frites.  (You don’t have to peel them but I do.)

1)  Trim your potatoes. Unless you are someone who likes a bit of burnt stuff on the ends of your frites (I know people who do), I would trim off the ends of your potatoes.  If I have a particularly bulbous one, I will trim off the sides too.  Then try to cut them in the as even pieces as possible.  That way they will bake and brown evenly.

2)  Soak your potatoes. Fill a large bowl with cold water and place the cut-up potatoes in the bowl for at least an hour.  This will remove some of the excess starch and which will keep them from sticking to the baking sheet and also make them crispier.

3)  Dry your potatoes. After their hour-long bath, it is important to dry them as well as possible.  I throw them in a kitchen towel and rub for a minute or two, then dry each one individually.  Lovingly.

4)  Don’t crowd your potatoes. For maximum flavor and texture, you want contact with the pan.  If you put too many frites on any pan, they will start to steam rather than bake.  Make sure each frite is touching the pan, not lolling about on another frite.  If you are making a lot, use more than one pan or bake them in batches.

5)  Go easy on the oil. I don’t just say this for healthy reasons.  If you use too much oil, the potatoes are likely to get soggy.  1½ tablespoon is about enough for 2 potatoes – 2½ tablespoons at most.  Just make sure you take the time to really mix coat all the frites with oil.  You could do this coating thing in a bowl, but why?  Just do the coating, mixing and salting directly on the baking sheet.  And speaking of salt…

6)  Be generous with salt. Potatoes of any kind need lots of salt.  These are no exception.

7)  Don’t move them around too much. Resist the urge to keep pulling them out of the oven and turning them over.  This is the tip that took me the longest to embrace.  I was always sure they were sticking and would try to move them around which would leave me with lots of severed frites.  The key is to actually let them stick and then cook – that way they will release.  Trust me.  They will not be browned on all sides.  The Earth will continue to spin on its axis.

8)  Be sure to make enough. People love these.  It’s not just me.  Be sure to plan on at least one potato per person and more if you have big eaters.  Moules are a light meal so you will be surprised how many frites you will want to eat alongside them.


Faux Pas

October 5, 2010

This is the dish I made to serve alongside the ratatouille on Sunday night.  I like to think of it now as the dish that could have killed my reputation, at least on Twitter, as a cook.  Let me explain.

The first time I ever had ratatouille also happened to be the first time I had polenta.  My beloved high school drama teacher had a daughter a few years older than me who really liked to cook.  One summer, newly vegetarian and home from college, they had me over for dinner.  They made me the ratatouille from the Moosewood cookbook and served it on top of a bed of polenta.  Truthfully, I was nervous.  I was maybe 19 and although I had always loved food, my palate was not what I would call overly sophisitcated.  But I loved that simple stew and I fell head over heels for the polenta.  Ever since, if I make ratatouille, I make polenta.

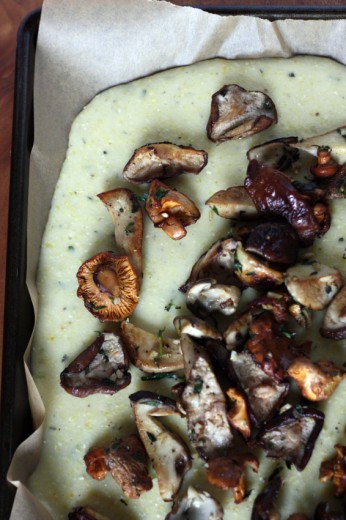
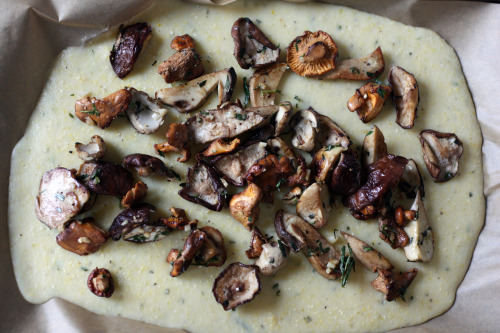
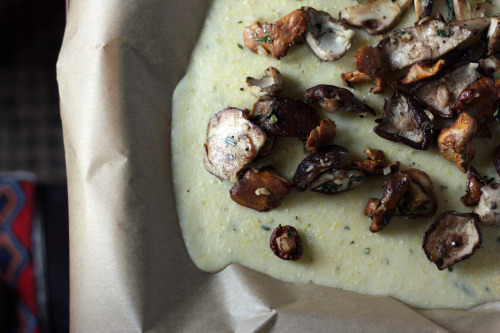
With Matt and family coming over, I wanted to make a little fancier riff but still keep it a Sunday night dinner.  In the Plenty cookbook, I found this idea.  This polenta is cooked with rosemary, butter, and Parmesan, and then poured out onto a sheet to cool and solidify.  Some mushrooms that are sauteed in olive oil and then tossed with garlic and herbs.  Taleggio cheese is carefully place over the top and the whole thing put in an oven warm enough to melt the cheese.

I bought my mushrooms, as I did almost everything for this meal, at the farmers market.  We are in prime mushroom season right now in the Northwest.  The chanterelles were $8 an pound and I splurged on a few porcinis as well.  I washed all the pine needles out of them and allowed them to dry, sauteed them as directed.  The few bites I stole told me that even without the polenta, this was going to be a great dish.  My polenta didn’t solidify as much as I wanted but the taleggio melted just as it should and the mushrooms were definitely the star.  After everyone went home, I put the polenta in a container but ate the mushrooms off the top as I did the dishes.

At 3am I woke up with a cramped stomach.  I did not go back to sleep that night.  I never felt terrible but I did not feel good.  My stomach tends to be pretty hard to upset – it is only very rich food or frivolous amounts of olive oil that make me feel sick.  Consequently, because I cook pretty clean, I have almost never felt ill from something I have made.  I knew it had to be the mushrooms because everything else I made was pretty healthy – I even used a lighter hand than advised on the cheese.  In other words, I was very concerned that I had poisoned my guests.  Is it not bad enough to feel the pressure to cook for a food blogger that you respect, but then you have to go and poison him and his wife?

By the time my boys woke up and I had made it about halfway through a novel, I was feeling better.  I sent a tentative email to Matt.  Were they feeling all right?  I was just a teensy weensy bit concerened about the mushrooms.  A tense hour went by in which I envisioned hospital visits and my reputation slaughtered, not to mention a budding friendship between three year old boys squashed.  But no, all was well in their house.  Phew!  So as it stands, my two worst cooking gaffes are the African peanut stew I made for a friend who is allergic to peanuts (I didn’t know!) and the frittata I served to a couple who came for brunch and who don’t eat eggs (I didn’t know!  And wouldn’t you mention that you don’t eat eggs if you are invited for brunch?)  What is your greatest cooking faux pas?  Come on – make me feel better.

Providing you don’t buy poisonous mushrooms, this is really a great dish.  Polenta is one of those things that can be hard to serve to guests.  If you are going to go the soft route, it really needs to be made just before serving (unless you want to cook it in a double boiler).  But if you make it this way, it can sit until you need it and it will still be hot from its trip to the cheese melting oven.

Polenta previously on Dana Treat: Polenta Baked with Corn, Basil, and Tomatoes
One Year Ago: Smoky Chard Over Grilled Bread
Two Years Ago: Mediterranean Five Lentil Soup

Mushroom and Herb Polenta
Adapted from Plenty
Serves 4

The recipe instructs you to add truffle oil to the pre-formed polenta but I was out so I left it out.  I opted to pour my polenta out free-form on a sheet of parchment paper for a more rustic look, but you can also pour it into a oven-proof pan sprayed with a little non-stick spray.

3 tbsp. olive oil
1 pounds mushrooms, very large ones halved
2 garlic cloves, minced
1 tbsp. chopped tarragon
1 tbsp. chopped thyme
3 cups water or vegetable stock
1 tsp. salt
¾ cups coarse cornmeal
¼ tsp. pepper
2 tbsp. unsalted butter
½ cup grated Parmesan cheese
1 tbsp. chopped rosemary
3 ounces Taleggio cheese, rind removed, cut into very thin slices

Heat half the oil in a large frying pan over medium-high heat.  Once hot, add half the mushrooms and fry until they are cooked through and brown in spots, about 8 minutes.  Try not to move them around too much.  Remove from the pan, add the other half of the oil and repeat with the rest of the mushrooms.  Off the heat, return all the mushrooms to the pan and add the garlic, tarragon, thyme and a large pinch of salt and a few grinds of pepper.

Line a medium-sized baking sheet with parchment paper.  Bring the water to a boil in a large saucepan.  Add the salt, then vigorously whisk in the cornmeal.  Bring it back to a boil, stirring all the while, then reduce the heat as low as it will go.  Cover the pan.  Stir every 5 minutes or so until the polenta is smooth, about 20 minutes all together.  Add the butter, Parmesan cheese, rosemary, a good pinch of salt, and a few grinds of pepper.  Spread the polenta over the parchment paper and allow it to cool and firm up, at least 30 minutes.

Preheat oven to 425ºF.  Top the polenta with Taleggio and place in the oven until the cheese is melted and starting to bubble, about 5 minutes.  Remove and top with the mushrooms then return to the oven just warm for a minute or two.


Braised Purple Cabbage with Apples

September 27, 2010

Well!

That was fascinating.  I want to thank you all for indulging me and sharing something so personal.  I was amazed that most of the dreams feel into a few general categories.  My informal tally shows that the most common anxiety dreams were roughly in this order:

Something to do with school
Teeth falling out or crumbling
Being chased
Driving
Waiting tables
Being along in a house
Being late
Can’t move
Something involving a bathroom

There were others – dressing up like Attila the Hun and being chased by Kiss, the band, were my favorites.  I was amazed by how many people dream about losing their teeth.  I sometimes dream that I am chewing an enormous piece of gum and am trying to talk to someone and the gum keeps getting stuck in my teeth.  When I go to take it out, it just pulls into long strands and keeps sticking.

Anyway.  Thank you again for sharing.  I was so touched that many of you who usually lurk came forward and commented.  As usual, I wish I could send each and every one of you this prize package.

Because  I like to give and because I have two children who were fighting over the task of picking a number out of a hat, and because I need an excuse to go back to Theo Chocolates (again, for the children!), I had assistant #2 pick out another winner.  I will send that person some chocolate goodies.  Drum roll please.

Winner #1 is Erica (comment #84) who has this dream:  “My main anxiety dream is that I’m running away from someone or something and no matter how hard I try to run, I’m going in slow motion. Every muscle is burning and I’m pushing as hard as I can go but I’m barely moving.  The second one is that my teeth are loose or are going to fall out. No lie. When I wake up I check to make sure they’re all there and not wiggling!”

Winner #2 is Holly E (comment #18) who has this dream:  “My anxiety dreams are always about high school. Often I am just roaming the halls or hiding out because I don’t remember what class I am supposed to be in. Sometimes I show up for the final after skipping the class all semester. Every now and then I can’t remember my gym locker combination. I keep hoping that one of these days I will “graduate” to college dreams! My FAVORITE dreams, however, are about the ocean: surfing, swimming, sometimes stuck under water but I can still breathe. I wake up feeling so ivigorated!

So let’s talk about cabbage.  My darling husband thinks he doesn’t like cabbage.  I mention it and he makes a face.  This from the man who loves sauerkraut and coleslaw.  When I tell him that both those things are in fact cabbage, he just smiles and nods.  So I didn’t talk about the exquisitely purple cabbage I picked up at the farmer’s market and I didn’t tell him that I was going to use it in a side dish for a weeknight Dana Meal.  I knew he would question a cabbage dish but I also knew he would love it once he tasted it.

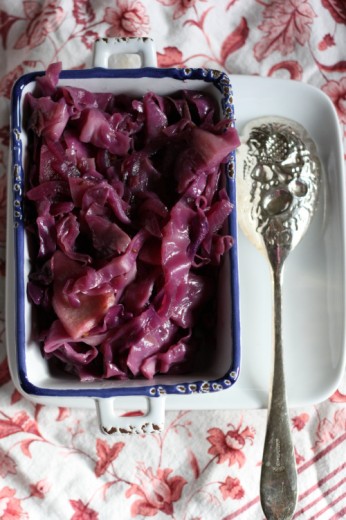
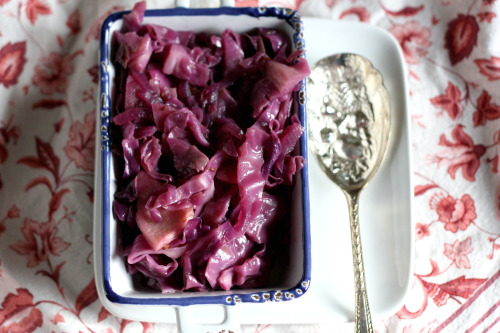
Which of course, he did.  A beautiful cabbage thinly sliced.  Peeled farm fresh apples too.  A bit of sugar, salt, caraway seeds, and cider vinegar and then a good long simmer on the stove – this is a lovely dish indeed.  The equinox has passed and fall is officially here.  I have found this dish works well alongside so many different things during this season.  This time I served it with a hearty pasta dish featuring buckwheat groats and a savory gravy (don’t knock it ’til you’ve tried it), but I have also served it with savory grain cakes sitting atop a carrot ginger sauce.  I would imagine it would be magnificent alongside some kind of savory stuffed squash as well.  Randy’s family serves sauerkraut at Thanksgiving (I know!) so he always requests that I make it for him.  I’m kind of hoping I can talk him into this dish instead.  He wouldn’t be the only one eating it, unlike the sauerkraut.

One Year Ago:  Holly B’s Almond Butterhorns
Two Years Ago:  Frittata with Cheese and Sun-Dried Tomatoes

Braised Purple Cabbage with Apples
Adapted from The Modern Vegetarian Kitchen
Serves 4-6

I like this dish with a hint of sweetness so the seasoning here is perfect for me.  I would imagine that you could replace half the water with apple juice or cider if you want it sweeter.

2 tbsp. butter
1 large red onion, sliced into thin crescents
2 tsp. brown sugar
1 tsp. caraway seeds
1 tsp. kosher salt
Freshly ground pepper
¾ cup water
3 tbsp. cider vinegar
1 head purple cabbage (about 2 pounsd), sliced into ½-inch strips
1 large firm apple, peeled and sliced ¼-inch thick

In a wide heavy sauté pan over medium heat, melt the butter.  Add the onions, brown sugar, caraway seeds, salt, and a few grinds of pepper.  Sauté, stirring occasionally, for 5 to 7 minutes, until softened.

Add the water, vinegar, cabbage, and apple.  Raise the heat and bring to a boil.  Cover, reduce the heat to low, and braise for 25 to 30 minutes.  Uncover and cook over high heat for a few minutes until the juices have reduced.  Season to taste with salt and pepper.


Worth Another Mention

September 7, 2010

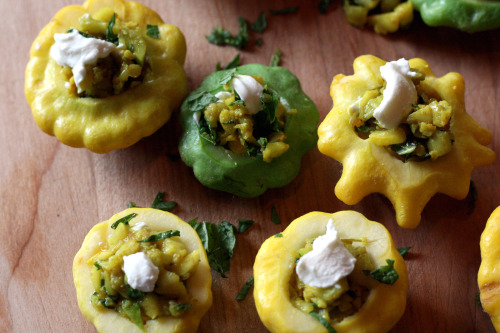
Long ago, back when the only people who were reading this blog were my husband and my brother, I posted the recipe for these squash.  Because I make them all summer long, because I have streamlined the recipe since the last post, and because, unless you are my husband or my brother, you didn’t read about them the first time, I decided to talk about them again.  (That is 5 commas!)  Also, the original post has a truly terrible photograph and you, the Dana Treat reader, deserve better.

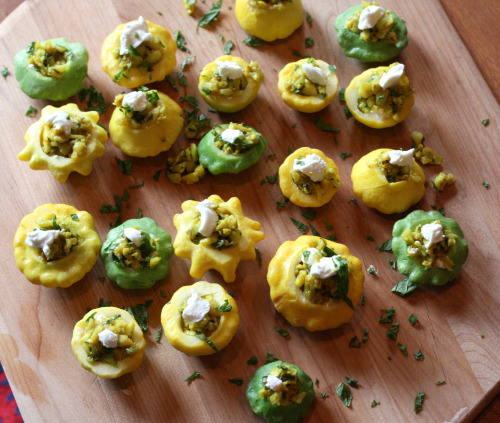
I have made these little guys more than almost anything else in my cooking life.  I used to follow the recipe to the letter but in the past year or so, I haven’t bothered looking at the book and I like how mine have turned out.  A lot.  So does everyone I make them for.  I have made them for gatherings large and small and they always get a lot of attention.  They are adorable of course, but the flavor is surprisingly sophisticated.  A little bit of curry powder is the thing that makes you go hmmmm.

The recipe originally called for a more-complex-than-necessary layering within each squash and also suggested that you bake the filled and finished product.  This summer I decided to do away with the baking step and just serve them room temperature.  They are delicious both ways.  The original recipe also instructed you to cook the “hats” along with the bodies and replace them before serving.  Cute but too much trouble.  And if you are making 30 of them, as I have done for parties, I can’t be bothered to keep track of which hat goes with which body.

I have made these with larger (think tennis ball) squash and with these little ones which are closer to golf balls.  I’ve served them standing upright as you see here and I’ve also served them on their sides with the filling nestled on top.  Are you sensing a theme here?  Make these.  They are good.

One Year Ago:  Thai Green Curry

Summer Squash Stuffed with Goat Cheese and Mint
Inspired by The Paris Cookbook
Serves about 8

If presentation is important to you and you want all the squash standing upright, slice a thin layer off the bottom of each one.

2 lbs. small round zucchini or other summer squash
Olive oil
1 small yellow onion, cut into very small dice
Kosher salt
1 tsp. curry powder
About 5 ounces soft goat cheese such as Montrachet
4 tbsp. fresh mint, cut into fine ribbons plus extra for garnish

Cut the tops off the zucchini.  Using a small melon baller, carefully scoop out the insides of the squashes.  Finely chop the pulp and set aside.  Bring a large pot of water to a boil and place the squash shells (and their tops if you want) in the water.  Cook for about 3 minutes and then drain.  Finely chop the pulp from the squash and set aside.

Heat a large sauté pan over medium heat.  Drizzle in just enough olive oil to coat the bottom and then add the onions and a large pinch of salt.  Sauté until just soft and not brown, then add the squash pulp and the curry powder.  Cook until the pulp is soft and the whole mixture is very fragrant, about 5 minutes.  Stir in the mint.  Allow to cool slightly.

Line the squashes up on a serving platter.  Spoon about a teaspoon of goat cheese into each one.  (The amount will depend on the size of your squashes.)  Top with enough of the curry mixture to fill the squash shell.  If you would like, top with another dot of goat cheese and garnish with the mint.


« Older Posts Newer Posts »