Category: Seasonal

Corn Pudding and a Rant

August 18, 2011

And now, for a bit of a rant.

Like most parents, my mom and dad tried to teach my brothers and I certain things.  There was a long list but some were more non-negotiable than others.  One was Clean Up Your Room.  And Always Be On Time.  Also If Someone Extends an Invitation Do Your Very Best to Be There.  The first one didn’t stick with me but the other two did.  Randy and I are always on time and we also make a big effort to attend any event/party/gathering to which we are invited.  I’m always amazed when people don’t follow suit.  Occasionally, I send out an invitation to something and most people take forever to respond if they do at all.  Is this a Seattle thing?  Does our casual lifestyle mean that we don’t need to RSVP?  Does this happen in your city?  The only thing that bothers me more than the people who don’t respond is the people who decide, on the day of the event, that they can’t make it.  Manners, people.

Done!  Moving on.

The fabulous Jen Yu breezed into town this week.  Do you know Jen?  Her site is one of the very first blogs I read.  Her talent, strength, determination, and her serious cooking and baking chops have made Use Real Butter a must read for me for years.  Jen and her husband were in town for a very limited time and I suggested a potluck at our house to gather the people she wanted to see.  She gave me her list, I sent an evite, and I was surprised by the quick response.  Apparently, Jen rates highly.  I decided to make several dishes to highlight our spectacular produce but, as per usual, on the day of the potluck, I got several cancellations.  I opted to be realistic and bag one of the planned dishes, a corn pudding I have been wanting to try since the corn left the markets last fall.  There was plenty of delicious food for everyone and we had a truly wonderful evening.

But I still had a bag of corn waiting to be used.  My good friend Deb came for dinner last night with her kids and I thought it was time to try out that pudding.  The original recipe uses four ears of corn and feeds 10 people.  I cut the recipe in half and microwaved the other two ears (it’s ok! Melissa Clark does it!) for the kids to eat straight off the cob.  My Graham is now missing both his front teeth so I cut his off the cob for him.  As I watched the corn tumble onto his plate, I had one of those memories that nearly knock you off your feet of my mom doing the same for me at a long-ago kitchen table in a long-ago house.

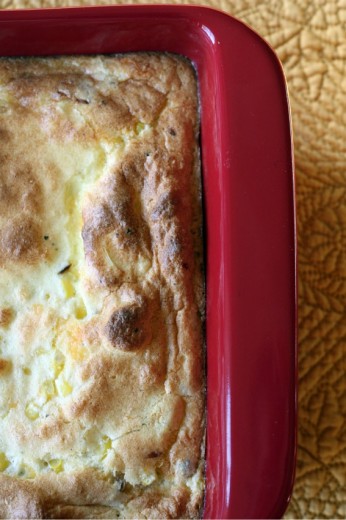
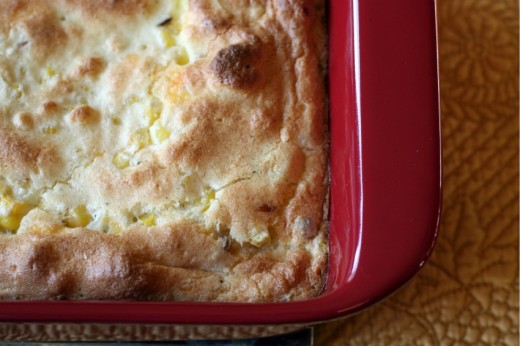
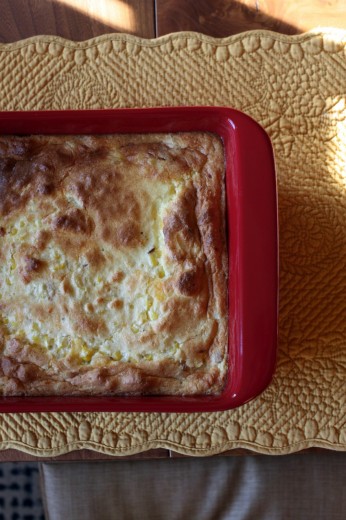
Anyway, this is not the kind of recipe you usually find here unless you are baking.  Butter, cream, milk, cheese, eggs.  I eat all those things, just not usually all together in one dish.  I thought it might be too heavy, a gut bomb.  But it wasn’t at all.  This is a dish where everything works together in harmony so that you don’t taste too much of any one thing and the only true standout is the summer’s pitch perfect corn.  The only bad thing I can say about this recipe is that it doesn’t look like much on the plate.  But looks aren’t everything.

One Year Ago:  Lavender and Honey Tea Cakes and (more corn in my red baking dish! and much prettier on the plate!) Polenta Baked with Corn, Basil, and Tomatoes
Two Years Ago:  Mushroom, Walnut, and Rosemary Pâté
Three Years Ago:  Chilled Roasted Tomato Soup with Mint

Corn Pudding
Adapted from Food & Wine
Serves 4-6  (4 as a main, 6 as a side)

1 cups milk
¼ cup heavy cream
2 ears of corn, shucked
1 tbsp. olive oil
1 large shallot, finely chopped
½ stick of unsalted butter (4 tablespoons)
¼ cup cornmeal
3 large eggs, separated
½ cup grated sharp Cheddar cheese
½ tsp. plus a pinch of salt
Black pepper

Preheat the oven to 350ºF.  Butter an 8-inch square baking dish.  In a saucepan, bring the milk and cream to a simmer over moderate heat.  Add the corn, cover, and cook over moderately low heat, turning a few times, until tender, about 10 minutes.

Meanwhile, in a medium skillet, heat the olive oil.  Add the shallot and cook over moderate heat until softened, about 4 minutes.

Transfer the corn to a plate and let cool.  Remove the saucepan from the heat and swirl in the butter until melted.  Let cool to room temperature.  Using a large knife, cut the kernels off the cobs and add to the saucepan.  Scrape the shallot into the saucepan.  Whisk in the cornmeal, egg yolks, Cheddar, and the ½ teaspoon of salt along with a few grinds of pepper.

In a large stainless steel bowl, beat the egg whites with the pinch of salt at high speed until firm peaks form.  Fold the whites into the corn mixture and pour into the prepared baking dish.  Bake for about 30 minutes, until the corn pudding is puffed and golden brown.  Let the pudding rest for about 5 minutes before serving.  (DT:  I served this about 30 minutes after it came out of the oven.  It had fallen slightly but the texture was still nice and light.)


Another Look at a Favorite

August 6, 2011

At the bottom of each of my posts, just before the recipe, I offer to you what I was making one, two, and three years ago.  Why do I do this?  Partly because other blogs I like do it, partly because I want to offer you other seasonal recipes that you might not have seen when I originally wrote about them, partly as a reminder to myself of the things I have made.  Truthfully, it’s kind of a pain in the neck.  Do you care?  Do you click back to those old recipes?

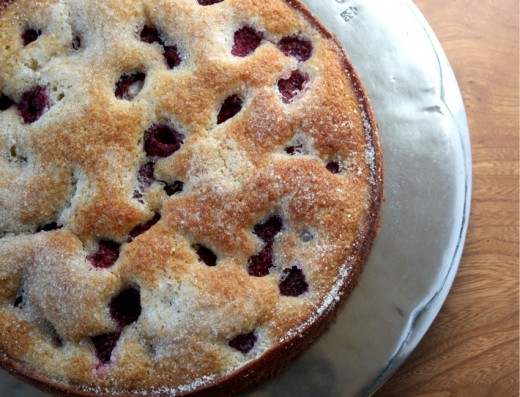
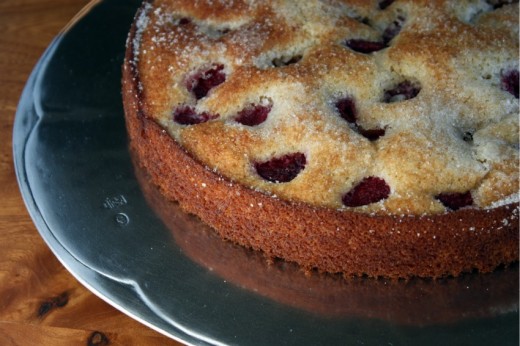
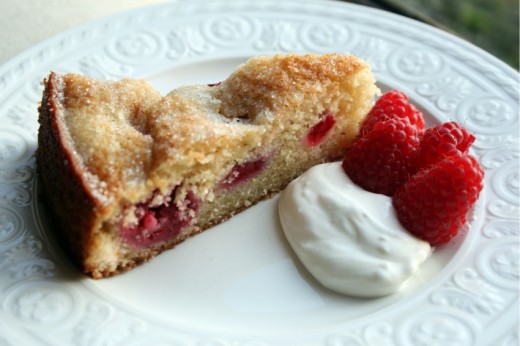
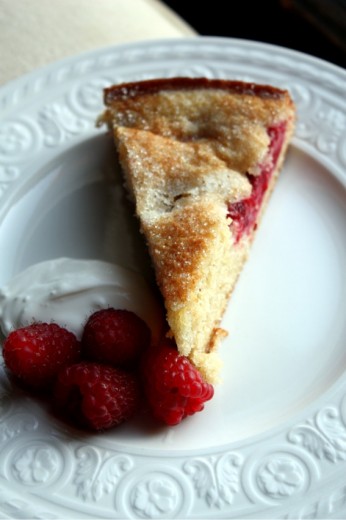
In my last post, as I was scrolling through my three years ago recipes, I came across this cake.  It was no surprise to see it there – I make it every August and have for the past nine years.  As soon as decent raspberries show up in the market, I make this cake, usually multiple times.  Looking at the old sad photo from that three years ago post, I knew I had to write about it again, this time with a better photo.

This cake is so simple and it shows off the raspberries beautifully.  I find raspberries to be a delicate berry, you don’t want to overwhelm them in either taste or texture.  This cake is sturdy but not dry and it has a subtle and yet diffrent (from the Marsala) flavor that allows the berries to shine.  I’ve made the delicious side cream with both crème fraîche and sour cream and I have to say, unless you have made your own crème fraîche, save yourself a few bucks and just use sour cream.

One Year Ago:  Rice Noodles with Marinated Tofu and Shiitake Mushrooms
Two Years Ago:  Grilled Potato Slices with Salt and Vinegar
Three Years Ago:  Olive and Jarlsberg Sandwich

Raspberry Cake with Marsala
Bon Appétit
Makes one 10-inch cake

I have made this cake in both a 9-inch and a 10-inch springform pan.  Both work fine.  I usually bake with a superfine sugar but used a coarser one for this cake and really liked how the top got a little crunchy.

1 ½ cups all purpose flour
1 teaspoon baking powder
1 teaspoon salt
¼ teaspoon baking soda
¼ teaspoon ground nutmeg
½ cup Marsala
¼ cup fresh orange juice
14 tablespoons (1 ¾ sticks) unsalted butter, room temperature, divided
1 cup plus 4 tablespoons sugar
2 large eggs
1 teaspoon vanilla extract
1 teaspoon grated lemon peel
4 cups fresh raspberries, divided

2 cups crème fraîche or sour cream

Position rack in center of oven and preheat to 400°F.  Butter 10-inch-diameter springform pan.  Whisk first 5 ingredients in medium bowl to blend.  Combine Marsala and orange juice in small bowl.  Beat 12 tablespoons butter and 1 cup sugar in large bowl until well blended.  Beat in eggs, vanilla, and lemon peel.  Beat in Marsala mixture in 2 additions alternately with flour mixture in 3 additions.  Transfer batter to prepared pan.  Sprinkle with 1 1/2 cups raspberries.

Bake cake until top is gently set, about 20 minutes.  Reduce oven temperature to 375°F.  Dot top of cake with 2 tablespoons butter and sprinkle with 2 tablespoons sugar.  Continue baking until tester inserted into center of cake comes out clean, about 15 minutes.  Cool in pan on rack.  Release pan sides; transfer cake to platter.  Cool to room temperature.

Mix crème fraîche and 2 tablespoons sugar in small bowl.  (Cake and crème fraîche mixture can be made 8 hours ahead. Let cake stand at room temperature. Cover and chill crème fraîche mixture.)  Cut cake into wedges.  Top each with dollop of crème fraîche and fresh raspberries and serve.


Baby in a Corn Tree

August 2, 2011

If you are a parent and you live in the Seattle area, chances are you have heard of Caspar Babypants.  Mr. Babypants is the alter ego of Chris Ballew, otherwise known as the lead singer of The Presidents of the United States of America and also former schoolmate of mine.  (He was several years ahead of me so while I knew who he was, he had no idea I existed.)  Caspar Babypants has four CDs of music out that are extremely unique in that kids and adults alike know and love the songs.  I will get them stuck in my head for days.  My kids know the words and whenever we see him around town (he does frequent and free shows), I am always amazed at how the kids just dig him.

One of his songs is called “Baby in a Corn Tree” and has the lyric, “Baby in a corn tree, wants to wear a poncho, flying through the river on a steaming hot day.”  It makes no sense but it is catchy.  So catchy in fact, that whenever I contemplate making or eating corn, this very lyric pops into my head.  Seeing as we are barreling down the path to full-blown corn season, this could be a problem.

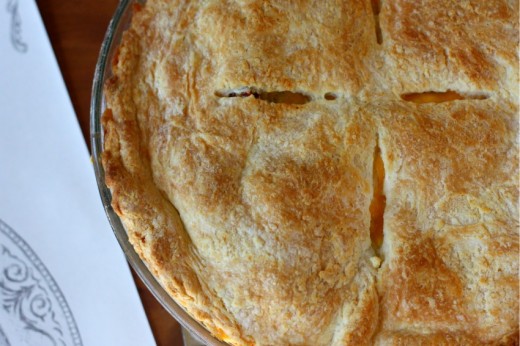
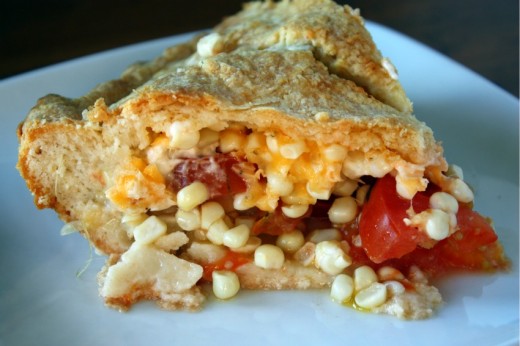
It’s worth it though, having a children’s song lyric that makes no sense stuck in my head for the next month or so, if it means I can eat things like this pie.

I had a, uh, moment last night with my husband over this pie.  I made it because I have been wanting to ever since it came out in Gourmet (sniff), because I needed to test it for some upcoming classes, because it sounded so incredibly good to me, and because I thought Randy would love it.  A tender crust, tomatoes, fresh corn, herbs, sharp Cheddar cheese – all right up Randy’s alley, especially the corn part.  But no.  He liked the crust but thought the filling needed more “oomph”.  What exactly have I created here?  Randy is, of course, welcome to his opinions and is generous with his praise when he likes something, but disappointed because of lack of “oomph” in a homemade savory pie on a Monday night?  People, can I get an amen here?

For the record, in my opinion, there was no lack of oomph.  It’s summer and that means that good ingredients speak for themselves.  There is no need for a thick custard filling when tomatoes and corn and herbs are at seasonal perfection.  The crust is super easy to make and is perfect for this particular pie – not too crust-like, more like a biscuit.  I wondered why a bit of mayo thinned with lemon juice made an appearance here but it was a perfect bit of creaminess without being too heavy.

As much as I loved Gourmet and as much as I miss receiving it in my mailbox every month, their recipes often seemed overly fussy to me.  I have streamlined this one a bit to make it more of a weeknight meal.

One Year Ago:  Holly B’s Fruit Scones
Two Years Ago:  Zesty Tofu Wraps
Three Years Ago:  Pasta with Cauliflower and Peppers, and Walnut Pesto

Tomato and Corn Pie
Adapted from Gourmet
Serves 6

2 cups all-purpose flour
1 tbsp. baking powder
1¾ tsp. salt, divided
¾ stick cold unsalted butter, cut into ½-inch cubes, plus 2 tsp. melted
¾ cup whole milk
1/3 cup mayonnaise (DT:  I used low-fat)
2 tbsp. fresh lemon juice, or more as necessary
2 pounds beefsteak tomatoes, sliced crosswise ¼-inch thick, divided
3 ears of corn, kernels cut off the cobs
¼ cup chopped fresh basil, divided
2 tbsp. chopped fresh chives, divided
Freshly ground black pepper
1½ cup sharp Cheddar cheese, divided

Preheat oven to 400ºF.  Whisk together flour, baking powder, and ¾ tsp. salt, then blend in cold butter (¾ stick) with your fingertips or a pastry blender until is resembles coarse meal.  Add milk, stirring until mixture just forms a dough, then gather into a ball.

Divide dough in half and roll out 1 piece on a lightly floured surface, into a 12-inch round.  The dough is pretty sticky, so be sure to keep moving it around the surface and sprinkling lightly with flour as needed.  Roll the dough over the rolling pin and unroll it into a 9-inch pie plate.  Pat into place with your fingers and trim any overhang.

Whisk together mayonnaise and lemon juice.  You want a thick pourable consistency, so add more lemon juice if necessary.

Arrange half of the tomatoes in crust, overlapping, and sprinkle with half the corn half the herbs, ½ tsp. salt, and a few grinds of pepper.  Repeat with another layer of the same.  Sprinkle with half the cheese.  Pour lemon mayonnaise over filling and sprinkle with remaining cheese.

Roll out remaining piece of dough into a 12-inch round in same manner, then fit over filling, folding overhang under edge of bottom crust and pinching edge to seal.  Cut 4 steam vents in top crust and brush crust with melted butter (2 tsp).

Bake pie until crust is golden and filling is bubbling, 30 to 35 minutes, then cool on a rack.  Serve warm or at room temperature.


Summer Vegetable Curry

July 11, 2011

Friends, I am back from vacation.  It was wonderful to be away, wonderful to see the sun, feel the heat, and to spend time with Randy’s large extended family.  There was a lot of travel to get through and my boys did great.  If you have young children and are wondering if you will ever get on an airplane again with out a pit of despair in your stomach, let me tell you that – in my opinion – things change when your youngest turns four.  I read almost a whole novel on the way out and another almost whole one on the way back.  Yes, we still answered an almost endless number of “Are we there yet?” questions and their close relations, but we all had fun.  Imagine that.

(By the way, if you like modern fiction – you have to pick up Jennifer Egan’s A Visit from the Good Squad.  I absolutely loved it and marveled at how one person wrote such a diverse novel.  It’s the best thing I’ve read since Let the Great World Spin – another book I can’t recommend highly enough.)

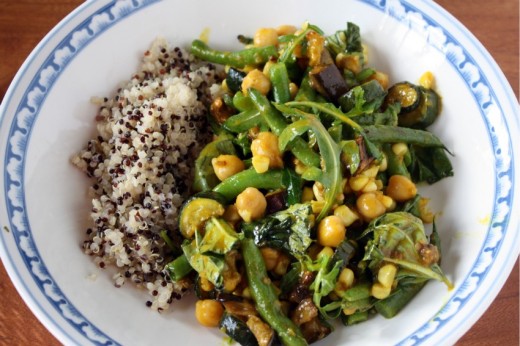
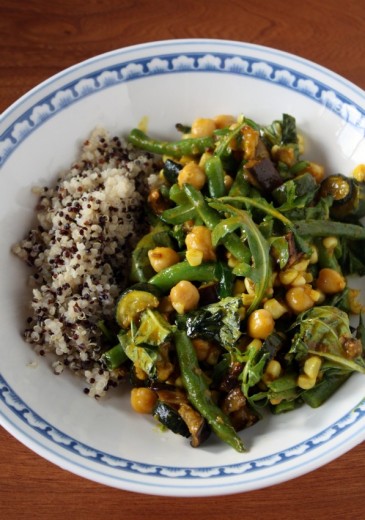
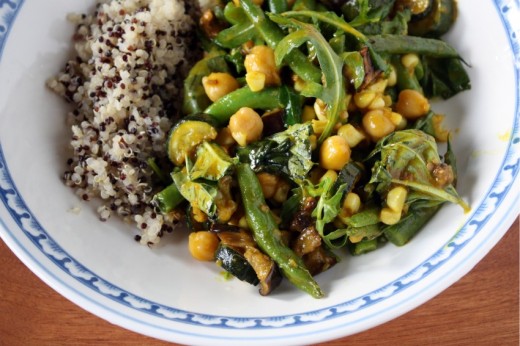
More on the trip after I take a look at the photos.  For now, here is a dish that we enjoyed right before we left.  This recipe is a little funny.  Not funny as in ha-ha or funny tasting.  Just, you know, funny.  Like why would you take a bunch of summer vegetables, summer being the season where it is supposedly hot, and roast them not once but twice in the oven?  Grill, yes – I understand, but roast in a 400º oven?  That makes no sense to me.  As it turns out, it was just fine to turn on my oven twice the day I made this dish because it was either the oven or the heater and I just refuse to turn on the heat post-summer solstice.

The recipe was also funny because you make a strange sauce (that is, nonetheless, very tasty) and just mix two hot things together in a bowl.  Maybe this works for some people but it just sounded all wrong to me.  I tweaked and made notes for next time, because there will be a next time.  This is not a super quick dish but I think if you used the grill, which I didn’t do but recommend, and just threw all the vegetables and the sauce together in a pot and served it alongside quinoa, which I did do and recommend, it’s a very different and very delicious dinner.

One Year Ago: Kosheri
Two Years Ago: Vietnamese Tofu Sandwiches
Three Years Ago: White Beans with Roasted Tomatoes

Summer Vegetable Ragout with Curry Sauce
Adapted from Bon Appétit
Serves 4

I can’t give you the recipe the way I would make it next time since I haven’t made it that way, so here it is more or less the way it was written with some of my changes.  Next time, I will cut the eggplant and squashes into thick slabs and grill them, then chop them into bite-size pieces.  I would also grill the corn.  I have several recipes that call for carrot juice and I always use Odwalla brand.

Curry Sauce
Vegetable oil
1 small onion, chopped
1 small carrot, peeled, chopped
1 stalk lemongrass, smashed lightly and coarsely chopped
1 1-inch piece unpeeled fresh ginger, thinly sliced
1 small Granny Smith apple, peeled, finely chopped
2 tbsp. curry powder
2½ tbsp. all-purpose flour
2 cups carrot juice

Vegetables
1½ pounds eggplants, cut into 1-inch cubes
About 4 tbsp. olive oil, divided
1 pound assorted summer squash, cut into 1-inch pieces
1 pound green beans, or other long beans, trimmed, cut into 2-inch lengths
4 ears of corn, husked
1 15-ounce can chickpeas, drained
2 cups arugula
¼ cup torn fresh basil (Thai basil if you can find it)

Curry Sauce
Heat a large saucepan over medium heat.  Drizzle in just enough vegetable oil to cover the bottom of the pan, then add the onion, carrot, lemongrass, and ginger; sauté until slightly softened but not brown, about 5 minutes.  Add apple and curry powder; sauté until vegetables are tender, about 8 minutes.  Add 2 tablespoons of vegetable oil, then flour and stir 1 to 2 minutes.  Gradually pour in carrot juice; bring to boil, whisking constantly.  Reduce heat to medium-low; simmer uncovered until sauce is slightly thickened and reduced to generous 2½ cups, about 20 minutes.  Strain sauce through fine strainer set over bowl, pressing on solids to extract as much liquid as possible; discard solids in strainer.  Season to taste with salt and freshly ground black pepper.  Place sauce back in saucepan and keep warm.  (Curry sauce can be made 1 day ahead.  Cool slightly then cover and chillRewarm over medium-low heat.)

Vegetables
Preheat oven to 400ºF.  Place eggplant cubes on a large baking sheet.  Drizzle with about 2 tablespoons olive oil and sprinkle with salt.  Toss to coat.  Place squash on another large baking sheet and drizzle with remaining 2 tablespoons olive oil and a sprinkling of salt.  Roast until squash and eggplant are light golden and tender, turning occasionally, about 25 minutes for squash and 40 minutes for eggplant.  Remove baking sheets from oven and set aside.

Fill large bowl with water and ice.  Cook beans in a large pot of salted boiling water until just crisp-tender, 2 to 4 minutes, depending on size of beans.  Using tongs, transfer beans to bowl of ice water to cool.  Drain.  Maintain boiling water in same pot; add corn.  Cook until corn is just tender, about 3 minutes.  Cool slightly.  Cut kernels off cob; discard cobs.

Place all vegetables in a large pot and heat over medium-low heat.  Carefully pour the sauce over top and mix well to combine.  Mix in chickpeas.  Just before serving, stir in arugula and basil and stir until slightly wilted.  Serve alongside quinoa, rice, or all on its own.


Very End of Spring Pizza

June 21, 2011

I want, need, and crave variety in my diet.  I can’t eat the same thing over and over again and usually if I do repeat a recipe, it’s been months between versions.

However, writing a food blog means that sometimes repeating a dinner is necessary.  I make something I intend to write about and then, for one reason or another, I don’t photograph the meal, or I don’t write down a crucial ingredient, or I don’t keep notes as I am cooking, and presto! I’m making the same meal two days later so I can share it with you.

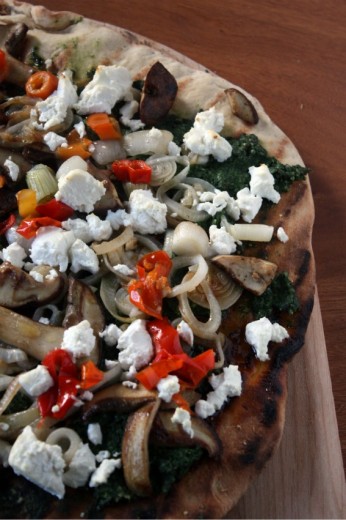
Last week when I had those friends over, I made this pizza.  It is a super seasonal, super local pizza and I loved it.  I was so proud of it.  I got a photo of it, I kept notes, everything I needed to share with you, my wonderful readers.  No need to make it again.  But I wanted to.  I wanted to eat it again.  Randy had been out of town that night and I wanted him to taste it.  I wanted to share it with a different group of friends and so I made it again.

The first time I got fresh porcini mushrooms at the farmers’ market, the second time I had to settle for morels.  (Poor me.)  Now, I recognize that in regions other than the Northwest, you are probably aren’t able to find either fresh porcinis or morels, stinging nettles, spring onions, or perhaps even Mama Lil’s peppers.  I could offer you a million different substitutions and variations.  But then it wouldn’t be this pizza.  The one I ate twice in a week.  I call this an original recipe but I am indebted to Mark Bittman for his fabulous dough recipe and to Jess Thomson for her nettle pesto.

Yes, I made pesto from nettles.  Those things that used to sting me while playing in the woods in 6th grade.  It sounds crazy but everyone who has tasted it (and there have been quite a few since I am currently obsessed with it), thinks it rocks.

One Year Ago: Perfect Chocolate Chip Cookies (make these now)
Two Years Ago: White Chocolate Almond Chunk Cookies and Strawberry Sour Cream Ice Cream
Three Years Ago: Spicy Lime and Herbed Tofu in Lettuce Cups

Late Spring Pizza with Nettle Pesto and Wild Mushrooms

Dana Treat Original
Serves 4-6

For the dough, I always use my stand mixer instead of the food processor but I’ve included his complete recipe.  I’ve made this pizza on the grill and in the oven and it works both ways.  I’m partial to the grill.

For the dough
3 cups all-purpose or bread flour, plus more as needed
2 teaspoons instant yeast
2 teaspoons coarse kosher or sea salt, plus extra for sprinkling
2 tablespoons extra virgin olive oil

For the pizza
Olive oil
4 spring onions, thinly sliced
6 ounces fresh porcini mushrooms, thinly sliced
Kosher salt and freshly ground black pepper
3 tbsp. nettle pesto (recipe follows)
½ cup Mama Lil’s peppers
4 ounces goat cheese, broken into small chunks

Make the dough
Combine the flour, yeast, and salt in a food processor. Turn the machine on and add 1 cup water and the oil through the feed tube.

Process for about 30 seconds, adding more water, a little at a time, until the mixture forms a ball and is slightly sticky to the touch. If it is still dry, add another tablespoon or two of water and process for another 10 seconds. (In the unlikely event that the mixture is too sticky, add flour a tablespoon at a time.)

Turn the dough onto a floured work surface and knead by hand for a few seconds to form a smooth, round dough ball. Put the dough in a bowl and cover with plastic wrap; let rise until the dough doubles in size, 1 to 2 hours. (You can cut this rising time short if you’re in a hurry, or you can let the dough rise more slowly, in the refrigerator, for up to 6 or 8 hours.) Proceed to Step 4 or wrap the dough tightly in plastic wrap or a zipper bag and freeze for up to a month. (Defrost in the bag or a covered bowl in the refrigerator or at room temperature; bring to room temperature before shaping.)

When the dough is ready, form it into a ball and divide it into 2 or more pieces if you like; roll each piece into a round ball. Put each ball on a lightly floured surface, sprinkle with flour, and cover with plastic wrap or a towel. Let rest until they puff slightly, about 20 minutes.

Make the pizza
Preheat the oven to 500ºF.  Have a pizza stone set on the bottom rack.  Alternatively, preheat an outdoor grill to high.

Heat a large sauté pan over medium heat.  Add just enough olive oil to coat the bottom, then add the spring onions along with a large pinch of salt.  Sauté, stirring occasionally, until softened and just starting to brown, about 6 minutes.  Remove to a plate and set aside.  Turn up the heat to medium-high and drizzle in more olive oil.  Add the mushrooms and another pinch of salt.  Allow to cook without disturbing for a few minutes.  You want the mushrooms to really sear.  After about 3 minutes, give them a toss and allow them to cook for a few minutes more.  Remove to the same plate as the onions and set aside.  Season both to taste with salt and pepper.

Coat a pizza peel with cornmeal or flour.  Roll the pizza dough out onto a floured surface until it is the desired thickness.  (I like mine thin.)  Transfer the dough to the peel.  Spread the Nettle Pesto over the surface of the dough.  Scatter the spring onions and the mushrooms over top.  Fill in the gaps with the peppers, then finally, crumble the cheese over top.  Carefully slide the pizza on to the stone.  Cook until the crust is browning and the cheese is starting to melt, about 10 minutes.

If you are using a grill, place the dough (with nothing on it) on the grill.  Cover and allow to bake until marks appear and the bottom is golden, about 5 minutes.  Carefully turn the dough over and slide it back on the peel.  Place the toppings on as described above, then slide the pizza back on the grill.  Cover and cook for another 5 minutes then remove and serve.

Nettle Pesto
Adapted from Jess Thomson
Make 1 generous cup

The main change I made here is to use less olive oil.  I don’t like my pesto too oily but you can add up to a cup or more of olive oil if you prefer.

½  pound nettles
2 large garlic cloves, smashed
½ cup toasted pine nuts
½  teaspoon salt
Freshly ground pepper
1 tablespoon freshly squeezed lemon juice
½ – ¾ cup extra virgin olive oil
1/3 cup grated Parmesan cheese

Bring a large pot of salted water to a simmer for the nettles.  Add the nettles directly from their bag and cook, stirring continuously, for 2 minutes. (This denatures their sting.) Dump into a colander to drain.  When the nettles are cool enough to handle, wrap them in a clean dishtowel and wring out as much moisture as possible, like you would for spinach.  You’ll have about a cup of cooked, squished nettles.  (DT: If you use a light colored dish towel, it will be stained brownish green afterward.  I would recommend using either a dark colored towel or paper towels.)

In the work bowl of a food processor fitted with the paddle attachment, whirl the garlic, pine nuts, salt, and pepper to taste until finely chopped.  Add the nettles, breaking them up as you drop them in, and the lemon juice and whirl until finely chopped.  With the machine running, add the oil in a slow, steady stream, and process until smooth.  Add the cheese, pulse briefly, and season to taste with additional salt, pepper, or lemon juice.


« Older Posts Newer Posts »