Category: Party Food

Stilton Tart with Cranberry Chutney

November 11, 2011

Ever since moving into my first apartment many many years ago, I have subscribed to food magazines.  The roster has changed a bit, but receiving at least one and as many as five magazines full of glossy food pages has been a constant in my cooking life.  I do love cookbooks, oh how I love cookbooks, but I also love how current magazines are and I also love the monthly inspiration.  My routine was that every couple of months, I would sit down and tear out recipes that I had flagged, then I would cut them out, then I would tape them into binders I have that are filled with almost twenty years of magazine recipes.

Then life got super super busy.  I have an over two year backlog of magazines in our bulging magazine holder and a whole other pile of recipes that are cut out but need to be taped.  Periodically I feel guilty.  So many recipes waiting to take up residence in my cute binders!  So many things waiting to be cooked!  And then the end of the day comes and I am spent and the last thing I feel like doing is dealing with my magazines.  So I put them off again.  Periodically, I think about just recycling all of those old magazines and starting fresh with the December issues.  But there are treasures in there.  Like this recipe.

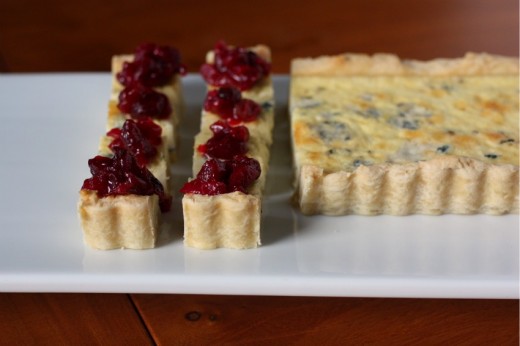
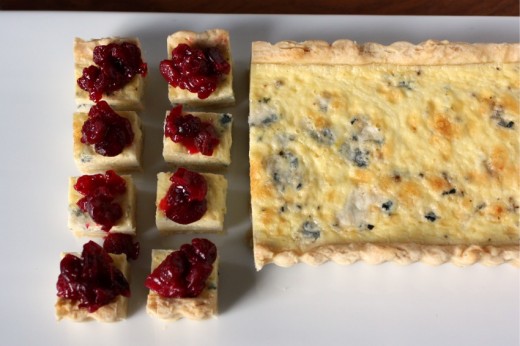
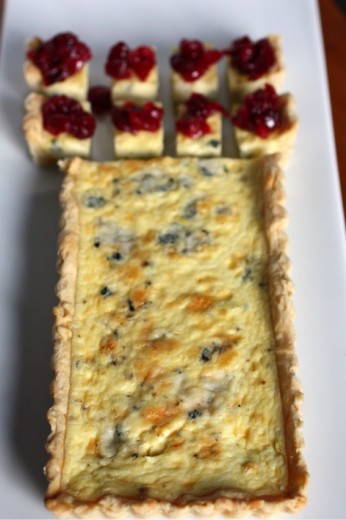
I cut this out years ago, the actual recipe is from Gourmet (sob!) back in 2001.  I cut out the photo as well and every time I page through the appetizer section of that binder, I look at it longingly.  You see, up until recently, I did not have a rectangular tart pan.  Of course, I could have made it in a round pan but that didn’t seem right to me.  I wanted to serve it in little bites, just like the photo in the magazine.

Last week was the last of my catered openings at the art gallery (although I hope to do more next year).  I’ve paid off my spoons.  This opening was for Erik Hall, the gallery owner (along with his amazing wife) and an incredibly talented artist.  I have been waiting for the right excuse to make this tart ever since I bought that pan and November and an art opening seemed just right.

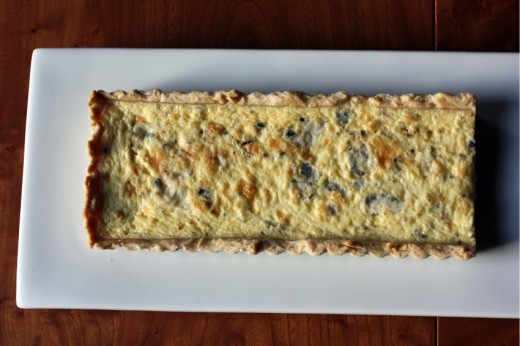
After gazing at the photo for so many years and cursing the fact that I did not have a rectangular pan, it might have turned out that the tart was a disappointment.  Nope.  Very easy to make, very pretty, holds well, and a terrific contrast of flavor and texture.  The crunch of the crust, the creaminess of the filling, the sharpness of the cheese, and then the sour bite of the chutney combines for a delicious bite.  I can only say this with authority because I made the tart twice.  The first time, at the gallery, it got devoured before I had a chance to try a piece.  So because I wanted to taste it, and because I wanted to share the recipe with you, and because I was smart enough to double the crust recipe, and because the chutney makes a lot, I can now say, without hesitation, Make This Tart!  It would be a beautiful way to welcome your Thanksgiving guests.  Or, if you travel by car for the holiday, you can still make it.  Just bring the tart in its pan and cut and top it at your destination.

One Year Ago:  Romaine Leaves with Caesar Dressing and a Big Crouton
Two Years Ago:  Holly B’s Gingersnap Cookies
Three Years Ago:  Bulgur and Green Lentil Salad with Chickpeas

Stilton Tart with Cranberry Chutney
Gourmet
Makes 32 appetizer portions (more if you cut the pieces larger)

For the pastry dough:
1¼ cups all-purpose flour
¾ stick (6 tablespoons) cold unsalted butter, cut into 1/2-inch cubes
2 tablespoons cold vegetable shortening
¼teaspoon salt
2 to 4 tablespoons ice water

Blend together flour, butter, shortening, and salt in a bowl with your fingertips or a pastry blender (or pulse in a food processor) just until most of mixture resembles coarse meal with small (roughly pea-size) butter and shortening lumps. Drizzle evenly with 3 tablespoons ice water and gently stir with a fork (or pulse in processor) until incorporated.

Squeeze a small handful: If it doesn’t hold together, add more ice water, 1/2 tablespoon at a time, stirring (or pulsing) until just incorporated, then test again. (If you overwork mixture, pastry will be tough.)

Turn out mixture onto a lightly floured surface and divide into 4 portions. With heel of your hand, smear each portion once or twice in a forward motion. Gather dough together with scraper and press into a ball, then flatten into a 5-inch disk. Chill dough, wrapped in plastic wrap, until firm, at least 1 hour.

For the tart:
1 recipe Pastry Dough (see above)
1 cup heavy cream
1 whole large egg
2 large egg yolks
¼ teaspoon salt
¼ teaspoon black pepper
5 oz chilled Stilton, rind removed and cheese crumbled (1½ cups)

Make tart shell:
Preheat oven to 350°F.

Roll out dough on a lightly floured surface with a floured rolling pin into a 17- by 8-inch rectangle and fit into tart pan. Trim excess dough, leaving a 1/2-inch overhang, then fold overhang inward and press against side of pan to reinforce edge. Lightly prick bottom and sides all over with a fork. Chill until firm, about 30 minutes.

Line pastry shell with foil and fill with pie weights. Bake in middle of oven 20 minutes, then carefully remove foil and weights and bake until golden, 10 to 15 minutes more. Cool shell in pan 20 minutes.

Reduce oven temperature to 325°F.

Make filling:
Whisk together cream, whole egg, yolks, salt, and pepper until combined.

Put tart shell (still in pan) on a baking sheet and scatter cheese evenly in shell. Slowly pour custard into shell and bake in middle of oven until golden around edge and custard is just set, 30 to 35 minutes. Cool tart completely in pan on a rack.

Cut tart into 32 rectangles and serve at room temperature, topped with chutney.

(Dana’s Make Ahead Tips:  You can make the pastry dough up to one month in advance, wrap it well, and freeze it.  Allow it thaw overnight in the refrigerator before using.  You can blind bake the shell earlier in the day and let it cool completely before filling and continuing to bake.  Finally, you can wrap the whole tart well, still in its pan, and refrigerate it overnight.  Allow it to come to room temperature for several hours before serving or heat it for about 10 minutes in a low oven.)

Cranberry Chutney
Makes about 2 cups

You will have more chutney than you need for this recipe but it’s delicious and it keeps well.

2 large shallots (3 oz), coarsely chopped
1 tablespoon vegetable oil
1 (12-oz) bag fresh or frozen cranberries (not thawed)
2/3 cup sugar
3 tablespoons cider vinegar
1 teaspoon minced garlic
1 teaspoon minced peeled fresh ginger
½ teaspoon salt
1/8 teaspoon dried hot red pepper flakes
Cook shallots in oil in a 3-quart heavy saucepan over moderate heat, stirring occasionally, until softened, about 3 minutes. Stir in remaining ingredients and simmer, uncovered, stirring occasionally, just until berries pop, 10 to 12 minutes, then cool.  (The chutney will keep for a week, covered, in the refrigerator.)


Bulgur Salad Stuffed Peppers

November 9, 2011

First, pears.  The winner of the Harry and David pear six-pack is commenter #74 – DVS – who tells us:

love love love H&D pears, though I haven’t had one in years. My favorite gift are the hand-decorated tiny gingerbread cookies my 92 year-old grandmother-in-law sends us every year.

Congratulations!  Send me an email so we can get you those pears!

A question that I get on a semi-frequent basis is whether or not I went to culinary school.  I did not.  I am a self-taught cook.  I learned by reading cookbooks, cooking a lot, and taking an occasional class here and there.  I love taking classes and always walk away with something that makes the cost and the time worth it.  I have two dear friends who attend all my cooking classes and they call all the little things they learn the “worth the price of admission tips”.  My friends have offered to write a guest post with their top ten of my tips.  Hopefully we’ll have that within the next month or so.

Anyway, we had a vegetarian cookbook author named Lukas Volger come to Book Larder recently.  He has a book called Vegetarian Entrées That Won’t Leave You Hungry.  The book is great.  I pick up a  lot of vegetarian cookbooks and 90% of the time, I put them back down because they contain the same old recipes that I have many versions of already.  Not this book.  The food is different  but not “out there”.  Hearty but not heavy.  Food I want to cook.  And eat.

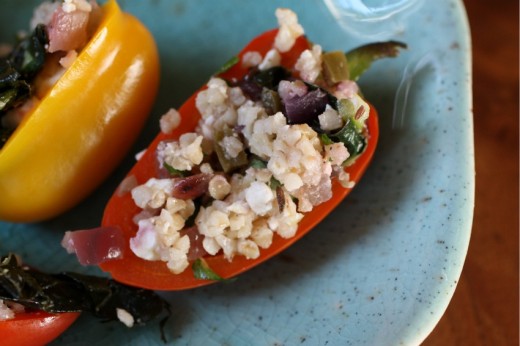
Lukas is young and wiry and adorable.  He was effortless in the kitchen but not cocky.  He made three delicious dishes.  (Full disclosure, I did the prep work.)  When making this super tasty bulgur salad, he turned the heat up higher than I would have and got a nice char on the red onions.  The onions became not just a barely noticeable background flavor and texture but a full fledged lusty ingredient in their own right.  I always sauté my onions the same way, so it was nice to watch something different and then get to taste it.

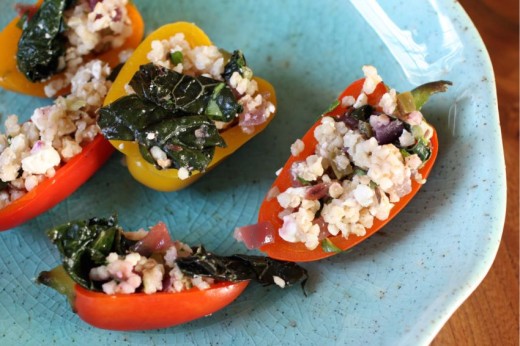
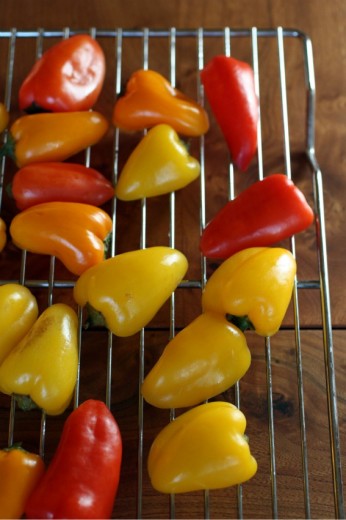
Lukas allowed us to all taste the salad and then we stuffed it into bell peppers that had been steamed.  I thought it was a lovely entrée and one day, when I spied bags of little bell peppers in the produce section, I knew bite-size versions were going on my next catering menu.

The recipe for the bulgur salad makes quite a bit so you can be confident that, even it if you use it to stuff peppers, you will get some delicious lunches out of it.  Just as an added note, you can steam peppers, large or small, by cutting them in half and scraping out the seeds and veins.  Place them in a large skillet (one with a lid) and pour in a bit of water.  Bring to a simmer and cover for 3 minutes, turn over and steam for another 3 minutes.  When Lukas made the larger peppers in the store, he placed them, filled, in a baking dish and covered it with foil.  They went into a 400º oven for about 20 minutes.  I didn’t bake my small ones.

One Year Ago:  Roasted Mushroom with Shallots and Fresh Herbs
Two Years Ago:  Creamy Artichoke Dip
Three Years Ago:  Spinach and Jerusalem Artichoke Soup

Bulgur Salad with Kale and Feta
Vegetarian Entrées That Won’t Leave You Hungry
Serves 4-6

If you are going to stuff small peppers, I recommend you dice the onions and cut the kale into smaller pieces so that you don’t have any bits that are too large.

1 cup bulgur
2 cups water
1 tbsp. canola oil or other neutral oil
2 tsp. cumin seeds
1 small red onion, sliced into strips
2 jalapeño peppers, minced (seeded for a milder heat level)
2 garlic cloves, minced
½ tsp. salt
¼ cup dry white wine or water
½ bunch kale, cut into thin strips
3 scallions, white and green parts, thinly sliced
½ cup coarsely chopped fresh cilantro
3 ounces feta cheese, crumbled
1 tbsp. olive oil

Combine the bulgur and water in a small saucepan over high heat.  Bring to a boil, then lower the heat, cover, and simmer for 15 minutes, until tender.  Strain off any water that hasn’t been absorbed.

Heat 1 tablespoon of the neutral oil in a sauté pan over medium-high heat.  Add the cumin seeds and let sizzle until fragrant, about 30 seconds.  Add the onion and cook until it’s browned around the edges, about 6 minutes.  Stir in the jalapeños, garlic, and salt.  Pour in the wine to deglaze the pan, scraping up any browned bits with a wooden spoon or spatula.  Add the kale and cook, tossing from time to time, until wilted, about 4 minutes.  Transfer to a mixing bowl and allow to cool slightly.  Stir in the scallions, cilantro, feta, cooked bulgur, and olive oil.  Taste and adjust the seasonings.  Serve warm, room temperature, or cold.  (Stored in an airtight container, this salad will keep for up to 3 days in the refrigerator.)


Chex Mix Again

September 15, 2011

I grew up in a house with a lot of food.  My family all likes to eat and I have two younger brothers, one of whom grew to be 6’4″ and the other grew to 6’1″.  (I’m 5’3″.  But I got the small nose gene.)  My mom is a good cook and she made virtually all of our meals.  Breakfast was usually cereal but she packed our lunches and made us dinner every night.  She often baked so we had homemade treats for after dinner.  But she never made snack food.  My mother is not a snacker.  Like, she never snacks.  Ever.  It is admirable really because I recently read that the average American consumes over 500 calories a day in mindless snacking.  Ahem.

In the two months since I last made Chex Mix, I have found myself discussing the stuff more than you would expect.  It turns out that I am not the only one who loves it.  Many people have memories of taking Chex Mix on camping trips or having it around during the holidays.  Why don’t I have those memories?  Oh yes, the no snacking thing.  It’s not that we didn’t snack – my brothers had (and have) huge appetites.  Alex, my middle brother, once ate 98 shrimp skewers each with three shrimp.  I can’t count that high but that’s a lot of shrimp.  The boys ate a lot.  So there were snacks.  But not homemade.

In my conversations with people about Chex Mix (what? is that weird?), I found that people are partial to certain things being in there.  Katie, the woman who waxes my eyebrows (what? is this weird too?) says that her mom not only puts all the different kinds of Chex cereal in (not just the rice), but also Cheerios and Cheerios soak up all the butter and taste the best.  On the list for next time.  But overall, I’m pretty happy with how this one turned out.

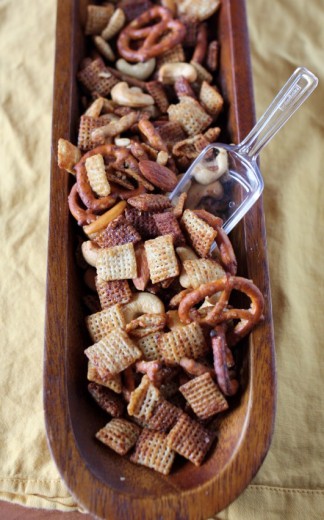
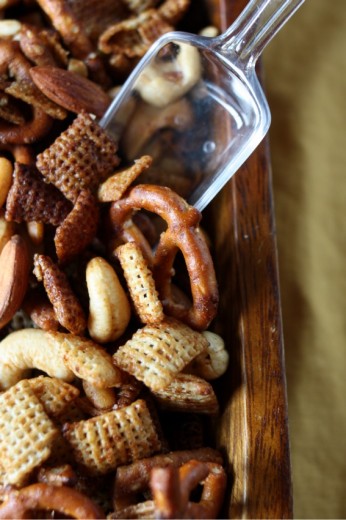
Here we find salty from soy sauce, rich from butter, sweet from maple syrup, and spicy from Thai curry paste.  The spice is very background although you could certainly add more paste to make it spicier.  I like all the crunch additions here – almonds, cashews, rice crackers, pretzels, and, of course, the Chex cereal.  This recipe makes approximately one ton of mix but it keeps well and you will win friends with it as you bring it over for playdates, to accompany cocktails, or to accompany cocktails at playdates.  :)

One Year Ago:  Tomato, Semolina, and Cilantro Soup
Two Years Ago:  Chickpeas and Chard with Cilantro and Cumin
Three Years Ago:  Pissaladière

Maple-Soy Snack Mix
Food & Wine
Makes about 27 (!) cups

12 cups Rice Chex cereal (12 ounces)
1½ pounds roasted mixed salted nuts (I used cashews and almonds), 6 cups
3 cups Asian rice cracker mix (7 ounces)
3 cups sesame sticks (8 ounces)
3 cups pretzel nuggets or mini pretzels (8 ounces)
2 sticks unsalted butter
½ cup maple syrup
1/3 cup soy sauce
1 tbsp. Thai red curry paste or sambal oelek
Kosher salt and freshly ground black pepper

Preheat the oven to 275ºF.  In a large bowl, combine the cereal with the nuts, rice cracker mix, sesame sticks, and pretzels.

In a medium saucepan, combine the butter, maple syrup, soy sauce, and curry paste and bring to a simmer, whisking to dissolve the curry paste.  Pour the mixture over the snack mix and toss to coat completely.  Season generously with salt and pepper and spread on 3 large rimmed baking sheets.  Bake for 35 minutes, stirring 2 or 3 times and shifting the sheets, until nearly dry and toasted.  Let cool completely, stirring occasionally.  (The snack mix can be stored in an airtight container at room temperature for up to 2 weeks.  Recrisp if necessary.)


Art, Trade, and Guacamole

August 11, 2011

Thank you all for the sweet comments on my one, two, and three years ago posts.  I will keep on keeping on!  Today I have a recipe for a most special, and very different, guacamole.  If you visit here regularly, you know there is sometimes a story that must be told.  Feeling impatient?  Feel free to scroll down to the bottom – I don’t mind.

The story goes a little something like this.  Four years ago, we met an artist named Erik Hall.  We were looking for a painting to fill a large wall in our dining room and we stumbled upon him (in the old-fashioned way, not the internet way) at an art fair.  We were struck by the beauty in his work and learned that he took commissions for paintings.  Over the course of several dinners, we became friends with him and his then-girlfriend/now-wife Amy, who is a talented artist in her own right.  And we got the most beautiful painting, one that makes me happy every time I step foot in the dining room.

Erik and Amy are not only talented artists, they are good business people with an eye for the talent of others.  They have opened a beautiful gallery where, once a month, they do an opening  for an artist they represent.  Last year, we attended several of those openings – lovely all of them.  Amazing art, nice wine – but the foodie in me thought they needed a nibble.  When you invite people somewhere between the hours of 5 and 7pm, there needs to be at least cocktail nuts.  So I offered my services.  I told them I would cater one of their parties pro bono and if they and everyone else liked having food there, we could figure out some kind of deal.

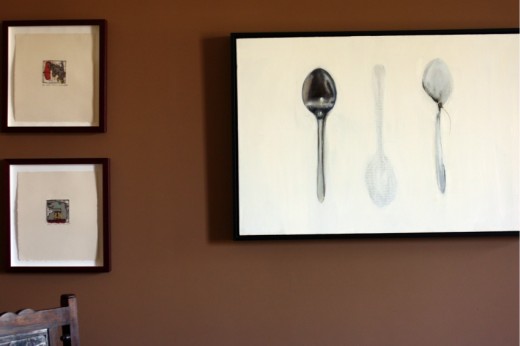
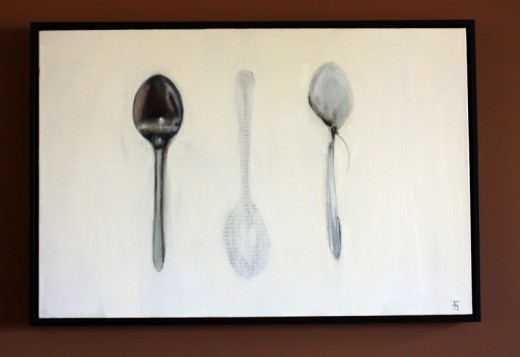
At that party, where gallery owners and visitors alike really did like having food there, I fell in love with some spoons.  Not just any spoons.  This simple beautiful painting of a trio of spoons.  In a gallery full of stunning art, I was immediately drawn to this lovely piece.  It was on a back wall, not even the star of the show, but I just stood in front of it, mesmerized.  Which, as it turns out, did not go unnoticed by Erik.

The day after the opening he called with a proposition.  We could pay a bit of money for the painting and do the rest in trade.  Food trade.  I didn’t even ask for details before I said yes.  What we ultimately agreed to was I would cater six of the year’s openings which I thought was a very fair deal.  I have done five so far, Erik’s show in November is the last one, and all have been so much fun and more than worth having those spoons hang on my dining room wall ever since January.

(A beautiful woman makes beautiful art.)

I catered last Thursday’s show and it was a special one for us.  Gretchen Gammel is an artist that we have had our eye on ever since we have known Erik and Amy.  Around the time that Erik finished our commissioned painting, we saw our first Gretchen show in their gallery.  Gretchen features a theme each year and that year it was people in boats.  Randy, having been in the Navy, got it in his head that he would like, some day, to commission Gretchen to do a family portrait of us in a boat.  The timing was tricky.  She was ready, we weren’t.  We were ready, she moved to France.  Finally early last summer, we had her over so she could get to know us, meet the boys, get a better sense for who we are as a family.  Gretchen started reading my blog too.  Just before Thanksgiving, she brought us this.

There are so many reasons I love this painting.  The obvious of course – it’s our family.  But there are so many special things she did here.

She put me in purple (my favorite color) and got my tattoo (and made me look quite glamorous, I must say).  She put Randy in, what we now call, a “Daddy shirt”, totally his style.  Seeing Spencer, my little somewhat-tyrant, in a Napoleon hat totally cracked me up.

And I think of all of us, she got Graham’s face just right.  That flag he is flying behind us – well, Gretchen copied what his handwriting looked like from the photo in this post.  Amazing, huh?

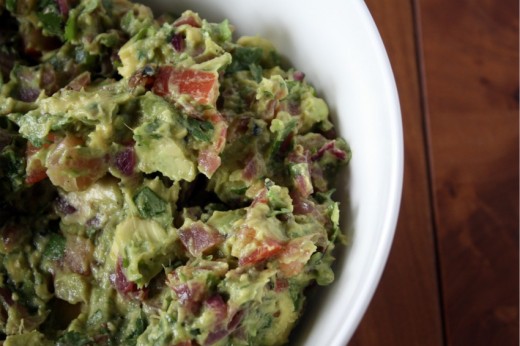
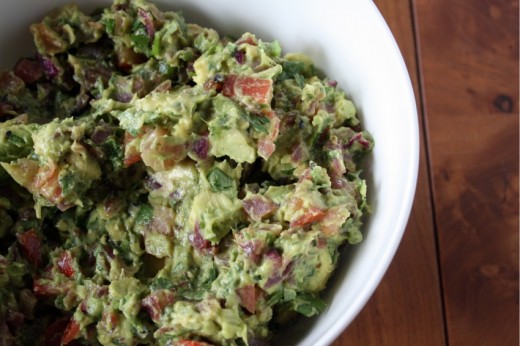
So let’s see.  Art, artists, spoons, people in boats, Napoleon hats, and now finally guacamole.  I was paging through The Essential New York Times Cookbook looking for ideas for the show when I saw this recipe.  I am a guacamole purist.  Avocados, lime, salt, pepper, cilantro.  Nothing else needed.  Sometimes I will add tomatillos but even then, I feel like they are just helping out the limes with sour and acidity.  Here we have onions that have been marinated and grilled, tomatoes, jalapeño peppers – all things that of course go with avocados and lime but for a moment I wondered, would it just be too much?  Amanda Hesser, in her head note to the recipe, put me at ease.  She is also a purist but really liked the flavors here and if it’s good enough for Amanda Hesser…  Obviously, it was fabulous.  A little more work but worth it for a little more oomph in something is already basically perfect.  Finally, I have a theory that no matter how much guacamole you make it will all get eaten.  I put that theory to the test for this party and it turns out that if you make a serious ton of the stuff, there will be some left over.  Oh darn.

Guacamole Previously on Dana Treat:  Simple Guacamole
One Year Ago:  Israeli Couscous with Olives and Roasted Tomatoes
Two Years Ago:  Cheese Balls Three Ways
Three Years Ago:  Farro with Green Beans and Corn

Grilled Onion Guacamole
Adapted from The Essential New York Times Cookbook
Serves 4-6

2 tbsp. vegetable oil
2 tbsp. fresh lemon juice
1 tbsp. red wine vinegar
1 tsp. ground cumin
¾ tsp. salt, plus more to taste
1 tsp. cracked black pepper
1 large red onion, cut into ¼-inch-thick slices
3 avocados
1 large tomato
1 garlic clove, minced
2 serrano chiles, seeded and chopped
¼ cup fresh cilantro, chopped
Juice of 2 limes

Combine the oil, lemon juice, vinegar, cumin, salt, and pepper in a small bowl.  Pour into a shallow dish, add the onion, and let marinate for 1 hour.

Heat a charcoal or gas grill until hot (or heat the broiler, with the rack 6 to 8 inches from the flame).

Drain the onion and place on the grill (or on the broiler pan under the broiler).  Grill for 3 minutes per side (4 minutes per side if broiling).  Let cool slightly, then coarsely chop, discarding any bits that have charred.

Peel, halve, and pit the avocados, and cut into ½-inch dice.  Seed and dice the tomato.

Combine the grilled onion, avocado, tomato, garlic, chiles, and cilantro in a bowl, mashing the avocado slightly as you go.  Season with salt and lime juice.

(As we all know, guacamole starts to turn brown as it oxidizes.  You can stall this process slightly by place a piece of plastic wrap directly on the surface of the guac, trying not to trap any air.  You can store it like this in the refrigerator for several hours.  Bring it to room temperature before serving and stir gently before doing so.)


One for the Weekend, Part Two

July 22, 2011

(Have you entered to win a Keurig Platinum Brewer yet?  You have until noon PDT on Tuesday, July 26th to enter.  You can do so here.)

A while back, I wrote a post where I talked about pedestrian tastes.  In that post, I mentioned Chex Mix as one of my, shall we say, less than gourmet tastes.  We did a fair amount of driving on our little family vacation to the Delaware shore and each gas fill-up/bathroom break, those little bags of Chex Mix beckoned to me from the gas station store.  I don’t ever buy those bags because they are full of chemicals and artificial everything and also because if I bought a bag I would eat a bag.  Simple formula.

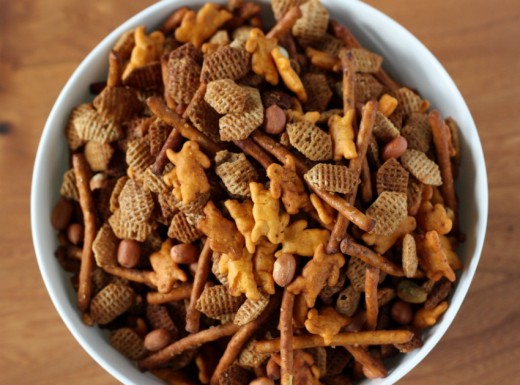
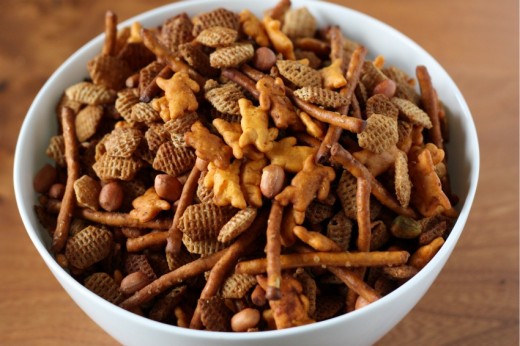
In the “appetizers” section of my recipe notebooks, I have several recipes for homemade mix.  We are heading to Lopez Island with some dear friends and, seeing as I know there will be lots of snacking with four kids around, I figured it was time to try one of them out.  I picked this recipe because it stars Old Bay Seasoning – something that Randy loves with all of his heart.  Truthfully, it is not the Old Bay that he loves, but the Maryland crabs that come coated with the stuff – the ones he gets to eat every other July when we visit his extended family on the Delaware shore.  This meal – “going out for crabs” – is one he looks forward to for 730 days.  It is the same meal that I dread for 730 days.  Imagine being a vegetarian at a long table covered with newspapers and mallets everywhere which are used to smash crabs into edible bits, claw sucking, meat flying…  It’s not pretty.  My dinner on that night is an iceberg lettuce salad followed by french fries and overcooked corn on the cob.  This year they actually had “steamed rosemary potatoes” on the menu which I ordered, but I ended up eating french fries anyway.

Anyway, Old Bay. I used to have a tin of Old Bay Seasoning hidden amongst all my spices.  It was battered and a bit dusty and my hunch is that it was among the few possessions that were saved from Randy’s kitchen when our households merged.  I certainly didn’t buy it – I’m not even sure you can buy it in Seattle.  When I went to reach for it yesterday, it was not there.  Where does a box of never-used seasoning go?  It might be that I brought it to London when we moved there and if I did, it is in the possession of our downstairs neighbor’s housekeeper to whom I donated all of our spices and leftover food because you cannot bring any food item at all back into the U.S. when you move back from abroad.  Not even canned goods.  Not even dusty tins of spice mixes.

So, thankfully the internet is useful for things like online banking and spice recipes.  I looked around a bit and found that most of the Old Bay knock-offs feature a lot of celery salt, a moderate amount of paprika, and a pinch of just about everything else in your spice cabinet.  I riffed on this one mostly.  As this was baking in the oven and the smell of salty goodness started to spread around my kitchen, I started to get nervous.  Why am I making something I know I cannot resist?  And guess what?  I cannot resist this mix.  At least I know I am eating mostly goodness and no chemicals.

One for the Weekend, Part One: Spiced Cocktail Nuts
One Year Ago:
Tortilla with Potatoes and Grilled Zucchini
Two Years Ago: Gnocchi with Mushroom Sauce

Chesapeake Bay Snack Mix
Adapted from Everyday Food (I think)
Makes about 12 cups

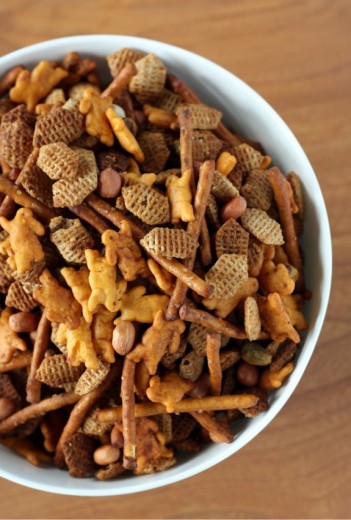
In an effort to make myself feel less guilty about eating handfuls of this at a time, I used an all natural Chex-like cereal and Annie’s Cheddar Bunnies rather than the oyster crackers called for in the recipe.  Oh, who am I kidding.  I shopped at Whole Foods for the stuff and those were my only choices.  Also, I have a giant container of pre-shelled pistachios in m pantry, so I threw some of those in and cut back slightly on the peanuts.

6 cups crisp corn or rice cereal, such as Crispix or Chex
3 cups thin pretzel sticks
3 cups oyster crackers (or Cheddar bunnies)
2 cups roasted unsalted peanuts
½ cup (1 stick) unsalted butter, melted
2 tbsp. vegan Worcestershire sauce
2 tbsp. plus 2 tsp. Old Bay Seasoning
Juice of 1 lemon
2 tsp. hot sauce, such as Tabasco

Preheat oven to 250ºF.  In a large bowl, combine cereal, pretzels, crackers, and peanuts.  In a small bowl, mix together melted butter, Worcestershire sauce, Old Bay, lemon juice, and hot sauce.  Pour butter mixture over cereal mixture and stir until ingredients are completely coated.  Turn out onto a very large rimmed baking sheet.  (You might want to use two sheets.)  Bake 1 hour, stirring every 15 minutes.  Allow to cool, stirring a few times in the process.  Can be stored in an airtight container for up to 1 week.


« Older Posts Newer Posts »