Category: Dessert

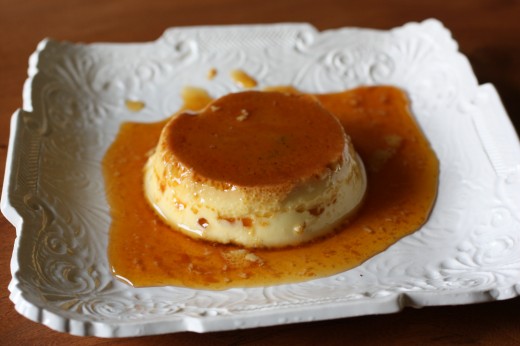
Flan!

April 28, 2012

Show me a dessert menu and I can tell you what I would order.  If there is chocolate, that is it.  If the chocolate is paired with caramel, I might hunt the server down to get our order in sooner.  No chocolate?  Fruit is all right, especially if it is an apple pie type thing in the fall or anything having to do with berries in the summer.  Sometimes a lemon tart can be nice.  After that, we kind of get into a no-man’s land of desserts for me.  Tiramisu, cheesecake, crème brulée – all things I would order really only under duress.  Like if I’m dying to have something sweet and there is no other choice.

Flan?  Or the French cousin crème caramel?  Not on my radar.  No eggy custard for me, thanks.  That is until recently.  This month I taught three versions of my Spanish cooking class and I put flan on the menu.  I usually try to include at least five dishes when I teach and I was going back and forth between doing another savory (gazpacho) and doing sweet (flan).  I remembered that I taught gazpacho last summer in a “beat the heat” class (which was funny because we had very little heat last summer), and there is nothing that interesting about watching me chopping vegetables and pouring tomato juice over them.  So, flan it was.

In order to make flan you make two things that seem to scare people.  Caramel and custard.  Being able to walk students through both of those tasks was very satisfying.  Because flan needs to be made the night before it is served, we had a lot of flan around here.  I would demonstrate how to make it and then the students would eat what I had prepped the previous day.  That meant that the version I made in class became our property the next night.  Brilliant, huh?

Who knew, but I really like flan.  As I was searching for recipes, I found countless versions (coconut, pumpkin, eggnog, lemon, dulce de leche, even asparagus!) but I opted to stay classic with this one.  I made it in both individual ramekins and also in a larger soufflé dish which makes a very impressive presentation.

Now that I have made it many many times, here are some tips.  First, the caramel.  I will tell you what anyone who has ever written a recipe for caramel will tell you – molten sugar is H-O-T so be careful when working with it.  Take your caramel off the heat about ½ a shade lighter than you actually want it (just shy of deep amber), because it will keep cooking and quickly.  This is especially true if you are pouring it into individual ramekins which takes more time than putting it in a big dish.  Whether you are using several small or one big vessel, cover your hand with an oven mitt when doing the tilting to cover the bottom and sides of the dish(es).  That way if a little caramel escapes, you won’t burn your hand.

Second, the custard.  No big insight here but I do find it helpful to put a piece of wet paper towel under the bowl where the egg yolks and sugar are.  This way you can whisk with one hand and pour in the milk/cream mixture with the other without your bowl rolling all over the place.  I do this when I make ice cream too.

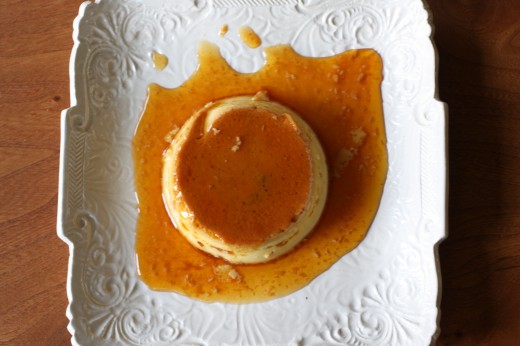
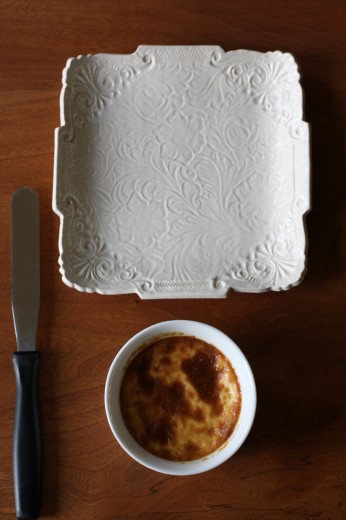
Third, removal and clean-up.  You will bake your flan in a water bath.  You will remove it from the baking pan and let it cool.  You will refrigerate it overnight.  You will take it out right before you are going to serve it and you will think, “There is no way this is coming out of the dish.”  And you will be wrong.  Trust me.  I know it looks like it’s in there forever.  I know it doesn’t make logical sense that you would coat the bottom and sides of a dish with molten sugar which hardens almost immediately on contact, fill that dish with custard, bake it, cool it, and refrigerate it and this thing that you created would not stick for all eternity.  I don’t know, magic happens in the kitchen sometimes.  Arm yourself with a palette knife or a very thin regular knife and run it around the edges of the dish.  Turn over onto a plate and it should just thwop right out.  (That is kind of the sound it makes.)  If it doesn’t, just repeat the knife technique and try again.  All of my many flans came out intact with a perfect puddle of caramel on top.  What you are left with is a dish (or dishes) that have some of the baked on caramel left in the bottom.  It looks kind of like a stained glass window.  It can be hard to get out.  My advice is just to let it soak overnight and it is easy to clean the next morning.

Wowza, I sound bossy.  Not trying to be so, just trying to get you to make flan!

One Year Ago:  Butterscotch Pudding Tarts, Greek Salad, Rhubarb “Big Crumb” Coffee Cake
Two Years Ago:  Leek Frittata, Strawberry Ricotta Tartlets, Tagine with Carrots, Potatoes, and Olives
Three Years Ago:  Miso Soup, Sushi Rice Salad, Classic Currant Scones

Flan
Adapted from Epicurious
Serves 6

If you happen to have 8 ramekins, this amount will fill 8 but 8 ramekins will not fit in a 13×9-inch pan.  If you want to serve 8 people, my advice would be to just make it in a large dish instead and cut it into slices.

1 ¾ cups whipping cream
1 cup milk (do not use low-fat or nonfat)
Pinch of salt
1/2 vanilla bean, split lengthwise
1 cup sugar
1/3 cup water
3 large eggs
2 large yolks
7 tablespoons sugar

Position rack in center of oven and preheat to 350°F. Combine cream, milk and salt in heavy medium saucepan. Scrape seeds from vanilla bean into cream mixture; add bean. Bring to simmer over medium heat. Remove from heat and let steep 30 minutes.

Meanwhile, combine 1 cup sugar and 1/3 cup water in another heavy medium saucepan. Stir over low heat until sugar dissolves. Increase heat to high and cook without stirring until syrup turns deep amber, brushing down sides of pan with wet pastry brush and swirling pan occasionally, about 10 minutes. Quickly pour caramel into six 3/4-cup ramekins or custard cups.  You can also use a 2 or 3-cup soufflé dish.  Using oven mitts as aid, immediately tilt each ramekin to coat sides. Set ramekins into 13x9x2-inch baking pan.

Whisk eggs, egg yolks and 7 tablespoons sugar in medium bowl just until blended. Gradually and gently whisk cream mixture into egg mixture without creating lots of foam. Pour custard through small sieve into prepared ramekins, dividing evenly (mixture will fill ramekins).  Transfer the pan with the full ramekins to the oven.  Carefully enough hot water into baking pan to come halfway up sides of ramekins, making sure not to splash any water into the custards.

Bake until centers of flans are gently set, about 40 minutes. Transfer flans to rack and cool. Chill until cold, about 2 hours. Cover and chill overnight. (Can be made 2 days ahead.)

To serve, run small sharp knife around flan to loosen. Turn over onto plate. Shake gently to release flan. Carefully lift off ramekin allowing caramel syrup to run over flan. Repeat with remaining flans and serve.


Birthday Cake for the Birthday Boy

February 7, 2012

By many peoples’ standards, we spoil our children.  We have a basement full of toys, bikes in the garage, an X-Box and other gaming things, and lots of movies to watch.  We go on nice vacations.  Both boys have plenty of clothes to wear and ski gear (though we rent skis and boots).  Their chores consist of bringing over their plate after dinner and cleaning up their rooms.  They get a lot of hugs and kisses and treats after dinner.

But.  We are sticklers about manners and being polite and respectful to adults and kids both older and younger.  We try to encourage awareness about how lucky they are without being morbid about it.  About once a year we go through our toys and clean out things they are not using to give to children who are less lucky.  They are old enough to understand that we can go look in a toy store but we are not going to buy anything.  (Unless they are with dad, who usually caves.)

This year Spencer is getting two birthday cakes.  This is the first year that we are having a real true party for him.  I’m not the mom who treasures throwing themed birthday parties for my kids complete with perfect invitations and favors.  I try and farm the party part out.  Seeing as Spencer is the second child, we tried to get away with just doing family for as long as possible.  There have been years where we have been in Sun Valley over his birthday (spoiled!).  But this year we are home, he turned five, and we are doing a trampoline party (spoiled!).

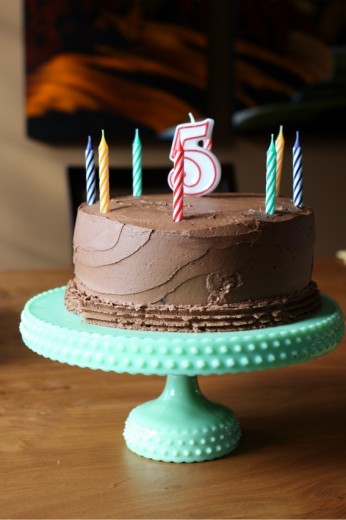
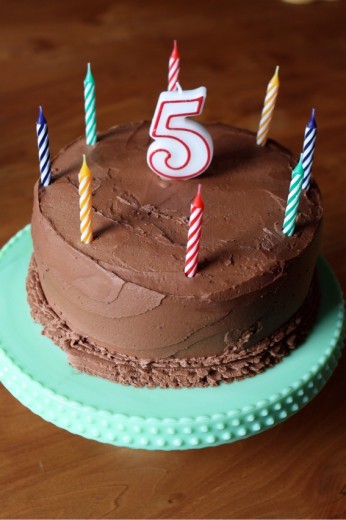
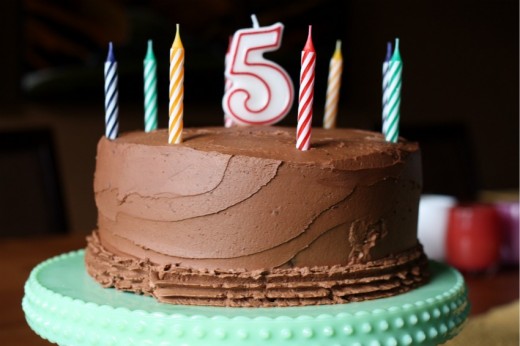
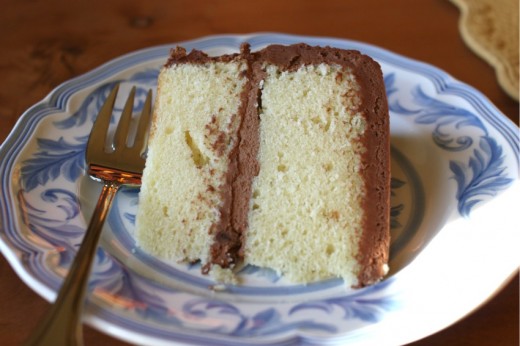
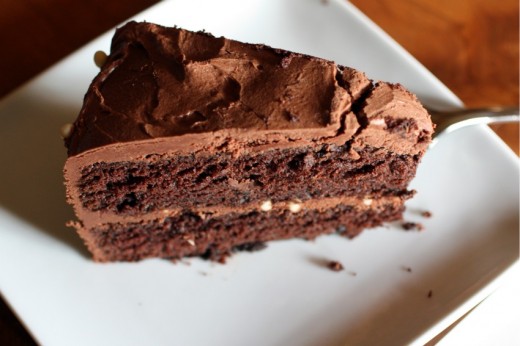
Spencer wants a Batman cake for the party which we will be getting from the same bakery as Graham’s cake.  Mommy doesn’t do Batman cakes.  Or she could, but it would end up looking like a gerbil cake or a blob cake which wouldn’t make him very happy.  For his “real” birthday cake, we sat down with several of my baking books and paged through options.  “I want that one!  Or wait, I want that one!  No, that one!”, is kind of how the conversation went.  I thought we were going with a lemon cake with a meringue frosting when he spied a cake in Flour that sealed the deal.  I guess to him it just looked like a birthday cake.  That may have been because there are birthday candles on the cake in the photo.  At any rate, I was glad to make a traditional cake that I knew he would like.

I feel like some of my cookbooks are kind of like the good guy friend in college who patiently listens to your love life failures, all the while secretly hoping you will actually notice him.  Flour has been sitting on my shelf for about a year now.  I made a couple ho hum things from it in the first few weeks after purchase and then moved on to brighter shinier things.  I knew it would house some good birthday cake ideas and this perfect birthday cake was in there waiting for me all this time.  Actually, not perfect, but pretty darn good.  The cakes themselves were very crummy and the frosting kind of set up too much after I put the cake in the refrigerator with the crumb coat, but the taste and the look was pretty close to perfect.  According to the birthday boy, that is.

One Year Ago:  Macaroon Brownie Bars, White Chocolate Tiramisu, Red, White, and Green Lasagne
Two Years Ago:  Olivetta Loaf, Spicy Smoky Chili
Three Years Ago:  Roasted Orange Pepper Soup, Mushroom Enchiladas, Broccoli and Red Pepper Pie, Chocolate Chip Cupcakes

Yellow Birthday Cake with Fluffy Chocolate Ganache Frosting
Flour
Makes one 8-inch layer cake (serves 8-12)

I’m giving you the (very wordy) recipe as written in the book.  A couple of tips.  The cake cools completely in the pans, presumably because it is large and thick, so be sure to grease them well and use a parchment round in the bottom of the pan.  I always refrigerate my cakes with a crumb coating for about 30-60 minutes, but I think the frosting hardened up too much during the waiting time.  So be sure to follow her advice and just frost the cake right after the crumb coating.  She recommends using non-fat buttermilk but I can never find that so I just used low fat.

1½ cups (3 sticks) unsalted butter, room temperature
2 cups granulated sugar
3 eggs
3 egg yolks
1 tsp. vanilla extract
3 cups cake flour
1 tsp. baking powder
½ tsp. baking soda
½ tsp. kosher salt
1 cup buttermilk

Fluffy Chocolate Ganache Frosting
12 ounces semisweet chocolate, finely chopped
1 cup heavy cream
1 cup (2 sticks) unsalted butter, at room temperature
1 cup confectioners’ sugar
¼ tsp. kosher salt
½ tsp. vanilla extract

Position a rack in the center of the oven and heat the oven to 350ºF.  Butter and flour two 8-inch round cake pans.  (DT:  Don’t forget the parchment here!)

Using a stand mixer fitted with the paddle attachment (or a handheld mixer), cream together the butter and granulated sugar on medium speed for 3 to 4 minutes, or until light and fluffy.  (This step will take 8 to 10 minutes if using a handheld mixer.)  Stop the mixer a few times  and use a rubber spatula to scrape the sides and bottom of the bowl and the paddle to release any clinging butter or sugar.

In a small bowl, whisk together the eggs, egg yolks, and vanilla just until combined.  On low speed, slowly pour the egg mixture into the butter mixture and mix just until incorporated.  Scrape the bowl and paddle again, then beat on medium speed for 20 to 30 seconds, or until the mixture is homogeneous.

In a medium bowl, sift together the flour, baking powder, baking soda, and salt.  On the lowest speed, add about one-third of the flour mixture to the egg-butter mixture and mix just until barely combined.  Immediately pour in about half of the buttermilk and continue to mix on the lowest speed until the buttermilk is almost thoroughly incorporated.  Stop the mixer and scrape the sides and bottom of the bowl well.  Again on the lowest speed, add about half of the remaining flour mixture and mix just until barely combined.  Add the rest of the butter milk and mix just until combined.  Be careful not to overmix.

At this point, it is best to finish the mixing by hand.  Remove the bowl from the  mixer stand and, using a rubber spatula, fold in the remaining flour mixture until the batter is just homogeneous.  As you fold, be sure to incorporate any batter clinging to the sides and bottom of the bowl.  Divide the batter evenly between the prepared cake pans.

Bake for 40 to 50 minutes, or until the ops are golden brown and the cakes spring back when pressed in the middle with a fingertip.  Let cool completely in the pans on wire racks.  (The cooled cakes can be tightly wrapped in plastic wrap and stored  in the freezer for up to 1 week.  Thaw at room temperature, still wrapped tightly in plastic wrap.)

To make the ganache frosting:  While the cake layers are cooling, put the chocolate in a medium heat-proof bowl.  In a small saucepan, scald the cream over medium-high heat (bubbles start to form around the edge of the pan, but the cream is not boiling).  Pour the hot cream over the chocolate and let sit for about 1 minute, then slowly whisk together the chocolate and cream until the chocolate is completely melted and mixture is smooth.  Let sit at room temperature for 1 to 2 hours, or until completely cool.  (Or refrigerate the ganache until cool, about 30 minutes, whisking every ten minutes.)

Fit the stand mixer with the paddle attachment (or use a handheld mixer) and beat the butter on medium-low speed for 10 to 15 seconds, or until smooth.  Add the confectioners’ sugar, salt, and vanilla and continue to beat on medium-low speed for about 2 minutes, or until the mixture is fluffy and smooth.  Stop the  mixer a few times and use a rubber spatula to scrape the bowl and paddle to release any clinging butter or sugar.  On medium speed, add the cooled ganache and beat for about 2 minutes, or until completely combined.  Stop to scrape the sides and bottom of the bowl.  Turn up the mixer speed to medium-high and beat for about 1 minute, or until the frosting lightens in color and thickens.  You should have about 4 cups.

Remove the cooled cakes from their pans.  (Be sure they are completely cool.  If they are even the slightest bit warm, the frosting will melt and you will have a mess.)  Using a long, serrated knife, trim the top of each cake to level it (the layers will have rounded a bit in the oven; the trimmed scraps make great nibbles).  Place one cake layer on a cake plate or cake pedestal (if you have a revolving cake stand, use it.)  Spoon about 1 cup of the frosting on top and use an offset spatula to spread it evenly to the edges.

Carefully place the second layer top-side down (so the even sharp edges will be on the top of the finished cake), on top.  Spoon about 1 cup of the frosting on top and spread it over the top and down the sides of the cake, smoothing the frosting as well as you can and covering the entire cake with a thin layer.  This the crumb coat which will keep any loose crumbs from migrating to the surface of the finished cake.  Spoon a heaping cup of frosting on top of the cake, an spread it evenly across the top and down the sides.  This is the finishing layer of frosting.  If desired, spoon any remaining frosting into a pastry bag fitted with a small round or star tip and pipe a decorative line along the top and/or bottom edge of the cake.

The cake can be stored in an airtight container at room temperature for up to 2 days.


Carrot Cake

January 9, 2012

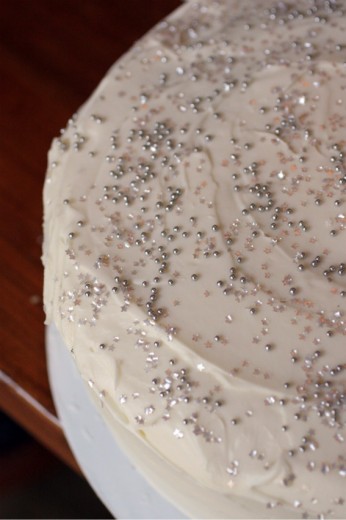
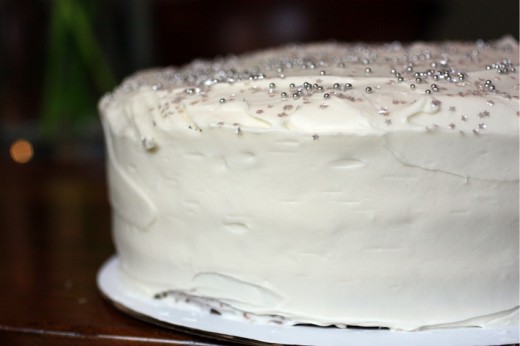
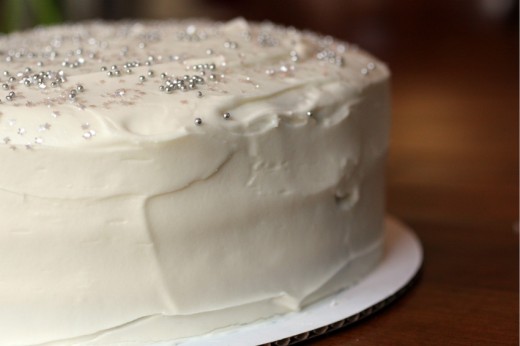
I have a question to ask you.  Before I get to that, I know you probably have a question for me.  “Where did you get the stars on that cake?”  And because I appreciate you (did I mention that in my 2011 recap? I do so appreciate you), I will answer your question first.  I slipped those stars into a King Arthur Flour order that also included chocolate sprinkles and chocolate bars perfect for making petits pains au chocolat.  It looks like the stars were a seasonal thing but you can buy the chocolate here.  (And while you are on that site, I can’t recommend the silicon rolling mat highly enough.  Whenever I teach a class and use it, people always ask about it.  (I have no affiliation with King Arthur Flour, I just love them.)

On to my question.  Cake or frosting?  Yes, some people are both but in my experience, people identify with being one or the other.  I am cake all the way.  I remember being at birthday parties as a child and asking for a piece of the store-bought cake with the rose on it because that is what all the other kids did, tasting the rose, and then scraping all the frosting off so I could get to the (hopefully) chocolate cake underneath.  Cake girl, right here.  Frosting is too sweet, too buttery, just too much for me.

There are two exceptions.  One is this cake where the frosting is so delicious, so ridiculously decadent, that I love it even more than the cake.  (And I really love that moist chocolatey cake.)  The other exception is carrot cake.  I am, um, not a fan of carrot cake.  Just not for me.  I do like cream cheese frosting and so, in the case of carrot cake, I would scrape off the frosting and leave the cake.

Randy and I are different in many ways.  I do believe it’s one of the reasons our marriage works.  We have different strengths and weaknesses and we balance each other.  One of his weaknesses is that his favorite cake is, you guessed it, carrot cake.  (Kidding.  Of course.  Kind of.)  I’ve made him carrot cupcakes and inside out carrot cake cookies, but never in all the years we have been together have I made him carrot cake.  His birthday was on January 2nd and his parents, who gave me a cookbook with a lovely sounding carrot cake were in town, so it was time.

Most people who don’t like carrot cake don’t like the idea of a vegetable in a cake.  I don’t like it because, while I like nuts, raisins, pineapple, and coconut – I don’t like them in cake and I certainly don’t like them all together in one cake as some recipes would have you make.  The carrots are the least of my problems.  So when I found a cake that featured none of those extras, just a lot of spices and even a bit of whole wheat flour along with the carrots, I knew I had my recipe.  Of course, the frosting is great too.  I’m sorry I don’t have a photo of a slice of cake.  I was serving this to a large group and had to cut very thin slices and I happen to think a thin slice of cake, while delicious, is a little sad looking.  One more note, the children in the group were all clamoring for a second piece before they were half way done with their first – until they learned that it was, in fact, carrot cake – and then the table got very quiet.

One Year Ago:  Herbed and Spiced Goat Cheese Balls
Two Years Ago:  Petites Pissaladières
Three Years Ago:  Poblano and Cheddar Stuffed Portabello Mushrooms

Carrot Cake
Adapted from Cake Ladies
Makes 1 9-inch 3-layer cake

My one quibble with this cake is that the actual cakes were on the flat side.  I might one and a half the recipe for the batter next time so the cake it a little taller. 

For the cake:
2 sticks (1 cup) unsalted better, at room temperature
1¾ cups sugar
¼ cup molasses
4 large eggs, at room temperature
1½ cups all-purpose flour
1½ cups whole wheat flour
½ tsp. baking soda
½ tsp. salt
1 tbsp. baking powder
2 tsp. cinnamon
1 tsp. allspice
1 tsp. nutmeg
1½ cups buttermilk, at room temperature
2 cups grated carrots
Zest of 1 lemon

For the icing:
2 packages (1 pound) cream cheese, softened
1 stick unsalted butter, softened
¼ tsp. salt
1 tsp. pure vanilla extract
5 cups powdered sugar

Preheat the oven to 350ºF.  Spray the bottom and sides of 3 9-inch round cake pans with cooking spray.  Place the pans on a sheet of parchment paper and trace three circles the same size as the bottoms of the pans.  Cut out the circles and place in the bottom of the greased pans.

Make the Batter:
Cream the butter, sugar, and molasses together in the bowl of a stand mixer fitted with the paddle attachment until light and fluffy.  While beating the mixture on low speed, add the eggs, one at a time, beating after each addition.

Using a rubber spatula, scrape down the bottom and sides of the bowl, and beat again until the mixture is smooth, light and creamy.

Stir the flours, baking soda, salt, baking powder, and spices together into a separate bowl.

With the mixer on low speed, alternately add the dry ingredients to the creamed mixture with the buttermilk, beginning and ending with the dry ingredients.  Scrape down the bottom and sides of the bowl sveral times.  Mix lightly but thoroughly between each addition, until ingredients are just combined.  Add the carrots and lemon zest, and stir by hand until combined.

Gently scrape the batter into the pans, dividing the batter  evenly between the three pans.  Place in the preheated oven, and bake for 30 to 35 minutes, or until a knife inserted into the center of the cake comes out clean and the sides of the cake have pulled away from the sides of the pan.  Allow the cakes to cool for 20 minutes, then run a thin knife around the edges of the cakes (a palette knife works best) to make sure they are not stuck to the pans.  Carefully remove the layers from the pans and settle on a wire rack to finish cooling.

Make the icing:
Cream the cream cheese and butter together in the bowl of a stand mixer on low speed.  Beat until the mixture is smooth and creamy and no lumps of butter remain.  Add and combine the vanilla.  Add the powdered sugar 1 cup at a time, blending on low speed until fully incorporated.  Using the rubber spatula, scrape down the paddle, sides , and bottom of the bowl.  Beat the mixture on medium speed until light and fluffy.

Assemble the cake:
When the layers are completely cool, invert the first layer onto a cake plate so that the parchment side is up.  Carefully peel off the parchment and throw it away.  Spread about 1 cup of the cream cheese icing on the top surface of the cake with an offset spatula, pushing the icing all the way to the edges.  Place the second layer on top of the first and repeat the process – removing the parchment paper and spreadting the icing.  Top with the third layer and apply a very thin coating of icing (a crumb coat) all over the cake.  Refrigerate for 1 hour.  Remove and finishing covering the cake with the icing.

Carrot Cake can be kept covered at room temperature for up to three days and can be refrigerated for up to one week.


Perfect Chocolate Birthday Cake and a Giveaway

October 19, 2011

I just took a quick look at the “Cake” section of my blog and counted no fewer than 17 chocolate cakes.  17!  I guess I should clarify – 17 cakes that have chocolate in them, but still, 17!  And there is always room for another.

Sometimes I like bells and whistles, sometimes I like straight chocolate.  Up until very recently, I had not found the perfect classic chocolate layer cake – the kind you bring out topped with candles and accompanied by on off-key rendition of “Happy Birthday”.  The cake from Holly B’s was pretty good, tasty and easy, but the frosting amount was off and I find very few things more annoying than setting out to make a layer cake and having some part of it not work.

These are the times when you turn to a trusted source.  I get really excited about super seasonal cookbooks or single subject ones (as long as that single subject is something I like to cook and eat), but a good cook needs a few no-nonsense, big, all-inclusive, tested-to-perfection cookbooks in her collection.   How many of those are out there?  In my mind, not many.  I have The Joy of Cooking, The Essential New York Times Cookbook, and Vegetarian Cooking for Everyone.  Oh, and my new baby.

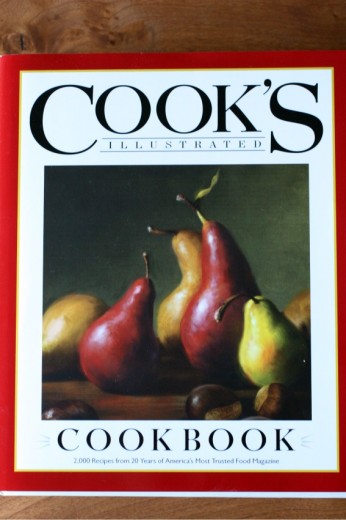
You know the folks at Cook’s Illustrated, right?  I have been getting their magazine for over ten years and have mentally thanked them countless times for coming up with perfect recipes and making mistakes in their testing process so that I don’t have to.  I’ve been using their book Baking Illustrated for years and it has the distinction of not a single note written in it because the recipes do exactly what they say they will.  Now those good people have come out with a single comprehensive volume called Cook’s Illustrated Cookbook, 2,000 Recipes from 20 Years of America’s Most Trusted Food Magazine.  (You can buy it here.)

For those of you who receive their magazine, you are used to reading the fascinating stories of how they come to the perfect recipes.  In this new very large book, they still include a bit of each story.  Each recipe is prefaced by a paragraph called “Why This Recipe Works”.  It’s not just recipes, the personality of the magazine still comes through.  You will still get to read tidbits about the testing process and also get valuable make-ahead tips for many of the recipes.  Oh yes, and the recipes.  If you have every made a Cook’s Illustrated recipe, you know that it turns out exactly as they say it will.  Every time.  Because this book is so comprehensive, you get everything from very basic (Foolproof Vinaigrette) to very fancy (Kahlúa Soufflé with Ground Espresso).  Am I gushing?  Is it clear that I love this book?

Good.  I, and the good people at Cook’s Illustrated, want you to have a copy.  All 2,000 recipes.  Just leave me a comment telling me if there is a perfect recipe you have been searching for.  I always love to get a sense of who my readers are and what you are cooking.  I will randomly pick a winner next Monday, October 24th.  You have until noon PDT that day to enter.  UPDATE:  Contest now closed.  Winner announced 10-25-11!

And now, back to cake.


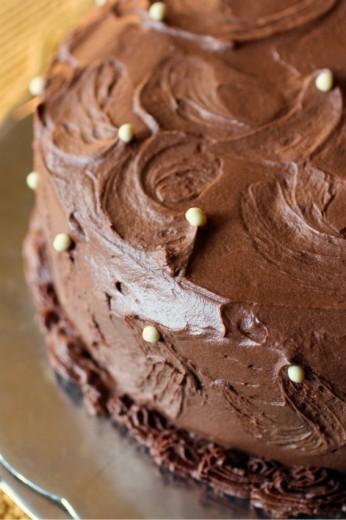
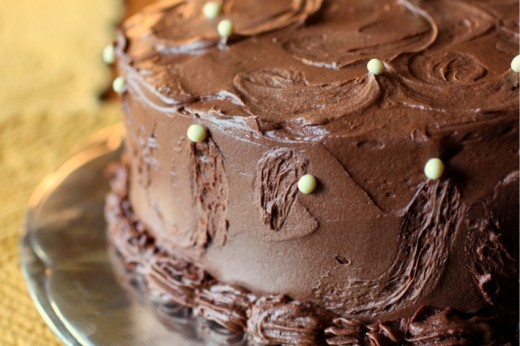
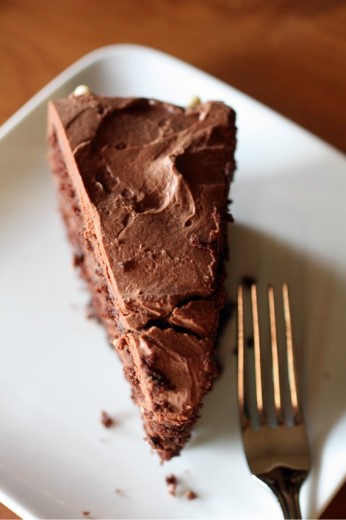
Old-Fashioned Chocolate Layer Cake
Cook’s Illustrated Cookbook
Serves 10 to 12

I served this cake at a 50th birthday party after a large meal and along side an apple crisp.  I cut very small slices and served 12 with about half the cake left over.

Cake
4 ounces unsweetened chocolate, chopped coarse
¼ cup (¾ ounce) Dutch-processed cocoa
½ cup hot water
1¾ cups (12¼ ounces) sugar
1¾ cups (8¾ ounces) all-purpose flour
1½ teaspoons baking soda
1 teaspoon salt
1 cup buttermilk
2 teaspoons vanilla extract
4 large eggs plus 2 egg yolks, room temperature
12 tablespoons unsalted butter, cut into 12 pieces and softened

Frosting
1 pound semisweet chocolate, chopped fine
8 tablespoons unsalted butter
1/3 cup (2 1/3 ounces) sugar
2 tablespoons corn syrup
2 teaspoons vanilla extract
¼ teaspoon salt
1¼ cups heavy cream

1.  For the cake:  Adjust the oven rack to middle position and heat oven to 350 degrees.  Grease two 9-inch round cake pans, line with parchment paper, grease parchment, and flour pans.  Combine chocolate cocoa, and hot water in medium heatproof bowl set over saucepan filled with 1 inch of barely simmering water and stir with  heatproof rubber spatula until chocolate is melted, about 2 minutes.  Add ½ cup sugar to chocolate mixture and stir until thick and glossy, 1 to 2 minutes.  Remove  bowl from heat; set aside to cool.

2.  Whisk flour, baking soda, and salt together in medium bowl.  Combine buttermilk and vanilla in small bowl.  Using stand mixer fitted with whisk, whip eggs and egg yolks on medium-low speed until combined, about 10 seconds.  Add remaining 1¼ cups sugar, increase speed to high, and whip until light and fluffy, 2 to 3 minutes.  Replace whisk with paddle.  Add cooled chocolate mixture to egg mixture and mix on medium speed until thoroughly combined, 30 to 45 seconds, scraping down bowl as needed.  Add butter, 1 piece at a time, mixing about 10 seconds after each addition.  Add flour in 3 additions, alternating with 2 additions of buttermilk mixture, mixing until incorporated after each addition (abut 15 seconds), scraping down bowl as needed (batter may appear curdled).  Mix at medium-low speed until batter is thoroughly combined, about 15 seconds.  Remove bowl from mixer and give batter final stir by hand.

3.  Divide batter evenly between prepared pans and smooth tops with rubber spatula.  Bake cake until toothpick inserted in centers comes out with few crumbs attached, 25 to 30 minutes.  Let cakes cool in pans on wire rack for 10 minutes.  Remove cakes from pans, discard parchment, and let cool completely, about 2 hours, before frosting.  (Cooled cakes can be wrapped tightly in plastic wrap and kept at room temperature for up to 1 day.  Wrapped tightly in plastic, then aluminum foil, cakes can be frozen for up to 1 month.  Defrost cakes at room temperature before unwrapping and frosting.)

4.  For the frosting:  Melt chocolate in heatproof bowl set over saucepan containing 1 inch of barely simmering water, stirring occasionally until smooth.  Remove from heat and set aside.  Meanwhile, melt butter in small saucepan over medium-low heat.  Increase heat to medium, add sugar, corn syrup, vanilla, and salt and stir with heatproof rubber spatula until sugar is dissolved, 4 to 5 minutes.  In bowl of sand mixer, combine melted chocolate, butter mixture, and cream and stir until thoroughly combined.

5.  Place mixer bowl over ice bath and stir mixture constantly with rubber spatula until frosting is thick and just beginning to harden against bowl, 1 to 2 minutes (frosting should be 70 degrees).  Fit stand mixer with paddle and beat frosting on medium-high speed until frosting is light and fluffy, 1 to 2 minutes.  Using rubber spatula, stir until completely smooth.

6.  To Assemble the Cake:  Line edges of cake platter with 4 strips of parchment paper to keep platter clean.  Place 1 cake layer on prepared platter.  Place about 1½ cups frosting in center of cake layer and, using large spatula, spread in even layer right to edge of cake.  Place second layer on top, making sure layers are aligned, then frost top in same manner as first layer, this time spreading frosting until slightly over edge.  Gather more frosting on tip of spatula and gently spread icing onto side of cake.  Smooth frosting by gently running edge of spatula around cake and leveling ridge that forms around top edge, or create billows by pressing back of spoon into frosting and twirling spoon as you lift away.  Carefully pull out pieces of parchment from beneath cake before serving.  (Assembled cake can be refrigerated for up to 1 day.  Bring to room temperature before serving.)


3 Cupcakes for $11

September 20, 2011

Now that the school year has started, we have a new weekly schedule in place.  Graham is in first grade so, obviously, he is in school five days a week.  Spencer goes to preschool four days a week and spends Wednesdays with me.  As much as I try to keep those days fun and Spencer-centered, they are often days full of errands.  He is a great sport and happily accompanies me as I drive around town getting the necessary ingredients for cooking classes or catering jobs.  I like to make sure those trips aren’t pure drudgery for him so there is often some kind of treat incentive.

Last week, we were near a cupcake shop and I suggested we stop in for cupcakes for the “boys” in our family.  (Me?  If I am going to eat cake, I am going to eat cake.  My cake.  Not store-bought cupcakes.)  I asked for three, the nice lady behind the counter boxed them up, rang me up, and told me I owed her $11.

$11.  For three cupcakes.  Really?  In my brain a little switch went off.  That “I will never buy into this crazy-ness again” switch.  As much joy as those cupcakes bring my children – it’s over.  Cupcakes in the Dana Treat household are homemade from now on.

But here is the thing.  I get it.  If I make cupcakes, it’s about 1 million times cheaper.  I can probably make 50 cupcakes for $11.  They will taste much better and be made with love.  But what am I going to do with 50 cupcakes?  Or even 12?  There are three people in my family who eat them.  Even if we have cupcake loving friends with cupcake loving kids over, we will only get through just over half a dozen.  What do I do with the rest of them?  They only keep for a day or so.  I can’t exactly put them in the cookie jar, right?  (Note to self:  Invent a cupcake jar!)

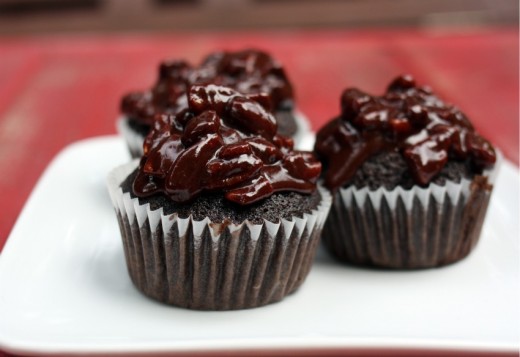
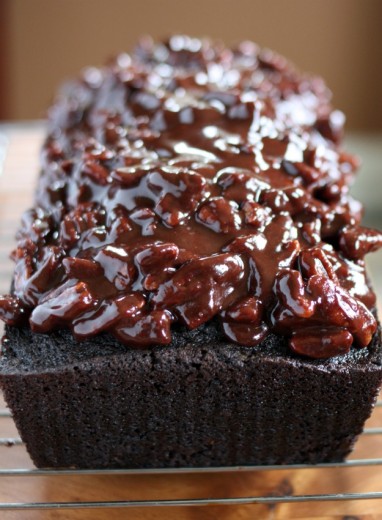
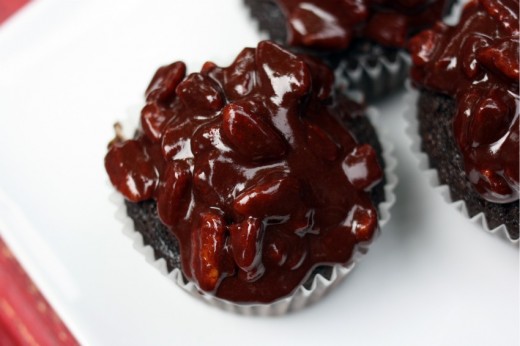
Once in a while my addled brain comes up with something surprisingly clear.  Post store-bought cupcake horror, I was extremely motivated to make my own.  I also realized that I needed a dessert for a special class I was teaching.  Mexican Chocolate Cake actually.  What if I made the cake smaller and used the rest of the batter for cupcakes?  It could have been a disaster but it worked great.  From one recipe, originally intended for a bundt pan, I made a 9×5-inch loaf cake and six cupcakes.  The boys were pleased, the babysitter was pleased, my students were pleased, Randy was pleased, and I was pleased.  Success!

One Year Ago:  Double Chocolate Layer Cake
Two Years Ago:  Grits Frittata
Three Years Ago:  Frittata with Feta, Sun-Dried Tomatoes, and Basil (apparently this is the time of year I make a lot of eggs)

Mexican Chocolate Cake
Gourmet

To make things simpler, I’m giving you the cake as originally written, for a 12-cup bundt pan.  (This is the standard size for a bundt pan in the US.)  You can play around with what pans you want or if you just want to make all cupcakes.  A site I find very useful when trying to figure out what pans to use is Joy of Baking.  You can look up your pan size, find out how many cups it holds by volume, and then reconfigure.  Sound complicated?  It’s actually really easy.

For cake
2 sticks (1 cup) unsalted butter
½ cup Dutch-process unsweetened cocoa powder
¾ cup water
2 cups granulated sugar
2 large eggs
½ cup well-shaken buttermilk
2 tablespoons vanilla
2 cups all-purpose flour
1 teaspoon baking soda
½ teaspoon cinnamon
¼ teaspoon salt

For glaze
2 cups chopped pecans (7½ ounces)
½ stick (¼ cup) unsalted butter
½ cup half-and-half
½ cup confectioners sugar
5 ounces fine-quality bittersweet chocolate (not unsweetened), finely chopped
¼ teaspoon salt

Make cake:
Put oven rack in middle position and preheat oven to 350°F. Butter cake pan well and dust with flour, knocking out excess.

Melt butter (2 sticks) in a 3-quart heavy saucepan over moderately low heat, then whisk in cocoa. Add water and whisk until smooth, then remove from heat. Whisk in separately sugar, eggs, buttermilk, and vanilla.

Sift together flour, baking soda, cinnamon, and salt into a bowl, then sift again into cocoa mixture and whisk until just combined (don’t worry if there are lumps).

Pour batter into cake pan and bake until a wooden pick or skewer comes out with a few crumbs adhering, 45 to 55 minutes. (Leave oven on.)

Cool cake in pan on a rack 20 minutes, then loosen edges with a thin knife and invert onto a plate.

Make glaze:
Spread pecans in 1 layer in a shallow baking pan (1 inch deep) and bake until fragrant and a shade darker, 6 to 8 minutes. Cool pecans slightly in pan on a rack, about 5 minutes.

Melt butter in a 2-quart heavy saucepan over low heat, then stir in half-and-half and confectioners sugar. Add chocolate and cook, stirring, until smooth. Remove from heat and stir in pecans and salt. Cool glaze until slightly thickened, about 5 minutes.

Spoon glaze over top and sides of cake (cake will still be warm) and spread with a small offset spatula or knife to cover completely.

(Cake (with glaze) can be made 2 days ahead and kept at room temperature in a cake keeper or covered with an inverted bowl.)


« Older Posts Newer Posts »