Category: Cheese

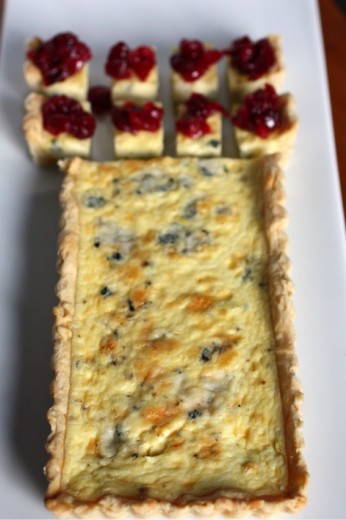
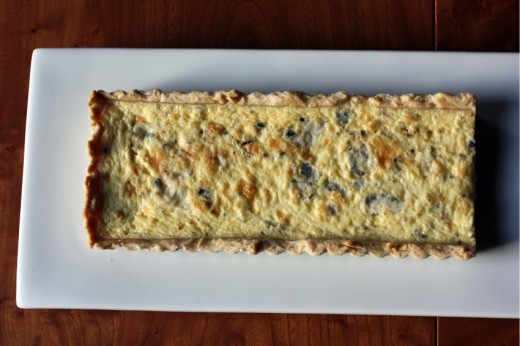
Stilton Tart with Cranberry Chutney

November 11, 2011

Ever since moving into my first apartment many many years ago, I have subscribed to food magazines.  The roster has changed a bit, but receiving at least one and as many as five magazines full of glossy food pages has been a constant in my cooking life.  I do love cookbooks, oh how I love cookbooks, but I also love how current magazines are and I also love the monthly inspiration.  My routine was that every couple of months, I would sit down and tear out recipes that I had flagged, then I would cut them out, then I would tape them into binders I have that are filled with almost twenty years of magazine recipes.

Then life got super super busy.  I have an over two year backlog of magazines in our bulging magazine holder and a whole other pile of recipes that are cut out but need to be taped.  Periodically I feel guilty.  So many recipes waiting to take up residence in my cute binders!  So many things waiting to be cooked!  And then the end of the day comes and I am spent and the last thing I feel like doing is dealing with my magazines.  So I put them off again.  Periodically, I think about just recycling all of those old magazines and starting fresh with the December issues.  But there are treasures in there.  Like this recipe.

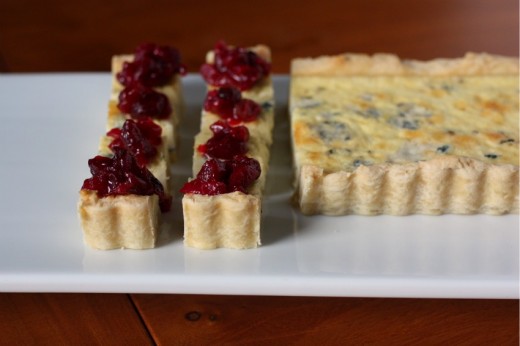
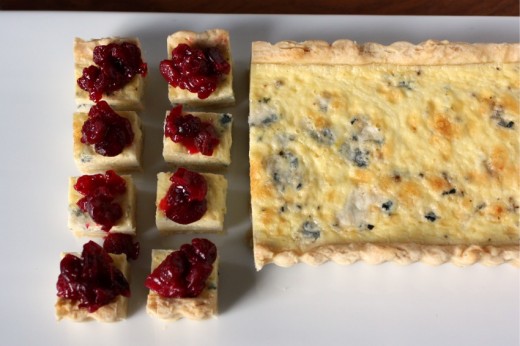
I cut this out years ago, the actual recipe is from Gourmet (sob!) back in 2001.  I cut out the photo as well and every time I page through the appetizer section of that binder, I look at it longingly.  You see, up until recently, I did not have a rectangular tart pan.  Of course, I could have made it in a round pan but that didn’t seem right to me.  I wanted to serve it in little bites, just like the photo in the magazine.

Last week was the last of my catered openings at the art gallery (although I hope to do more next year).  I’ve paid off my spoons.  This opening was for Erik Hall, the gallery owner (along with his amazing wife) and an incredibly talented artist.  I have been waiting for the right excuse to make this tart ever since I bought that pan and November and an art opening seemed just right.

After gazing at the photo for so many years and cursing the fact that I did not have a rectangular pan, it might have turned out that the tart was a disappointment.  Nope.  Very easy to make, very pretty, holds well, and a terrific contrast of flavor and texture.  The crunch of the crust, the creaminess of the filling, the sharpness of the cheese, and then the sour bite of the chutney combines for a delicious bite.  I can only say this with authority because I made the tart twice.  The first time, at the gallery, it got devoured before I had a chance to try a piece.  So because I wanted to taste it, and because I wanted to share the recipe with you, and because I was smart enough to double the crust recipe, and because the chutney makes a lot, I can now say, without hesitation, Make This Tart!  It would be a beautiful way to welcome your Thanksgiving guests.  Or, if you travel by car for the holiday, you can still make it.  Just bring the tart in its pan and cut and top it at your destination.

One Year Ago:  Romaine Leaves with Caesar Dressing and a Big Crouton
Two Years Ago:  Holly B’s Gingersnap Cookies
Three Years Ago:  Bulgur and Green Lentil Salad with Chickpeas

Stilton Tart with Cranberry Chutney
Gourmet
Makes 32 appetizer portions (more if you cut the pieces larger)

For the pastry dough:
1¼ cups all-purpose flour
¾ stick (6 tablespoons) cold unsalted butter, cut into 1/2-inch cubes
2 tablespoons cold vegetable shortening
¼teaspoon salt
2 to 4 tablespoons ice water

Blend together flour, butter, shortening, and salt in a bowl with your fingertips or a pastry blender (or pulse in a food processor) just until most of mixture resembles coarse meal with small (roughly pea-size) butter and shortening lumps. Drizzle evenly with 3 tablespoons ice water and gently stir with a fork (or pulse in processor) until incorporated.

Squeeze a small handful: If it doesn’t hold together, add more ice water, 1/2 tablespoon at a time, stirring (or pulsing) until just incorporated, then test again. (If you overwork mixture, pastry will be tough.)

Turn out mixture onto a lightly floured surface and divide into 4 portions. With heel of your hand, smear each portion once or twice in a forward motion. Gather dough together with scraper and press into a ball, then flatten into a 5-inch disk. Chill dough, wrapped in plastic wrap, until firm, at least 1 hour.

For the tart:
1 recipe Pastry Dough (see above)
1 cup heavy cream
1 whole large egg
2 large egg yolks
¼ teaspoon salt
¼ teaspoon black pepper
5 oz chilled Stilton, rind removed and cheese crumbled (1½ cups)

Make tart shell:
Preheat oven to 350°F.

Roll out dough on a lightly floured surface with a floured rolling pin into a 17- by 8-inch rectangle and fit into tart pan. Trim excess dough, leaving a 1/2-inch overhang, then fold overhang inward and press against side of pan to reinforce edge. Lightly prick bottom and sides all over with a fork. Chill until firm, about 30 minutes.

Line pastry shell with foil and fill with pie weights. Bake in middle of oven 20 minutes, then carefully remove foil and weights and bake until golden, 10 to 15 minutes more. Cool shell in pan 20 minutes.

Reduce oven temperature to 325°F.

Make filling:
Whisk together cream, whole egg, yolks, salt, and pepper until combined.

Put tart shell (still in pan) on a baking sheet and scatter cheese evenly in shell. Slowly pour custard into shell and bake in middle of oven until golden around edge and custard is just set, 30 to 35 minutes. Cool tart completely in pan on a rack.

Cut tart into 32 rectangles and serve at room temperature, topped with chutney.

(Dana’s Make Ahead Tips:  You can make the pastry dough up to one month in advance, wrap it well, and freeze it.  Allow it thaw overnight in the refrigerator before using.  You can blind bake the shell earlier in the day and let it cool completely before filling and continuing to bake.  Finally, you can wrap the whole tart well, still in its pan, and refrigerate it overnight.  Allow it to come to room temperature for several hours before serving or heat it for about 10 minutes in a low oven.)

Cranberry Chutney
Makes about 2 cups

You will have more chutney than you need for this recipe but it’s delicious and it keeps well.

2 large shallots (3 oz), coarsely chopped
1 tablespoon vegetable oil
1 (12-oz) bag fresh or frozen cranberries (not thawed)
2/3 cup sugar
3 tablespoons cider vinegar
1 teaspoon minced garlic
1 teaspoon minced peeled fresh ginger
½ teaspoon salt
1/8 teaspoon dried hot red pepper flakes
Cook shallots in oil in a 3-quart heavy saucepan over moderate heat, stirring occasionally, until softened, about 3 minutes. Stir in remaining ingredients and simmer, uncovered, stirring occasionally, just until berries pop, 10 to 12 minutes, then cool.  (The chutney will keep for a week, covered, in the refrigerator.)


End of Summer Heirloom Tomato Tart

September 18, 2011

Uh oh.  I think I may have waited a bit too long to share the recipe for this tart with you.  Feel that?  Smell that?

Fall.

September in Seattle actually means the end of summer produce-wise.  Those things that many of you get in July (squashes, tomatoes, corn, etc) we don’t really get until September.  I’ve said this before but as amazing as our markets are in the peak of summer – tables filled to every square inch with berries, peaches, peas, green beans – fall is the produce season that makes me swoon.  Heirloom tomatoes, corn, and summer squash sit right next to booths with winter squash, carrots, eggplants, and all manner of peppers.  For the next six weeks or so, I will be a very happy shopper.

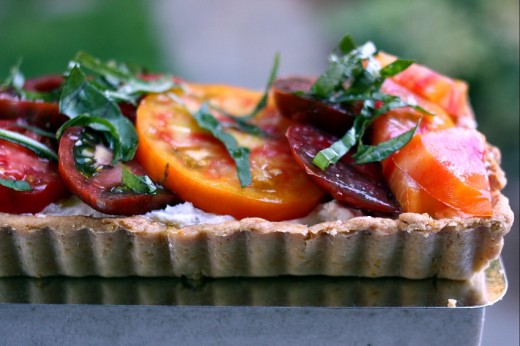
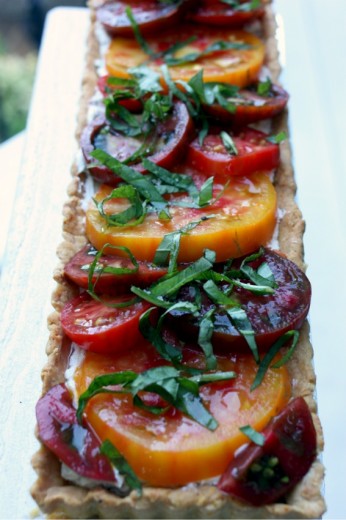
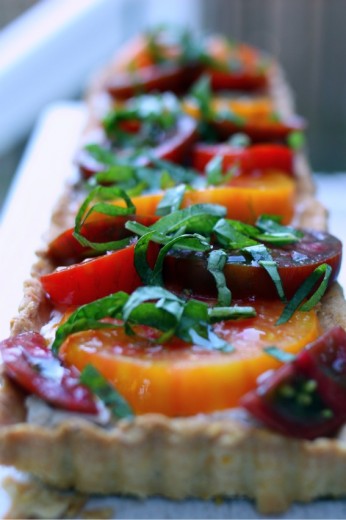
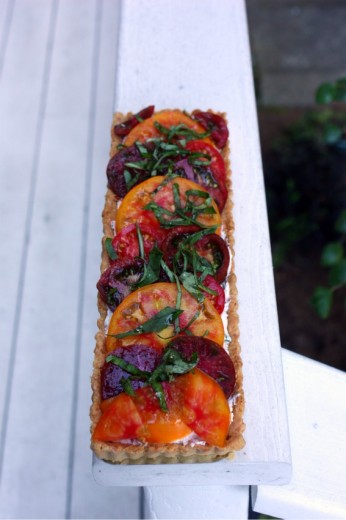
This lovely tart was inspired by three things.  One, my new rectangular tart pan.  Two, a similar tart that Ashley made last summer in a class I attended.  Three, a crust from this book I keep yammering on about.  Ok, four – those gorgeous tomatoes that keep calling my name.  This is actually quite simple.  A cornmeal studded crust, soft goat cheese mixed with fresh basil, perfect tomatoes, salt.  Oh all right, I did use a secret weapon.

Rather than just drizzle the top with olive oil, I took a cue from Purple Citrus & Sweet Perfume and mixed together some pomegranate molasses, lemon juice, and olive oil.  I drizzled that simple but intoxicating mixture sparingly over the top and gave it a healthy sprinkle of sea salt.  You know how once in a while you take a perfect bite?  What is in your mouth is an ideal mix of texture and flavor?  This tart is full of those bites.  The cornmeal in the tart dough gives it a delightful crunch and a bit of sweetness – also, the crust has more heft which is a nice contrast for the creaminess of the goat cheese.  The tomatoes, of course, are the star but they are certainly helped along by the sour punch of the lemon and pomegranate molasses.  I hope you don’t have to wait until next year to give this a try.

One funny note.  I balanced the tart on the railing of our deck for these photos.  I am a bit vertically challenged and was having trouble getting enough distance from it to get a good photo.  I didn’t want to put it on the ground.  Randy, who is 9 inches taller than I am, offered to take a shot.  So here is the view from 6 feet.

One last piece of news!  My friend Jen and I are doing another yoga retreat together on October 1st.  These dates always sell out which is why I’ve never mentioned them beforehand.  This time, with the busy fall that we are all diving into head-first, there are a few spots.  Come join us on Bainbridge Island for the most amazing yoga day complete with lunch made by me.  Details are here.

One Year Ago:  Peach and Heirloom Tomato Salad
Two Years Ago:  Nutella Pound Cake (probably the most popular recipe on my site)

Heirloom Tomato Tart with Basil Goat Cheese and Cornmeal Crust
Dana Treat Original (inspired by many)
Serves 6-8

If you don’t have a 14 x 4-inch rectangular pan, this can also be made in a 9-inch round tart pan.  I also made mini tarts for a party and used colorful cherry tomatoes as the topping.  You will have left over pomegranate molasses mixture but it’s pretty great on just about any vegetable.

For the crust
1 1/3 cups flour
¼ cup yellow cornmeal
½ tsp. kosher salt
½ cup (1 stick) unsalted butter, cut into small pieces and chilled
1 large egg, beaten

For the tart
8 ounces soft goat cheese, such as Montrachet
2 tbsp. heavy cream
¼ cup (packed) basil leaves, sliced into thin ribbons, plus additional for garnish
Kosher salt and freshly ground black pepper
6-8 (depending on size) heirloom tomatoes, mixture of colors
2 tbsp. pomegranate molasses
2 tbsp. lemon juice
6 tbsp. olive oil
Sea salt

Make the crust
Place the flour, cornmeal, and salt in the bowl of a food processor fitted with the metal blade.  Process until well combined.  Add the butter and pulse until the mixture resembles bread crumbs.  Add the egg and process until the mixture comes together.  Dump the dough out onto a lightly floured board and knead to bring it together into a cohesive mass.  Flatten into a rough rectangle, wrap in plastic wrap, and refrigerate for 2 hours.

Preheat the oven to 400ºF.  Roll the pastry out into rectangle about 1/8th of an inch thick.  Carefully transfer the dough to the pan.  This dough is very stiff and can be difficult to roll out without tearing and cracking.  You can also just press it into the pan with your fingers rather than rolling.  Trim any edges.  Prick all over the bottom with a fork and place the pan in the freezer for 10 minutes.  Remove from the freezer, line with parchment paper or foil, and pour in pie weights or dried beans.  Bake for 15 minutes.  Carefully remove the pie weights, return to the oven for 8-10 minutes, until the crust is a nice golden brown.  Cool completely.

Finish the tart
Place the goat cheese in a large bowl and mash roughly with a fork.  Add the cream and mix well to combine.  (The cream will make it, um, creamier, and will also help with the chalkiness that goat cheese tends to have.)  Gently mix in the basil.  Season with salt and pepper.  Scoop the goat cheese into the cooled crust and smooth it with a spatula.  Slice the tomatoes and layer them in decoratively.

Mix together the pomegranate molasses, lemon juice, and olive oil.  Drizzle the mixture over the top of the tart.  Sprinkle with a healthy pinch of your best sea salt and a few more ribbons of basil.


Super Simple Appetizer

July 2, 2011

I will admit that I’m not always the best about posting super simple recipes.  This might be the place you come for treats, tofu, and tasty vegetarian fare, but it’s probably not your first choice of blogs if your guests are coming in five minutes and you need a recipe.  I like super simple as much as the next person but I am, inexplicably, drawn to more tedious and complicated things in the kitchen.

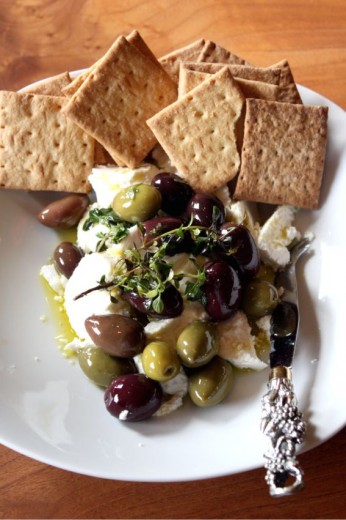
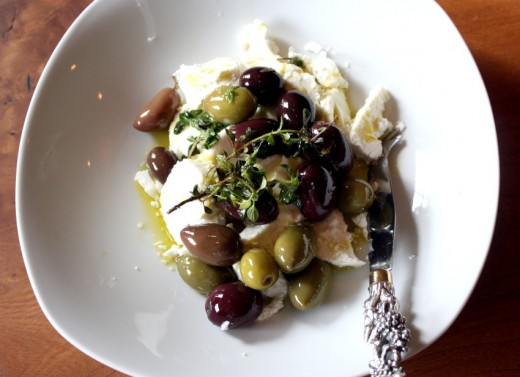
No more!  Give me :10 and you’ve got something pretty and delicious.  There is no effort here beyond slicing goat cheese and heating up some oil.  I always have these ingredients on hand and also always have crackers, so if you are coming to my house any time soon, you know what we are having as an appetizer.


Goat Cheese with Olives, Lemon, and Thyme
Adapted from Gourmet
Serves 4-6

½ cup assorted olives
3 fresh thyme sprigs (use lemon thyme if possible)
3 tbsp. extra-virgin olive oil
Zest of 1 lemon
4-5 ounces soft goat cheese (such as Montrachet), sliced

Heat olives, thyme, oil, zest, and ¼ tsp. pepper in a small skillet or saucepan over low heat until fragrant (do not simmer).  Cool to room temperature.  Serve olive mixture over goat cheese.  (This dish can be prepared 2 hours ahead and kept, covered, at room temperature.)


My First Cannoli

February 9, 2011

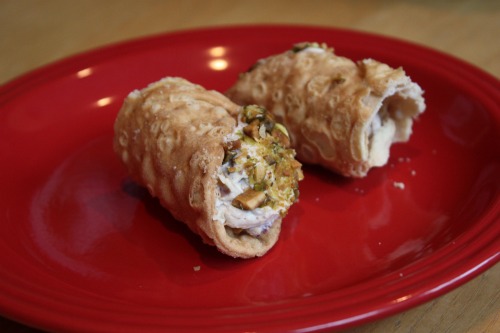
Here is where I admit that up until a couple of days ago, I had never eaten a cannoli.  My parents were both born and raised in New York and they had the luxury of eating things like real bagels, good profiteroles, late summer tomatoes, and cannoli.  My mom has a cousin who used to come visit us every summer and they would bring 4 dozen bagels with them to store in our garage freezer.  I’m sure that if the other things on that list weren’t so perishable, my mom would have requested she bring those too.

So, cannoli were not a part of my childhood.  If I were the type to go nuts over cheese in my desserts, I would have made them long ago.  But truthfully, this is not my kind of treat.  If you are a regular here I think you know what my kind of treat is.  But I am telling you about these cannoli for several reasons.

1)  Someone at Saturday’s yoga retreat sat me down and said, “If you do not post the recipe for these cannoli, I will never speak to you again.”  Strong words.

2) One of my new favorite “Food and Graham” stories happened while preparing these.  I don’t mention this often enough but Graham is a great eater.  He has a huge appetite and really loves food.  He is eager to try new things.  Something he hasn’t seen before makes him wonder what it tastes like.  Spencer‘s response is the opposite.  Anyway, I was chopping crystallized ginger for the filling and Graham asked for a taste.  I gave him a cube of it, he took a little bite, and then asked for three more pieces.

3)  I got this recipe off Epicurious.  Our computer is in our study which is not right next to the kitchen.  I was the end of a LONG cooking day when it came time to prepare these.  I took a quick glance at the recipe and then went back to my food processor to finish it.  I had a nagging suspicion that I had forgotten something in the filling but was too lazy to go back and double check.  Finally, once the filling was in the bowl, I took a quick taste and thought it was fine for, you know, a cheese filling, and into the refrigerator it went.  Then I checked the recipe.  Sugar.  I didn’t add the full 2 cups of powdered sugar that the recipe called for. I tasted again.  I’m no expert, but cannoli are not supposed to be super sweet, right?  It tasted just about right to me and everyone loved this without the sugar.

So there you go.  Cannoli.  Discuss.

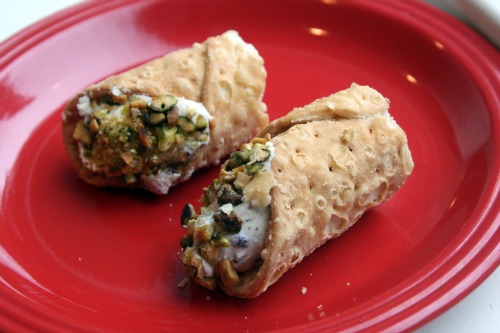
Now.  The recipe makes enough filling for 25 regular size cannoli.  For reasons that are too boring to explain, I only bought 12 shells.  I cut each cannoli in half so everyone could have one but I still had tons of leftover filling.  I brought it back home with me, wondering what I was going to do with it.  And then, an unexpected opportunity came my way.

This is Spencer’s birthday cake.  Once again for reasons that are too boring to explain, I did not make enough frosting.  I was left with just enough to very lightly frost the outside of the cake but  not enough to frost all of the cones.  (The chocolate you see is the buttercream mixed with melted chocolate.)  As I was contemplating driving to the store to buy some frosting in a can (shudder), I remembered my leftover filling.  So that is what is adorning half the cones.

This cake is pretty darn cute and the cake part itself, which is the part I care about, was super moist and flavorful.  If you are interested in making it, I direct you to this recipe.  In the comments, most people hated the frosting, so I made a simple buttercream from The Cake Bible.  Just do yourself a favor and make sure you have enough frosting…

And now, back to the cannoli.

One Year Ago: Olivetta Loaf and Spicy Smoky Chili
Two Years Ago: Broccoli and Red Pepper Pie

Dried Cranberry and Ginger Cannoli
Adapted from Bon Appétit
Makes 25

This recipe originally called for dried cherries but I only had cranberries.  If you would like to add the sugar that I forgot, add two cups – one in each batch.

4 cups (2 pounds) fresh ricotta cheese
1 cup mascarpone cheese
Zest of 1 orange
½ tsp. vanilla extract
¾ cup minced crystallized ginger
¾ cup minced dried cranberries (or cherries)
4 ounces bittersweet chocolate, finely chopped
25 purchased cannoli shells
Chopped pistachios

Working in 2 batches, blend first 4 ingredients in processor until smooth; add ginger and cranberries and process until finely chopped and well incorporated.  Using on/off turns, mix in chocolate just until blended (do not purée).  Transfer filling to a large bowl.  (Filling can be prepared 1 day ahead.  Cover and refrigerate.  Bring to room temperature before continuing.)

Working in batches, transfer filling to pastry bag without tip.  Pipe into shells.  Dip ends in chopped pistachios.  Chill at least 2 hours and up to 6 hours.


Herbed and Spiced Goat Cheese Balls

January 9, 2011

I’m really late in saying this but Happy New Year!!  I’m curious – what did you all do?  We were lucky enough to have a night out this year.

I spent my 20’s feeling like New Year’s Eve was Very Important.  I had to be doing just the right thing, otherwise it was disappointing.  The problem is, I never figured out what just the right thing was so I was always disappointed.  I spent Y2K in an uncomfortable skirt, heels that were too high, at a very expensive party where they ran out of wine by 9:30, wondering why I didn’t lower my expectations a little.

Once I did, New Year’s became just another fun night out.  Or in.  Some of the best that I have spent have been with close friends in someone’s home.  Since having kids, going out has become a little trickier.  Our babysitters all have social lives and often they include big plans for the big night.  Occasionally, Randy’s parents come to town right after Christmas and we have built in babysitters.  Such was the case this year.

My friend Julie rallied a small group of us and we had a 9:30 reservation at a local favorite Cantinetta.  I like to eat late but 9:30 is pretty extreme for Americans.  We decided to have everyone come over to our house for a nibble and a glass of champagne.  Knowing a big dinner was on the horizon, I wanted to make something relatively small and light but substantial enough to hold us until dinner was served.  I also had a lot of cooking in my future and didn’t want to spend a whole lot of time on a nibble.

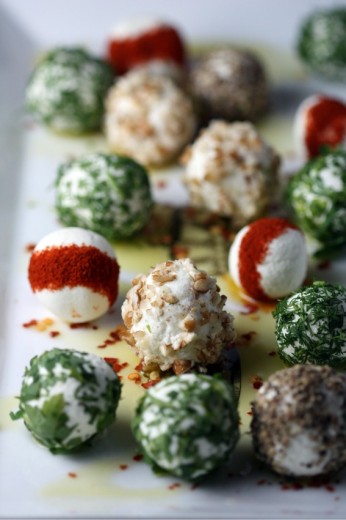
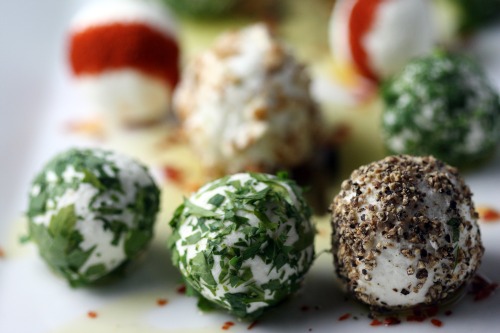
Because we entertain a lot and because I have catered several parties, I have a lot of appetizers in my back pocket.  But nothing seemed right.  In those cases, I turn to Martha Stewart and as usual, she had the perfect thing.  These little balls of goat cheese are about marble size and take no more than 10 minutes to prepare.  You can really roll them in anything.  I chose some things I had on hand – parsley, dill, pecans, black pepper, and took her advice for rolling them in paprika to get that stripe.

One Year Ago: Petites Pissladières
Two Years Ago: Poblano and Cheddar Stuffed Mushrooms

Herbed and Spiced Goat Cheese Balls
Adapted from Martha Stewart’s Hors d’Oeuvres Handbook
Makes about 3 dozen

1¼ pounds soft goat cheese
2 tbsp. finely chopped parsley
2 tbsp. finely chopped dill
2 tbsp. finely chopped pecans
1 tbsp. freshly cracked black pepper
2 tsp. paprika
2 tbsp. olive oil
1 tsp. red pepper flakes

Line a baking sheet with parchment paper.  Form 1 tablespoon of the goat cheese into a small ball.  Transfer to the baking sheet.  Continue with the remaining cheese.  Refrigerate the balls for 10 minutes to set slightly.

In separate bowls, place the parsley, dill, pecans, and pepper.  Roll several balls in each of the coatings and set aside.  To make the paprika band, sprinkle the paprika in a straight thin line on a cutting board.  Straighten the edges of the paprika with a knife.  Roll some of the balls down the line to form the paprika strip.

Pour the olive oil onto a serving platter.  Sprinkle the oil with the red pepper flakes.  Arrange the goat cheese balls on the platter and serve with toothpicks.


« Older Posts Newer Posts »