Category: Brunch

A Winner, Christmas Sweaters, and Granola

December 13, 2010

I’m going to talk about granola.  But a warning.  I’m also going to talk about Christmas sweaters.  And I am going to announce the winner of the apron contest.  Adorable assistant, please show us the number!

Commenter #39 is Annie from Phoo-D!  Annie, please send me an email so I can get your address.  You have a week!

Randy’s and my first date was ten years ago – November 26, 2000 to be exact.  After a week of communicating by email, we met in a Starbucks near his office.  It was a Sunday so he was wearing weekend attire – loose fitting jeans, a comfortably worn plaid shirt, and a pair of clogs.  I kid you not.  During the week, I would later learn, his taste skewed toward Brooks Brothers and sort of preppy clothes that, while very nice, are not really my taste.

One of my very favorite memories of my life with Randy comes from the Christmas of that first year.  We had been dating less than a month and he had plans to join his parents and sisters in Atlanta for the holiday.  I told him I would miss him and he was a little mystified.  We didn’t know each other that well, he would be back in just a few days – why would I miss him?  Lo and behold, soon after arrival in Atlanta, he realized he missed me.  He called me many times in that few days’ span and he also asked his sister Lois for wardrobe assistance.  Lois, bless her, took him shopping and “funked him up”.

Once back in Seattle, he got off the plane and called me from the road saying he missed me so much, he had to stop by my job before going to his.  In he walked wearing a tight-fitting tan sweater with good jeans.  The first time I met Lois, I thanked her for the inspiration because his taste and the clothes  just got better from there.

Now, these many years later, Randy has a very funky wardrobe.  Classy but different.  I love it and he does too.  He still has kind of old fashioned ideas about getting dressed up, but I love that Southern part of him.  When going out to dinner, he will sometimes ask me if it is all right for him not to wear a tie.  My answer is always along the lines of, “You know Seattle, you don’t have to wear a tie anywhere” but what he is asking is it all right with me if he doesn’t.  He is a gentleman.

I like our boys to have cool clothes too.  If you have a boy, you know this is no small task.  The choices range from puppy-dog to skater-punk to little-man-suit without a lot of other options.  But I have found brands that I like and they wear a lot of solids and stripes.  I am practical – I know they are hard on clothes and I try to buy everything on sale.  It is nice to have two boys because all of the more expensive things (jackets, fancy shirts) can be handed down from Graham to Spencer.

These Christmas sweaters were Randy’s idea.  It felt old-fashioned to me.  Like pose for the camera with Santa in a stiff sweater kind of thing.  But things like this make him happy so I waited until some that I liked went on sale and last week I came home with these sweaters.  I showed Graham and his face lit up and he ran over and hugged the sweater.  Talk about easy to please.  We put them on and snapped a few shots and I was grateful that Randy pushed on this one.  I will treasure these photos long after the sweaters stop fitting.

After all that clothes talk, I’m not sure how much you want to read about granola.  But stay with me here.  This recipe comes from Melissa Clark’s new book In the Kitchen with a Good Appetite.  She came through town on a recent book tour and I signed up for an event with her where we got a copy of the book as part of the ticket price.  A week beforehand, I found myself in the cookbook section of a bookstore and pulled it down for a sneak peek.  Based on what I saw, I would not have bought the book.  It is very meat heavy with extremely long introductions to each recipe, more stories than I usually like, and no pictures.  But I had already bought my ticket so I figured I would just give the book away.

After bringing it home from the event, a funny thing happened.  I grew to like it.  Really like it.  The stories are funny.  And Clark has serious kitchen chops, having written or co-written many many books, not to mention her ongoing column in the New York Times.  There are a few authors whose taste and recipes I never question – Deborah Madison and Patricial Wells are two that jump to mind – and I think I might soon be putting Melissa Clark in the same category.  Yes, there are entire chapters of the book, a full two-thirds of it practically, that are off limits to me.  But the things I can make (and have made) have been wonderful so far.

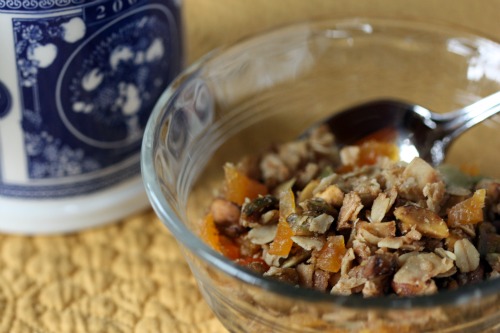
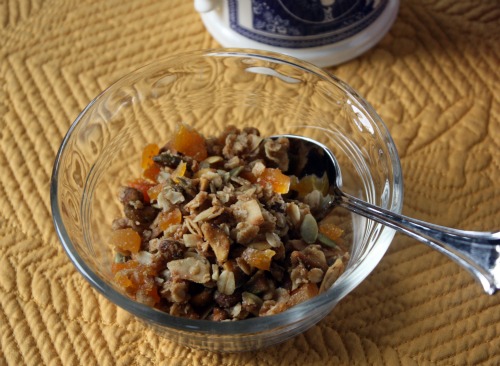
This granola is wonderful.  I have another recipe that I like very much but it has pecans in it which are not my favorite nut.  It also has a lot of butter and honey in it.  There is nothing wrong with either of those things – I just like that this one is different and uses heart healthy olive oil.  In fact, this recipe is vegan and I know vegans who would love a big bowlful with soy milk.

One Year Ago:  Holly B’s Rugelach
Two Years Ago:  Middle Eastern Lentil Rice Rolls with Lemon Tahini Sauce

Olive Oil Granola with Dried Apricots and Pistachios
In the Kitchen with a Good Appetite
Makes about 9 cups

Clark suggests you serve this with fresh ricotta and berries.  Not for me, thank you, but feel free to add this to yours.  I used roasted salted pistachios because that is all I had so did not add the salt.  I used coconut flakes from Bob’s Red Mill and I love their texture here.

3 cups old-fashioned rolled oats
1½ cup raw pistachios, hulled
1 cup raw pumpkin seeds, hulled
1 cup coconut chips
¾ cup pure maple syrup
½ cup extra-virgin olive oil
1/3 cup packed light brown sugar
1 tsp. kosher salt
½ tsp. ground cinnamon
½ tsp. ground cardamom or ginger
¾ cup chopped dried apricots

Preheat oven to 300°F.

In a large bowl, combine the oats, pistachios, pumpkin seeds, coconut chips, maple syrup, olive oil, brown sugr, salt, cinnamon, and cardamom or ginger.  Spread the mixture on a large rimmed baking sheet (about 11×7 inches) in an even layer and bake for 45 minutes, stirring every 10 minutes, until golden brown and well toasted.

Transfer the granola to a large bowl and add the apricots, tossing to combine.  (DT: I just did this on the baking sheet.)


Savory Scones

September 1, 2010

Some people love breakfast.  Other people only eat breakfast because they know they are supposed to and they know that if they don’t, they will inhale an entire table’s worth of food for lunch.  I put myself in the second category.  I never feel hungry in the morning and, consequently, I eat one of the same three things every single day.  Having a rotation of three things is actually fairly recent.  Up until this year, I ate a Luna bar every day for nine years.  Nine years.  Now I alternate with thrilling things like yogurt and cereal.

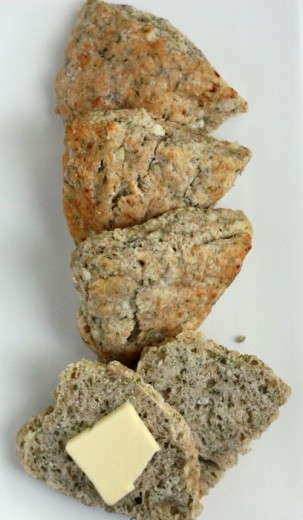
Sweet scones are all well and good but how about a savory scone?  I made these with a combination of dill and aged Cheddar but there are many other combos that would work.  Roasted red pepper and feta, scallion and chèvre, thyme and Gruyère all sound good to me.  I like the idea of serving these with some soup on a fall day in addition to offering them to friends for breakfast.

For this basic recipe, you use a (homemade) scone mix.  After I made the blueberry ones, I had just enough left over for another batch.  I kept the mix in the refrigerator and was so happy to have some on hand so I could make treats for my guests.


Scones previously on Dana Treat:
Almond Praline Scones, Classic Currant Scones|
One Year Ago:
Mint Filled Brownie Cupcakes
Two Years Ago:
Fresh Summer Rolls with Tofu

Savory Scones

Adapted from With Love & Butter
Makes 12 scones

For this recipe, you will need approximately half the Scone Mix.  Or if you want, you can double the Savory Scones and freeze half of them.  Lots of options.

4½ cups Scone Mix
½ cup coarsely grated Cheddar cheese
¼ cup chopped fresh dill
1 large shallot, chopped
½ tsp. freshly ground black pepper
1 cup buttermilk
½ cup cottage cheese

Preheat the oven to 375ºF with the rack in center position.  In a medium bowl, toss together the Scone Mix, cheese, dill, shallot, and pepper.  Drizzle the buttermilk over the surface and blob in the cottage cheese.  (DT: “Blob” is Holly’s word!)  Stir until mixed.  If the dough is too dry to stick together when pressed, add a bit more buttermilk.  You want to be able to make a nice firm shape.

Turn the dough onto a lightly floured surface and pat into two disks about 1½-inches thick.  Cut each disk into 6 wedges and arrange 1-inch apart on a cookie sheet.  Bake in two batches if they don’t fit on one sheet.  Bake 15 minutes, rotate the pan, and bake another 10 to 15 minutes, until the scones are light brown on top and darker on the bottom, and no longer soft and doughy in the center.  When judging doneness, don’t rely on the color of the tops alone.  The tops can look quite light and undone while the bottoms are getting quite brown.

Scone Mix
4½ cups all-purpose flour
1 cup plus 2 tbsp. whole wheat flour
2 tbsp. sugar
1½ tbsp. baking powder
1¼ tsp. baking soda
¾ tsp. salt
2¾ sticks cold butter, sliced

Place all the ingredients except the butter in a large bowl and mix.

Fit your food processor with the steel knife blade.  Put half the butter in the bowl and top with half the dry ingredients.  Pulse until the butter is reduced to pearl-sized bits.  Don’t over process or it will turn into a dough, you want a dry mix.  Pour the processed mixture into another large empty bowl.  Repeat this process with the remaining dry ingredients and butter.  Be sure to break up any large lumps of butter and, when through, toss thoroughly with your fingers.

Transfer the scone mix to an airtight container and store it in the refrigerator for up to 2 months, or in the freezer for up to 6 months.


Incredible Honey

August 9, 2010

After writing this blog for over two years, I’m surprised by how many things you all don’t know about me.  Of course there are plenty of things you don’t know about me the person – Dana.  As opposed to me the cook – Dana Treat.  For example, even if you have met me, you probably don’t know that I have a hitchhiker’s thumb on my left hand but not on my right.  Like my thumb bends all the way back.  I kill at thumb wrestling.

So maybe it is not surprising that I haven’t shared more fascinating things like hitchhiker’s thumbs on my food blog.  But it is a little surprising that I still have some culinary things I haven’t shared.  Like the fact that I love honey.  Did you know that?  I love honey.  It is one of my very favorite things in the whole world.  I use it in marinades and in salad dressings and I stir it into Greek yogurt for breakfast.  I have been known to sneak spoonfuls of it when I am craving something sweet.

Living in a city where there are loads of farmers’ markets, it is easy for me to buy good honey.  Over the years, I have tasted some wonderful honey from Washington bees.  So when the good people at Mohawk Valley Trading Company offered to send some of theirs to try, I hesitated.  But the truth is, I was low on honey and the stuff isn’t cheap so I so I replied yes to their offer.

Not a week later, I got a box with four different jars of the most beautiful tawny-colored honey.  Not only is it beautiful, the flavor is so different than any honey I have tasted.  It is thicker, richer and more floral than anything I have ever used.  It seems a shame to put it in things where the amazing flavor gets masked by other ingredients.  I wanted to make something that would take advantage of the unique flavor and texture of this special honey.  (And yes, honey can have texture.  You know how you put a spoon in a jar and the honey almost immediately runs off?  This stuff really coats your spoon.  You have to coax it off.)

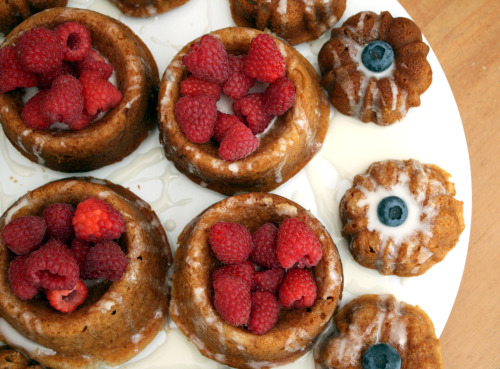
These mini bundt cakes were one of the first things I noticed in the first Ottolenghi cookbook.  I had seen a display of the adorable cakes in the window of the restaurant while in London in June.  Is there anything more tempting than a little cake sized perfectly for one?  For some reason I would totally buy one of these but not a slice of a large cake.  Anyway.  In the recipe, Ottolenghi mentions that the pans are not easy to find in England but we Americans can find them more easily.  (See?  Americans don’t like everything super-sized.)  I found mine in a local kitchen shop and I would imagine they can be tracked down online.

I was a little stumped as to how best to make these.  I needed about 20 of them and there are only 12 cakes in the molds.  I didn’t want to bake a whole batch, allow the molds to cool, and then bake another batch.  I have another larger mini-bundt pan mold so I doubled the recipe and just hoped for the best.  I ended up getting all my mini-bundts, a whole tray of mini-muffin size cakes and a small loaf cake.  The bundts got eaten at the party, the boys snacked on my mini-muffins, and the loaf cake is in the freezer.

I don’t know if I have ever written a paragraph quite as boring as that one.  What I am trying to tell you is that if you make the recipe as written below, I have no idea of how many cakes you will end up with.  Just get out all your fun sized pans and go for it.  Whatever you end up with will be the most delicately flavored but substantially textured cake.  If you leave it plain, it is perfect for an afternoon tea or even for breakfast.  Or you can dress it up with a drizzle of glaze and some lovely berries and call it dessert.

And speaking of dessert, my blog duty at Amazon Fresh has started back up again.  This week I posted a recipe for a very delicious and very easy cheesecake ice cream.  You can read it here.

Honey and Lavender previously on Dana Treat: Lavender-Honey Ice Cream
One Year Ago: Cheese Balls Three Ways
Two Years Ago: Olive and Jarlsberg Sandwich

Lavender and Honey Tea Cakes
Adapted from Ottolenghi, The Cookbook
Makes ??

8 ounces unsalted butter, room temperature
4 ounces sugar
4 ounces best quality honey
3 large eggs
8 2/3 ounces flour
1 tsp. baking powder
½ tsp. baking soda
½ tsp. salt
½ tsp. ground cinnamon
½ tsp. dried lavender, chopped
½ cup sour cream

Glaze
1 tbsp. fresh lemon juice
2 tsp. honey
3½ oz. powdered sugar

Berries for garnish, optional

Preheat the oven to 340ºF.  Grease your pans with butter.

Cream the butter, sugar, and honey together until pale and fluffy, preferably using an electric mixer.  Break the eggs into a cup, beat them lightly with a fork and gradually add to the creamed mixture, beating well until each little addition has been fully incorporated.  Sift together the flour, baking powder, baking soda, salt and cinnamon, then stir in the dried lavender.  Gently fold the flour mixture into the creamed mix in 3 additions, alternating with the sour cream.

Carefully fill your molds or pans.  If you are using molds, only the fill them to within a ½-inch of the top.  Place in the oven and bake for about 25-30 minutes, depending on what size pan or molds you are using.  You will want a skewerer inserted into the center of the cake to come out clean.  Remove them from the oven and leave them for 10 minutes, then turn out onto a rack to cool completely.

To make the glaze, mix the lemon juice and honey together in a small bowl, then whisk in enough powdered sugar to make a thick pourable glaze.  Use a pastry brush or a spoon to coat the top of the cakes, allowing the icing to drip down the sides.  Garnish with berries, if desired.

(DT: Even though I was careful about not overfilling my pans, I still got a rounded bottom on my small cakes.  I just sliced off a thin bit so they would stand up straight.)


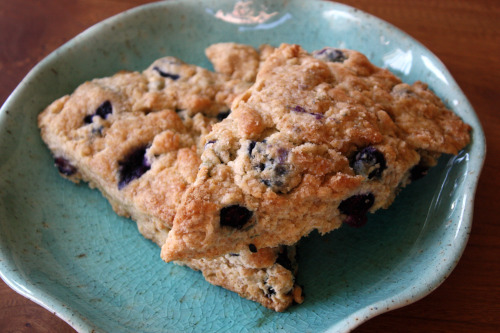
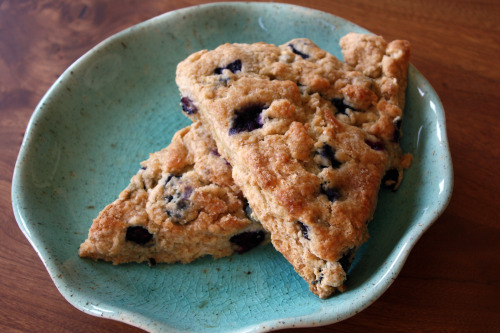
Holly B’s Fruit Scones

July 30, 2010

We have an interesting phenomenon in our house.  If you are a parent, perhaps you are familiar with this one.  It’s the “whenever I don’t have much of something the kids want tons of it, but when I buy tons of it, the kids want nothing to do with it” phenomenon.  There is an additional part to it which is the “whatever the kids love and adore at their friends’ houses, they will not eat at home”.

Blueberries.

Last Friday, I brought the boys to a favorite farmers market and I needed some berries for a dessert for the next day.  I bought a half flat – three boxes of blueberries, two of raspberries, and one of strawberries.  The boys were literally eating the blueberries by the handful, shoveling them in their mouths like I had never given them fruit before.  But I had to cut them off because I needed some of those blueberries and they acted like I had just taken ice cream cones away from them.

So on our way home from a family birthday celebration on Lopez Island, as we passed farm stand after farm stand full of berries, we pulled off and I bought a full half flat of blueberries.  They had a few and now are over it.  Which leaves me with precisely almost a full half flat of blueberries.  Only one thing to do with them.

Actually, there are lots of things I could do with them and considering I still have lots left over, I will be doing something else.  (Suggestions?)  The reason I went right to scones is because of good old Holly B.  We left for Lopez on Sunday and my sister-in-law Amy, who was leaving the island just as we were arriving, was kind enough to text me that Holly B’s would be closed on Monday, my birthday, for an “over-the-hump” day.  WHAT?? The nerve!  So we made sure to stop off on the way to the house.  Usually, when we go for the weekend, I have at least two visits to the bakery.  This time there was only one and if you can only go once, you have to get a cinnamon roll.  At least if you are me.  Oh yes, I could have gotten multiple things but there is such a thing as OD’ing on baked goods (oh yes there is!) and I’d rather than have a little than too much.  So I baked scones instead of buying them at the bakery.

Truth be told, I’m not a big scone girl.  Or muffin or pancake girl.  I like my breakfasts on the savory side and if I am going to eat something with loads of butter, I would rather have a brownie.  But when fruit is calling you and you have just seen gorgeous scones in a favorite bakery that you didn’t get a chance to sample, it’s time to make scones.

Now I have to tell you about my new favorite flour.  Over the past couple of months, I have gotten numerous emails from companies offering me free things with the idea that I will blog about them.  Many of the products are things I would never use but occasionally something catches my attention.  One of the first offers I got was for some flour from a company called Stone-Buhr.  Stone-Buhr works with wheat farmers in Washington, Oregon, and Idaho and has a web site (www.findyourfarmer.com) where you can find out where your bag’s wheat came from.  Cool, huh?  I’ve been a loyal King Arthur flour user for years but I love the idea of supporting local farmers and I have now officially made the switch.  After using up my free bag in a hurry (I go through a lot of flour), I was thrilled to find Stone-Buhr in my local grocery store.

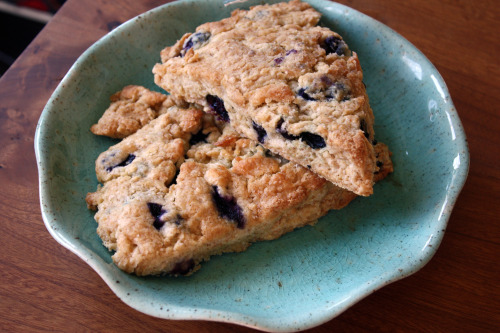
Back to the scones.  I really liked these because they are not too sweet so that the fruit can shine through.  There are all kinds of combinations you could use here and just about everything would be good.  Holly’s original recipe has you make a giant amount of scone mix which, although it keeps well, is not something I feel like storing in my refrigerator.  I cut it in half which is why some of the measurements might sound a little odd.  You will still have enough for two batches of scones.

One Year Ago: Indian Spiced Chickpea Salad
Two Years Ago: Raspberry Cake with Marsala

Holly B’s Fruit Scones
Adapted from With Love & Butter
Makes 8 large scones

Scone Mix
4½ cups all-purpose flour
1 cup plus 2 tbsp. whole wheat flour
2 tbsp. sugar
1½ tbsp. baking powder
1¼ tsp. baking soda
¾ tsp. salt
2¾ sticks cold butter, sliced

Place all the ingredients except the butter in a large bowl and mix.

Fit your food processor with the steel knife blade.  Put half the butter in the bowl and top with half the dry ingredients.  Pulse until the butter is reduced to pearl-sized bits.  Don’t over process or it will turn into a dough, you want a dry mix.  Pour the processed mixture into another large empty bowl.  Repeat this process with the remaining dry ingredients and butter.  Be sure to break up any large lumps of butter and, when through, toss thoroughly with your fingers.

Transfer the scone mix to an airtight container and store it in the refrigerator for up to 2 months, or in the freezer for up to 6 months.

Fruit Scones
3¼ cups scone mix
¼ cup sugar
1 cup fresh or frozen fruit, berries left whole, other fruit cut into ½-inch cubes
¾ cup buttermilk
Sugar for topping the scones

Preheat the oven to 375ºF with the rack in the center position.

In a medium bowl, toss the Scone Mix and sugar together with your fingers.  Add the fruit and toss again until just-mixed.  Frozen fruit will begin to melt and bleed at bit – this is OK.  Drizzle the buttermilk over the mixture and stir gently.  The mixture should be just wet enough to make a ball when pressed together.  If too dry, drizzle on more buttermilk.  Dryer is better than wetter.

Turn the dough onto a lightly floured surface and form into a disk 1½ inches thick.  Sprinkle generously with sugar.  Cut the circle into 8 wedges.  Place the scones at least 1 inch apart on a baking sheet.

Bake 10 minutes, rotate the pan, and bake 5 to 10 minutes more or until the scones are brown on the bottom (check with a spatula) and slightly brown on top.  The baking time maybe shorter if you are using fresh fruit.  Cool, or serve warm.

(DT: These get a bit soggy after a day or so, but still taste delicious.  You can always freeze them.)


Leek Frittata and a Big Question

April 22, 2010

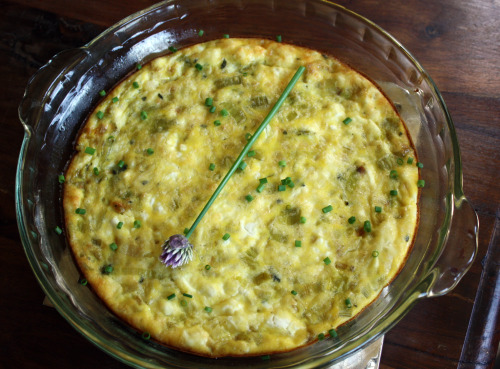
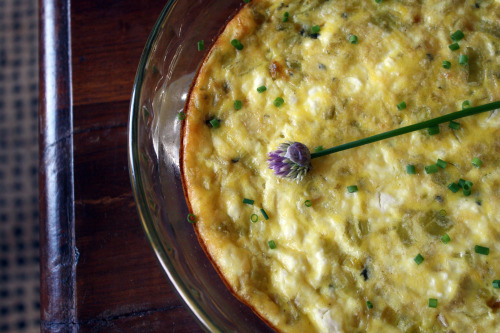
Yes, I want to tell you about this very good, very simple frittata I made for brunch on Sunday.  It uses those incredible leeks and it was delicate and delicious in a ladies-who-lunch kind of way.  It could probably be made more substantial with extra eggs, milk, and cheese – but our guests liked it just the way it was.  This morning I have been dreaming about putting it on a ciabatta roll slathered with aioli and topped with thin slices of tomato and peppery arugula.  For breakfast.  Or lunch, or dinner.  Or all three.

Seeing as it is a winner, I will most definitely share the recipe but first I have an important question to ask.

For a long time, I have been wanting another tattoo.  I have a small Leo symbol on the back of my left shoulder.  It’s about the size of a half dollar (remember those?) and I got it when I was 22.  At the time, I wanted something that I knew I could relate to the for the rest of my life.  I considered getting the Pearl Jam symbol but thought I may not be a Pearl Jam fan when I was 40 but would always be a Leo.  (As it turns out, I am 3 months away from 40 and still a Pearl Jam fan.)

Anyway, my tattoo is sideways (the guy made a mistake) but I have loved having it.  I feel like I have a special secret and I love those few months in Seattle when I can wear things that make it visible.  Now I feel like I am ready for something more out there, something that I can show on a daily basis.  For the past year or so, I have thought about getting something on my left forearm but haven’t been able to come up with the right thing.  I want something pretty and feminine – something that would look right with a short-sleeved shirt and jeans, and something that would look right with the amazing dress I will wear to celebrate my 40th birthday.

I had dinner with a friend recently who has a gorgeous spoon on her upper arm.  She is a chef and it is the perfect thing for her.  I love the idea of doing something related to food but I want something more feminine – more girlie.  I was telling Randy about it and he said, “Why don’t you get some kind of herb?”.  And then it hit me.  Chives.

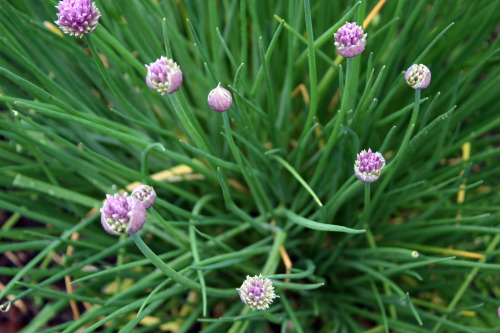
We have a gorgeous chive plant in our front yard.  It is the first of our plants to bloom and it produces all spring and summer.  I love the long green stem and the delicate yet substantial purple blossom.  I love purple.  I love purple and green together.  I love herbs and I love chives and, of course, I love to cook.  Doesn’t this seem like a natural fit?  It’s pretty, it relates to my life in food…I feel like it’s me.

So – here is where you come in.  Am I crazy?  Would this look beautiful or just weird?  Will I love it in 20 years or regret it?  This is, obviously, a big decision, and I am definitely looking for feedback, so tell me.  What do you think?  In the meantime, while you are pondering, make this frittata.  Delicate, lovely, delicious.

Leek Frittata
Dana Treat Original
Serves 4

¼ stick unsalted butter
2 large leeks, white and very pale green part only, cut in half lengthwise and then sliced into ¼-inch thick slices
1½ tsp. chopped fresh thyme leaves
1 tbsp. water
¼ tsp. salt
6 eggs
½ cup whole milk
1/2 cup soft goat cheese, such as Montrachet, divided
Salt and freshly ground black pepper
Chives, for garnish

Preheat the oven to 375ºF.  Spray a 9-inch pie plate with non-stick spray (or lightly coat it with oil).

Melt the butter in a large skillet over medium-low heat.  Add the leeks along with the salt and stir to coat.  Add the thyme and cook until starting to soften, about 4 minutes.  Add the water and reduce heat to low.  Cover the skillet and cook, stirring occasionally, until the leeks are meltingly tender, about 25 minutes.  If there is still liquid in the skillet, remove the top and allow it to cook off.  Remove from heat and set aside to cool for a few minutes.

Crack all of the eggs into a medium mixing bowl and give them a good whisk.  Add the milk and whisk again.  Add the leeks and mix together, then add half the goat cheese and stir carefully.

Pour the egg mixture into the pie plate and crumble the remaining goat cheese over top.  Place in the oven and allow to bake until the middle is set, and the edges are only very light brown, about 20 minutes.  Remove from the oven and allow to sit for 5 minutes before serving.  Can be eaten warm or at room temperature.  Or cold from the refrigerator the next day.


« Older Posts Newer Posts »