Archive for February, 2012

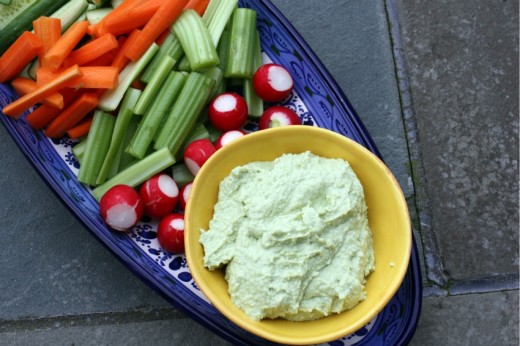
What Is In This Dip?

February 14, 2012

I used to make a dip that I called The Dip.  I made it often and I loved it.  Simple, nutritious, easy to scale up, healthy.  Tasty.  I brought it to multiple yoga retreats.  I made it for parties.  People would ask, “Is this The Dip?”, and then they would use whatever scooping utensil that was handy to bring it to their mouths.

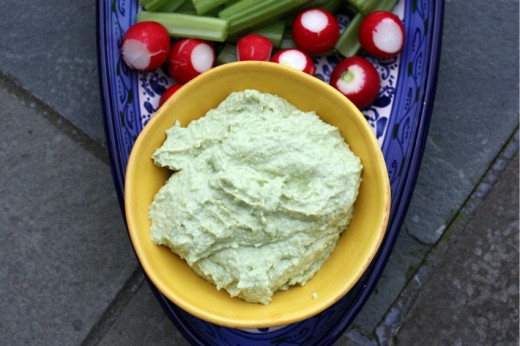
Then I saw Lisa talk about another Dip.  Similar to the one I made but with a few important differences.  Lisa doesn’t usually post the actual recipes for the food she makes, she just talks clearly about the ingredients.  So I bought the things I needed and made it to taste.  And got totally hooked.  Now this dip has become The Dip.  I always do it to taste but because I think it is really extraordinary, I decided to actually measure out what I add to it so I could share.  It is creamy (thank you silken tofu), a bit sweet (honey), a bit acidic (lime), and has a wonderful nose-clearing spice (wasabi).  All this things mix together to make an intriguing dip that people will ask you about endlessly.

The veggies and dip tray is the thing I tend to hover around at big parties.  This is partly so I don’t hover around the loaded potato skins tray but also because I really like veggies and dip.  Even the super gross pre-made-full-of-chemicals-and-fat dip.  So it is extra nice to be able to enjoy this dip knowing it is full of good stuff.

One Year Ago:  Somen Noodle Soup with Spring Vegetables and Baked Tofu
Two Years Ago:  Honey Roasted Pear Salad
Three Years Ago:  Tom Yum Soup with Mushrooms and Tofu

Wasabi Dip
Dana Treat Original
Makes about 2 cups

Silken tofu is not usually refrigerated.  It is in shelf stable packaging and can usually be found on the Asian food aisle.  It comes in bricks that weigh about 12 ounces but you will not use the whole thing.  I like this dip with quite a lot of heat but if you want less, add just 1 tablespoon of wasabi paste.

1 10-ounce bag frozen shelled edamame
8 ounces silken tofu
2 tbsp. honey
2 tbsp. wasabi paste
1 tsp. salt
Juice of 1 lime
2 tbsp. olive oil

Bring a medium pot of water to a boil.  Add a pinch of salt and then pour in the edamame.  Cook for 3 minutes, drain and cool.

Put the edamame in the bowl of a food processor fitted with the steel blade.  Add the tofu, honey, wasabi paste, salt, and lime juice.  Purée the mixture, stopping several times to scrape down the sides of the bowl, until it is more or less uniform.  It might still be a bit chunky.  With the machine running, pour in the olive oil.  You might use more or less than 2 tablespoons depending on how loose you want the dip to be.  Taste for seasoning and add more honey, salt, or wasabi to your liking.

Serve with crudité and/or pita chips.


A Slice of My Life – Week 6

February 12, 2012

The boys are now at an age where I can take them to a park on a sunny day, bring my New Yorker, and read a bit.  I’m no longer walking behind them waiting for them to fall, helping them go down the slide, or pushing them on the swings.  Except when we come this park and there is an inevitable, “Mommy!  Help me get down!” coming from Spencer.

At Graham’s school, there is a community garden.  Once a month, the kids all eat a vegetable that comes from that garden.  Graham came home from school saying, “I ate kale!” which made his vegetarian mother very proud.  At the farmers’ market he was able to not only pick out the kale but identified it correctly as dinosaur kale.

The view from the house where we watched the Super Bowl.  Can you imagine waking up to that every day?

A couple of weeks ago, I found myself in a very cool neighborhood of Seattle and wanting a cup of coffee.  I had to walk two whole blocks before I found a coffee shop.  Now in this other very cool neighborhood there are two amazing options within 20 paces of each other.  That’s more like it.  A note on the color of the sky.  I know you know that it rains in Seattle.  In case you didn’t, it rains in Seattle.  But it is also gray gray gray for days and days and days.  This is kind of the constant color of the sky from November to June.  Which is why people freak out on Twitter and Facebook and on their blogs when we have sunny days in the winter.

I remember wandering around bookstores when I was in my early 20’s and pretty broke.  I would only let myself buy one thing and never a hardback book.  I promised myself that someday, when I wasn’t broke, I would buy what books I wanted, several at a time if they spoke to me.  Put me in an independent bookstore now and I can’t control myself.  I know there is this thing called a Kindle.  My husband even has one.  But I am a book girl.

I realize that showing you my child’s drawings might be a little bit like telling you my dreams.  In other words, you are not that interested.  I can’t help it.  Spencer’s drawings absolutely crack me up with the arms coming out of heads and no noses.  This is our family (can’t you tell?) all jumping on trampolines.

Friday was “Bring Your Stuffy to School” day for Graham.  I read the email and yet I forgot to pack his beloved friend in his backpack.  His lovely teacher called me in the late morning telling me he was holding it together but if at all possible, to bring Hippo.  So Hippo and I took a little trip to school.

Not only did I get flowers from my boys for Valentine’s Day, they came a few days early.  I’m a lucky lady.


Green Curry Noodles

February 10, 2012

Last weekend, the boys and I went to the West Seattle farmer’s market.  It is one of the three markets that stay open all year.  Although it is a bit of a hike from our house, I like this market because it is food only, some of the very best vendors are there, it doesn’t feel crowded, they often have music and little seats set up for children, and it’s in the middle of a thriving business district.  The weather last week was glorious and it almost felt like spring was just around the corner.  A trip to the market made me realize that winter is definitely still here.

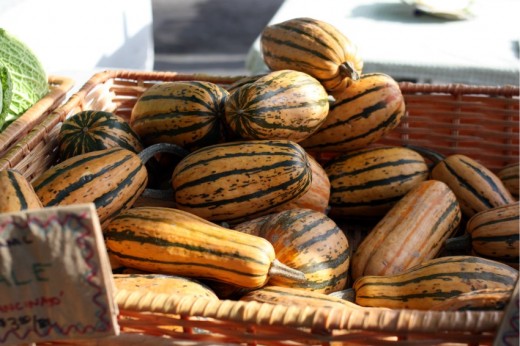
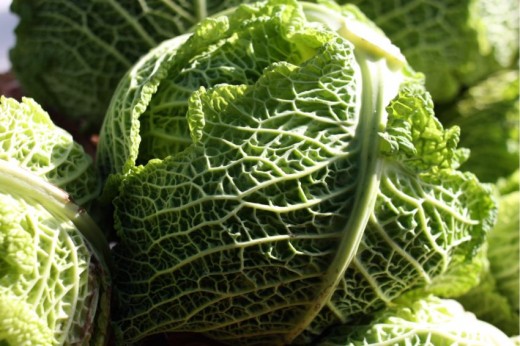
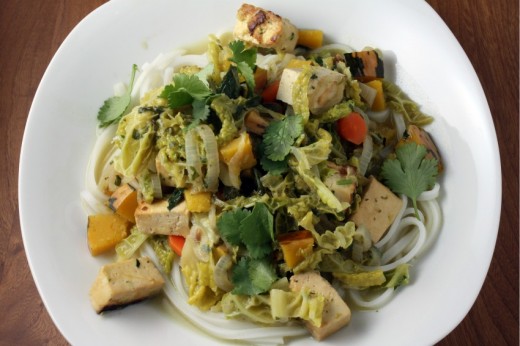
I find the farmers’ market inspiring, even in February.  After making that amazing Sweet Winter Slaw five times in two weeks, I had seen a lot of Savoy cabbage – but not like this one.  How could I not buy this beauty?  And with delicata squash in the basket right next to it, a dish began to form in my mind.  Green curry, lots of shallots, rice noodles, sweet squash, cabbage cooked down to wilted.  Sounds good, no?

It was good.  Lovely really.  Warming, hearty, healthy.  I think those three words are magic in the wintertime.  If you can find or create a dish that warms your toes, fills your belly, and doesn’t weigh you down, life is pretty good.

Allow me to try to convince you to make your own curry paste.  Yes, I know that you can buy a nice little jar of it that lasts almost indefinitely in your refrigerator.  I have two of those jars myself, one green and one red.  The problem is that the consistency is similar to cement, so it can be a little difficult to incorporate into a dish.  It also has essentially two flavors.  Hot and salty.  There is no nuance there.  Just spicy and savory.  Nothing wrong with that if you are having a curry crisis.  But homemade is quick to make, has much more subtle flavor, a much looser consistency, and will also keep for a while in your fridge.  (I would say a  month.  You can freeze it for up to six.)  The ingredients are all natural – lemongrass, jalapeño peppers, cilantro, shallot, garlic.  If you love these ingredients, please give the curry a try.

One Year Ago:  Spicy Sweet and Savory Cauliflower
Two Years Ago:  Pesto Parmesan Cornbread
Three Years Ago:  Red Curry with Winter Vegetables and Cashews (recipe for red curry in this one!  coincidence!)

Green Curry Noodles with Cabbage and Squash

Dana Treat Original
Serves 4

While you should never rinse your Italian style noodles, rice noodles do need a good rinse.  This step will keep them from sticking together.  Both Savory and Napa cabbage would work here.  I wouldn’t use green as it will take to long to soften and purple will turn your whole dish a crazy color.  Finally, if you do decide to use a commercial curry paste, I would start with one tablespoon and add more later to your taste.

10 ounces extra firm tofu, blotted dry and cut into 1-inch pieces
4 tbsp. soy sauce, divided (I like tamari)
8 ounces rice noodles, linguine width
Canola, peanut, or coconut oil
6 ounces shallots, peeled and thinly sliced
Kosher or sea salt
½ medium delicata squash, seeded, and cut into 1-inch chunks
1 carrot, peeled and cut into thin rounds
2-3 tbsp. homemade Green Curry Paste (recipe follows)
½ head Savoy cabbage, cored and thinly sliced
1 14-ounce can coconut milk (can be “lite”)
1 cup vegetable broth
½ cup chopped cilantro, plus a few whole leaves for garnish

Place the tofu in a large ziploc bag.  Sprinkle in two tablespoons of the soy sauce and give the bag a vigorous shake.  Allow the tofu to marinate while you prepare the noodles.

Bring a large pot of water to a boil.  Turn off the heat and add the rice noodles to the pot.  Allow to sit for ten minutes, stirring occasionally, then taste.  The noodles should be al dente.  Allow them to sit for another few minutes if they are too firm, then drain.  Immediately rinse very well with cold water.  Run your hands through the noodles to make sure the water reaches the ones on the bottom.  Allow to drain well.  Set aside.

Heat a large skillet over medium-high heat.  Drizzle in just enough oil to coat the bottom of the pan.  Carefully add the tofu to the pan, making sure that all the pieces are touching the bottom of the pan.  Allow to cook for about 3 minutes on one side then, using tongs, turn all the pieces over.  They may stick a little and that is ok.  If you have the patience, you can brown all sides of the tofu, but I usually stop at two.  Scrape the tofu to a plate and sprinkle with salt.  Set aside.

Return the skillet to the heat.  Drizzle in a bit more oil and then add the shallots and sauté, tossing occasionally, until the shallots are soft and starting to brown in places, about 6 minutes.  Add the squash and the carrot, then spoon in the curry paste.  If you are nervous about the heat, just use two tablespoons to start.  Give everything a good stir.  Add the cabbage and toss until the cabbage starts to wilt, about another 5 minutes.  Pour in the coconut milk and the broth and the other 2 tablespoons of soy sauce.  Toss to coat well, reduce the heat to medium-low and cover.  Cook for about 15 minutes, stirring occasionally.

Remove the lid and taste the broth.  You might want to add more curry paste or more soy sauce.  Once it is to your liking, add the tofu and chopped cilantro and cook for another 5 minutes.  Check the squash and carrot to make sure they are tender and also adjust the liquid amount to your taste.  If you prefer a saucier dish, add more stock.  If you want it drier, allow the mixture to cook without the lid to allow some of the liquid to evaporate.

To serve, place a bundle of noodles in the bottom of a shallow bowl and ladle on the vegetables and tofu in their sauce.  Garnish with cilantro leaves.

Green Curry Paste
Adapted from Real Vegetarian Thai
Makes about 1½ cups

1 tbsp. whole coriander seeds
1 tsp. whole cumin seeds
½ tsp. freshly ground black or white pepper
3 stalks lemongrass
4 fresh green jalapeño chilies, seeded for a milder heat, roughly chopped
¼ cup coarsely chopped fresh cilantro leaves and tender stems
2 medium shallots, chopped
3 cloves garlic, chopped
2 tbsp. chopped or grated fresh ginger
Zest of 1 lime
1 tsp. kosher or sea salt

In a small skillet over medium heat, dry-fry the coriander and cumin seeds until they turn a shade or two darker, shaking the pan and stirring often, about 3 minutes.  Turn out onto a plate to cool.  Grind the spices in a coffee grinder or with a mortar and pestle.  Set aside.

To prepare the lemongrass, trim away and discard any root section below the bulb base, and cut away the top portion, leaving a stalk about 6 inches long, including the base.  Pull off the out layer and then thinly slice the rest.

Combine the lemongrass, chopped chilies, cilantro, shallots, garlic, ginger, lime zest, salt, and spices in a mini food processor or a blender.  Pulse to combine to a smooth paste, scraping down the sides of the bowl as necessary.  You might need to add just a couple tablespoons of water to keep the blades moving.  Store in an airtight container in the refrigerator for up to one month.


Addictive

February 9, 2012

Short and sweet today.  You may recall that I promised lots of food this week.   There is lots of food waiting to be talked about but no time to talk about it in.  Next week!

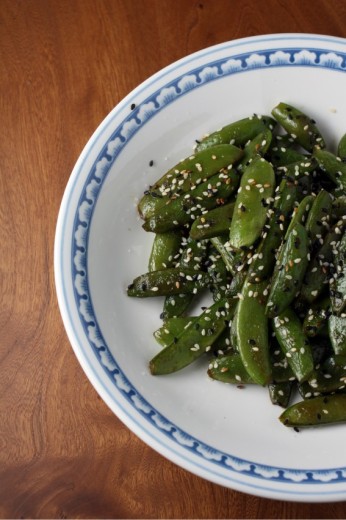
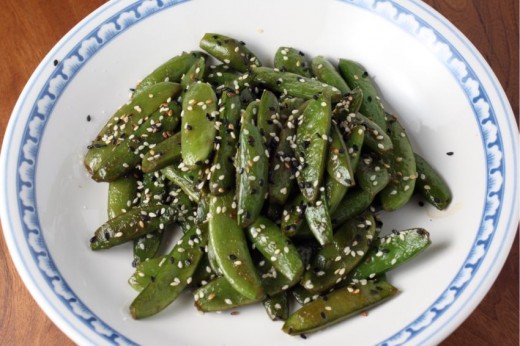
Do you have a thing that, no matter how much you make, it all gets eaten?  Up until last spring, I had that experience with only two things.  Popcorn and guacamole.  Then, in one of my cooking classes, I made these snap peas and was astounded to watch every last one of them get eaten.  Dinner parties – gone.  Last month’s yoga retreat – gone.  They are addictive, salty, nutty, crunchy.  They are also quick, healthy, and vegan.

I always de-string my snap peas and I have been surprised to hear that other people don’t do so.  I find if I don’t do that, this charming vegetable becomes less charming.  The fibrous string is hard for me to choke down so if you haven’t done this step, give it a try.  They don’t always come off.  In my experience, the fresher the pea, the more readily the string comes off but I don’t know if there is any scientific basis in that.  Using my fingers, I just “snap” one end and pull it towards the middle along the top of the pea and then “snap” the other end and pull it toward the middle along the bottom.

One Year Ago:  Dried Cranberry and Ginger Canoli
Two Years Ago:  Apple Torte
Three Years Ago:  Vegetarian Caesar Salad

Sesame Snap Peas
Dana Treat Original
Serves 4

Don’t let the simplicity of this recipe fool you into thinking these are nothing special.  They are special.  They can be made even more so by the addition of a bit of minced garlic and ginger, added about a minute before the snap peas, but they are equally delicious without.  I had some gomasio, a Japanese condiment made from white and black sesame seeds and salt, on hand and used that to garnish but plain old sesame seeds are good too.

1 tbsp. canola oil
10 ounces sugar snap peas, strings removed
1 tsp. kosher salt
2 tsp. toasted sesame oil
2 tbsp. soy sauce
Sesame seeds (for garnish)

Place a medium sauté pan over medium-high heat.  Drizzle in the canola oil and swirl around the pan.  Add the snap peas and salt and cook, tossing occasionally, for 3 minutes, or until starting to brown in places.  Drizzle in the sesame oil, give the peas a toss, then pour in the soy sauce.  Cook for one more minute, just until the sauce starts to get syrupy, then pour out onto a serving plate.  Garnish with sesame seeds.


Birthday Cake for the Birthday Boy

February 7, 2012

By many peoples’ standards, we spoil our children.  We have a basement full of toys, bikes in the garage, an X-Box and other gaming things, and lots of movies to watch.  We go on nice vacations.  Both boys have plenty of clothes to wear and ski gear (though we rent skis and boots).  Their chores consist of bringing over their plate after dinner and cleaning up their rooms.  They get a lot of hugs and kisses and treats after dinner.

But.  We are sticklers about manners and being polite and respectful to adults and kids both older and younger.  We try to encourage awareness about how lucky they are without being morbid about it.  About once a year we go through our toys and clean out things they are not using to give to children who are less lucky.  They are old enough to understand that we can go look in a toy store but we are not going to buy anything.  (Unless they are with dad, who usually caves.)

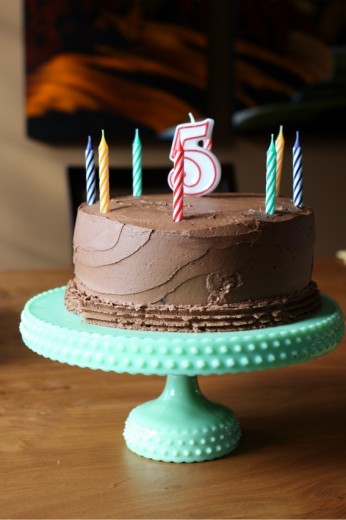
This year Spencer is getting two birthday cakes.  This is the first year that we are having a real true party for him.  I’m not the mom who treasures throwing themed birthday parties for my kids complete with perfect invitations and favors.  I try and farm the party part out.  Seeing as Spencer is the second child, we tried to get away with just doing family for as long as possible.  There have been years where we have been in Sun Valley over his birthday (spoiled!).  But this year we are home, he turned five, and we are doing a trampoline party (spoiled!).

Spencer wants a Batman cake for the party which we will be getting from the same bakery as Graham’s cake.  Mommy doesn’t do Batman cakes.  Or she could, but it would end up looking like a gerbil cake or a blob cake which wouldn’t make him very happy.  For his “real” birthday cake, we sat down with several of my baking books and paged through options.  “I want that one!  Or wait, I want that one!  No, that one!”, is kind of how the conversation went.  I thought we were going with a lemon cake with a meringue frosting when he spied a cake in Flour that sealed the deal.  I guess to him it just looked like a birthday cake.  That may have been because there are birthday candles on the cake in the photo.  At any rate, I was glad to make a traditional cake that I knew he would like.

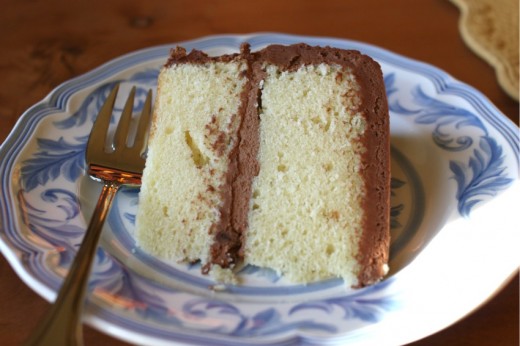
I feel like some of my cookbooks are kind of like the good guy friend in college who patiently listens to your love life failures, all the while secretly hoping you will actually notice him.  Flour has been sitting on my shelf for about a year now.  I made a couple ho hum things from it in the first few weeks after purchase and then moved on to brighter shinier things.  I knew it would house some good birthday cake ideas and this perfect birthday cake was in there waiting for me all this time.  Actually, not perfect, but pretty darn good.  The cakes themselves were very crummy and the frosting kind of set up too much after I put the cake in the refrigerator with the crumb coat, but the taste and the look was pretty close to perfect.  According to the birthday boy, that is.
One Year Ago:  Macaroon Brownie Bars, White Chocolate Tiramisu, Red, White, and Green Lasagne
Two Years Ago:  Olivetta Loaf, Spicy Smoky Chili
Three Years Ago:  Roasted Orange Pepper Soup, Mushroom Enchiladas, Broccoli and Red Pepper Pie, Chocolate Chip Cupcakes

Yellow Birthday Cake with Fluffy Chocolate Ganache Frosting
Flour
Makes one 8-inch layer cake (serves 8-12)

I’m giving you the (very wordy) recipe as written in the book.  A couple of tips.  The cake cools completely in the pans, presumably because it is large and thick, so be sure to grease them well and use a parchment round in the bottom of the pan.  I always refrigerate my cakes with a crumb coating for about 30-60 minutes, but I think the frosting hardened up too much during the waiting time.  So be sure to follow her advice and just frost the cake right after the crumb coating.  She recommends using non-fat buttermilk but I can never find that so I just used low fat.

1½ cups (3 sticks) unsalted butter, room temperature
2 cups granulated sugar
3 eggs
3 egg yolks
1 tsp. vanilla extract
3 cups cake flour
1 tsp. baking powder
½ tsp. baking soda
½ tsp. kosher salt
1 cup buttermilk

Fluffy Chocolate Ganache Frosting
12 ounces semisweet chocolate, finely chopped
1 cup heavy cream
1 cup (2 sticks) unsalted butter, at room temperature
1 cup confectioners’ sugar
¼ tsp. kosher salt
½ tsp. vanilla extract

Position a rack in the center of the oven and heat the oven to 350ºF.  Butter and flour two 8-inch round cake pans.  (DT:  Don’t forget the parchment here!)

Using a stand mixer fitted with the paddle attachment (or a handheld mixer), cream together the butter and granulated sugar on medium speed for 3 to 4 minutes, or until light and fluffy.  (This step will take 8 to 10 minutes if using a handheld mixer.)  Stop the mixer a few times  and use a rubber spatula to scrape the sides and bottom of the bowl and the paddle to release any clinging butter or sugar.

In a small bowl, whisk together the eggs, egg yolks, and vanilla just until combined.  On low speed, slowly pour the egg mixture into the butter mixture and mix just until incorporated.  Scrape the bowl and paddle again, then beat on medium speed for 20 to 30 seconds, or until the mixture is homogeneous.

In a medium bowl, sift together the flour, baking powder, baking soda, and salt.  On the lowest speed, add about one-third of the flour mixture to the egg-butter mixture and mix just until barely combined.  Immediately pour in about half of the buttermilk and continue to mix on the lowest speed until the buttermilk is almost thoroughly incorporated.  Stop the mixer and scrape the sides and bottom of the bowl well.  Again on the lowest speed, add about half of the remaining flour mixture and mix just until barely combined.  Add the rest of the butter milk and mix just until combined.  Be careful not to overmix.

At this point, it is best to finish the mixing by hand.  Remove the bowl from the  mixer stand and, using a rubber spatula, fold in the remaining flour mixture until the batter is just homogeneous.  As you fold, be sure to incorporate any batter clinging to the sides and bottom of the bowl.  Divide the batter evenly between the prepared cake pans.

Bake for 40 to 50 minutes, or until the ops are golden brown and the cakes spring back when pressed in the middle with a fingertip.  Let cool completely in the pans on wire racks.  (The cooled cakes can be tightly wrapped in plastic wrap and stored  in the freezer for up to 1 week.  Thaw at room temperature, still wrapped tightly in plastic wrap.)

To make the ganache frosting:  While the cake layers are cooling, put the chocolate in a medium heat-proof bowl.  In a small saucepan, scald the cream over medium-high heat (bubbles start to form around the edge of the pan, but the cream is not boiling).  Pour the hot cream over the chocolate and let sit for about 1 minute, then slowly whisk together the chocolate and cream until the chocolate is completely melted and mixture is smooth.  Let sit at room temperature for 1 to 2 hours, or until completely cool.  (Or refrigerate the ganache until cool, about 30 minutes, whisking every ten minutes.)

Fit the stand mixer with the paddle attachment (or use a handheld mixer) and beat the butter on medium-low speed for 10 to 15 seconds, or until smooth.  Add the confectioners’ sugar, salt, and vanilla and continue to beat on medium-low speed for about 2 minutes, or until the mixture is fluffy and smooth.  Stop the  mixer a few times and use a rubber spatula to scrape the bowl and paddle to release any clinging butter or sugar.  On medium speed, add the cooled ganache and beat for about 2 minutes, or until completely combined.  Stop to scrape the sides and bottom of the bowl.  Turn up the mixer speed to medium-high and beat for about 1 minute, or until the frosting lightens in color and thickens.  You should have about 4 cups.

Remove the cooled cakes from their pans.  (Be sure they are completely cool.  If they are even the slightest bit warm, the frosting will melt and you will have a mess.)  Using a long, serrated knife, trim the top of each cake to level it (the layers will have rounded a bit in the oven; the trimmed scraps make great nibbles).  Place one cake layer on a cake plate or cake pedestal (if you have a revolving cake stand, use it.)  Spoon about 1 cup of the frosting on top and use an offset spatula to spread it evenly to the edges.

Carefully place the second layer top-side down (so the even sharp edges will be on the top of the finished cake), on top.  Spoon about 1 cup of the frosting on top and spread it over the top and down the sides of the cake, smoothing the frosting as well as you can and covering the entire cake with a thin layer.  This the crumb coat which will keep any loose crumbs from migrating to the surface of the finished cake.  Spoon a heaping cup of frosting on top of the cake, an spread it evenly across the top and down the sides.  This is the finishing layer of frosting.  If desired, spoon any remaining frosting into a pastry bag fitted with a small round or star tip and pipe a decorative line along the top and/or bottom edge of the cake.

The cake can be stored in an airtight container at room temperature for up to 2 days.


« Older Posts Newer Posts »