Archive for July, 2011

Um….

July 19, 2011

Do you know what SEO stands for?  Search Engine Optimization.  I’ve been to two food blogging conferences and both times there was a lot of talk about SEO.  I don’t make any money on this blog so truthfully, I kind of tune out when people start talking about metrics and how to drive more traffic.  I do remember talk of how to title your posts and write content so that search engines send eager clickers your way.

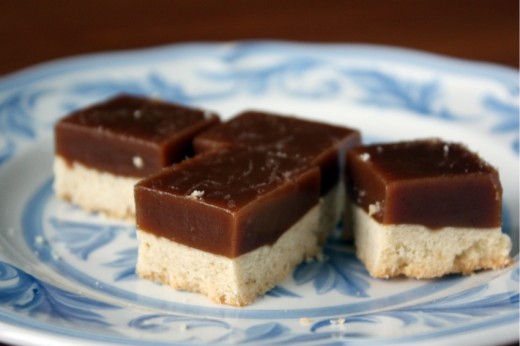
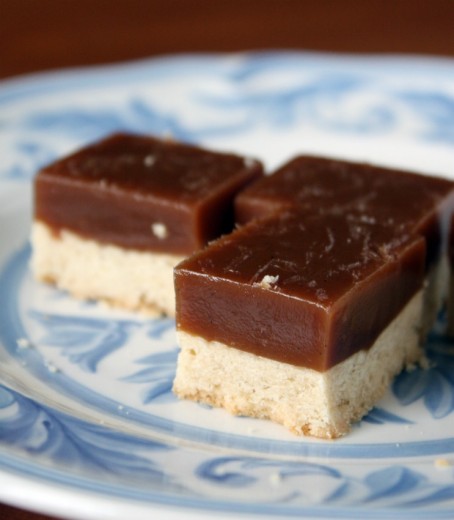
Obviously, the people who know a thing or two about SEO would be horrified by the title of this post.  But what else could I call it?  Salted Caramel Squares I guess would have been a good alternative but even typing that I get a little misty-eyed and spacey and just start thinking, “Um…..”

You see, I love chocolate.  You probably know that if you visit here even semi-frequently.  I also love caramel.  Maybe more than chocolate.  I don’t know.  Don’t make me choose! A while back, a friend gave me a box of salted caramels wrapped in pretty gold foil and I hid them from my family.  When I ran out of my secret stash, I panicked and bought Kraft caramels only to curse them and throw them away because they were not as good as I wanted them to be, and then I cursed myself for throwing them away and leaving my house caramel-free.  Oh wait.  I think I may have just over-shared.

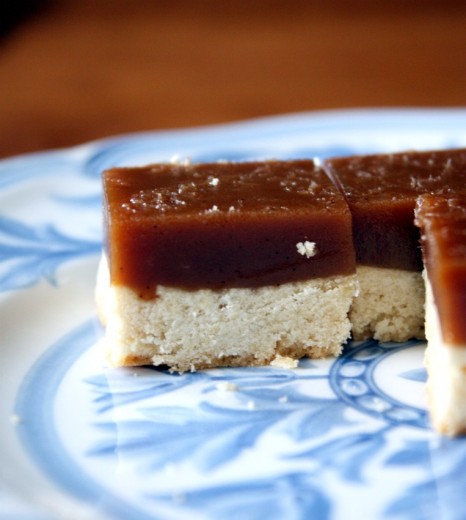
Solution!  Make these unbelievable squares.  Yes, there are two parts and a candy thermometer is involved but do not let either of those facts deter you.  The two steps are easy, a candy thermometer is a good thing to have in your house anyway, this recipe makes a ton of bars (especially if you cut them bite-size which is what they should be), and they keep well.  The only thing I would do differently next time is to sprinkle just a bit of sea salt over top for a step into perfection.

One Year Ago: Chocolate Pavé and Romesco Filled Potatoes
Two Years Ago: Honeyed Goat Cheese Tart with Pistachio Crust and Blasted Broccoli
Three Years Ago: Orzo with Broccoli, Feta, and Olives

Salted Caramel Squares
Food & Wine
Makes 32 squares (more if you cut them smaller)

Note that this recipe calls for kosher salt in both the crust and the caramel.  Do not substitute table salt – they will be way too salty. I like Diamond Brand.

Pastry Shell
1 stick unsalted butter, softened
1 cup confectioners’ sugar
2 large eggs, beaten
2 cups all-purpose flour
1 tsp. kosher salt
1 large egg white, beaten

Caramel
2¼ cup heavy cream
1 vanilla bean, split, seeds scraped
2¼ cups sugar
1¾ sticks unsalted butter
2½ tsp. kosher salt

Prepare the shell
Preheat the oven to 350ºF.  Line a 9-by-13-inch baking pan with parchment paper, leaving a 2-inch overhang on the short sides.  In a large bowl, using a handheld mixer at low speed, cream the butter.  Beat in the confectioners’ sugar.  Add the whole eggs and beat until incorporated, then beat in the flour and salt.  Press the pastry into the prepared pan in an even layer, ¼-inch thick.  Freeze until firm, 10 minutes.

Line the pastry with parchment paper and fill with pie weights.  Bake for 35 minutes, until just set.  Carefully remove the pie weights and parchment paper.  Brush shell with the egg white and bake for 20 minutes longer, until golden and cooked through.  Let cool.

Make the caramel
In a saucepan, bring the cream, vanilla bean, and seeds to a simmer.  Cover; keep warm.

In a large heavy saucepan, stir the sugar into  ¼ cup of water.  Simmer over moderate heat, without stirring, until a deep amber caramel forms, 7 minutes.

Remove the caramel from the heat and carefully add the cream.  (DT: It will bubble up vigorously so slow as you go.)  When the bubbling subsides, stir in the butter.  Insert a candy thermometer and cook over moderately high heat, stirring with a wooden spoon, until the caramel reaches 240º, 10 minutes.  Discard the vanilla bean and stir in the salt.  Pour the caramel over the shell.  Refrigerate until firm, 4 hours or overnight.  Remove the bar from the pan using the parchment overhang; cut into squares.  (DTIn my experience, these squares kept well for several days but I did not cut them all at once.  I cut off what I needed and wrapped the rest, carefully, in foilThey are equally good cold or at room temperature.)


Savory Muffins on a Saturday

July 17, 2011

Early Saturday morning saw me on a ferry bound for the magical island of Bainbridge and another yoga retreat with my awesome friend Jen.  We are into our third year of joining forces on these day-long celebrations and they are a true anchor of stability and centered-ness in our chaotic lives.  Forgive me if I sound a little woo-woo – I’m still coming down off the yoga high.

Memories from last year’s summer retreat include scenes from a bright sunny day – lunch outside at picnic tables and towels laid out on the grass for chatting and post-lunch snoozing in the sunshine.  This year, through the window of the yoga studio, I watched the rain drip down from the sky at approximately the same rate as the sweat dripped off my body (the morning session is hot yoga).  Summer?  What summer?  As I write it is 30 degrees cooler here than it was on the Eastern shore last week.  Sigh.

But even though the weather is not co-operating, my body is still telling me it is summer by the food that it craves.  The thermometer may say butternut squash and mushrooms, but my cravings run more along the lines of berries and salads.  So, I made salads for the retreat.  Four of them including this potato salad which got rave reviews.  I thought about doing some kind of sandwich but in the end opted for two kinds of savory baked goods.  One was a corn bread featuring a corn relish and the other was this muffin.

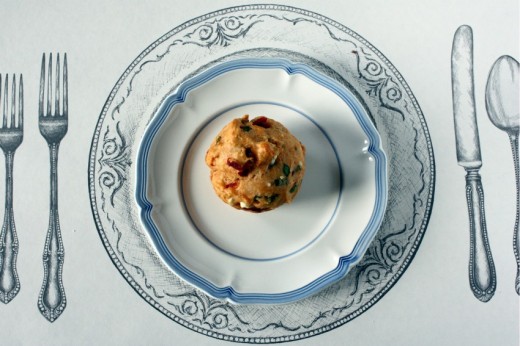
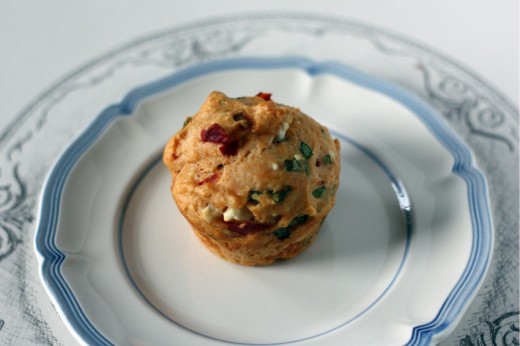
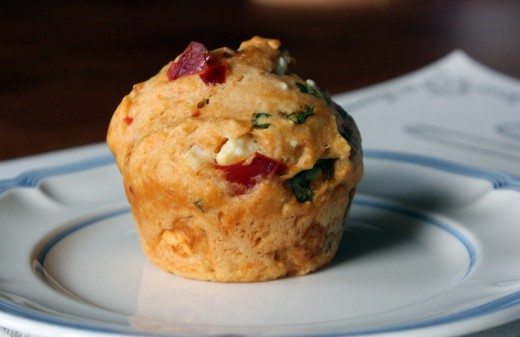
This is a Savory Spinach, Feta, and Peppadew Muffin and it was my favorite thing I made for the retreat.  Actually no, my favorite thing was the Salted Caramel Squares which I will share with you next.  But as far as savory goes, the muffins were tops.  They are easy to make, beautiful, just the tiniest bit sweet (from a bit of sugar) and the tiniest bit spicy (from the Peppadews) and they keep well overnight in the refrigerator.  I would love them alongside a bowl of soup, with a hearty salad, or all by their lonesome.

(By the way, I’m sure I’m bound to get questions about those placemats.  They are paper (recyclable!) and I got them at an adorable stationery store in our neighborhood called Paper Delights.  They come 50 to a pack and I’ve been using them for my classes.)

Peppadews Previously on Dana Treat: D’Lish Peppadew Peppers
One Year Ago: Couscous and Mograbiah with Oven-Roasted Tomatoes
Two Years Ago: Roasted Tomato and Olive Galette with Fontina
Three Years Ago: Leek Frittata

Savory Spinach, Feta, and Peppadew Muffins
Adapted from Bon Appétit
Makes 12 standard muffins

You can find Peppadew peppers in one of two places.  Either on the condiment aisle nearby the jarred roasted red peppers or on the olive bar if your grocery store has one.  I have seen them whole and sliced – either would work here since you need to chop them anyway.

Non-stick vegetable oil spray
2¾ cups all-purpose flour
¼ cup sugar
2 tsp. baking powder
½ tsp. sweet paprika
½ tsp. smoked paprika
¾ tsp. salt
¾ cup whole milk
½ cup vegetable oil
2 large eggs
1 cup thinly sliced spinach leaves
¾ cup crumbled feta cheese
½ cup drained mild Peppadew peppers or roasted red peppers, chopped

Preheat oven to 375ºF.  Spray 12 standard (1/3-cup) muffin cups with nonstick spray.  Whisk flour, sugar, baking powder, both paprikas, and salt in medium bowl.  Whisk milk, oil, and eggs in large bowl to blend.  Add dry ingredients; whisk just until blended.  Add spinach, feta, and peppers; fold to incorporate evenly.  Divide batter among prepared muffin cups (cups will be filled to top).

Bake muffins until tester inserted into center comes out clean, 25 to 28 minutes.  Cool 5 minutes.  Run knife around muffins to release from pan.  Invert pan to release muffins, then turn muffins right side up to cool completely.

(DT: I made these the night before, allowed them to cool completely, wrapped them, and stored them in the fridge.  I let them come to room temp before serving.)


Might Be in the Top 10

July 13, 2011

As a food blogger, the photography portion is not my strong point.  I know this.  I consider myself to be on the low side of decent.  I’m better than many and worse than many.  I am at peace with my place in the food photography world.  When I have the time and some creative juices are flowing, I may take a picture that is better than decent.  But most of the time I am rushing, fighting against the waning light or the ticking of the clock and my husband’s appetite and patience.  You might notice that my sweet shots tend to be better than my savory.  That is because I can shoot cookies the morning after I have made them and when I don’t have anyone wondering when we are going to be ready to eat already.

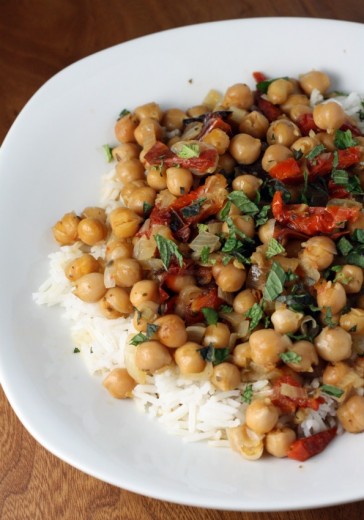
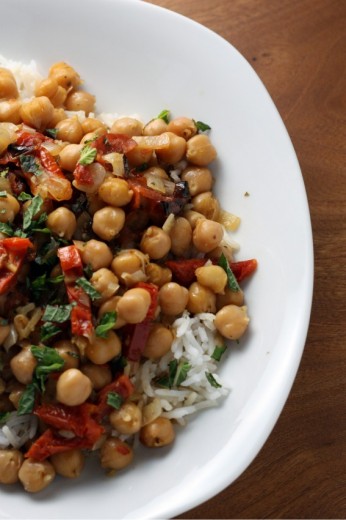
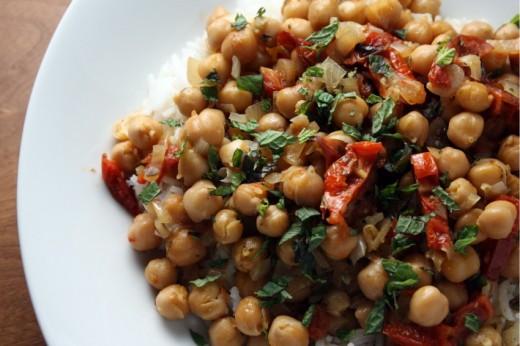
I mention this now because it is truly a shame that I don’t have the skills or the tools to make this dish look more exciting than it does in these photos.  You might look at them and think, “Chickpeas – yum.”  You might look at the recipe and think, “That’s it?”  Have you been reading this site for a while?  Do you trust me?  You know I am not prone to hyperbole, right?  That I am the first to admit when something does not live up to my expectations or didn’t turn out right, or was just so-so?  I have to say, this is one of the best dinners I have made in a while.  And if we are talking about dinners that take next to no effort, then this might be Top of 2011 So Far.  Randy, who always says, “Thank you for a nice dinner” but often just plows his way through his plate without fully appreciating what is there, said no fewer than six times, “Oh wow this is yum!” and got up to get his own seconds.  Except there were none!  (Hint: Double the recipe!)

How is this possible?  It’s shallot, a few dried herbs, chickpeas, broth and lemon juice.  Oh, but wait.  There are also some slow roasted tomatoes and slow roasted cloves of garlic that make an appearance just before serving time and those two things add so much depth, such savory umami-ness, almost creaminess to this dish.  I am no stranger to slow-roasted tomatoes or to roasted garlic.  But I would never have thought to include them in a chickpea stew and shame! on! me! for not doing this sooner.

So, I made two mistakes.  Mistake #1 was that I opted out of making a full batch of the tomatoes.  My thinking went along the lines of “why on earth do I need to buy 8 pounds of tomatoes and have 5 jars of slow roasted tomatoes and garlic in my refrigerator?”  Silly silly Dana.  If I had made the full batch, we could have this dinner once a week which would make both of us very happy.  I could also use those tomatoes and garlic in all manner of things.  Mistake #2 was not listening to my gut when it told me that 325º is far too high for slow roasting anything.  Sure enough, after about an hour the edges of the tomatoes were starting to turn one shade of brown past caramelization and I pulled them out.  Sometimes I feel this blog exists so that I can make mistakes so you don’t have to…

One Year Ago: Fresh Pea Soup with Pea Jelly
Two Years Ago: Chocolate Chip-Pretzel Bars
Three Years Ago: Raspberry Cream Sandwiches

Lemony Chickpea and Oven-Dried Tomato Stew
Adpated from Food & Wine
Serves 2-3

I think this was originally meant as a side.  If you are making it as a main, I would definitely double it, even for 2.  Leftovers would be amazing but I wouldn’t know since we didn’t have any.  Because I didn’t have enough tomatoes, I added some sun-dried ones as well to bulk my stew up.  Don’t be tempted to skip making the oven-dried ones though.  Trust me.  Finally, I sprinkled a bit of chopped mint over top for color – normally I use parsley but I was out.  We both liked the flavor of the mint so that is a keeper step.

Olive oil
1 large shallot, finely chopped
1 19-ounce can chickpeas, drained and rinsed
½ tsp. dried oregano
1 bay leaf
¼ tsp. crushed red pepper
Kosher salt
3 cups vegetable broth
Juice of 1 lemon
1 cup Oven-Dried Tomatoes, coarsely chopped, plus 4 garlic cloves from the jar
2 tbsp. chopped fresh mint

Place a large saucepan over medium heat.  Drizzle in just enough olive oil to coat the bottom, then add the shallot along with a large pinch of salt and cook over moderate heat, stirring, until softened, about 5 minutes.  Add the chickpeas, oregano, bay leaf, and crushed red pepper.  Cook, stirring frequently, until the herbs are fragrant, about 5 minutes.  Add the broth and lemon juice and bring to a boil.  Simmer the stew over moderately low heat until the broth is reduced by half, about 20 minutes.  Stir in the Oven-Dried Tomatoes and the garlic and simmer for 5 minutes.  Discard the bay leaf.  Season the stew with salt and serve over with rice or with crusty bread.  Garnish with chopped mint.

Oven-Dried Tomatoes
Makes 2½ pints

8 pound firm but ripe plum tomatoes, cored and halved lengthwise
½ cup olive oil, plus more for packing
2 heads garlic, cloves separated but not peeled
12 large thyme sprigs
Salt and freshly ground black pepper

Preheat oven to 250º and position 2 racks just above and just below the middle of the oven.  Working over a medium bowl, pry the seeds and pulp out of the tomatoes and discard.  Pour ¼ cup of the olive oil onto each of 2 very sturdy, rimmed, light-colored baking sheets.  Arrange the tomatoes, cut side down on the baking sheets and scatter the garlic and thyme all around.  Make a tiny slit on each tomato.

Bake the tomatoes for about 45 minutes, until the skins begin to wrinkle.  Shift the pans from top to bottom halfway through.  Carefully pinch off the skins.  Flip each tomato and bake until the surface looks dry, about 1 hour.  Flip the tomatoes again and continue baking until the surfaces look dry but the tomatoes are still slightly plump, about 2 hours longer.  Season the tomatoes with salt and pepper and let cool completely.

Discard the thyme sprigs and peel the garlic cloves.  Layer the tomatoes with the garlic in five ½-pint jars.  Add enough olive oil to cover the tomatoes by at least 1 inch.  Slide the blade of a knife along the side of each jar to release any air bubbles.  Seal the jar and refrigerate for up to 2 months or freeze for up to 6 months.


Summer Vegetable Curry

July 11, 2011

Friends, I am back from vacation.  It was wonderful to be away, wonderful to see the sun, feel the heat, and to spend time with Randy’s large extended family.  There was a lot of travel to get through and my boys did great.  If you have young children and are wondering if you will ever get on an airplane again with out a pit of despair in your stomach, let me tell you that – in my opinion – things change when your youngest turns four.  I read almost a whole novel on the way out and another almost whole one on the way back.  Yes, we still answered an almost endless number of “Are we there yet?” questions and their close relations, but we all had fun.  Imagine that.

(By the way, if you like modern fiction – you have to pick up Jennifer Egan’s A Visit from the Good Squad.  I absolutely loved it and marveled at how one person wrote such a diverse novel.  It’s the best thing I’ve read since Let the Great World Spin – another book I can’t recommend highly enough.)

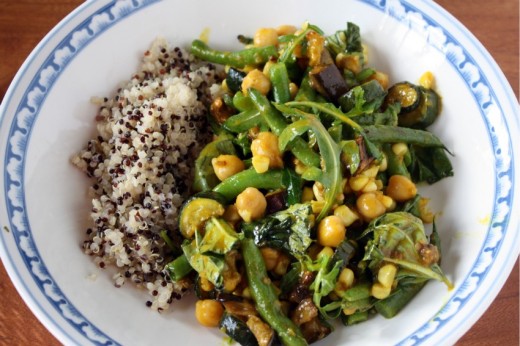
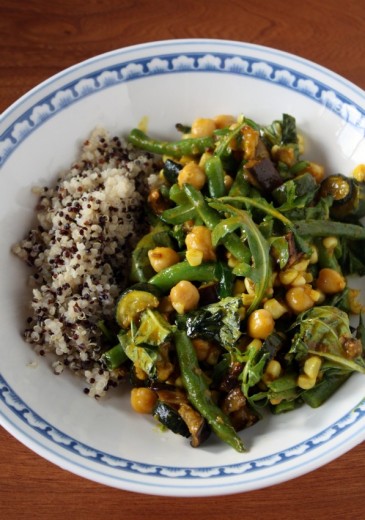
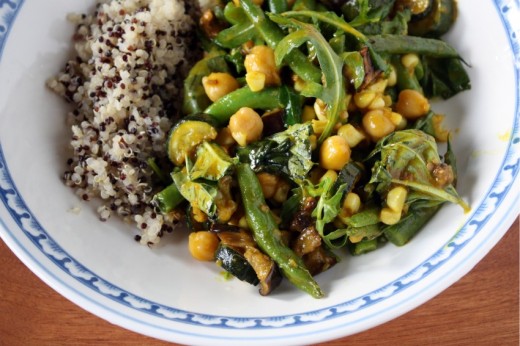
More on the trip after I take a look at the photos.  For now, here is a dish that we enjoyed right before we left.  This recipe is a little funny.  Not funny as in ha-ha or funny tasting.  Just, you know, funny.  Like why would you take a bunch of summer vegetables, summer being the season where it is supposedly hot, and roast them not once but twice in the oven?  Grill, yes – I understand, but roast in a 400º oven?  That makes no sense to me.  As it turns out, it was just fine to turn on my oven twice the day I made this dish because it was either the oven or the heater and I just refuse to turn on the heat post-summer solstice.

The recipe was also funny because you make a strange sauce (that is, nonetheless, very tasty) and just mix two hot things together in a bowl.  Maybe this works for some people but it just sounded all wrong to me.  I tweaked and made notes for next time, because there will be a next time.  This is not a super quick dish but I think if you used the grill, which I didn’t do but recommend, and just threw all the vegetables and the sauce together in a pot and served it alongside quinoa, which I did do and recommend, it’s a very different and very delicious dinner.

One Year Ago: Kosheri
Two Years Ago: Vietnamese Tofu Sandwiches
Three Years Ago: White Beans with Roasted Tomatoes

Summer Vegetable Ragout with Curry Sauce
Adapted from Bon Appétit
Serves 4

I can’t give you the recipe the way I would make it next time since I haven’t made it that way, so here it is more or less the way it was written with some of my changes.  Next time, I will cut the eggplant and squashes into thick slabs and grill them, then chop them into bite-size pieces.  I would also grill the corn.  I have several recipes that call for carrot juice and I always use Odwalla brand.

Curry Sauce
Vegetable oil
1 small onion, chopped
1 small carrot, peeled, chopped
1 stalk lemongrass, smashed lightly and coarsely chopped
1 1-inch piece unpeeled fresh ginger, thinly sliced
1 small Granny Smith apple, peeled, finely chopped
2 tbsp. curry powder
2½ tbsp. all-purpose flour
2 cups carrot juice

Vegetables
1½ pounds eggplants, cut into 1-inch cubes
About 4 tbsp. olive oil, divided
1 pound assorted summer squash, cut into 1-inch pieces
1 pound green beans, or other long beans, trimmed, cut into 2-inch lengths
4 ears of corn, husked
1 15-ounce can chickpeas, drained
2 cups arugula
¼ cup torn fresh basil (Thai basil if you can find it)

Curry Sauce
Heat a large saucepan over medium heat.  Drizzle in just enough vegetable oil to cover the bottom of the pan, then add the onion, carrot, lemongrass, and ginger; sauté until slightly softened but not brown, about 5 minutes.  Add apple and curry powder; sauté until vegetables are tender, about 8 minutes.  Add 2 tablespoons of vegetable oil, then flour and stir 1 to 2 minutes.  Gradually pour in carrot juice; bring to boil, whisking constantly.  Reduce heat to medium-low; simmer uncovered until sauce is slightly thickened and reduced to generous 2½ cups, about 20 minutes.  Strain sauce through fine strainer set over bowl, pressing on solids to extract as much liquid as possible; discard solids in strainer.  Season to taste with salt and freshly ground black pepper.  Place sauce back in saucepan and keep warm.  (Curry sauce can be made 1 day ahead.  Cool slightly then cover and chillRewarm over medium-low heat.)

Vegetables
Preheat oven to 400ºF.  Place eggplant cubes on a large baking sheet.  Drizzle with about 2 tablespoons olive oil and sprinkle with salt.  Toss to coat.  Place squash on another large baking sheet and drizzle with remaining 2 tablespoons olive oil and a sprinkling of salt.  Roast until squash and eggplant are light golden and tender, turning occasionally, about 25 minutes for squash and 40 minutes for eggplant.  Remove baking sheets from oven and set aside.

Fill large bowl with water and ice.  Cook beans in a large pot of salted boiling water until just crisp-tender, 2 to 4 minutes, depending on size of beans.  Using tongs, transfer beans to bowl of ice water to cool.  Drain.  Maintain boiling water in same pot; add corn.  Cook until corn is just tender, about 3 minutes.  Cool slightly.  Cut kernels off cob; discard cobs.

Place all vegetables in a large pot and heat over medium-low heat.  Carefully pour the sauce over top and mix well to combine.  Mix in chickpeas.  Just before serving, stir in arugula and basil and stir until slightly wilted.  Serve alongside quinoa, rice, or all on its own.


Prediction: Ice Cream

July 5, 2011

I have a prediction and I can almost guarantee it will come true.  Guar – an – tee.  Like sure enough that if I was a betting woman and if they placed bets on things like ice cream or cookbooks or ice cream cookbooks, I would clean up in Vegas.

The internet is soon going to become overrun with recipes pulled from the Jeni’s Splendid Ice Creams at Home book.  For real.  It’s going to hit big and it’s going to hit hard, maybe not with the same strength as No-Knead Bread or the New York Times chocolate chip cookies, but strong all the same.  This time I am on the cutting edge, not joining in the club two years after it has formed.

“What is the big deal?”, you might ask.  Have you ever made ice cream?  Used lots of yolks, and had to strain out the scrambled bits?  Made a truly delicious treat but with just a bit more iciness than you would like in your ice cream?  This woman, Jeni, she has been making ice cream for years and she has nine ice cream shops (and counting) to prove that she knows her stuff.  She doesn’t use eggs.  At all.  What she does is use a bit of cream cheese and cornstarch and a couple of tablespoons of corn syrup.  The cooking method is streamlined – milk and cream get boiled together for exactly four minutes.  A cornstarch slurry is stirred in and then the mixture boils for exactly another minute.  Whisk the whole thing into cream cheese with a bit of salt, and you have the base for your ice cream.  I’ve always thought that making ice cream was so easy for how delicious it is – now I think it’s even easier.

In addition to coming up with and streamlining this process, Jeni has shared her treasure trove of recipes in a delightful book.  They are arranged seasonally – seasonal ice creams!  Who knew?  I’m a person who likes to chew when eating ice cream and I love that there are plenty of add-ins, mix-ins, and pairings that make even the most routine flavor exciting.

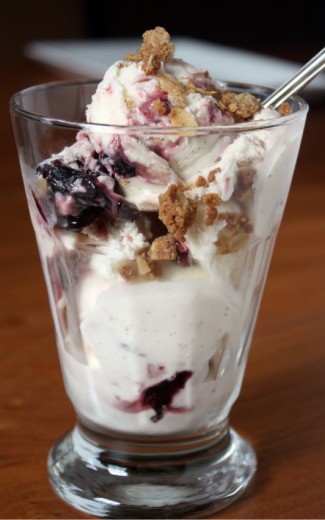
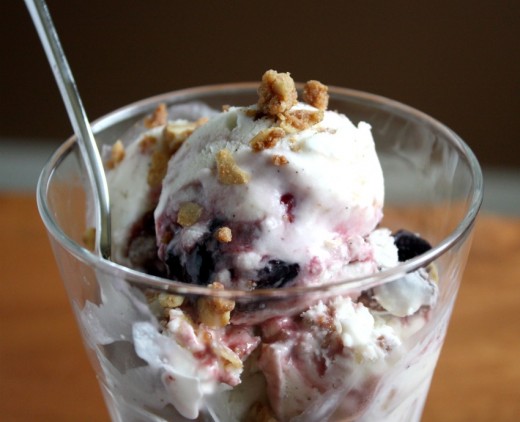
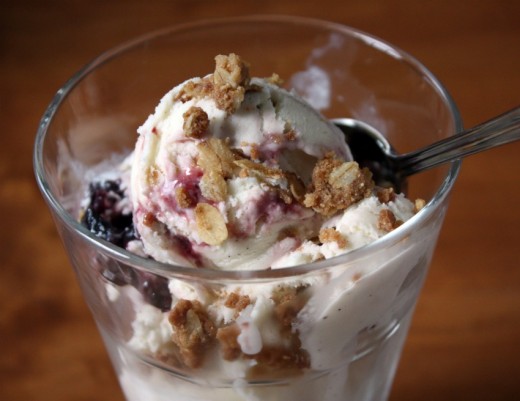
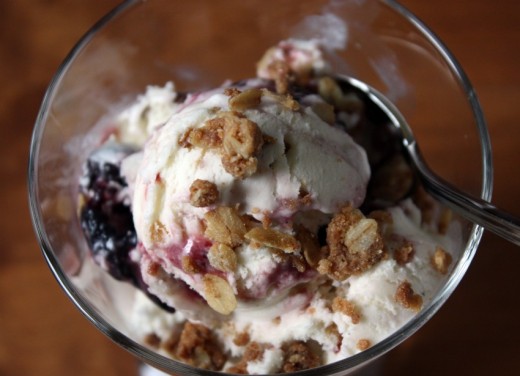
Graham’s eyes got really big when he saw the cover of the book.  He immediately pointed to the scoop that looked like it had cherries in it.  We made Cherry Crisp Ice Cream.  We roasted cherries, made the crispy bits (think a streusel on a cherry crisp), and used our new technique to make the ice cream.  We licked the paddle (swoon!), alternated the vanilla bean ice cream with the other goodies in the container, and put it away in the back of the freezer to firm up.  The result?  The boys did not like it.  I had a feeling they wouldn’t.  Their ice cream tastes are more simple.  They probably won’t like the Sweet Corn and Black Raspberry Ice Cream which intrigues me, or the Black Walnut Divinity Ice Cream which does not.  It might be that I have to use my other more traditional ice cream cookbook when making that special treat for them.

As for Randy and I…well.  Randy said it was the best ice cream I have ever made.  Most recently I made a strawberry version (from another book) and both of us were turned off by how icy it was.  This was the opposite.  So creamy, velvety, not a hint of an ice crystal.  This is totally Randy’s type of ice cream flavor and totally not mine.  But holy cow was this good.  I’m a little worried.  If a totally-not-my-type-of-flavor has me dipping my spoon directly into the container over and over again, what am I going to do when I make a totally-me flavor?

One Year Ago:  Big French Salad
Two Years Ago:
Coconut Bars
Three Years Ago:
Panzanella with Artichokes, Olives and Manchego

Cherry Crisp Ice Cream
Adapted from Jeni’s Splendid Ice Creams at Home
Makes about 1 quart

For the ice cream
2 cups whole milk
1 tbsp. plus 1 tsp. cornstarch
1½ ounces (3 tbsp.) cream cheese, softened
1/8 tsp. fine sea salt
1¼ cups heavy cream
2/3 cup sugar
2 tbsp. light corn syrup
1 vanilla bean, split, seeds scraped out, seeds and bean reserved
1 recipe roasted cherries (recipe follows)
About 1 cup Crisp Streusel (recipe follows)

Mix about 2 tbsp. of the milk with the cornstarch in a small bowl to make a smooth slurry.  Whisk the cream cheese and salt in a medium bowl until smooth.  Fill a large bowl with ice and water.

Combine the remaining milk, the cream, sugar, corn syrup, and vanilla seeds and bean in a 4-quart saucepan, bring to a rolling boil over medium-high heat, and boil for 4 minutes.  Remove from the heat and gradually whisk in the cornstarch slurry.  Bring the mixture back to a boil over medium-high heat and cook, stirring with a heatproof spatula, until slightly thickened, about 1 minute.  Remove from the heat.

Gradually whisk the hot milk mixture into the cream cheese until smooth.  Pour the mixture into a 1-gallon Ziploc freezer bag and submerge the sealed bag in the ice bath.  Let stand, adding more ice as necessary, until cold, about 30 minutes.

Remove the vanilla bean.  Pour the ice cream base into the frozen canister and spin until thick and creamy.

Spread about ½ of the cherries over the bottom of a freezer safe container.  Scoop out about 1/3 of the ice cream and sprinkle with 1/3 of the streusel.  Top with the other half of the cherries, another 1/3 of the ice cream, and another 1/3 of the streusel.  Repeat with the remaining ice cream and streusel.  (There will be quite a bit of streusel left over.  Use it for another ice cream or for a pie or crisp topping.)  Press a sheet of parchment directly against the surface and seal with an airtight lid.  Freeze in the coldest part of your freezer until firm, about 4 hours (if you can wait that long.)

Roasted Cherries
2 cups pitted fresh or frozen (not thawed) red or black cherries
2/3 cup sugar
2 tsp. cornstarch

Preheat the oven to 400ºF.

Combine the cherries, sugar, and cornstarch in a 9-inch square baking dish, tossing to mix.  Roast for 30 to 45 minutes, until the juices are thickened and bubbly, stirring every 15 minutes.  Let cool completely, then chill in the refrigerator.

Crisp Streusel
½ pound (2 sticks) unsalted butter, cut into ½-inch cubes and chilled
1½ cups all-purpose flour
1/8 tsp. ground cinnamon
¾ cup packed light brown sugar
½ tsp. salt
1½ cups old-fashioned oats

Preheat the oven to 350ºF.

Put all the ingredients except the oats in the bowl of a food processor and pulse until mixture looks like coarse sand.  By hand, add the oats and mix well.  Spread out on a baking sheet and break up any large clumps into crumbs about ½-inch in size.

Bake for 30 to 35 minutes, until toasted and browned, stirring occasionally to prevent burning, especially in the corners, and to turn over the unbaked portions.  Let cool completely, then freeze until ready to use.  The streusel can be frozen for up to 1 month.


« Older Posts Newer Posts »