Archive for June, 2011

Lopez in Photos and News About Graham

June 18, 2011

Over Memorial Day weekend, we spent a couple of days on Lopez Island.  Our kids are now getting to the ages where they remember things from the few past years of their lives.  We are no longer dragging them around without them knowing where they are, they are really creating memories.  It is exciting and moving to witness.  They remember Lopez.  It isn’t just another place where they sleep in a bed that is different from home.  They remember the pretzels on the ferry, that our house has a hammock and a great rock-throwing beach.  They remember that the drugstore has milkshakes and that there is an incredible bakery.  (Hmmm.  Most of these memories involve food.  I wonder why that would be.)

Because I have written so much about my almost life-long love affair many different times here, I thought I would more or less let the photos speak for themselves.

The hammock.  It is silent out there.

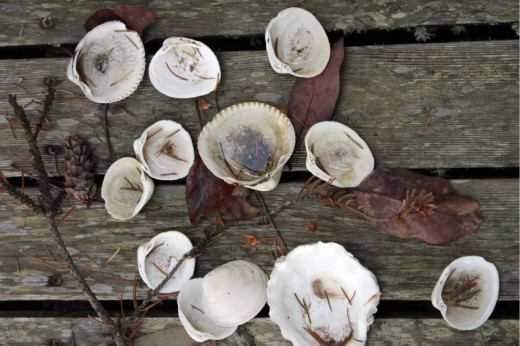
Every time we go up to the island there are different shells on the back porch.

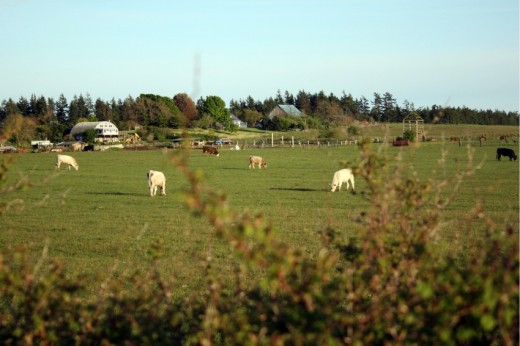
Lopez has this amazing rugged coastline with mountain views and eagles soaring across (sometimes) blue skies.  It also has a gorgeous pastoral interior where lots of cows, sheeps, and horses live a pretty good life.  This year, because of all the rain we have had, the hay is so green.  By August this will be brown.

Speaking of rain, I don’t ever remember, in 30 years of going to that island, the fire danger sign reading as “low”.

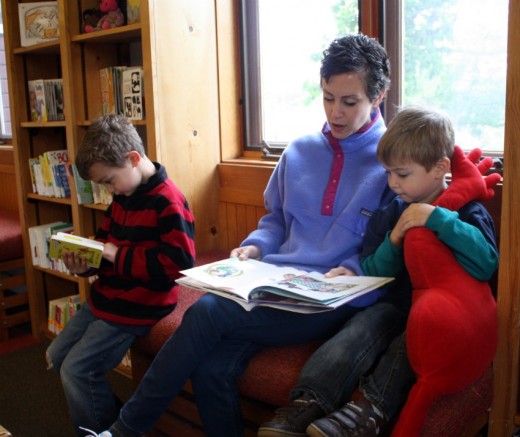
Speaking of rain, again, we spent a rainy morning at their lovely perfect library.

Fortunately there was plenty of sun for rock-throwing on our little beach.

This photo pretty much sums up his personality these days.

No words.  The cuteness…

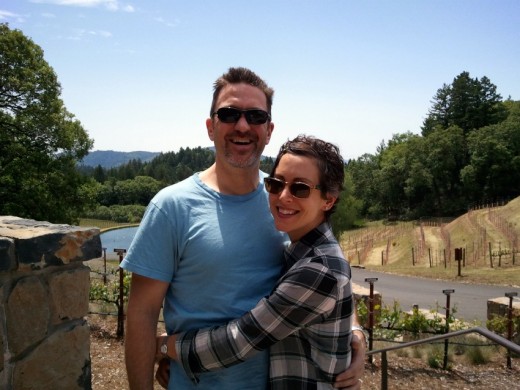
And because I don’t think I have a single photo of Randy and I together on this blog, I thought I would include this from our Napa trip in early May.

I have good news on the school front.  In the spring I wrote about our predicament with our neighborhood school.  We sent off our application to an “option” school not too far from our  neighborhood.  Option schools are public and they draw from all over the city.  They tend to have a specific focus and the one we hoped to get into has a technology focus.  While that was a compelling reason for Graham to attend, the main reason we wanted to send him there is so that he could follow his amazing resource room teacher, the exceptionally kind librarian, and the all-important gym teacher.  Just a couple of weeks ago, I got word that Graham got in.  Randy and I breathed a huge sigh of relief.

But now, as the school year is winding down (2 more days left), I feel incredibly sad about leaving our neighborhood school.  There are so many nice children in Graham’s class and some wonderful parents with whom I can imagine forming friendships.  Everyone just got their immersion language assignment (Spanish or Japanese) and there is a buzz as parents and children alike contemplate their next year learning a new language.  We are not and will not be a part of that.  I feel angry that we were basically forced to leave this school, these children, and these parents.  Our city has let us down.

I know that the new school will be terrific.  Graham will make new friends, I will get to know a whole new set of parents and children – we will form a new community.  I’m glad we have the summer to heal and gear up for first grade.


Reunion

June 16, 2011

When I was about 8 months pregnant with Graham, my oldest child, Randy and I did a Lamaze weekend out of town.  Most OB’s recommend you do some kind of class to prepare you for childbirth and the hospital where we ultimately delivered offered a six week course.  Randy had just started working at Microsoft and was spending a ridiculous number of hours there trying to get up to speed.  The thought of trying to get back across the lake in time for a class stressed him out, so we opted to cram all those classes into one weekend instead.

Sometimes things happen for a reason and I think we ended up going this Lamaze route so we could meet an incredible group of people.  There were 12 couples, all due within a few months of each other, and over the course of the weekend and talking about things like contractions and bed-rest and colostrum, we got to know each other.  We were all in this incredibly heady time in our lives – about to have our first baby.  Scared, excited, scared and um, scared.  The weekend ended and we drifted away from each other and back to our lives.

The first couple had their baby just days before we had Graham.  The husband emailed their news out to the group and, now that we were connected, all the rest of the couples followed suit.  Through this email connection, the women started bonding.  Once all of us had our babies, we began to get together with our brand new babies.

At the time I was in a PEPS group (Program for Early Parenthood Support), an organization I believe in and support.  I even lead a group myself when Graham was a year old.  But my particular group was a little funny.  Everyone was nice but there were some big overachievers in there and everyone seemed to have it together.  No one cried, everyone’s baby seemed to be sleeping, nursing was going well for all the moms – in short, no one was real.  I went to those meetings making sure I had showered, did not cry, bit my lip the whole time, and left feeling like a failure.  It was the weekly gathering of Lamaze ladies where I could be myself.  It was my lifeline.  Being able to walk out of the house unshowered, crying baby in tow, get to a friend’s house who was in a similar mental and emotional space as me, and be able to cry myself – out of exhaustion, frustration, fear, and hormones – is what saved me in those first few months.  One in our group gave us this quote: “You make friends for a reason, a season, or a lifetime.”  It seemed we had made lifelong friends.

Sadly, within a couple of years, 6 of the 12 couples moved away.  We all got busy with our lives, husbands, work, second children.  I have remained extremely close with two of the women – I consider them two of my closest friends.  I wish I saw everyone else more frequently but busy lives and distance makes it difficult.  Donna was one of our true gems and she had the nerve to North Carolina before we knew it.  Donna and I have been keeping in intermittent touch on Facebook and I will occasionally get a comment from her on this blog.  She emailed last week to say that she and the family were heading to town and could we gather?  Of course!

6 adults, 10 kids, 2 pizzas, 2 salads, and 1 cake makes for a rocking good time.  Graham was in heaven because all the six-year-olds were girls.  Spencer was in heaven because there were so many people to play with.  It was so nice seeing them all as such big kids and seeing how truly far we have come.  In true Lamaze group fashion, we shared some of the joys and some of the frustrations we are experiencing.  And we got to sing “Happy Birthday” to one of our group whose birthday is Friday.

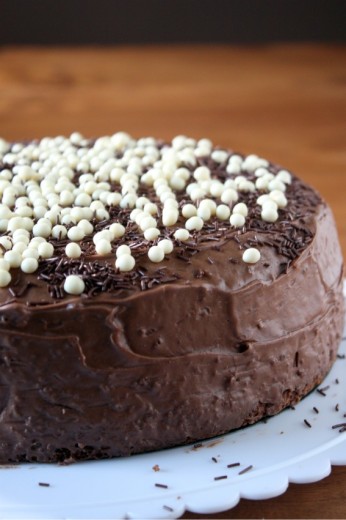
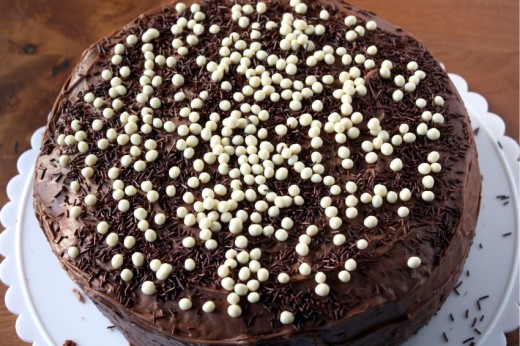
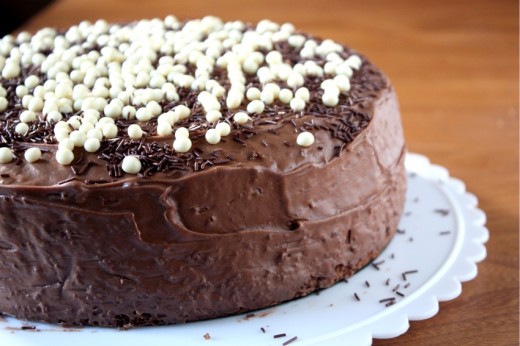
I have been wanting to practice my layer cake technique ever since watching this incredibly helpful video.  A friend’s birthday is the perfect excuse for practice.  This is a Holly B’s recipe and it’s hard for me to believe I have never made it.  Holly mentions in her book that this is the standard birthday cake in her family and now I know why.  It’s a perfect chocolate cake.  The cake itself is moist, the frosting is to die for and the whole thing is incredibly easy and quick to make.  Yes, really.  My only quibble is that there was not enough frosting.  The cake is very crumbly so it needs a crumb coat, but there was not enough for me to do that.  No matter, sprinkles cover a lot of error.  But next time I will one and a half the frosting recipe to make sure there is enough to really cover the cake and for little fingers to dip into.

One Year Ago: Chile Cheese Gratin Sandwiches
Two Years Ago:
Grilled Vegetable Quesadillas
Three Years Ago:
Feta and Ricotta Cheese Pie (ignore the bad photo, this is a terrific recipe)

Sour Cream Chocolate Cake

With Love & Butter

Makes a 9-inch double layer cake

I‘m giving you the recipe as written in the book.  Remember, I would at least one and a half the frosting recipe – even double it and do a crumb coat.  To do so, spread a thin layer of frosting all over the cake and place it in the freezer for about 15 minutes.  Then frost the rest of the cake.  This will keep little crumbs from marring the smooth appearance of your masterpiece.

Cake
1 cup (2 sticks) unsalted butter, at room temperature
½ cup unsweetened cocoa
½ cup boiling water
1 cup granulated sugar
2/3 cup brown sugar, firmly packed
2 tsp. vanilla extract
3 eggs
1 cup sour cream
2 cups flour
1½ tsp. baking powder
1 tsp. baking soda
¼ tsp. salt

Chocolate Sour Cream Frosting
¾ cup sour cream
4 cups powdered sugar
1 tsp. vanilla extract
¼ tsp. salt
1/3 cup (2/3 stick) unsalted butter, melted
¾ cup unsweetened cocoa powder

Make the cake
Preheat the oven to 375ºF with the rack in the center position.  Butter and flour 2 9-inch round cake pans.

Melt ¼ of the butter (½ of one stick) and combine with the cocoa powder and boiling water in a small bowl.  Stir until smooth and set aside.

In the large bowl of an electric mixer, cream the remaining butter with the granulated and brown sugars and vanilla.  Add the eggs and beat until smooth.  Mix in the sour cream, then the reserved cocoa mixture.  Finally, dump in the flour, baking powder, baking soda, and salt and mix just until combined.  Divide the batter between the 2 pans and smooth the tops with a rubber spatula.

Bake the layers for 10 minutes, rotate the pans and bake for 10 to 15 minutes more or until a toothpick just comes out clean.  Don’t overbake – moistness is your goal.  Cool the cakes on a rack.

Make the frosting
Put the sour cream, powdered sugar, vanilla, and salt in the bowl of a mixer.  Whip to combine.  Stir the melted butter and cocoa together.  If the mixture begins to harden, dribble in a little more melted butter and beat until free of lumps.  Add to the sour cream mixture and beat until smooth.

Put one cake layer top-side-up on a serving plate and spread frosting generously to within ½-inch of the edge.  Place the second layer on top, bottom-side-up.  Smooth the remaining frosting over top and sides.

(DT: I made this cake a day ahead frosted and all.  I waited until the frosting had hardened slightly and loosely covered the whole thing with foil.  I think it improved both the flavor and texture of the cake so don’t hesitate to do the same.  You could probably even make it two days ahead, but then I would refrigerate it, covered, and bring it to room temp before serving.)


Gnocchi 10 Years in the Making

June 14, 2011

The last time I made gnocchi was approximately 10 years ago.  Well, that is not entirely accurate.  The last time I made gnocchi was really about 2 years ago (this dish to be exact), but the last time I actually made the gnocchi myself, not just a dish containing store-bought gnocchi, was last decade.

In that two-year-ago gnocchi post, I told the story of attempting gnocchi for the first time for Randy.  It is one of his very favorite dishes in the world and, when you are newly dating someone and really excited about them, how can you not want to make one of their favorite things?  I followed a recipe to the letter, made a huge mess in my kitchen, had gnocchi that did not behave as they were supposed to, and, once sampled, were about as light as lead.  I decided I would never make them again.

To tell you the truth, I’m not as crazy about these little potato pillows as my husband is.  Maybe it is because when I go to an Italian restaurant, hoping for sublime pasta or a perfectly seasonal risotto – dishes that I disdain as unimaginative veg options in non-Italian restaurants – the only veg thing on the menu is gnocchi.  In the fall, I can guarantee there is brown butter and sage in the dish and summer, maybe a light tomato sauce and basil.  Often, even in the best restaurants, gnocchi are heavy, dough, starchy – not what I want to eat for dinner.  I know, someone cue the small violins – poor me!
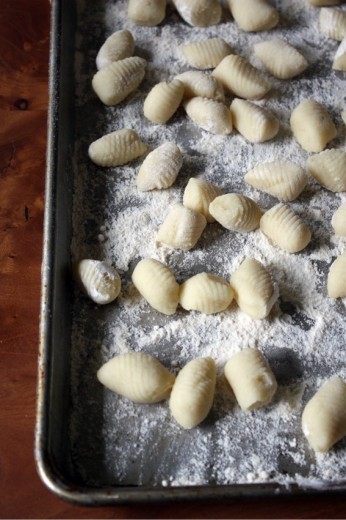
So even though gnocchi are not my favorite thing to eat, I decided to take a class offered by the master.  I love my husband and appreciate his willingness to eat vegetarian at home and to raise our boys vegetarian, it is the least I could do.  Ethan Stowell is a local restauranteur who I wrote about here and who, it just so happens, is featured in the July issue of Food & Wine.  The class was at a local grocery store, nothing fancy, but he managed to turn out one incredible dish after another in a 2½ hour time period.  We learned how to make gnocchi with potato, with ricotta, and with semolina.  I liked the ricotta version the best, both the actual gnocchi and the preparation, but I know my dear husband is all about potato gnocchi.  And so that is what I made.
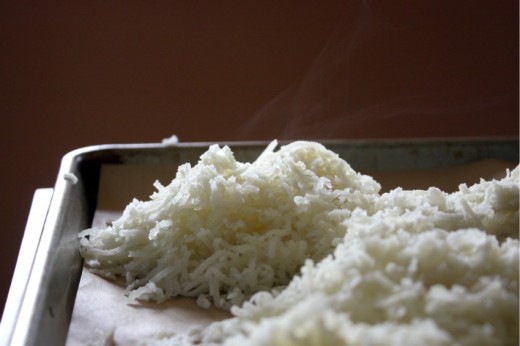
(Potatoes, after being put through the ricer.)

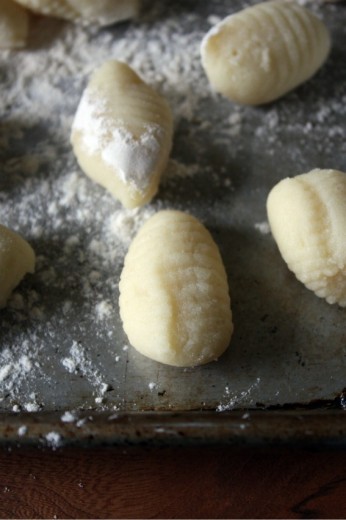
When I approach something I have made before without success, I feel a certain amount of dread.  Will it work?  Will I have the same failure as last time?  As it turns out, no need for dread here.  This recipe was a dream.  Stowell recommends baking the potatoes rather than boiling or steaming them, so they stay very dry and therefore, need very little flour to turn them into a dough.  The light hand with the flour and the lack of salt (which draws out moisture and creates a need for more flour), makes these little pillows light and fluffy as they are meant to be.  I found the dough incredibly easy to work with and the $5 gnocchi board I purchased made rolling them not only a breeze, but fun.  (Another Stowell tip – roll cut corner to cut corner.)
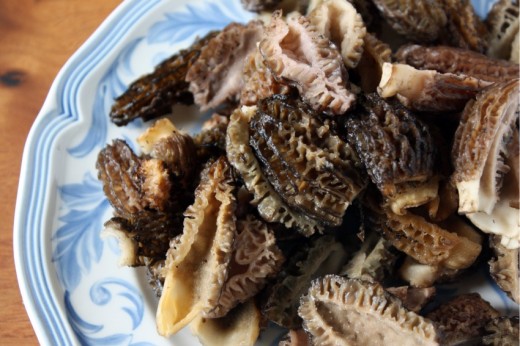
As for preparation, you can’t go wrong with morels and peas.  There are a few advantages to living in our climate and one of them is the mushrooms.  We get the most amazing morel mushrooms this time of year although, until recently and because of record amounts of rain, they were $50/pound.  I got them at the farmers’ market last weekend for the bargain price of $22/pound but thankfully they are light and you don’t need many for incredible flavor.
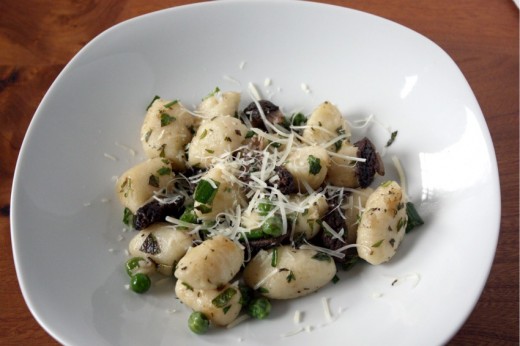
One Year Ago: Pasta with Chickpeas
Two Years Ago: Spicy Chickpeas with Ginger and Kale, Chilled Avocado Soup

Gnocchi with Morel Mushrooms and Spring Peas
Inspired by Ethan Stowell
Serves 3-4

If morels aren’t available in your part of the world, shiitakes would be delicious instead.  I would use more of them, maybe closer to ¾ of  a pound and just slice them in half.  I would not have put oregano and mint together but it is a great combination.

For the gnocchi
2 large russet potatoes, scrubbed
Kosher salt
2 large egg yolks, at room temperature
½ cup all-purpose flour, plus more for dusting

For the dish
2 tbsp. unsalted butter
¼ lb. morel mushrooms, rinsed, ends trimmed, and sliced in half
¾ cup peas, fresh or frozen
2 tbsp. fresh mint, chopped
2 tbsp. fresh oregano, chopped
Kosher salt and freshly ground black pepper
Freshly grated Parmesan cheese
Olive oil, for garnish
Truffle salt, for garnish (optional)

Make the gnocchi
Preheat the oven to 400ºF.  Prick the potatoes all over with a sharp knife and sprinkle them generously with salt.  Place in the oven directly on the rack and bake until tender, about 1 hour.  Allow to cool slightly, just enough to handle.

Lay a sheet of parchment paper on a sheet pan.  Put the potatoes through a ricer, letting them fall onto the parchment and discarding the skins.  Spread the potatoes out on the parchment and allow them to rest until warm, but not hot enough to cook the eggs.  Gather up the parchment and dump the potatoes into medium-size bowl.

Add the egg yolks to the potatoes and stir to combine.  Sprinkle the flour over the top of the mixture and knead gently in the bowl until the egg and flour are distributed.  Turn the dough out onto a floured board and continue to knead, adding extra flour as necessary, until the dough is no longer sticky.

Divide the dough into quarters.  Very gently roll each quarter into a log about 1-inch in diameter (or smaller, if you like), then cut crosswise into 1-inch squares.  To create ridges, either use a gnocchi paddle or roll each square over the tines of a fork.  Move the squares cut corner to cut corner.  Allow each gnocchi to fall onto a well-floured sheet pan as you finish.  If you use a fork, invert the fork so that the tines point down.  Start at the tines nearest the handle, and roll the dumpling firmly but gently down the tines.

You can hold the gnocchi on a sheet pan, as long as they are not touching, for a few hours.  Or, you can blanch them which allows you to hold them up to one day in the refrigerator.

To blanch, bring a pot of water to a boil.  Cook the gnocchi, 15 to 20 at a time, just until they float to the surface, 1 to 2 minutes.  Either add sauce and serve immediately or place on a well-oiled sheet pan and cover with plastic wrap.  (DT: After blanching I put mine in a greased plastic container and drizzled them with a bit of olive oil to make sure they didn’t stick together.)

Finish the dish
Bring a large pot of water to a boil.  Melt the butter in a large sauté pan.  Add the morels and sauté until tender and starting to turn brown, about 5 minutes.  Add the peas and fresh herbs and turn the heat to medium-low.  Season with kosher salt and pepper to taste.  Add the gnocchi to the boiling water and as they are ready, scoop them directly into the pan with the vegetables.  I made this dish fairly dry, but you can make it saucier by adding some white wine to the pan.

Garnish each portion with a sprinkling of Parmesan cheese, a drizzle of olive oil, and light pinch of truffle salt.


The Salad That Got Away From Me

June 12, 2011

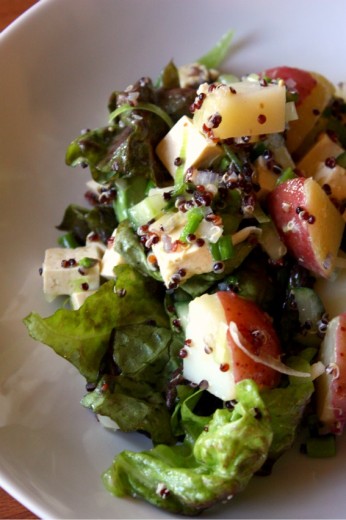
This is the salad that got away from me.  I mean that in a good way.  It started out as a riff on Heidi Swanson’s Mostly Not Potato Salad.  I love potato salad.  Any potato salad.  I know some people have strong feelings about mayo, as in they hate it, but I am an equal opportunity potato salad lover.  If I’m going to make a more traditional one myself, I feature mustard strongly and mix the mayo with Greek yogurt so there is more tang and bite than glop.  But whatever you want to make for me, I will eat.

Having said that, I liked the idea of a potato salad in which the potatoes were just a part of the ensemble and not the star.  I also like the idea of some things cooked and some things raw and so off I went to make it one Sunday night.  And then, two dinner guests came over and so I started adding things to it.  Having just gotten some terrific whole grain tips during my trip to the Thermador kitchen, I added some black quinoa to the mix.  (Two tips to share, add while grains in unexpected places, like potato salad, and cook up a big pot of your favorite grain, store it in the refrigerator, and use it all week.)  To bulk up my salad to feed four, I also added a bit of farmers’ market lettuce and a perfectly ripe avocado.  I had a favorite dressing already in my refrigerator and dinner was served.  I liked this so much I made it again the next night.

One Year Ago: Brown Rice with Tempeh and Tahini Sauce
Two Years Ago: Strawberry Rhubarb Coffee Cake
Three Years Ago: Ina Garten’s Outrageous Brownies

My Mostly Not Potato Salad
Inspired by Heidi Swanson
Serves 4-6

You can use regular quinoa instead of the black called for here, but it won’t look as striking.  Tossing the warm vegetables with a bit of the salad dressing first will allow them to absorb more of the dressing.

For the dressing
1 small shallot, minced
1 tsp. Dijon mustard
2 tbsp. Balsamic vinegar
4 tbsp. olive oil
Kosher salt and freshly ground black pepper

For the salad
2 large red potatoes
1 large leek, cut in half and thinly sliced
½ bunch of very thin asparagus, trimmed and cut into 1-inch pieces
½ English cucumber, seeded, cut into small pieces
2 tbsp. chopped fresh chives
¼ cup fresh basil leaves, torn
6 ounces extra-firm tofu, cut into ½-inch cubes
5 large lettuce leaves, washed and torn into bite size pieces
½ cup cooked black quinoa
1 large avocado, cut into small pieces

Make the dressing
Place the shallot, mustard, vinegar, a large pinch of kosher salt, and a few grinds of pepper in a wide mouth jar.  Cover and give a vigorous shake.  Uncover and add the olive oil and cover and shake again.  Adjust the dressing to your taste with more oil, salt or pepper.

Make the salad
Place the potatoes in a small pot and cover them with cold water.  Salt the water and bring to a rapid boil, then lower the heat to a gentle boil.  Cook until a knife can be inserted easily into the center of each potato, about 15 minutes.  Drain and set aside.

Place a medium sauté pan over medium heat.  Add just enough olive oil to coat the bottom of the pan and then add in the leeks.  Cook, stirring occasionally, until the leeks soften but do not allow them to brown, about 5 minutes.  Add the asparagus and sauté for another minute.  Scrape the vegetables into a large salad bowl.

Cut the potatoes into bite-size pieces and add to the bowl.  Toss the warm vegetables with just a bit of the dressing, then layer on the cucumber, herbs, tofu, lettuce, quinoa, and avocado.  Drizzle on more dressing and toss carefully.


From the Other Cookie Jar

June 9, 2011

In my house growing up, we had two cookie jars.  One was traditional looking (photo in this post) and sat out on the counter.  It held all the things my brothers and I took in ZipLoc bags in our lunch boxes and also were occasionally allowed to have as an after school treat.  Most of the time, they were homemade treats but as my mom got busier (she went back to school to get a nursing degree when my youngest brother was just a baby), often times that cookie jar held store-bought cookies.  We didn’t care – sweet was sweet.

The other cookie jar was just a large glass jar with a white screw-top lid and it sat in a cabinet beneath the stove.  There was only ever one thing in that jar and it was Mandlebrot.  We pronounced it “mandel bread” and it was one thing my mom made consistently throughout my childhood.  Like all good bakers, she was always trying out new cookies, cakes, and brownies, but she made Mandlebrot several times a month.  It was my dad’s favorite after-dinner treat and I have very clear memories of him going down to that cabinet, taking out the jar, unscrewing the lid, taking two pieces onto a small plate, and sitting at the table with the paper or The New Yorker. If my dad likes something, especially if it is sweet, he tends to suck on it rather than chew it.  He could make those two slim cookies last for the better part of an hour.

My relationship with my father’s favorite cookie was a little more complicated.  There were a few problems.  First, there is no chocolate to be found here which is problematic for a chocolate lover.  Second, there are lots of nuts to be found here and (let’s say it all together, shall we?), I don’t like nuts in my sweets.  Third, these aren’t very sweet.  To my adult palate, that is actually welcome but when you are nine years old, cookies are supposed to be sweet.  The thing that kept me coming back to sit at that table with him and take my own Mandelbrot out of the special jar was the texture.

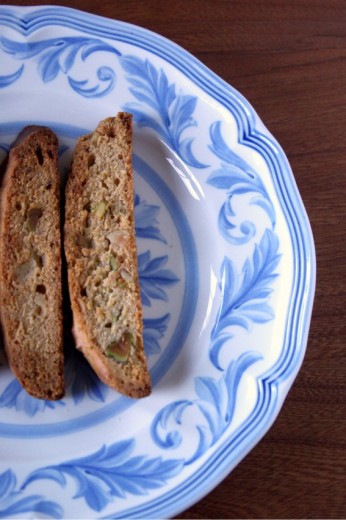
The ends are crisp, almost a little smoky tasting.  I am the person who likes the slightly burnt kernels in the popcorn bowl and who, back in the days when I ate marshmallows around  a campfire, used to burn them black, eat off the outer black part, and burn them again, so I like those edges.  But the middle is what really brought me back each night until that jar was empty.  Soft, a bit chewy even with the nuts giving you a pleasant crunch.

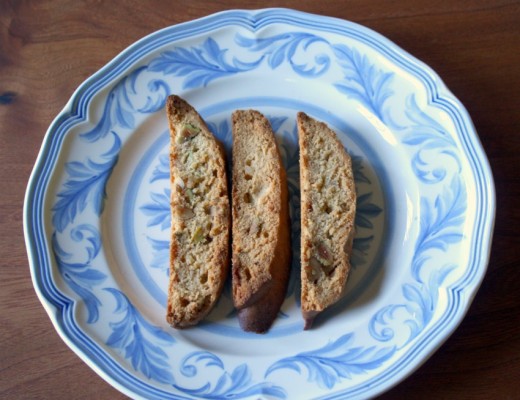
After not having Mandelbrot for close to 20 years, I recently asked my mom for the recipe.  She wrote it out in her lefty-looking handwriting and I’ll tell you, it’s a good thing I know a thing or two about baking.  Copied off a 3×5 card from her ancient recipe box, it offers next to no instructions besides ingredients, baking temperature, and baking time.  Having made my fair share of biscotti, I was able to figure it out.  Having waited 20 years to make them, I am now officially kicking myself for not making them 19 years sooner.

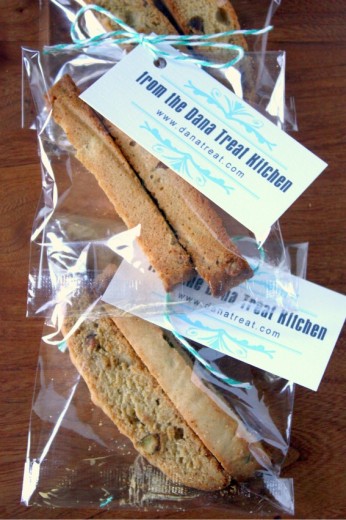
This is a sophisticated cookie.  Not hit-you-over-the-head-with-flavor cookie.  Perfect with an afternoon cup of tea or served alongside a cheese plate.  I make so few of the recipes from my childhood since our dinners were mostly focused around meat.  I’m thrilled to be able to share this with all of you.

One Year Ago: Asparagus and Grilled Shiitake with Soy Vinaigrette, Crisp Sage Tempura
Two Years Ago: Oven-Fried Rice Balls, Mexican Pizza with Corn and Tomatillos
Three Years Ago: Paparadelle with Herbs and a Poached Egg

Mandelbrot
Makes about 3 dozen

Traditionally, this recipe is made with either almonds or a mix of almonds and walnuts.  I used pistachios and walnuts in this batch because I was out of almonds.  Use what you have.  I also over-baked this batch a bit, so be sure to watch yours carefully.

3 eggs
1 cup sugar
1 cup vegetable oil
½ tsp. vanilla extract
½ tsp. almond extract
3 cups flour
½ tsp. baking powder
¼ tsp. salt
1½ cups almonds or a mix of almonds and walnuts, coarsely chopped

Preheat the oven to 375ºF with the racks in the middle and bottom position.  Line two baking sheets with parchment paper.

Mix together the eggs and sugar until combined well.  Add the extracts and mix to blend again.  Pour in the oil and carefully mix so that you don’t splatter oil.  Sprinkle on the flour, baking powder, and salt and mix until just combined.  Stir in the nuts by hand with a wooden spoon or a rubber spatula.  The dough will be sticky, almost the consistency of Play-Doh.

Scoop out roughly a quarter of the dough and form it into a log about 2-3 inches wide and an inch or so high.  Use a rubber spatula to help you guide it into shape.  Repeat with the rest of the dough, placing two logs on each sheet.  Bake for 15 minutes, or until barely golden brown.

Remove the sheets from the oven and allow to sit for a minute.  One a time and using a serrated knife, cut each log into ½-inch thick slices.  Lay the slices back on the baking sheets and put them back in the oven.  Bake for 7 minutes, remove and flip all the cookies over, and bake for another 7 minutes.  You want the cookies to be barely golden brown around the edges but still pale in the center.  Remove the cookies to a rack and let them cool completely.


« Older Posts Newer Posts »