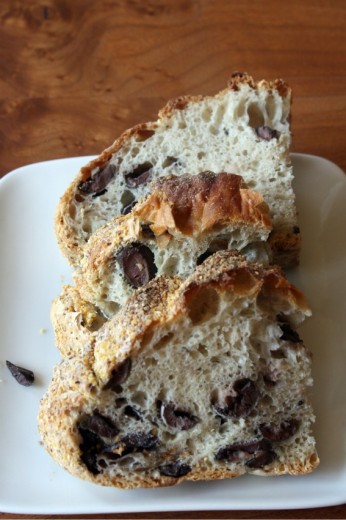
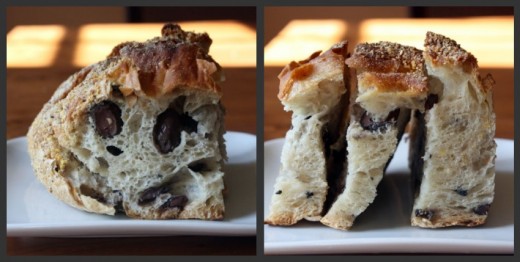
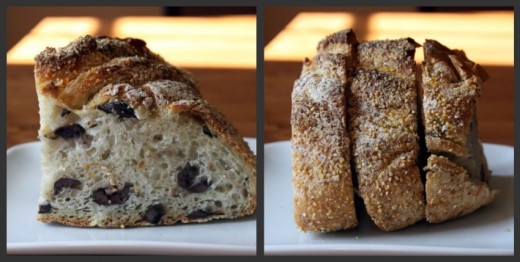
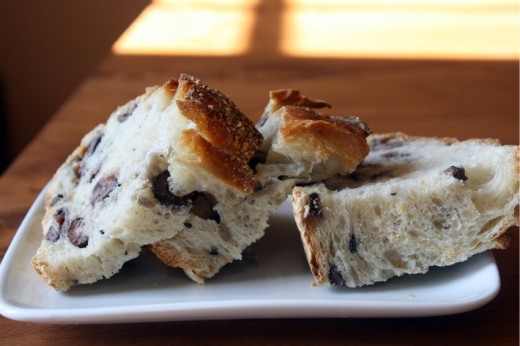
OK, so maybe I’m a little obsessed with making this no-knead bread. I make it for the classes I teach, I make it for every dinner party, I make it when I think, hey! I need some really good bread. It just works so well for me and my schedule. And every single person who tastes it marvels that I made it. That my friends is an excellent recipe. You know how you can sometimes do a 360º camera on web sites? Like to look at a hotel room? Here is my 360º of this bread.
I’ve been loving the cheese version. I made the version with some whole wheat flour and surprisingly, I didn’t love that one. Give me a bread basket in a restaurant and I will always reach for the darker wheat-ier slice, but this one just didn’t do it for me. The olive bread though…Nirvana! Um. Almost. Lahey tells you not to use salt in this recipe because the olives are so salty. This totally made sense to me but there was too big a contrast flavor-wise between the olives and the bread. I needed a bit of salt in the dough to balance. So, next time, maybe a couple of grams of salt, some rosemary to mix in with the olives, and a bit of coarse salt sprinkled on top. Can’t wait.
Entries for the Pike Place Market gift pack can be made up through midnight PDT tomorrow, Friday, May 27th. Winner will be announced on Monday. Thank you all for your thoughtful entries!
One Year Ago: Giant Chocolate Cake with Bittersweet Chocolate Ganache, Mushrooms with White Wine
Two Years Ago: Roasted Asparagus with a Poached Egg, Crystallized Ginger Ice Cream, Tofu Salad with Spicy Peanut Sauce
Pane all’Olive (Olive Bread)
My Bread
Makes one 10-inch loaf
I’m giving you the recipe as written in the book without any additional salt. If you make it and add salt, let me know how it works out. I will update this recipe when I make it again (soon). Also, Lahey recommends using already pitted olives so they don’t get too smushed and color the bread. I used Kalamata. UPDATE 12-11: I did use 2 grams of salt in the bread and I think it was perfect!
400 grams (3 cups) bread flour
200 grams (1½) cups pitted olives
¾ tsp. (3 grams) instant or active dry yeast
300 grams (1½ cups) cool water
Wheat bran, cornmeal, or additional flour for dusting
In a medium bowl, stir together the flour, ovels, and yeast. Add the water and, using a wooden spoon or your hand, mix until you have a wet, sticky dough, about 30 seconds. Cover the bowl and let sit at room temperature until the surface is dotted with bubbles and the dough is more than doubled in size, 12 to 18 hours.
When the first rise is complete, generously dust a work surface with flour. Use a bowl scraper or rubber spatula to scrape the dough out of the bowl in one piece. Using lightly floured hands or a bowl scraper or spatula, lift the edges of the dough in toward the center. Nudge and tuck in the edges of the dough to make it round.
Place a tea towel on your work surface and generously dust it with wheat bran, cornmeal, or flour. Gently place the dough on the towel, seam side down. If the dough is tacky, dust the top lightly with wheat bran, cornmeal, or flour. Fold the ends of the tea towel loosely over the dough and place it in a warm, draft-free spot to rise for 1 to 2 hours. The dough is ready when it is almost doubled. If you gently poke it with your finger, it should hold the impression. If it springs back, let it rise for another 15 minutes.
Half an hour before the end of the second rise, preheat the oven to 475ºF, with a rack in the lower third, and place a covered 4½ to 5½-quart heavy pot in the center of the rack.
Using pot holders, carefully remove the preheated pot from the oven and uncover it. Unfold the tea towel and quickly but gently invert the dough into the pot, seam side up. (Use caution, the pot will be very hot.) Cover the pot and bake for 30 minutes.
Remove the lid and continue baking until the bread is a deep chestnut brown but not burnt, 15 to 30 minutes more. Use a heatproof spatula or pot holders to gently lift the bread out of the pot and place it on a rack to cool completely.


 Share
Share
The bread looks perfect! I love the big chunks of olives. I wish I could rip into a loaf right now!
Comment by Maria — May 26, 2011 @ 9:50 pm
one of my favorite breads, well two actually, olive and sourdough. the real sourdough like from san francisco.
i knead to do a bread post at some point….
Comment by vanillasugarblog — May 26, 2011 @ 11:37 pm
This bread is right up my alley. I just received some seasoned olives which would work very nicely!!!
Comment by bellini — May 26, 2011 @ 11:55 pm
Gorgeous olive loaf. It’s hard to believe that such a beautiful texture doesn’t require kneading.
Comment by Nisrine M. — May 27, 2011 @ 12:40 am
Can you explain why my no-knead bread never has such a nice crust like that? Mine is always all…soft and mushy. Maybe I just need to go to Seattle and bake bread. That makes sense.
I’m SO sad that I’m not going to be seeing you while I’m on this coast! I’ll be back in October though to run a marathon. I think this calls for a trip up north.
Comment by Joanne — May 27, 2011 @ 4:38 am
I made my first no knead bread for mother’s day.. and wow was it awesome. I cannot wait to try this one! :)
Comment by Beth R — May 27, 2011 @ 1:31 pm
Mmmm – I eventually tried this bread over the weekend, between the two of us we polished off half a loaf! I noticed that mine did not rise as much as yours did – It did stick to the towel and had to be scraped off so I might have lost some there. I guess I needed more flour on the towel. I used half wholemeal flour and half white. I used half olives and half sun-dried tomatoes, and the taste and texture was amazing, but I agree I would have preferred more salt. Hubby did not think so but he put butter on his bread and I had mine plain so that might have made the difference. thanks for spurring me on – I have mulled over making this bread for so long.
Comment by GILLIAN — May 30, 2011 @ 1:40 am
Your bread looks exquisite! I’ll have to try making it soon. Yum.
Comment by Joy — May 30, 2011 @ 9:32 pm
Awesome looking loaf! I made an olive bread with rosemary this past weekend, but had quite a few problems, tasted ok, but let’s say it looked a bit freakish ;-)
I must repeat it, with your beautiful loaf in mind as a goal
Comment by SallyBR — May 31, 2011 @ 6:13 pm
[…] that he well deserves. I grilled copper river salmon, made this salad, and had plans to bake this bread (which I didn’t get around to, but luckily we have some great bakeries around here!). I […]
Pingback by Rosé Sangria « — June 11, 2011 @ 4:20 pm
What incredibly gorgeous bread! I love the big holes yumm.
Comment by Ashley — July 5, 2011 @ 3:58 am
i just made this bread for the first time, added salt and fresh rosemary, and it came out perfectly, even looked like yours! thanks for the amazing recipe.
Comment by Belinda — July 10, 2011 @ 8:26 pm
We made this for Christmas dinner, but added salt as suggested. It was fantastic and, like you said, just about the easiest thing to make. Thanks so much for sharing!
Comment by Stephanie — December 27, 2011 @ 10:06 pm
thank you for the note about salt! I made this recently without added salt and felt it needed some!
Comment by Annie — May 28, 2013 @ 3:59 pm