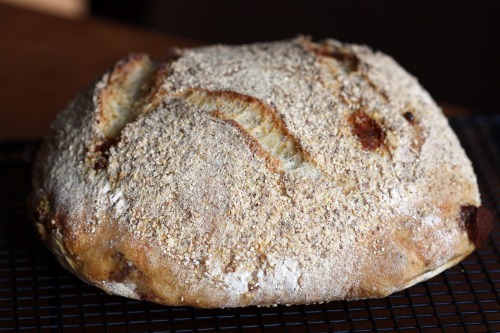
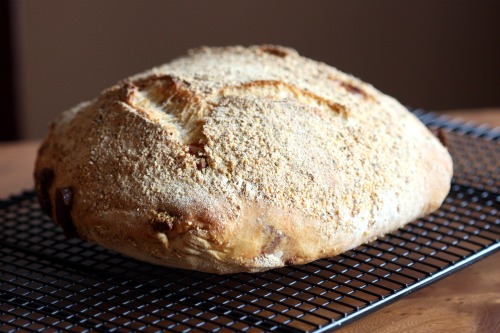
I have been keeping something from you. Well, not keeping from you per se, but just not sharing. It is time to come clean. I’ve been baking a lot of bread.
No-knead bread to be exact. I’ve been making loaves to to serve to my classes and for every dinner party in recent memory. I know, no-knead bread is so 2008 (2006 is actually when it first graced the pages of the New York Times). What can I say? I’m a late adopter.
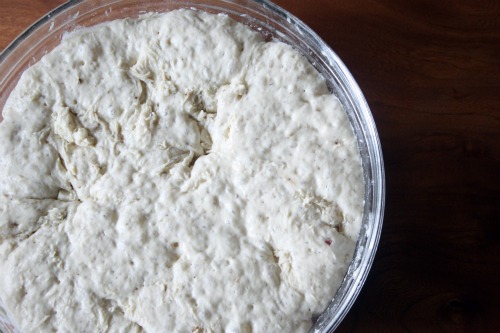
(This is the dough after the first rise.)
The fact that everyone was writing about it and raving about it is precisely why I decided not to make it. I was so over hearing and reading about it, so over it I didn’t even want to attempt making the bread. Which is a shame because this, as you have no doubt heard many times before, is the best bread I have ever made. And by far the easiest.
Jim Lahey’s wonderful book My Bread has wonderful step by step photos and includes many delectable variations of his masterpiece. Until recently, I did not feel any need to stray from the original. Why mess with perfection? But the cheese bread was calling my name. I decided to use, on Lahey’s recommendation, a young Pecorino. When I found myself in a cheese shop, I realized I had no idea of how much I was supposed to buy and decided to err on the side of too much. So, if you are attending one of my upcoming classes or coming to my house for a dinner party in the near future, you will be having cheese bread. There are worse things.
In my mind, there are only two tricky things about making this or any of the other no-knead breads in this book. One is timing and the other is getting the dough out of the towel and into the extremely hot pot without burning yourself. I can’t really give you any advice on the latter except be really careful. As for the former, this is what works for me. I start my dough at around 8pm the night before I want to serve the bread. That way, it will be done with it’s first (very long) rise around 2pm. I let it rise for another two hours which puts in the oven at around 4pm. After almost an hour of baking, it’s done around 5pm. That way, it has plenty of time to cool before I want to serve it. If you think starting a dough after you have already made and cleaned up dinner (and possibly given your kids a bath and read them stories) sounds daunting, it takes literally 2 minutes of your time to do.
One Year Ago: Black Bean Tostadas (Several people have told me they made these recently. Now I am craving them.)
Two Years Ago: Butterscotch Spiral Coffee Cake
Pane con Formaggio (Cheese Bread)
My Bread
Makes one 10-inch loaf
Most good bakers will tell you to measure by weight, not by volume. I admit to usually resorting to my good old measuring cups – except with this recipe. I encourage you to try it here – even fewer dishes to wash!
3 cups bread flour, 400 grams
2½ cups pecorino Toscano, Asiago, or aged Fontina, cut into ½-inch cubes, 200 grams
1 tsp. table salt, 6 grams
¾ tsp. instant or other active dry yeast, 3 grams
½ tsp. freshly ground black pepper, 2 grams
1 1/3 cups cool water, 300 grams
wheat bran, cornmeal, or additional flour for dusting
1. In a medium bowl, stir together the flour, cheese, salt, yeast, and pepper. Add the water and, using a wooden spoon or your hand, mix until you have a wet, sticky dough, about 30 seconds. Cover the bowl and let sit at room temperature until the surface is dotted with bubbles and the dough is more than doubled in size, 12 to 18 hours.
2. When the first rise is complete, generously dust a work surface with flour. Use a bowl scraper or rubber spatula to scrape the dough out of the bowl in one piece. Using lightly floured hands or a bowl scraper or spatula, lift the edges of the dough in toward the center. Nudge and tuck in the edges of the dough to make it round.
3. Place a tea towel on your work surface and generously dust it with wheat bran, cornmeal, or flour. (DT: I always use cornmeal for this step. I like the added crunch.) Gently place the dough on the towel, seam side down. If the dough is tacky, dust the top lightly with flour. Fold the ends of the tea towel loosely over the dough to cover it and place it in a warm, draft-free spot to rise for 1 to 2 hours. The dough is ready when it is almost doubled. If you gently poke it with your finger, it should hold the impression. If it springs back, let it rise for another 15 minutes.
4. Half an hour before the end of the second rise, preheat the oven to 475ºF, with a rack in the lower third and place a covered 4½ to 5½ quart heavy pot in the center of the rack. (DT: I use a 4 quart Le Crueset pot with great success.)
5. Using pot holders, carefully remove the preheated pot from the oven and uncover it. Unfold the tea towel and quickly but gently invert the dough into the pot, seam side up. Cover the pot and bake for 30 minutes.
6. Remove the lid and continue baking until the bread is a deep chestnut color but not burnt, 15 to 20 minutes more. Use a heatproof spatula or pot holders to gently lift the bread out of the pot and place it on a rack to cool thoroughly.


 Share
Share
Hello! I have a question – if i don’t want to use cheese (for some weird and unexplainable reason), should I increase flour quantity or no?
Comment by Kärt — April 12, 2011 @ 9:33 am
So you know what my plans were for today?
Yes, believe. MY BREAD’s no kneed loaf.
I have NEVER made bread at home before. I feel yeast challenged and have watched others make this bread with ease.
I have the yeast ready, the scraper, the pot and the book.
and there you are and your nice loaf.
I am a believer!
S.
Comment by stacey snacks — April 12, 2011 @ 11:56 am
I completely understand what you’re saying, Dana. It’s so hard to write about something that’s been blogged about to no end in the world of food blogs. But with this bread, you just can’t let it slip by without giving credit where huge credit is due. I’m actually quite thankful you wrote about it as I wasn’t aware Lahey had a cheese version of this bread, let alone a whole book about it. I’m heading to amazon right now to buy his book! Thank you!
Comment by Clara — April 12, 2011 @ 1:27 pm
A beautiful recipe! The timing and simplicity of it makes it seem possible to do, given my busy life. This is as close as I’ve come to trying no-knead bread. However, I wonder how I could make it with whole wheat bread flour and maybe some seeds or whole grains. I don’t really care for white bread, no matter how good it is. (I grew up thinking I didn’t like bread, because all I’d ever had was white bread. But when I tasted whole-grain bread as an adult, I fell in love!)
Comment by Carol — April 12, 2011 @ 1:29 pm
I LOVE bread, and this looks just AMAZING!
Comment by Monique — April 12, 2011 @ 2:15 pm
I too hear such great things about no knead bread and about that book, and I really like baking bread, and I’ve never tried this! The only no knead dough I’ve ever made was the recent rye flatbread. I need to give this a go. Your bread looks great!
Comment by lisaiscooking — April 12, 2011 @ 3:38 pm
Making no-knead bread has been on my list for awhile! I also need to by a Le Crueset pot, so I think that is why I have been holding off. BUT, when I do I am going to use your recipe, because cheesy bread sounds like the way to go!
Comment by fresh365 — April 12, 2011 @ 4:19 pm
Friends, if you are looking to alter this recipe (i.e. leave out the cheese or use different flours), I would encourage you to either look at the original recipe – easily found by googling – or buy the book. I am not enough of a bread expert to figure out substitutions. Also, you DO NOT need a Le Crueset pot. I have friends who make it in a regular old pot (stainless even!) with no problem.
Comment by dana — April 12, 2011 @ 4:22 pm
I always forget about that bread, but I’ve loved it since 2008. I think baking in a dutch oven is genius even if you don’t make that particular bread recipe.
Comment by Kate @ Savour Fare — April 12, 2011 @ 5:46 pm
I’ve only done the Healthy Bread in 5 and Artisan bread in 5 no-kneads before but your Jim Lahey bread looks INFINITELY better than any of my no-kneads ever did! Given my extreme lack of time lately, this is going to be put together tonight!
Comment by Joanne — April 12, 2011 @ 5:57 pm
Gorgeous bread, Dana…. Now, you do realize that in the very near future you will get your first sourdough starter going, don’t you?
:-)
Comment by SallyBR — April 12, 2011 @ 11:26 pm
Hi Dana,
I’ve been baking no-knead bread in all kinds of variations and I put it in a baking paper (the brown one from whole foods) lined basket or colander or whatever you use to let it rise. When it is done rising I simply lift the whole thing with the paper and put it in the hot pot (with the paper). No mess – easy to handle.
take care
Eva
Comment by eva — April 13, 2011 @ 12:43 am
This looks really tasty, but since you have been making a lot of loaves lately, I really wish you would try your hand at the no-knead method in my Kneadlessly Simple book. As you will see, it is a bit different than the Lahey method–a little easier, I think. It also calls for a retarded first fermentation–which really just means that the dough is mixed with ice cold water. This retards the first rise, a step I think delivers exceptional flavor and color. I’ve got several of my recipes posted on my site–hope you’ll give one a try!
Comment by Nancy Baggett — April 13, 2011 @ 12:49 am
I love no-knead bread and usually use the Jim Lahey recipe out of How to Cook Everything. Somewhere along the line, I read that rather than let it do a second rise on a towel, you could use a sheet of parchment over a frying pan (for shape)and cover it with plastic wrap. Then,when it comes time to put it in the pot,you just take off the plastic wrap and plop the bread in the pot parchment and all. The odd time I’ve had the parchment make an indent into the bread but it sure makes the whole moving process a lot easier. I can hardly wait to try this cheese version – thanks!
Comment by Luann — April 13, 2011 @ 2:01 am
Yet another reason why I want to attend your classes! I have a fear of baking with yeast, but you make this bread sound so easy that I just may have to try to make it…and it looks soooooo good!
Comment by melinda ke — April 14, 2011 @ 9:26 pm
I held out forever as well…but it’s too easy not to! Love the no knead bread.
Comment by peabody — April 15, 2011 @ 12:07 am
I love fresh bread and don’t make it too often…but my curiosity is peaked. Guess I wasn’t around to experience the last no-knead bread craze! :)
Here’s a link to my post sharing your post with Rosie Dreams readers.
http://rosiedreams.com/lovely-links-1/
Thanks!
jeanine
Comment by Jeanine — April 25, 2011 @ 1:32 am
That is a perfect crust! I had some not so successful no-knead bread making experiences before but am willing to try again after seeing your photos!
Comment by Ashley — May 22, 2011 @ 2:36 pm
Oh wow this bread is delicious. I used an aged asiago cheese and it was amaaaaaaaazing!
Comment by Scott L. — July 15, 2011 @ 7:23 pm
[…] google reader blog subscriptions, Dana Treat’s recipes totally tantalized. Firstly, no-knead cheese bread. (Darn my addiction to a good cheese.) Second, a soup to add to the repertoire. […]
Pingback by lovely links, sharing mom blog links, link love | rosiedreams.com — December 8, 2011 @ 7:26 am