Archive for January, 2011

It’s Complicated

January 20, 2011

Those two words sum up my relationship with my Baked cookbooks.  It’s complicated.

These books are like the almost perfect boyfriend from high school.  Handsome, smart, useful, interesting, even exciting.  But they can let you down when you least expect it.  And they are not reliable.  When they are good, they are very very good.  And when they are bad, well, sometimes there are tears.

Last weekend, I made the Grasshopper Cake from the first book for a friend’s birthday.  I love the Baked chocolate cake recipe.  It bakes up nice and tall and perfectly flat.  No domed top of slice off.  And it is moist with terrific chocolate flavor.  Adding a mint ganache and a mint buttercream frosting to that perfect cake seemed like a no-brainer.  Their buttercream recipe is not traditional and it did not turn out well for me at all.  I could not get the butter to incorporate no matter how long and how hard I whipped.  I was left with a frosting that tasted good but looked terrible.  There were flat pea sized pieces of butter throughout.  I only used about 1/3 of it – I just couldn’t pile it on – and I covered the cake with flat Dutch mints.  It ended up looking good and my husband and my friend Lauren, both of whom have eaten plenty of my cakes, said it was one of my best.  But throwing out about the equivalent of three sticks of butter made me mad.

Because I’m a girl and I had to come back for more, I decided to make Nutella scones from the new book.  How could you go wrong, right?  Wrong.  In spite of the authors’ warnings of not mixing the dough too much (a common warning with scones), I had to manhandle it and add much more cream than recommended to get anything even resembling a dough.  What came out of the oven did not look like the scones of my past.  They kind of toppled over on the themselves.  And they just didn’t taste good.  At first I thought it was because they weren’t sweet enough but no, they just weren’t good.  My kids were so excited – a chocolate scone! – but they didn’t like them either.  Rats.  And my brother Michael, the one who asks me to make the Nutella Pound Cake any time I offer dessert, he didn’t take a single one home with him.  That, my friends, is a failure.

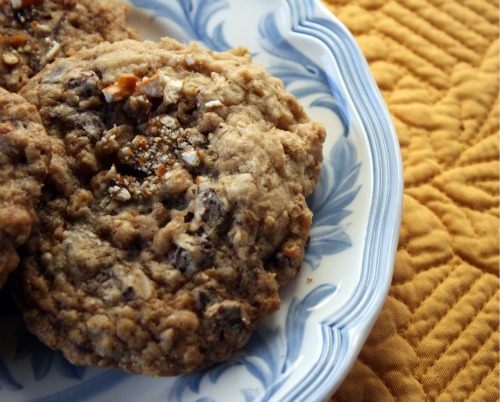
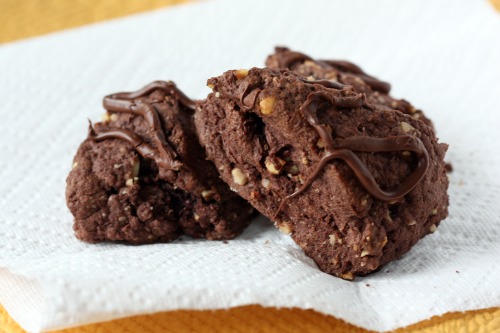
Oh, but I went back for more.  Rather than break up with my books, I decided to make a cookie that sounded like a home run.  And it is, kind of.  There is almost too much chocolate for the dough (I never thought I would say that), and not quite enough pretzels for them to make sense being there.  If I’m going to have something salty in my cookie, I want to really notice it, not be like, “Huh?  What is a pretzel piece doing in my cookie?”.  But I will be back for more.  I just can’t quit you Baked.

One Year Ago:  Lasagne with Eggplant and Chard
Two Years Ago:  Sicilian Eggplant Spread with Crostini

Cowboy Cookies
Baked Explorations
Makes about 24 large cookies

1¾ cups flour
1 tsp. baking soda
1 tsp. baking powder
½ tsp. salt
2 cups rolled oats
14 tbsp. (1¾ sticks) unsalted butter, cool but not cold, cut into 1-inch cubes
¾ cup granulated sugar
1 cup firmly packed dark brown sugar
1 large egg
1 large egg yolk
1 tsp. vanilla extract
1 tsp. instant espresso powder
2 cups semisweet chocolate chunks (about 12 ounces)
¾ cup thin salty pretzels (about 1½ ounces) broken into tiny pieces but not crushed into dust

In a medium bowl, whisk together the flour, baking soda, baking powder, and salt.  Add the oats and stir to combine.

In the bowl of a standing mixer fitted with the paddle attachment, beat the butter and sugars together until smooth and creamy.  Add the egg and egg yolk, beating until the mixture looks light and fluffy.  Scrape down the sides and bottom of the bowl, add the vanilla, and beat for 5 seconds.  Dissolve the espresso powder in ¼ cup hot water and add it to the bowl, mixing until combined.

Add half the dry ingredients and mix for 15 seconds.  Add the remaining dry ingredients and beat until just incorporated.  Scrape down the sides and bottom of the bowl and fold in the chocolate chunks and ½ cup of the pretzel pieces.  Cover the bowl tightly and refrigerate for at least 4 hours.

Preheat the oven to 350ºF.  Line two baking sheets with parchment paper.

Use a small ice cream scoop with a release mechanism to scoop dough in 2 tablespoon-size balls (or use a tablespoon measure) and place the dough balls onto the prepared sheets about 1 inch apart.  Sprinkle the remaining ¼ cup pretzel pieces over the dough balls.  Use the palm of your hand to press the dough down lightly; don’t small the cookie – you just want to slightly flatten the ball and push the pretzel pieces into the dough.

Bake for 11 to 13 minutes, rotating the pans halfway through the baking time, until the edges of the cookies are golden brown or just starting to darken.

Set the pan on a wire rack for 10 minutes to cool.  Use a spatula to transfer the cookies to the rack to cool completely.  They can be store in an airtight container for up to 3 days.


Summer Beans, Winter Vegetables

January 17, 2011

Imagine this.  A windy wet January day.  Me and two small boys trying in vain to hold our hoods on our heads after leaving the warmth of our car, walking the wet sidewalk that will lead us to the West Seattle farmers’ market.  We are in search of two breadsticks, apple cider, and some inspiration for dinner.  I love this market.  It runs all year, is food only, and never seems to feel crowded.  Plus it has some of the best vendors.  But it is a sad and lonely place in January.  Sure, the cider guy is there, cheerful as ever.  The bakery woman sees us coming and puts the breadsticks in a bag.  The apple people were so delighted by Graham’s enthusiastic “Thank you!” that I felt we made their day.  But there was not a lot of dinner inspiration.

And then I remembered that I had a bag of fresh cranberry beans stowed away in my freezer.  I buy them every summer and hide them from myself for a few months until I forget they are there, and then remember them in the middle of a deluge in West Seattle.  I quickly made the rounds again of the few vendors who had braved the elements.  Leeks, celery root, delicata squash, gorgeous purple potatoes.  I knew I had half a cauliflower and some kale at home.  Soup!

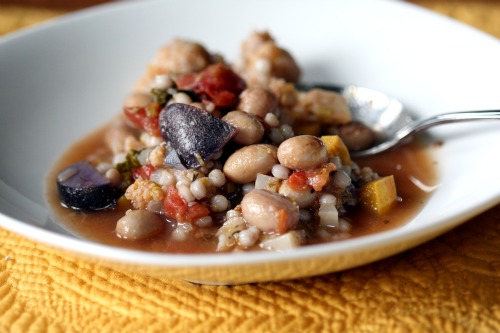
Now, please believe me when I tell you this.  This soup was gorgeous just out of the pot.  The colors were a knock out.  Purple, red, vibrant green, and orange all together in one bowl.  Did I take a picture when it looked like that?  Of course not.  I waited until the next day when the soup looked a little sad and sorry but tasted, if this is possible, better.

One Year Ago:  Chunky Vegetable Pot Pie
Two Years Ago:  Pea Salad with Radishes and Feta

Winter Market Soup

Dana Treat Original
Serves 6

I realize that most of you do not have a bag of fresh cranberry beans stowed in your freezer.  (And if you do, can I have some?)  You can use a can of your favorites.  Or better yet, cook up some dried beans.  They hold up so much better in soups in my opinon.  You will want about 2 cups of cooked beans.

Olive oil
4 small or 2 large leeks, washed well, cut in half, and thinly sliced
¾ lb. purple potatoes, cut into bite size chunks
1 tsp. dried thyme
1 small celery root, peeled and cut into ½-inch dice
1 small (1 pound) delicata squash, seeded and cut into 1-inch dice
½ a small cauliflower, sliced and then separated into small florets
1 14-ounce can diced tomatoes
1 14-ounce can beans of your choice, drained
8 cups vegetable broth
1 small bunch kale, torn into small pieces
1 cup Israeli couscous
Kosher salt and freshly ground black pepper
Freshly grated Parmesan (optional)

Place a soup pot over medium heat.  Add just enough olive oil to coat the bottom and then add the leeks and a large pinch of salt.  Sauté until starting to soften, stirring constantly, then add the potatoes and the thyme.  (Leeks burn quickly, so be attentive.)  Cook for 5 minutes, stirring often, then add the celery root and the squash.  Cook another 5 minutes, adding a bit of water if things are sticking too much to the bottom.

Next add the tomatoes with their juices and the cauliflower and cook another 5 minutes, stirring often.  Stir in the beans and pour in the stock.  Bring to a boil, then lower the heat to a simmer.  Sprinkle in another pinch of salt and cook, stirring occasionally, until the vegetables are tender, about 20 minutes.

About 10 minutes before serving, add the kale and turn the heat up so the soup comes back to a boil.  Add the couscous and cook, stirring often, until the couscous is al dente, about 8 minutes.  Season to taste with salt and pepper.  Serve the soup in wide bowls garnished with Parmesan.


Change

January 15, 2011

Last week something amazing happened.  On Thursday, at around noon, I sat and had a lunch date with my husband.  In the 6½ years since we returned from London, we had never done that.  I don’t think we ever did it in London either for that matter.

The reason for the lack of lunch dates?  Randy worked at a very large company located across the lake from our house, a company well-known for a certain “culture”.  A company called Microsoft.  Perhaps you have heard of it?  Perhaps you know its reputation for asking a lot of their employees?

Randy is a self-described type Triple-A personality.  He works incredibly hard.  His trajectory since graduating from the Naval Academy in Annapolis goes a little something like this:

Go to flight school and graduate top of his class
Fly A-6 Intruders for a few years until they de-commission the aircraft
Go back to the Naval Academy to teach English
Get a Masters in Philosophy at nearby St. John’s at the same time
Go to Harvard for the MBA program
Move to Seattle to work at a start-up (this is when we met)
Get recruited by Microsoft

Basically, the guy has not slowed down since the day he was born.  Microsoft LOVES people like that.

All along, his career has afforded us a wonderful lifestyle but has also been hard on me and our family.  For the first five years of having children, he rarely saw them during the week.  Because of the commute, he was on the road before they were awake and home after they were in bed.  In the last year and a half, his office moved to the Seattle side of the lake and things got significantly better.  But then his travel schedule picked up dramatically and he was out of state 50-60% of the time.  He would come home and be exhausted from time changes plus the overall stress of travel and the job.

Periodically we would check in.  Is it worth it?  Are we ok?  Are the kids ok?  I would worry about him.  Waking up at 3am and not being able to fall back to sleep night after night because of stress is not sustainable.  To be fair, that was an extreme.  Most of the time, life as a Microsoft employee was challenging but not over the top.  He was very successful there and they recognized his hard work.  He was promoted steadily and received awards for the work he did.  And for the most part, he enjoyed his actual job, the work he did day to day.  He did not enjoy the constant “re-orging” and never being sure if the job he was doing that day would be there the next.

And then one day, Randy had had enough.  It was one request too many or one too many trips.  Maybe it was looking at Graham and thinking, “I have a six year old and I have not been here”.  Whatever it was, he reached a breaking point.  He reached out to his considerable network and started taking recruiting calls more seriously.  A company that had already approached him about a job twice re-appeared, this time with a friend of over 20 years as CEO.  Coffees, conversations, and number crunching happened.  As a family, we weighed the pros and cons.

I had always heard that term “golden handcuffs” but working through the decision, I really came to understand what it meant.  In all the years with Microsoft, we never paid a single cent for health care.  No monthly fees, no co-pays, no deductibles, no cost for drugs.  My two c-sections, Randy’s knee surgery, a herniated belly button surgery for Graham, four years of speech therapy, all the pediatric visits, and the two emergency room visits – we never paid a dime.  It is probably the best health care in the United States.  To me that was much more valuable than the stock left behind.

The fact that Randy would be taking a pay cut and our benefits would become more like most Americans (at least those who have health care) were the cons for the new job.  The pros list was less tangible and more emotional.  Working alongside two people he admires without question, an office 2.1 miles from our house, 25% travel at the most, a conscious decision to slow down – to be more present in our family.  It was that last one we really discussed.  For him to make this move, it had to be a lifestyle move, not just a job change.

I give him a lot of credit.  He was climbing the corporate ladder.  He had over 300 people reporting to him.  He had tremendous success.  And he decided that having lunch with his wife once a week was more important.  This new job is going to be very challenging.  He will still work very hard – he doesn’t know how to work any other way.  But he will go on field trips with Graham, he will be home at 6 (!) every night, he will sleep better, and learn from a trusted friend.

I have always loved the idea of sending Randy to work with a weekly treat.  But Randy has always worked in groups that were too large for it to make sense.  Now that he is at a much smaller company, the weekly treat tradition has begun.  His first week, I asked what he wanted me to make.  I knew it would either be the White Chocolate Almond Chunk Cookies or the Cowgirl Cookies, so I already had the Holly B’s cookbook in hand when I asked.  Sure enough, the Cowgirls won out.

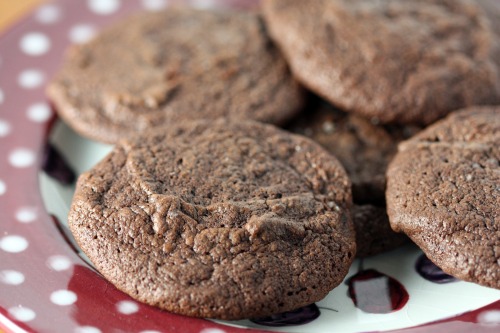
This week, I made something new.  I was paging through my Tartine book, looking for the Lemon Cream recipe for last week’s party, when I happened upon this chocolate amazingness.  How is it that my chocolate loving self never made these?  I know they don’t look like much, but they are one of my most favorite cookies ever.  Essentially, they are a regular cocoa-based chocolate cookie to which you add a half pound of melted bittersweet chocolate.  The batter is like ganache and you pull the cookies out when they are just starting to set and the end result is like a chocolate pillow that you will want to sleep on forever.  As I was scooping them out, I thought a scattering of chocolate chips might be good for texture, but no no no!  No texture needed.  My only change is that I scattered a bit of sea salt (smoked Chardonnay if you must know) over the top of each cookie before baking and that was a good decision.

One Year Ago: Oatmeal Carmelitas

Deluxe Double Chocolate Cookies
Tartine
Makes about 24 large or 36 small cookies

These cookies are very soft when you take them out of the oven so I would advise letting them rest on their baking sheet for a few minutes before moving them to the cooling rack.

8 oz. bittersweet chocolate, coarsely chopped
1 cup + 1 tbsp. flour
½ cup + 2 tbsp. cocoa powder
2 tsp. baking powder
½ cup unsalted butter, at room temperature
1 cup + 2 tbsp. sugar
2 large eggs
¼ tsp. salt
1 tsp. vanilla extract
1/3 cup whole milk
Sea salt, for sprinkling (optional)

Preheat the oven to 350ºF.  Butter a baking sheet or line with parchment paper.

Pour water to a depth of about 2 inches into a saucepan, place over medium heat, and bring to a simmer.  Put the chocolate into a stainless-steel bowl that will rest securely in the rim of the pan and place it over, not touching, the water.  Make sure the pan is completely dry before you add the chocolate and that no moisture gets into the chocolate.  Moisture will cause the chocolate to seize, or develop lumps.  Heat, stirring occasionally, just until the chocolate melts and is smooth.  Remove from the heat and let cool.

Stir together the flour, cocoa powder, and baking powder in a bowl.  Set aside.  Using a stand mixer fitted with the paddle attachment, beat the butter on medium-high speed until creamy.  Slowly add the sugar and mix until the mixture is completely smooth and soft.  Stop the mixer and scrape down the sides of the bowl with a rubber spatula as needed.  Add the eggs one at a time, mixing well after each addition until incorporated before adding the next egg.  Beat in the salt and vanilla, and then add the melted chocolate and beat until incorporated.  Add the milk and beat until combined.  Finally, add the flour mixture and beat on low speed until incorporated.

Drop the dough by heaping tablespoonfuls onto the prepared sheet, spacing them about 1 inch apart.  Bake the cookies until they are just barely firm on top when lightly touched but are still very soft underneath, about 7 minutes.  They wil get firmer as they cool.  Transfer the cookies to a wire rack and let cool.  They will keep in an airtight container at room temperature for several days.


Re-Thinking Tofu

January 12, 2011

I can tell you a sure-fire way to have your spouse/partner/significant other/friend tell you that your food is absolutely delicious.

Have them do a cleanse.

Randy has been talking about doing a cleanse for about 6 months now.  I have been wary.  He tends to be a bit hypoglycemic, meaning if he does not eat when he is hungry, he is not all that pleasant to be around.  I have been in more than one restaurant frantically waving down someone to bring bread as he turns pale.  So, the idea of him basically eating just fruit or vegetables all day was a little frightening.

Every cleanse is different and the one he is doing allows him to eat a “sensible” meal at night.  This basically means vegan and gluten free which is not a stretch for me at all.  It took me about five minutes to come up with several dinners for the week.  I have made some tasty meals the past few nights but you would think I was a Michelin three star chef based on Randy’s reactions to the food.  So there is a good tip for you, starve your partner all day and they will think you are the best cook around!

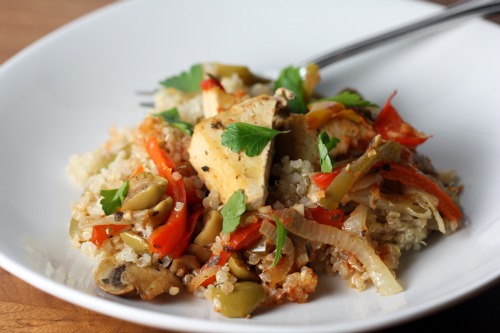
Here is a dish that totally pushed me out of my tofu-with-Asian-food rut.  I know people have strong feelings about our little bean curd friend, but I have always liked tofu and welcome the opportunity to use it more.  When people ask me about tofu, I always give them two suggestions – make sure you buy extra firm and don’t expect it to taste like steak.  It might sound obvious but I do think that people are looking for a meat replacement and tofu is not that.  Tofu is tofu, a relatively tasteless brick of protein.  Using extra firm helps with that texture issue (it is not mushy) and making a dish like this one allows something tasteless on its own to become super tasty.

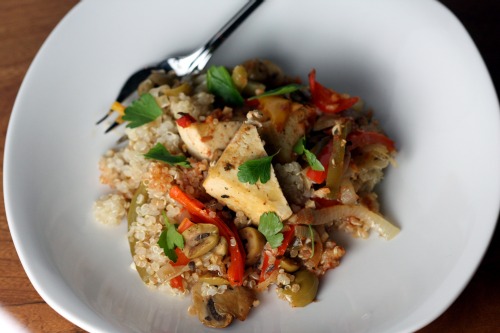
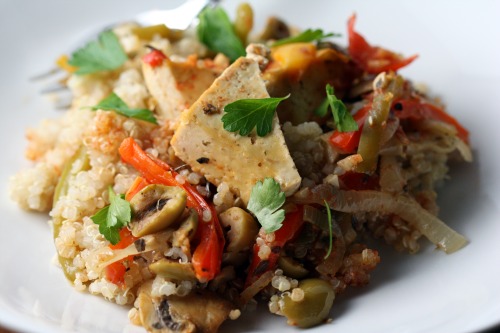
So rather than the flavors of coconut milk, soy sauce, and sesame oil, this tofu soaks up the flavors of white wine, olives, and red wine vinegar.  I took this idea from Deborah Madison and made some changes.  I streamlined some of the baking, lightened up the sauce and added a bed of quinoa for the vegetables and tofu to sleep on.  If you look at this and think, “Tofu?  Quinoa?  Why not just put me out in a field and let me graze?” I beg you to give it another thought.  I thought this made for a very tasty dinner and Randy thought it was the single most delicious thing he had ever put in his mouth.  Thank you cleanse!

One Year Ago:  Black Bean Chilaquile
Two Years Ago:  Milk Chocolate Frosted Layer Cake

Baked Tofu with Peppers and Olives
Adapted from Vegetarian Cooking for Everyone
Serves 4

The Tofu and Vegetables
1 pound extra firm tofu, cut into thin triangles or slabs
Olive oil
1 large onion, thinly sliced
1 tsp. dried thyme
1 tsp. dried basil
½ tsp. dried marjoram
¼ cup chopped parsley
3 bell peppers – red, yellow, and green – thinly sliced
8 ounces mushrooms, thinly sliced
1 garlic cloves, minced
Salt and freshly ground black pepper
½ cup dry white wine
20 Niçoise olives, pitted and halved

The Sauce
1 tbsp. olive oil
2 tbsp. red wine vinegar
1 tbsp. tomato paste
1 tsp. Dijon mustard
2 garlic cloves, minced
Freshly ground black pepper
1 tsp. soy sauce
2 tbsp. warm water

¾ cup quinoa
1¼ water

Preheat the oven to 375ºF.  Rinse the quinoa in a fine-mesh sieve (if you buy Bob’s Red Mill brand, you don’t need to do this).  Add the rinsed quinoa and water to a small saucepan and bring to a boil.  Turn the heat down to low, cover, and allow to cook for 20 minutes.  Fluff with fork, then replace cover and set aside.

Heat a large skillet over medium heat.  Add just enough olive oil to coat the bottom, then add the onions along with a large pinch of salt and sauté enough to soften, about 5 minutes.  Add the herbs, peppers, tofu, mushrooms, and garlic and cook until the onions are very soft and the tofu starts to sear a bit on the outside, stirring occasionally, about 14 minutes.  Season with salt and pepper.  Add the wine and olives and simmer until the vegetables are coated with a syrupy sauce, about 8 minutes.

Spread the quinoa in an 8×11-inch baking dish.  Spread the vegetable and tofu mixture over top.  Whisk together the ingredients for the sauce and pour the sauce over top.  Bake, covered, until heated through, about 25 minutes.  Serve with Sriracha if you like things spicy.


Gingerbread with Maple Cream Cheese Frosting

January 11, 2011

On Saturday night, we had a little party.  It was to celebrate Randy’s birthday, the new year, and some fairly big news in our family (once again, I am not pregnant).  We have some friends who own a very cool art gallery.  Over dinner with them one evening, we threw out the idea of having a gathering there.  Being the lovely and accommodating people they are, not to mention the fact that they are both gorgeous and ridiculously talented, they thought it was a great idea.  We invited our nearest and dearest, I got some catering and organizational assistance from my good friend Julie, and a lovely time was had by all.  I hope.

The gallery has a kitchenette but does not have an oven or stove.  That means that all the food served has to be room temperature or cold.  Since we didn’t have seating, we wanted everything to be pick-up-and-eat food so that people did not have to worry about how to manage plate, fork, napkin, and drink.  Add to that, party time was 7pm.  People need to have dinner if it is 7pm.  5:30, appetizers are fine but by 7 folks are hungry.  I have to say I struggled with my menu.

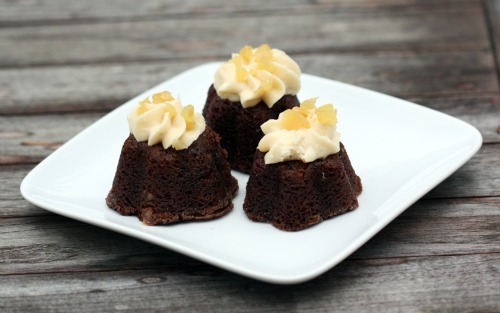
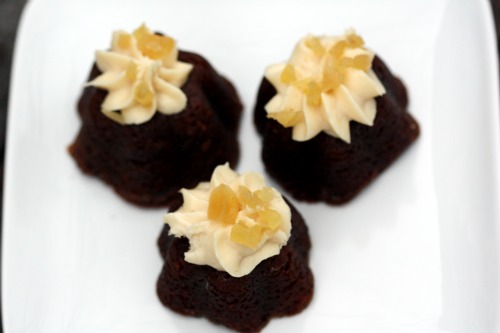
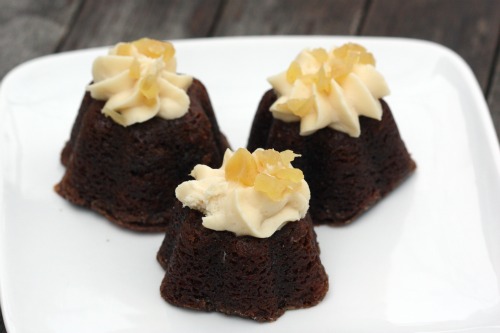
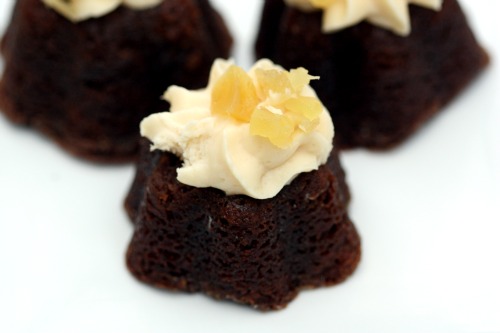
But!  There is always dessert.  I toyed with the idea of doing a big cake, but decided in the end to keep the easy to pick up food theme going.  I made small versions of those amazing chocolate chip cookies (and was told by more than one person that it was the best they had ever tasted), mini lemon tartlets, and these mini gingerbread bundt cakes.  One of Randy’s favorite things in the world is ginger.  He loves ginger cookies and his favorite cake is gingerbread.  I have a few mini bundt cake pans and a terrific recipe for gingerbread, so it seemed like a no-brainer to make these little guys.

When I make the gingerbread in a standard bundt pan, I just dust the finished cake with powdered sugar.  For this party, I felt we needed something a little fancier.  I made a maple cream cheese frosting – super simple and a nice compliment to the ginger.  Each cake was garnished with some chopped candied ginger.  Now, this is some serious gingerbread.  There is a full cup of Guiness and a full cup of molasses in there, along with a very healthy amount of spices.  I would call it “grown-up” gingerbread if my six year old hadn’t inhaled a left over piece this evening.  Ahem.  If your eyes have glazed over at any point during this post, now would be the time to perk up.

Grease and flour your pan(s).  I know this.  I know the batter is thin and incredibly sticky and I know you can never trust a non-stick coating when it comes to bundt cakes.  I got lazy.  Everyone has their kitchen tasks that they hate and one of mine is greasing pans.  The idea of coating 24 mini-bundts with shortening and flour (my method of choice) was too much to contemplate so I crossed my fingers.  And guess what?  Prying completely stuck-on cake from 24 mini-bundts, washing each of them thoroughly to remove all traces of said cake, and remaking the entire recipe is much more time consuming than just greasing the pans to begin with.  Trust me.

Grammercy Tavern Gingerbread
Gourmet

Since most people probably do not have 24 mini bundt pans (it’s really just two pans with 12 slots each), I’m just giving the original recipe.  It says that the cake serves 8-10 but that can’t be right if I was able to get 24 individual servings (plus a mini-loaf pan) without even doubling the recipe.  And I apologize that the directions in this recipe are running together.  Not quite sure what is going on there.

1 cup oatmeal stout or Guinness Stout
1 cup dark molasses (not blackstrap)
1/2 teaspoon baking soda
2 cups all-purpose flour
1 1/2 teaspoons baking powder
2 tablespoons ground ginger
1 teaspoon ground cinnamon1/4 teaspoon ground cloves
1/4 teaspoon freshly grated nutmeg
Pinch of ground cardamom
3 large eggs
1 cup packed dark brown sugar
1 cup granulated sugar
3/4 cup vegetable oil
Powdered sugar or Maple Cream Cheese Frosting (recipe follows)

Preheat the oven to 350ºF.  Generously butter a 10-inch (10 to 12 cup) bundt pan and dust with flour, knocking out excess.
Bring stout and molasses to a boil in a large saucepan and remove from the heat.  Whisk in baking soda, then cool to room temperature.
Sift together flour, baking powder, and spices in a large bowl.  Whisk together eggs and sugars.  Whisk in oil, then molasses mixture.  Add to flour mixture and whisk until just combined.
Pour batter into bundt pan and rap pan sharply on counter to eliminate air bubbles.  Bake in middle of oven until a tester comes out with just a few moist crumbs adhering, about 50 minutes.  Cool cake in pan on rack for 5 minutes.  Turn out onto rack and cool completely.  Either serve dusted with powdered sugar or with Maple Cream Cheese Frosting.
Maple Cream Cheese Frosting
1 8-ounce package cream cheese, room temperature
¼ cup (½ stick) unsalted butter, room temperature
¾ cup powdered sugar
¼ cup maple syrup
¾ tsp. vanilla extract
Beat cream cheese and butter in large bowl until smooth.  Add powdered sugar, maple syrup, and vanilla extract; beat until smooth.


« Older Posts Newer Posts »