Archive for August, 2010

Random August Notes Including Art and a Table

August 13, 2010

First and very foremost, I want to tell you about an amazing project I am a part of.   Hsiao-Ching Chou, a former restaurant critic for a Seattle newspaper, decided to start her own magazine geared toward helping families who love to eat.  The first issue of Refrigerator Soup, which you can purchase here, includes articles from some wonderful local food writers and bloggers.  This issue’s focus is on the role that moms play in the world of family eating.  I’m honored that she asked me to write an article for the magazine and am thrilled to be in the company of some truly great writers.  Please check out Refrigerator Soup and if you like it, tell your friends!

Randy and I hosted a big party last weekend, ostensibly for my birthday.  (Yes, the celebration is ongoing.)  We like to have a party each summer because we have a good summer party house.  Unfortunately, the weather was more like November so we all stayed inside and, consequently, I did not take a single photograph of the food I made.  (And yes, I made the food for my own party.)  But I did get a photo with two of my best friends.  Michelle, on the left, I have mentioned here.  Lauren, in the middle, I have mentioned here.  I have been friends with both of them for over 15 years.  I have several photos like this in albums and shoeboxes, just the three of us together at various stages in our lives.  I feel lucky to have celebrated my 40th with them.  We are not the Three Musketeers, we are the Three Brunettes.

This is my dining room.  I love this room.  It is west facing so it gets wonderful afternoon light and it is where I take almost all of my photos.  Lauren, see above, helped us pick the color of the walls and I love how they look in both winter and summer light.  We recently got this new amazing dining room table, again with the help of Lauren, and I was thrilled to see the company highlighted in the New York TimesMeyer Wells makes incredibly beautiful furniture out of reclaimed wood.  Trees that have fallen in storms or have been taken down due to disease find their way into their studio and re-emerge as functioning works of art.  All of the furniture is made from trees that come from within a ten mile radius of Seattle.  Cool, huh?

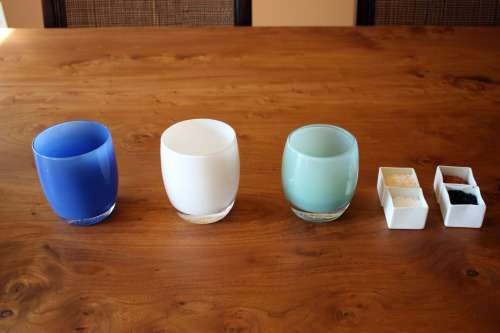
For our table, we were able to choose our wood and then choose our actual tree.  We were able to customize it with two leaves so that, when they are both in, we can comfortably seat 12 and up to 14.  This will come in handy at Thanksgiving and it came in handy when a certain party ended up indoors rather than outdoors (see above).  We have been using a nice but very plain teak table that we bought in London and had shipped back here.  I always thought it was crazy to spend money on a table but that was before I saw learned about these guys.  (By the way, those little votives are GlassyBabys.  I catered an event at their glassblowing studio in May.)

I can’t show you the dining room without mentioning this painting.  Soon after we moved in to our house, we realized we were going to need something big for this wall.  It’s a big wall.  We went to a wonderful local art show and met an extremely talented artist there named Erik Hall whose work we really liked.  Erik does custom work so we invited him over for dinner to take a look at our wall.  He envisioned a triptych, showed us some sketches, and just a few short months later, this beauty graced our walls.  Three years later I am still mesmorized by this painting every time I see it.

I leave you with a minor miracle in the Dana Treat household – an on the fly family photo where all four of us are looking at the camera.  And it’s sunny.  And Mt. Baker is in the background.  Great job Mr. Ferry Man!


Summer on a Plate

August 11, 2010

If you read any blogs written by people who live in Seattle, or if you follow any of us on Twitter, you are probably tired of hearing us complain about the weather.  This has been the summer that practically wasn’t.  We have had some decent days here and there but we have also had lots of low temperatures, clouds, and rain.  After a long wet dark spring, we all feel we are due some sunshine.  Our summer is why we put up with the winter after all.

I am looking ahead to the forecast for the week and it looks like we have some warm and then hot weather on the way.  I can’t tell you how happy that makes me.  Like all good Northwesterners, I usually complain when it gets too hot.  I like my temperature right around 78º, thank you very much.  But at this point I don’t care.  I’ll take heat as long as there is sun so I can make summery food and enjoy it out on our patio instead of in the kitchen with the heat on.

Polenta has always been a bit elusive for me.  All that stirring!  For some reason I don’t mind stirring risotto but I hate stirring polenta.  The good people at Cook’s Illustrated have, in the past year, come up with ways to make both risotto and polenta without constant stirring and I give them a big cyber-thank you.  I adapted their practically no-stir method slightly (because I was just lazy enough that I didn’t want to fashion my own flame tamer), and just gave it a good stir every 5 minutes or so.

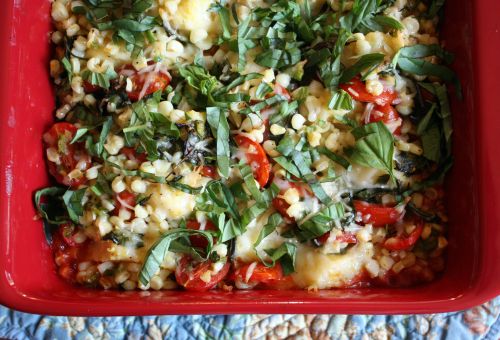
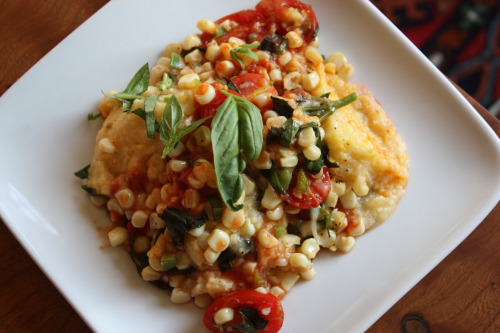
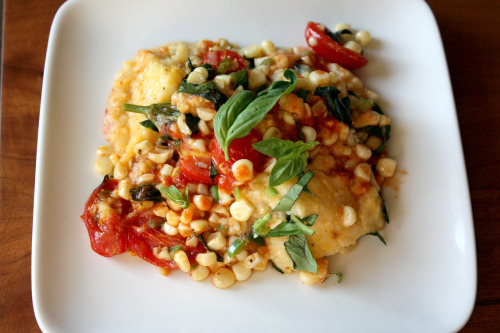
So what do we have here?  Triangles of polenta wedged in tight on a bed of tomato sauce, a quick sauté of corn, tomatoes, garlic, and jalapeño peppers, and a sprinkle of Parmesan cheese.  The whole thing gets baked in the oven until it is bubbly then you get summer on a plate.  Besides its deliciousness and seasonal appeal, here are some things I like about this recipe.

You can make the tomato sauce days before and the polenta a day or two before.

You can also make it super easy on yourself and use store-bought tomato sauce and one of the those polenta logs.  (I won’t tell anyone.)

You can assemble the whole thing early in the day and keep it in the refrigerator until ready to bake.

You can bake it about two hours before you want to serve it and just let people eat it room temperature.

This is healthy food that is super flavorful.  Really the only fat you are getting is from a small amount of Parmesan cheese.

It makes a LOT of food.

In fact, I cut this recipe in half which is something I rarely do.  I find it’s always better to have more food on hand than less – if for no other reason that wonderful people like to babysit at my house because there is usually something good in the refrigerator.  But I made this early in the week and I knew there would not be a lot of leftover eating so I made less.  We still could have fed four with the dish.

One Year Ago: Mushroom, Walnut, and Rosemary Pâté
Two Years Ago: Farro with Green Beans and Corn

Polenta Baked with Corn, Tomatoes, and Basil
Adapted from Fields of Greens
Serves 6-8

Polenta (recipe follows)
1½-2 cups of your favorite tomato sauce
1 tbsp. unsalted butter
3 ears of corn, kernels shaved off the cob
Salt
¾ pound tomatoes, cored and seeded
1 tbsp. olive oil
Pepper
1 cup fresh basil leaves, chopped
1 or 2 jalapeño chiles, seeded and finely chopped
¾ cup freshly grated Parmesan cheese

First make the polenta.  Make sure you have plenty of time to allow it to set up.

Heat the butter in a large skillet and add the corn.  Sauté over medium heat just until the corn is tender, about 5 minutes for very fresh corn.  Season with a sprinkling of salt.  While the corn is cooking, cut the tomatoes into large pieces.  Marinate the tomatoes in the olive oil with a ¼ teaspoon of salt and a few grinds of pepper.  Cool the corn and toss with the tomatoes, half the basil, and the chiles.  Add salt and pepper to taste.

Preheat the oven to 375ºF.  Pour the tomato sauce into the bottom of a 9×13-inch baking pan.  Arrange the polenta triangles upright in tows across the width of the dish, overlapping the triangles slightly; use all of the polenta.  Spoon the vegetables into the spaces between the polenta triangles, separating the rows as you go.  Sprinkle with the cheese.  Cover and bake for 25 minutes, then uncover and bake for 10 more minutes, until the gratin is bubbly.  Sprinkle on the remaining  basil and serve.

Polenta

To keep the whole dish even more healthy, I skipped the butter and cheese in the actual polenta but you can add them for even more flavor.

6 cups water
1½ tsp. salt
1½ cups coarse cornmeal
¼ tsp. pepper
2 tbsp. unsalted butter
½ cup grated Parmesan cheese

Lightly oil a 9×13-inch baking dish and set aside.  Bring the water to a boil in a large saucepan.  Add the salt, then vigorously whisk in the cornmeal.  Bring it back to a boil, stirring all the while, then reduce the heat as low as it will go.  Cover the pan.  Stir every 5 minutes or so until the polenta is smooth, about 20 minutes all together.

Remove the pan from the heat and stir in the pepper, the butter, and the cheese.  Pour the hot polenta into the baking dish and set aside to cool.  Once it is cool, cover and refrigerate to make the polenta even more firm.  Once cold, dump the whole thing out on a cutting board and cut it into 12 squares.  Cut each square into two triangles.


Incredible Honey

August 9, 2010

After writing this blog for over two years, I’m surprised by how many things you all don’t know about me.  Of course there are plenty of things you don’t know about me the person – Dana.  As opposed to me the cook – Dana Treat.  For example, even if you have met me, you probably don’t know that I have a hitchhiker’s thumb on my left hand but not on my right.  Like my thumb bends all the way back.  I kill at thumb wrestling.

So maybe it is not surprising that I haven’t shared more fascinating things like hitchhiker’s thumbs on my food blog.  But it is a little surprising that I still have some culinary things I haven’t shared.  Like the fact that I love honey.  Did you know that?  I love honey.  It is one of my very favorite things in the whole world.  I use it in marinades and in salad dressings and I stir it into Greek yogurt for breakfast.  I have been known to sneak spoonfuls of it when I am craving something sweet.

Living in a city where there are loads of farmers’ markets, it is easy for me to buy good honey.  Over the years, I have tasted some wonderful honey from Washington bees.  So when the good people at Mohawk Valley Trading Company offered to send some of theirs to try, I hesitated.  But the truth is, I was low on honey and the stuff isn’t cheap so I so I replied yes to their offer.

Not a week later, I got a box with four different jars of the most beautiful tawny-colored honey.  Not only is it beautiful, the flavor is so different than any honey I have tasted.  It is thicker, richer and more floral than anything I have ever used.  It seems a shame to put it in things where the amazing flavor gets masked by other ingredients.  I wanted to make something that would take advantage of the unique flavor and texture of this special honey.  (And yes, honey can have texture.  You know how you put a spoon in a jar and the honey almost immediately runs off?  This stuff really coats your spoon.  You have to coax it off.)

These mini bundt cakes were one of the first things I noticed in the first Ottolenghi cookbook.  I had seen a display of the adorable cakes in the window of the restaurant while in London in June.  Is there anything more tempting than a little cake sized perfectly for one?  For some reason I would totally buy one of these but not a slice of a large cake.  Anyway.  In the recipe, Ottolenghi mentions that the pans are not easy to find in England but we Americans can find them more easily.  (See?  Americans don’t like everything super-sized.)  I found mine in a local kitchen shop and I would imagine they can be tracked down online.

I was a little stumped as to how best to make these.  I needed about 20 of them and there are only 12 cakes in the molds.  I didn’t want to bake a whole batch, allow the molds to cool, and then bake another batch.  I have another larger mini-bundt pan mold so I doubled the recipe and just hoped for the best.  I ended up getting all my mini-bundts, a whole tray of mini-muffin size cakes and a small loaf cake.  The bundts got eaten at the party, the boys snacked on my mini-muffins, and the loaf cake is in the freezer.

I don’t know if I have ever written a paragraph quite as boring as that one.  What I am trying to tell you is that if you make the recipe as written below, I have no idea of how many cakes you will end up with.  Just get out all your fun sized pans and go for it.  Whatever you end up with will be the most delicately flavored but substantially textured cake.  If you leave it plain, it is perfect for an afternoon tea or even for breakfast.  Or you can dress it up with a drizzle of glaze and some lovely berries and call it dessert.

And speaking of dessert, my blog duty at Amazon Fresh has started back up again.  This week I posted a recipe for a very delicious and very easy cheesecake ice cream.  You can read it here.

Honey and Lavender previously on Dana Treat: Lavender-Honey Ice Cream
One Year Ago: Cheese Balls Three Ways
Two Years Ago: Olive and Jarlsberg Sandwich

Lavender and Honey Tea Cakes
Adapted from Ottolenghi, The Cookbook
Makes ??

8 ounces unsalted butter, room temperature
4 ounces sugar
4 ounces best quality honey
3 large eggs
8 2/3 ounces flour
1 tsp. baking powder
½ tsp. baking soda
½ tsp. salt
½ tsp. ground cinnamon
½ tsp. dried lavender, chopped
½ cup sour cream

Glaze
1 tbsp. fresh lemon juice
2 tsp. honey
3½ oz. powdered sugar

Berries for garnish, optional

Preheat the oven to 340ºF.  Grease your pans with butter.

Cream the butter, sugar, and honey together until pale and fluffy, preferably using an electric mixer.  Break the eggs into a cup, beat them lightly with a fork and gradually add to the creamed mixture, beating well until each little addition has been fully incorporated.  Sift together the flour, baking powder, baking soda, salt and cinnamon, then stir in the dried lavender.  Gently fold the flour mixture into the creamed mix in 3 additions, alternating with the sour cream.

Carefully fill your molds or pans.  If you are using molds, only the fill them to within a ½-inch of the top.  Place in the oven and bake for about 25-30 minutes, depending on what size pan or molds you are using.  You will want a skewerer inserted into the center of the cake to come out clean.  Remove them from the oven and leave them for 10 minutes, then turn out onto a rack to cool completely.

To make the glaze, mix the lemon juice and honey together in a small bowl, then whisk in enough powdered sugar to make a thick pourable glaze.  Use a pastry brush or a spoon to coat the top of the cakes, allowing the icing to drip down the sides.  Garnish with berries, if desired.

(DT: Even though I was careful about not overfilling my pans, I still got a rounded bottom on my small cakes.  I just sliced off a thin bit so they would stand up straight.)


Impulse Buys

August 5, 2010

I’m a careful Costco shopper.  Did you know Costco started in Seattle?  We’ve been members for as long as I can remember.  We go about every other month and I buy the same things over and over.  Paper towels, toilet paper, canned tomatoes, chickpeas, garbage bags, olive oil, string cheese, Diet Pepsi, beer, wine.  Occasionally I buy Ziploc bags, dish washing detergent, kids vitamins, ibuprofen, butter, Dijon mustard, dried pasta, some kind of cookbook, and nuts.  I am very very happy to tell you that I no longer need to buy diapers or wipes.  Or formula.  Hallelujah.

My point here is that I don’t get sucked in.  I know what I need and what I have room for.  I see people’s carts and wonder “where are these people putting all this stuff?”.  I am lucky in that I have plenty of room for impulse purchases, but I hate to have things on hand that I know I won’t use.  So there is not a lot of impulse shopping at Costco.

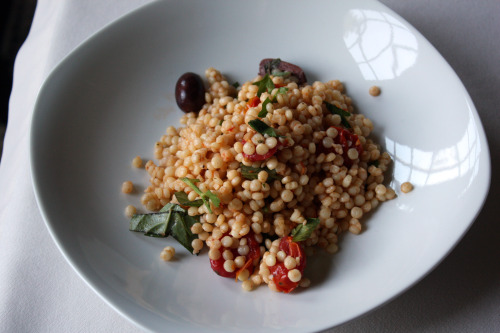
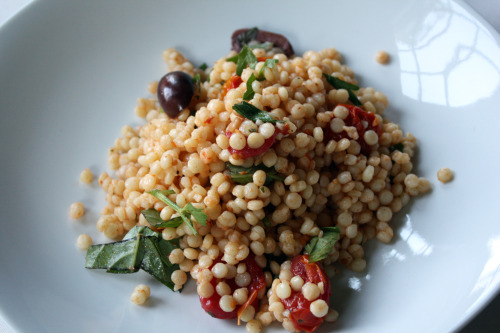
Once in a great while, I see something and I pounce without thinking too carefully.  I get sucked in by cheap pretzels and quinoa.  About a year ago, I found a 5 pound bag of Israeli couscous and very happily put it in my cart.  I love the stuff and it is not always that easy to find in regular grocery stores.  That 5 pound bag has been mocking me from the basement storage room.  Yes, thankfully I have a basement storage room for things like giant bags of Israeli couscous, but still.  What I have realized is that, while I love Israeli couscous, it’s not something I use all that often.

In my searches for a salad for the summer yoga retreat, I was thrilled to remember this one tucked away in one of my notebooks.  The flavors sounded wonderful, all things that I love, and it uses a lot of Israeli couscous.  Because I knew there were going to be 18 of us, I doubled the recipe.  The salad was a hit and partly because I loved it and partly because I still had lots of couscous, I made another giant portion of it to bring to a block party.  I even held back some of it so I could serve it as a side dish at a dinner party the night after the block party.   And yes, I still have couscous in that bag.  A lot of it.

Israeli Couscous previously on Dana Treat: Couscous and Mograbiah with Oven-Dried Tomatoes
One Year Ago: Grilled Potato Slices with Salt and Vinegar

Israeli Couscous with Olives and Roasted Tomatoes
Adapted from Gourmet
Serves 6-8

For roasted tomatoes and dressing
2 pints red grape or cherry tomatoes (1½ pounds)
3 large garlic cloves, left unpeeled
¼ cup olive oil, plus extra for drizzling
¼ cup warm water
Juice of ½ a lemon
1 tsp. kosher salt
½ tsp. freshly ground black pepper

For couscous
2½ cups vegetable broth
2 cups Israeli couscous
½ cup Kalamata olives, pits removed and sliced in half
½ cup basil, thinly sliced
¼ cup parsley, chopped

Roast tomatoes and make dressing
Preheat oven to 400ºF.  Place tomatoes and garlic, still in its peel on a baking sheet.  Drizzle with olive oil and sprinkle with a healthy pinch of salt and a few grinds of pepper.  Bake in the oven until the tomatoes are quite soft and starting to brown, about 20 minutes.  Remove and allow to cool slightly.

Peel garlic and purée with oil, water, lemon juice, salt, pepper, and ½ cup roasted tomatoes in a blender until dressing is very smooth.  Set aside.

Make couscous
Bring broth to a boil in a large heavy saucepan and stir in couscous.  Simmer for about 3 minutes then cover pan and remove from the heat.  Let stand for 10 minutes.  Spread couscous in 1 layer on a baking sheet and cool 15 minutes.

Transfer couscous to a large bowl and stir in remaining ingredients, dressing, roasted tomatoes, and salt and pepper to taste.  You may not need all the dressing so hold a bit back.

(DT: I found it best mix this salad with my hands so the tomatoes don’t get too squished.  You can make the couscous and dressing a day ahead and store them separately.  The couscous will stick together but add some of the dressing and work it with your hands before adding the rest of the ingredients.)


New Favorite Noodles

August 4, 2010

Several months ago, I had lunch with a friend at a relatively new local restaurant called Nettletown.  It has been getting a lot of buzz lately and I took precious babysitting time to go check it out.  I am not a restaurant reviewer but I can tell you that within a very modest space, very exciting über-local and sustainable food is happening.  If you want more information, Tea wrote a great post about Nettletown here.

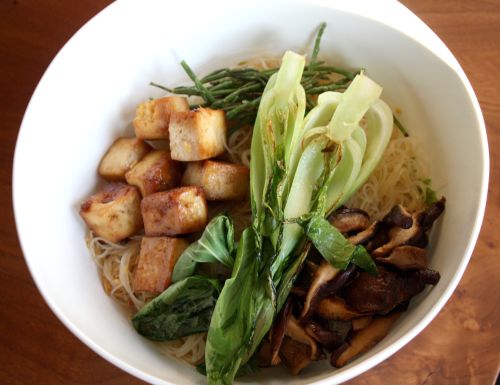
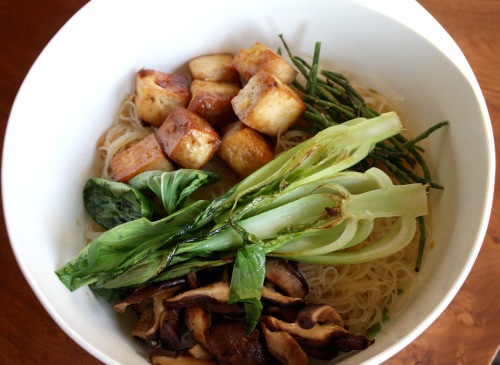
From the specials list, I chose a dish that turned out to be one of the most interesting and delicious dishes I have eaten in a long time.  I don’t remember everything exactly but I know for sure that my shallow but well-filled bowl contained fresh rice noodles, very firm and perfectly flavored tofu, sea beans, mizuna, and shiitake mushrooms.  There may or may not have been other delicacies in there.  I was pretty hungry that day and I still only made it through about half of my dish.  I dislike leftovers but I loved my noodles so much that I took my unfinished portion home with me and ate them later that night.

Since then, the dish has haunted me.  I have been back to Nettletown twice and have been dismayed to find it absent from the specials menu.  So, I have attempted to re-create the dish.  Three times.  The first two times I was so hungry and distracted by the time the dish was done that I didn’t have the energy or patience to take a photo.  (Fellow food bloggers, can I get an amen?)  I just figured I would make it again.  These are flavors and ingredients I love so why not use “no photo” as an excuse to repeat?  Each time I refined the dish a little more.  Some things stayed constant, others changed.  All three times I hoped to use fresh rice noodles and was never able to make that happen in spite of looking for them at my local Asian market.

So what is going on here?  First I made a marinade/sauce.  I cut the tofu into pieces, put them in a small baking pan, and poured about half the marinade over top.  I sautéed up some shiitake mushrooms until they started to brown and added just a touch of soy sauce at the end.  I rinsed sea beans, pre-cooked and then rinsed the rice noodles, and I allowed the tofu to bake long enough to absorb the marinade and develop a bit of a crust.  I assembled the whole dish together, poured the remaining sauce over top, and quickly seared bok choy halves to put on top.

This is not exactly the dish I had at Nettletown.  I’m still going to keep tweaking it and I am going on a fresh rice noodle quest.  But I’m getting close.

One Year Ago:  Zesty Tofu Wraps

Rice Noodles with Marinated Tofu and Shiitake Mushrooms

Dana Treat Original
Serves 4

I tried both the angel hair thickness rice noodles and the more fettucine thickness and preferred the latter.

For the marinade:
2 inch pieces of fresh ginger, peeled and grated
1 garlic clove, minced
2 stalks lemongrass, outer leaves removed, minced
6 tbsp. soy sauce
3 tbsp. honey
3 tbsp. rice wine vinegar
1½ tbsp. mirin
Zest and juice of 1 lime
1 tbsp. sesame oil
2 tbsp. canola oil
2 tbsp. water
½-1 tsp. red pepper flakes

12 ounces extra-firm tofu, blotted dry and cut into 1-inch cubes
8 ounces shiitake mushrooms, stems trimmed and cut into thick slices
4 baby bok choy, sliced in half
Large handful of sea beans, rinsed and drained
Mizuna leaves (you can substitute spinach)
1 pound rice noodles

To make the marinade/sauce, mix together all the ingredients in a medium size bowl.  Taste for flavor balance and add more soy, honey, or lime juice to taste.  Put the tofu in a shallow baking dish (an 8×8-inch pan is perfect) and pour about 1/3 of the marinade over top.  Allow the tofu to sit for at least half an hour, turning the pieces periodically.  You can also refrigerate the pan, covered, for up to one day.  Reserve the rest of the marinade.

Preheat the oven to 375ºF.  Place the baking pan in the oven and bake until the marinade is absorbed and the tofu is developing a bit of outer crunch, 30 to 40 minutes.  Turn the tofu once during baking.  Set aside.

Heat a medium non-stick pan over medium heat.  Add just a bit of canola oil and then the mushrooms.  Allow to cook with out turning too much so that they get a bit browned.  Once they are soft and have released all of their liquid, add about a tablespoon of soy sauce.  Stir until the soy sauce is absorbed and set the mushrooms aside.

Bring a large pot of water to boil.  Add the rice noodles and cook until just tender.  Check the package for how long they need to cook and be sure to taste them to make sure they are done.  Drain and immediately rinse them with cold water until they are cool.

Heat a bit more oil in the same skillet in which you cooked the mushrooms.  Add the bok choy halves and cook just until softened a bit, about 3 minutes.

To assemble the bowls, place a small handful of mizuna at the bottom of a wide shallow bowl.  Top with ¼ of the noodles.  Pour ¼ of the marinade/sauce over the noodles.  Top with some tofu, sea  beans, mushrooms, and a couple bok choy halves.


« Older Posts Newer Posts »