Archive for June, 2010

The Short List

June 13, 2010

Most people who cook have some kind of short list.  Those go-to recipes that require very little thought, contain ingredients you either have on hand or that can be easily procured from any grocery store, and that taste delicious.  Those are precious recipes indeed and I need a few more in my arsenal.

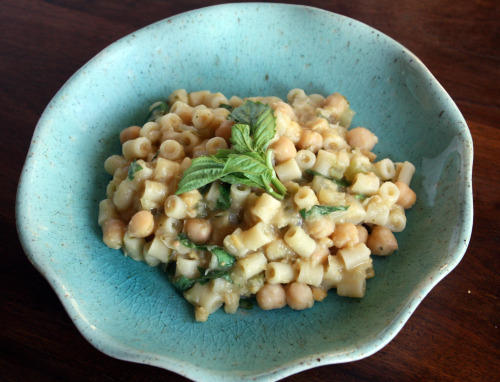
For now, this Jamie Oliver dish is at the top of my short list which, if I haven’t made it clear, is very short.  No matter – I love this recipe.  I always have onions and garlic plus many cans of chickpeas, almost always have celery, and I have rosemary growing in my yard.  Give me half an hour and I will give you something healthy, appealing to most people, satisfying, and very tasty.  It is also a very forgiving dish so you can either eat it right away or allow it to sit for a bit with the flavor only improving.

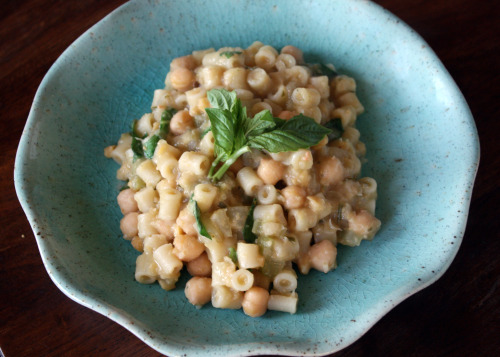
The method is simple.  The onions and garlic get sautéed together in a bit of olive oil along with the rosemary, which immediately makes your kitchen smell wonderful.  The chickpeas are next in the pot along with the broth and after those have cooked for a bit, half of the chickpeas are scooped out and reserved while the goodness in the pot gets a quick purée with an immersion blender.  After everything is reunited in the pot, in goes the pasta.  As soon it is tender, you are ready for dinner.  Add some fresh herbs on top (which I always seem to have some remnant of in my crisper drawer) and you have a rich and creamy tasting (but very healthy) meal.

I change this up a bit from the original recipe by adding some red pepper flakes for a bit of heat, and I also add more pasta and broth.  I always seem to need even more broth as the cooking process happens and you can add even more than that if you want the dish to be more saucy.  I don’t think it is possible to screw up this dish, so do what you like.  You will see my changes in the recipe below.  If you don’t have an immersion blender, you can use a food processor instead – just be careful with the hot stuff!

What is on your short list?

One Year Ago: Chilled Avocado Soup
Two Years Ago: Ina Garten’s Outrageous Brownies

Pasta e Ceci (Pasta with Chickpeas)
Adapted from Jamie’s Italy
Serves 4

1 small onion, peeled and finely chopped
1 stick of celery, trimmed and finely chopped
1 clove of garlic, peeled and minced
½ tsp. red pepper flakes
Olive oil
1 sprig of rosemary, leaves picked and finely chopped
2 14-oz. cans of chickpeas, rinsed and drained
3 cups vegetable stock
5 ounces ditalini or other small pasta (such as orzo)
Sea salt and freshly ground black pepper
Small handful of fresh basil or parsley leaves, picked and torn

Place a large skillet over medium heat and then pour in just enough olive oil to coat the bottom.  Add the onion and celery and sauté just until tender, about 6 minutes.  Add the garlic, rosemary, and red pepper flakes.  Sauté for 2 minutes, then add the chickpeas and the stock.  Bring to a boil, then lower heat to simmer and allow to cook just until the chickpeas are heated through, about 5 minutes.  Using a slotted spoon, remove half of the chickpeas and set them aside.

Purée the soup in the pan with a handheld immersion blender.  Add the reserved whole chickpeas and the pasta, season the soup with salt and pepper, and simmer gently until the chickpeas are very tender and the pasta is cooked, about 10  minutes.  Add more liquid as necessary.

Season to taste with salt and pepper and sprinkle with torn basil or parsley.


What Vegetarians Eat

June 10, 2010

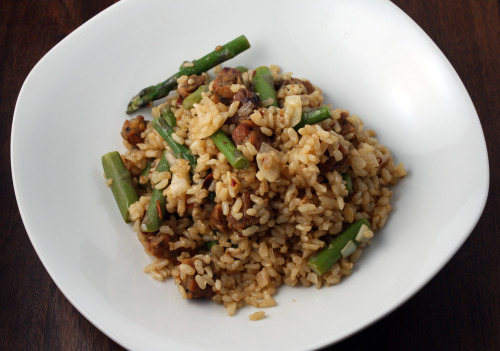
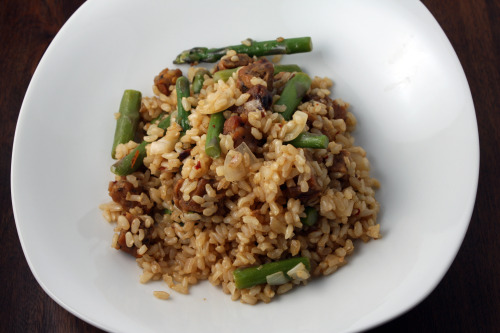
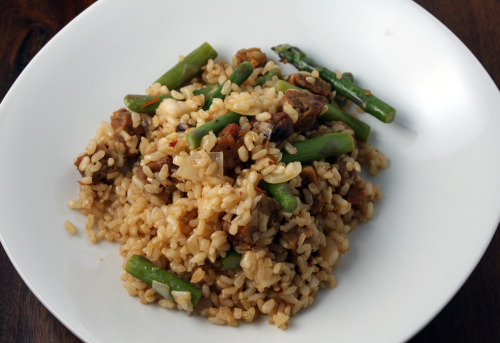
Let’s imagine a person.  That person lives, say, in Ohio and has grown up eating meat all their life.  They like bacon in the morning, turkey on their sandwich for lunch, and a big steak for dinner.  If they ever thought about a vegetarian, they would probably think that this dish is what we eat.  Brown rice.  Tempeh.  Tahini sauce.  Some kind of green vegetable.  Maybe they would imagine this dish with a side of sprouts.  (For the record, I have nothing against Ohio and nothing against people who eat meat.  As I often say, my own husband eats meat and actually he was once married to someone from Ohio.)

As I have tried to prove over the two years I have been keeping this blog, vegetarians have an incredibly varied and interesting diet.  It is not all brown rice, tempeh, and tahini sauce.  But sometimes that combo – especially when you have come home from vacation and are craving clean and healthy food – is really good.

This creation is a riff on a delicious dish that I orginally found on 101 Cookbooks.  When I first found it two years ago, I made it many times all through asparagus season.  Then I did the same last year.  This time, I changed it up.  I wanted more protein than the chickpeas could give me, so I baked up some tempeh in a marinade and added that.  I omitted the nuts and changed the cooking method slightly.  Several weeks ago, I found an amazing tahini sauce at the Whidbey Island farmers market and I used it instead of the homemade that Heidi suggests.  (Hers is delicious and easy, by the way.)  I had spring onions and green garlic from our CSA so I used those and I added some red pepper flakes for heat.

The result was something I could probably eat everyday, if I was not trying to debunk the theory that all we vegetarians eat is things like this.  Tempeh is a little polarizing – there are plenty of vegetarians who don’t like it.  If you are one of those, I implore you to try it this way.  I found this method in one of my most-loved cookbooks The Voluptuous Vegan.  You first steam the tempeh (which you should always do to remove the bitter taste), then you mix together a sweet and savory marinade starring apple juice and soy sauce, then you add the tempeh.  It will look like too much liquid, but let that tempeh bake in the oven and it will absorb it all and even develop a bit of a crust.  So good.  I am going to try tempeh this way next time as a kind of crouton in a main course salad.  I always eat all the croutons out of my salad anyway, they may as well be healthy.

I love this dish enough to continue making it even after asparagus are gone from the markets.  It would be great with green beans and I’ve even thought of adding edamame.  Meat lovers in Ohio, give it a try!

One Year Ago:  Chilled Avocado Soup

Brown Rice with Tempeh and Tahini Sauce

Inspired by 101 Cookbooks and The Voluptuous Vegan
Serves 4

The sauce I used is called Mr. Mobley’s Tahini Sauce and is available in various locations around Seattle.  You can order it online here.  Or just use the sauce from Heidi’s original recipe.  Peanut sauce would be great here too.

For the tempeh:
8 ounces tempeh, cut into ¾-inch cubes
½ apple juice
2 tbsp. soy sauce
1 tbsp. rice vinegar
2 tbsp. olive oil
1 tbsp. mirin or other sweet wine
1 tbsp. red chile paste (I used sambal olek)

For the rice:
1 pound slender asparagus, tough stems removed, cut into 1-inch pieces
2 cups brown rice
Olive Oil
1 medium yellow onion, finely diced
2 garlic cloves, thinly sliced
½ – 1 tsp. red pepper flakes
Tahini Sauce to taste
Salt and pepper

Make the tempeh:
Place the tempeh in a steamer over boiling water for 10 minutes.  Meanwhile, prepare the marinade.  Whisk the apple juice, soy sauce, vinegar, oil, mirin, and chile paste in a glass pie dish.  Add tempeh and toss to coat.  Allow it to marinate for 20 minutes.

Preheat the oven to 375ºF.  Place the pie dish in the oven and bake for 30 to 40 minutes, or until all the marinade has been absorbed and the tempeh is golden.  (Can be made one day in advance.  Cool, cover, and refrigerate.)

For the rice:
Bring a large pot of salted water to boil.  Have a bowl filled with ice water close by.  Add the asparagus to the water and let cook just until it loses the crunch, about 1 minute.  Quickly scoop out of the boiling water and into the ice water.  Once cool, drain well.  Add the rice to the boiling water and allow to cook until tender but not mushy, about 30 minutes.  Drain well.  (Both the rice and asparagus can be made one day ahead.  Wrap the asparagus in a clean kitchen towel and then place in a plastic bag.  Put the rice in a container.  Refrigerate both.)

Heat a large skillet over medium heat.  Drizzle in just enough olive oil to coat the bottom, then add the onion and a large pinch of salt.  Cook until softened, about 6 minutes, then add the garlic and chile flakes.  Cook, stirring constantly, for 2 minutes, then add the rice, tempeh and asparagus.  Continue to cook, stirring carefully all the while, until the rice is heated through.  Add enough tempeh sauce to coat the grains and salt and pepper to taste.


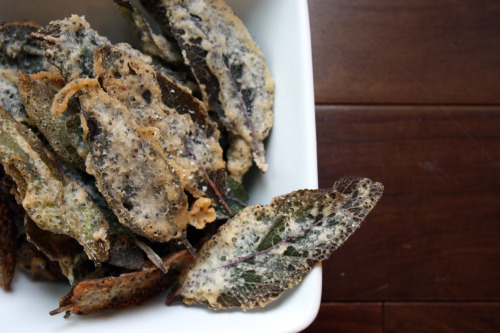
Crisp Sage Tempura

June 8, 2010

Yesterday, sitting in the almost sunshine and waiting for the little bus to bring Graham home from preschool, my thoughts went something like this.  “I need to write that post about the fried sage leaves.  Mmmm.  Fried sage leaves.  God, I hate making those things but they are so incredibly good.  I have all the ingredients on hand and of course I have tons of sage…  Wait a minute – where is my sage?”

It seems our little garden, seen in its infancy here, is just on the verge of exploding.  Now in its third summer, everything seems to be growing in bigger and more glorious than ever.  Or maybe it’s just the indecent amount of rain we have gotten this spring.  The way things are going, my poor sage is going to get trampled by other flashier plants and flowers.  Good thing we have several plants.

I have made these fried sage leaves several times and they are one of Randy’s all time favorite things.  As stated above, they are not one of my favorites to make but I sure love to eat them.  Frying is tricky for me.  Because I don’t do it all that often, I find it intimidating.  These are not deep-fried – I can literally count on one hand the number of times I have deep-fried – but still working with hot oil and batter makes me nervous.  Inevitably, I start when the oil is not quite hot enough and then end up with a few soggy leaves that need to be tossed.  This batter makes enough for plenty of leaves though and I even had to send Randy out in the rain to pick more.

One Year Ago: Spicy Chickpeas with Ginger and Kale and Lime Yogurt Sauce

Crisp Sage Tempura
Adapted from Food & Wine
Makes about 32

This doesn’t seem like the kind of thing that would keep well, but they do indeed keep overnight and retain their crunch.

½ cup rice flour
1½ tsp. poppy seeds
Salt
1/8 tsp. freshly ground black pepper
½ cup cold club soda
1 tbsp. cold water
Vegetable oil, for frying
1 bunch sage leaves (about 32), stems trimmed to ¼ inch

In a medium bowl, mix the rice flour with the poppy seeds, ½ tsp. salt and the pepper.  Whisk in the club soda and cold water.  Let the batter rest for 20 minutes.

Heat ½-inch of oil in a small skillet just until shimmering.  Holding each sage leaf by the stem, dip it into the batter to coat both sides.  Add the the oil and fry over moderately high heat until golden, about 30 seconds.  (DT: I turned each leaf over to make sure they were cooked on both sides.)  Drain on paper towels and sprinkle lightly with salt.  Serve warm or at room temperature.  (Can be stored in an airtight container overnight.)


Polishing Off a Side Dish

June 6, 2010

So.

I’m back from an amazing week in the state of Massachusetts.  When we weren’t pahking the cah in Hahvahd Yahd, we were traipsing around the lovely crooked streets of Provincetown, and being shown incredible East coast beaches by our friend Maryann.  It was so nice to see the sun, walk out in the evening without a jacket (!) and to realize that the very difficult times of traveling with small children are almost behind us.  It wasn’t easy, but both the flights and all the transitions (cabs, ferries, cars, ferries, cabs again – it wasn’t us pahking the cah in Hahvahd Yahd) went smoothly.  I actually read almost the whole way to and from Massachusetts.  Yahoo!

Oh yes, and I got a tattoo.  I so wanted to post a photo today but it is in the process of losing the scab which looks about as attractive as it sounds.  Story coming after healing process is over.  From the precious few people who have seen it (including Erin who I got to meet over coffee), I have gotten thumbs up.

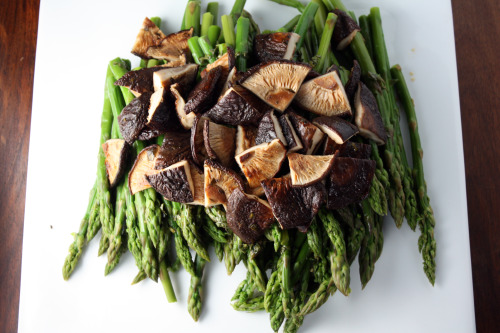
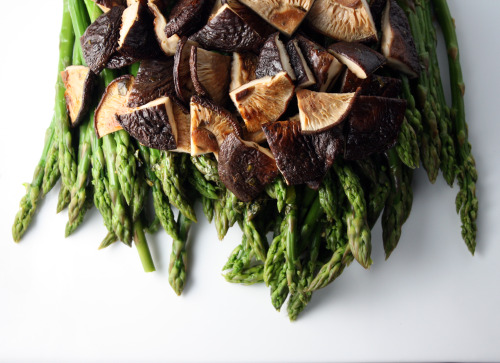
I made this wonderful side dish before we left and just didn’t have time to write about it.  Often when I am making Asian food, I will just steam some broccoli to serve on the side.  I could eat my weight in steamed broccoli but when I made these noodles, I wanted something with a little more oomph.  In case you have never had asparagus together with shiitake mushrooms in a soy sauce spiked dressing, I highly encourage that you try it.   The recipe said 8 to 10 servings but 5 of us polished it off even with a little fighting over the last few asparagus spears.  The dressing might sound a bit odd – tarragon in a Asian inspired side? – but it worked beautifully in this dish.  If you live in a climate where you can stand outside and grill without looking like the victim of a flood, then I highly recommend the grill rather than the safe-and-dry oven inside that I had to use.

One Year Ago:  Mexican Pizza with Corn and Tomatillos
Two Years Ago:  Gazpacho (still my tried and true recipe)

Asparagus and Grilled Shiitake with Soy Vinaigrette
Adapted from Food and Wine
Serves 8-10 (not in my family)

2 tbsp. olive oil
2 tbsp. soy sauce
1 tbsp. lemon juice
1 tbsp. rice vinegar
2 tbsp. chopped tarragon
Salt and freshly ground black pepper
1½ pounds fresh shiitake mushrooms, stemmed
2 pounds thin asparagus

Light a grill.  In a small bowl, mix the olive oil, soy sauce, lemon juice, vinegar, and tarragon and season with salt and pepper.

Brush the shiitake with 2 tablespoons of the soy vinaigrette; season with salt and pepper.  Grill over moderate heat, turning once, until just tender, about 6 minutes.  (DT: I roasted them in a 400° oven until they had absorbed the marinade and were tender, about 10 minutes.)  Transfer the shiitakes to a bowl; cut any large mushrooms into quarters.

bring a large skillet of salted water to a boil.  Fill a large bowl with ice water.  Add the asparagus to the skillet and cook until crisp-tender, about 3 minutes.  Transfer to the ice water to cool.  Drain and pat dry with paper towels.

Arrange the asparagus on a platter.  Drizzle with about half the remaining dressing.  Spoon the shiitakes over the asparagus followed by the rest of the dressing.  Serve right away.

(Make ahead: The dressing, grilled shiitakes, and blanched asparagus can each be refrigerated separately overnight.  Reheat the shiitake in a 400° oven for about 4 minutes and bring the asparagus and dressing to room temperature before serving.)


Appetizer Gold

June 2, 2010

The last time I wrote about appetizers, I mentioned that I struggle with them a bit.  Too much and no one is hungry for dinner.  Not enough and people start looking nervous about whether they are going to have enough to eat.  Over the years and many many dinner parties, I have attempted to strike a balance.  Finding a good recipe that is savory but not too filling and also doesn’t take a lot of your time is appetizer gold.

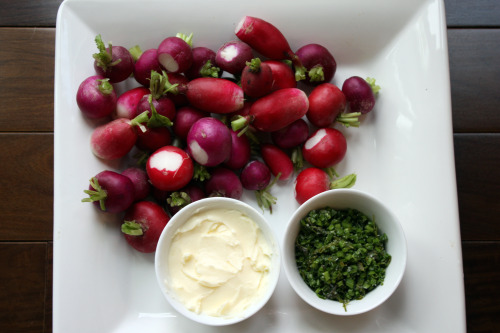
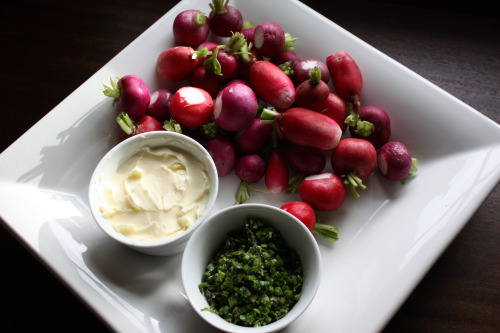
I have read about the idea of dipping radishes in butter and then salt which, I have to admit, always sounded a bit odd to me.  I recently found a recipe for a chive-sage salt which was meant to be used as a rub for meat or a topping for a baked potato (yum).  Instantly I thought of radishes and butter mingling together with this salt.  In our farmers markets, asparagus are just starting to make an appearance but we’ve had radishes for weeks.  They are so beautiful that I always just want to buy bunches of them – never mind that we are not a huge radish eating family.

For the big dinner I made last week, I set out four trays of nibbles.  People came at 7pm and I knew there would be a chunk of time before we actually sat down to eat.  Cocktails would need to be poured, toasts would need to be made, some food would need to be consumed, otherwise no one would make it to dessert.  I made crostini topped with ricotta cheese, lemon zest and honey, Parmesan roasted carrots (courtesy of Lisa), fried sage leaves (recipe coming soon), and my radishes.

I wasn’t sure about those babies – would people eat them?  Would they think it was weird to dip them in butter and then a green salt?  I swear, I looked up and they were gone.  I bought four bunches of radishes and probably could have put out double that amount.  As dinner was winding down and people were thanking me for the food (so nice), someone said, “You had me at the radishes”.  Appetizer gold.

One Year Ago: Oven-Fried Rice Balls with Gruyère

Radishes with Sweet Butter and Chive-Sage Salt
Dana Treat Original (sort of)
Serves 8 radish lovers

4 bunches radishes, leaves trimmed but leave ½-inch of the stalks (for holding)
1 stick unsalted butter
Chive-Sage Salt

For the Chive-Sage Salt (from Food & Wine):
1 tbsp. olive oil
¼ cup sage leaves
1 cup minced chives
2 tbsp. kosher salt

In a small skillet, heat the olive oil.  Add the sage leaves and cook over moderate heat, turning once, until crisp, about 2 minutes.  Scrape the leaves and oil into a small bowl and let cool.  Crumble the leaves.  Add the chives and salt and stir to combine.  (The salt can be refrigerated for up to 1 week.)

Leave the butter out at room temperature for a few hours, until very soft.  Pack it into a 6-ounce ramekin and smooth the top.  Either use right away, or put back in the refrigerator for up to a few days.  If you do refrigerate it, make sure you take it out at least two hours before you want to serve it.  It needs to be nice and soft.  You will most likely have left over butter – I did – so if you have a smaller ramekin or bowl, you could probably just use a half stick for this many radishes.


Newer Posts »