Archive for June, 2009

Spring Vegetable Salad

June 17, 2009

img_2657

I have always thought of June as summer even though the first three weeks are technically still spring.  Most years in Seattle, spring is actually winter-days-that-are-slightly-less-cold-and-lighter-longer.  Seriously, May and June are the months when I am thinking it’s time to move somewhere else.  Yes the weather sucks here in February, but it sucks in most places in February so I can let it go.  By June, when it is light until 10pm but you can’t enjoy it because it’s raining and freezing, that’s when a sunny climate starts to sound really good.

This year, I am happy to report, we have had a spring.  We have had something like 28 days straight with no rain which is either a record or close to a record (you think I am joking, but I am not.)  Yes, we have had some hot days (90 is hot for us), but mostly it has just been lovely.  Warm, sunny, slight breezes to keep the air quality high – heavenly.  By this time last year, I had not even pulled my boys’ shorts out of the closet.  This year, they have been wearing them for a full month.

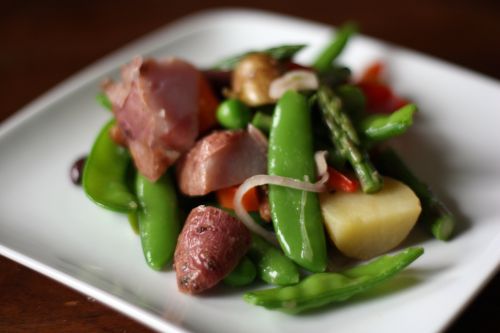
Summer is just days away and I can only hope our good luck lasts.  While we are still technically in spring, I urge you to make this salad.  Everything about it is good.  Three kinds of crunchy spring peas, roasted potatoes, rich pine nuts, salty olives.  The only bad news about making it late in spring is that I was unable to find Meyer lemons for the vinaigrette – their season seems to have passed.  The incredible peas, snap peas, and snow peas I was able to find at a farmer’s market more than made up for the lack of Meyers.

Because this is not a throw-some-lettuce-and-tomatoes-into-a-bowl kind of salad (i.e. it takes a little work), I give you some make-ahead tips.  You can certainly make the salad dressing up to three days ahead.  One day ahead, I de-stringed my snow and snap peas and shelled the English peas.  I also toasted the pine nuts, cut the asparagus, and pitted the olives.  Early on the day of, I blanched all the vegetables and wrapped them in a cotton towel and put them in the refrigerator.  Does all this sound like a lot of work for a salad?  Make it, delight in it’s deliciousness, then decide.

img_2656

One Year Ago:  Spicy Lime and Herbed Tofu in Lettuce Cups

Spring Vegetables with Lemon Vinaigrette
Adapted from Fields of Greens
Serves 4

Of course you can make tons of substitutions and/or add-ins.  I added a quartered hard boiled egg to each of Randy’s and my portion to make it more of a main course.  I also think radishes would be a great addition.

1/2 pound Yukon Gold or other boiling potatoes
Olive oil
Salt and pepper
Lemon Vinaigrette (recipe follows)
2 shallots
1 small red or yellow pepper, sliced into thin strips
1 medium carrot, cut in half lengthwise and sliced 1/2 inch thick on a diagonal
1/2 pound asparagus, woody ends removed, cut into 2 inch lengths on a diagonal
1/4 pound snap peas, strings removed
1/4 pound snow peas, strings removed
1/2 pound English peas, shelled (or use 1/2 cup frozen peas, unthawed)
2 tbsp. pine nuts, toasted
8-12 Niçoise olives, pitted

Preheat the oven to 400°F.  Place the potatoes in a small baking dish; toss with a little olive oil and sprinkle with salt and pepper.  Cover and bake until tender, 30-35 minutes.  Make the vinaigrette.  While the potatoes are still warm, cut them into halves or quarters and toss with the bell pepper, shallots and just a bit of the vinaigrette.

The bright color and crisp texture of the vegetables are essential to this salad, so be sure to have all the ingredients prepared before you begin.  Prepare a large bowl of water with lots of ice.  Bring a medium pot of water to a boil and add 1 tsp. of salt.  Drop the carrot into the water, followed 30 seconds later by the asparagus, snap peas, snow peas, and English peas.  Cook for 2 more minutes.  Immediately scoop the vegetables into the ice water bath, adding more ice as necessary to keep the water cold.  Drain well.

To keep the green vegetables from discoloring, toss the salad just before serving.  Toss the vegetables together with the potato mixture, pine nuts, olives, and remaining vinaigrette.

Lemon Vinaigrette
Makes about 1/2 cup

If you can find Meyer lemons, by all means use them here.

Zest of 1 lemon, grated
2 tbsp. lemon juice
1 tbsp. Champagne vinegar
1/2 tsp. salt
1/8 tsp. black pepper
6 tbsp. olive oil

Combine everything but the oil in a small bowl, then whisk in the oil.


This is Not Whipped Cream

img_2643

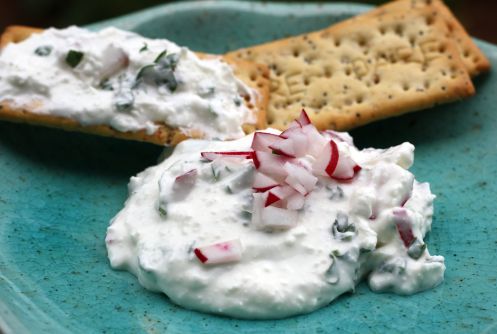
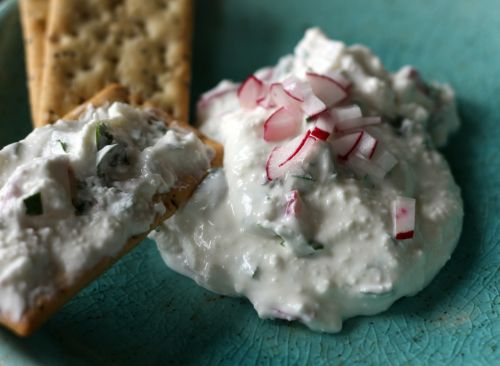
So, this dip is what I mistook for whipped cream the other night.  Yes, I brought this to sandwich between layers of strawberry shortcake and strawberries.  In my defense, it didn’t have the garnishes in it yet – it was just white.  But trust me, it’s much better served with crackers than with chocolate sauce.

This is a great recipe to have in your repetoire because it has few ingredients and takes next to no time.  It also tastes really good and can be made one day ahead.  It’s a lovely place to put all those gorgeous radishes you are seeing at the farmer’s markets.

img_2636

One Year Ago: Feta and Ricotta Cheese Skillet Pie

Feta-Radish Spread
Adapted from The Martha Stewart Living Cookbook, The New Classics
Serves 4-6

Martha tells you to make your own pita chips here but I simply ran out of time.  I brought my clients store-bought pita chips instead.  Another change I made was to use more yogurt (a full 7 oz. container instead of the 1/4 cup she called for) to eliminate the need for olive oil in the spread.

1 package sheep’s milk feta cheese (7 or 8 ounces), coarsely chopped
1- 7 oz. container Greek yogurt (DT: I used low fat)
2 tbsp. fresh lemon juice
3 tbsp. coarsely chopped fresh flat-leaf parsley
4 radishes, quartered and thinly sliced

Pulse the feta, yogurt, and lemon juice in a food processor just utnil the mixture is thick and spreadable, about 10 pulses.  Transer to a medium bowl, and stir in the parsley and radishes.  Serve with pita chips or crackers.  (The dip can be made, without the radishes and parsley, 1 day ahead.  Cover and refrigerate.  Add parsley and radises just before serving.)


A Shortcake and Ice Cream

June 15, 2009

img_2631

So, here is a peek into the world of Dana Treat.

I will often start writing a post hours (or even a full day) before I actually post it.  I start thinking about the story behind a recipe and will start on that track before I get a decent photo and before I type in the recipe.

img_2619

For today’s post, I had a long story about how I have made this Strawberry Shortcake before, many years ago.  I wrote about how I tried bringing it over to a friend’s house assembled and how it totally slid into disaster (literally slid) before we even arrived.  I wrote about how I had the brilliant idea these many years later to bring the bring the components of the cake (biscuit, strawberries, chocolate sauce, whipped cream) over to a different friend’s house and to assemble the cake on site.  I wrote a few witty things (namely that I don’t usually like strawberry shortcake because if I am going to eat cake, I’m not interested in a biscuit masquerading as cake) and I was looking forward to taking photos and posting the recipe on our return home.

Well, instead of bringing the lovely slightly sweet and vanilla spiked whipped cream, I accidentally brought the feta and Greek yogurt mixture I had prepared in advance for Tuesday’s meal.  In my defense, they were both white and whipped looking and both were in glass bowls.  This mistake necessitated my husband making an emergency trip to a local market where they didn’t have whipping cream but they did have this.

img_2632

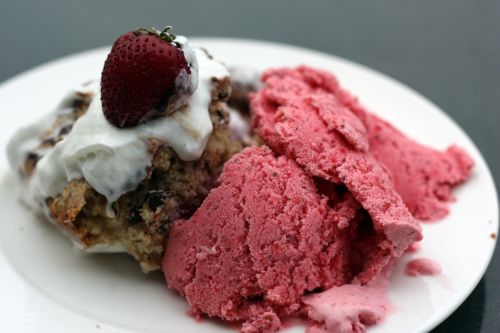
So this is what I used.  As I was putting it all together, a full third of the cake broke away from the rest and the spray can whipped cream started melting on contact.  I do have to say that the flavors were lovely.  Fresh local strawberries can cover up for a lot of mistakes.  So can homemade chocolate sauce.  But I feel confident that I will never make this dessert again.  If you want to attempt it, you can find the recipe here.

Normally, making a mistake like this and having a cake that I spent a lot of time not turn out would have totally bummed me out.  But the truth is that it did taste good and I made ice cream.  Somehow I made it through my whole life up until very recently without purchasing David Lebovitz’s The Perfect Scoop.  Really, I made it through my whole life up until very recently without using my ice cream maker.  Any dessert you make, no matter how simple – or how disastrous, is dramatically improved by pairing it with homemade ice cream.  People go nuts over it.  For the amount of joy it brings, ice cream should be extremely difficult and time consuming to make.  But it is just the opposite.  This one in particular is not custard based so it really just a matter of slicing strawberries, letting them macerate in a little sugar and vodka, and then whizzing them and a few other ingredients together in a blender.  A rest in the refrigerator and a swim in the ice cream machine and you are done.

Is it the perfect strawberry ice cream?  I would have to say no.  I’ll try another recipe another time.  But this one certainly worked well enough to distract people from the the mistakes of the cake.

One Year Ago:  A Love Letter to Lopez

Strawberry Sour Cream Ice Cream
The Perfect Scoop
Makes 1 1/2 quarts

1 pound fresh strawberries, rinsed and hulled
3/4 cup sugar
1 tbsp. vodka or kirsch
1 cup sour cream
1 cup heavy cream
1/2 tsp. freshly squeezed lemon juice

Slice the strawberries and toss them in a bowl with the sugar and vodka or kirsch, stirring until the sugar begins to dissolve.  Cover and let stand at room temperature for 1 hour, stirring every so often.

Pulse the strawberries and their liquid with the sour cream, heavy cream, and lemon juice in a blender or food processor until almost smooth but still slightly chunky.

Refrigerate 1 hour, then freeze in your ice cream maker according to the manufacturer’s instructions.


Randy’s Favorite Cookies

June 12, 2009

img_2603

My husband and I have very different types of memory.  I am great with the long term stuff.  I remember dates, phone numbers, food I have eaten, books I have read, movies I have seen.  However, I have no short term recall.  I am the proverbial person who walks up the stairs to get something, only to forget what it is once I get there.  I am prone to losing keys, sunglasses, debit cards, etc.

Randy, on the other hand, can retain any information, no matter how complicated, for about 24 hours.  I will ask him to do something just before he falls asleep at night and he will actually remember to do it in the morning.  He never loses anything.  But the guy cannot remember anything long term.  I wouldn’t even try to test him on our kids’ birthdays because I’m afraid he might get them wrong.  Cooking for him is fun because he never remembers anything I have made.  Everything is new to him.

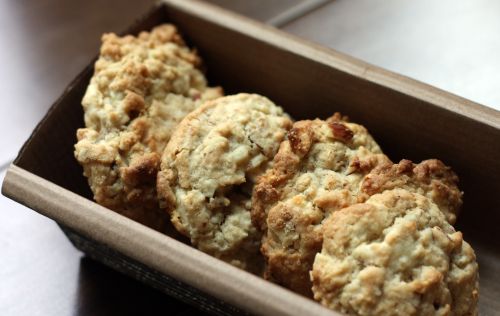
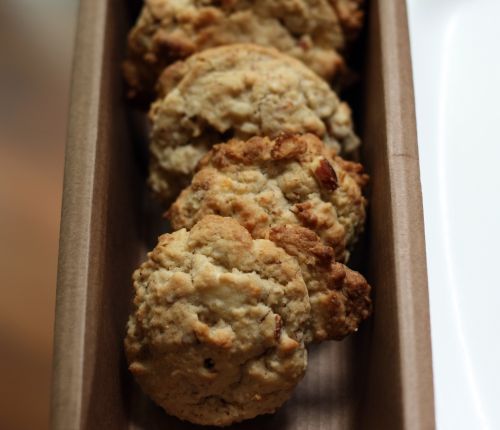
Apparently he does actually have a small portion of his extremely large brain where memories of cookies reside.  As these beauties were cooling on the rack, he walked by, took a sample and declared, “Oh, you made my favorite cookies.”  To which I snarkily replied, “Oh yeah?  Which ones are they?”  To which he sweetly said, “They are the White Chocolate Almond Cookies from the Holly B’s cookbook.”  Doh!  If Randy remembers them – you know they have to be good.

img_2599

(By the way, the reason that there is white on the right side of this photo and brown on the other is because I balanced the cookies on the high chair tray.  The glamorous life of a food blogger.)

One Year Ago:  Curried Lentil Stew with Vegetables and My Top 10 Foods

White Chocolate Almond Chunk Cookies
Adapted from With Love and Butter
Makes about 4 dozen cookies

1 cup (2 sticks) butter, at room temperature
1 cup granulated sugar
1/2 cup brown sugar, firmly packed
2 eggs
1 tsp. vanilla extract
2 1/2 cups quick (1-minute) oats
2 cups flour
1 tsp. baking powder
1 tsp. baking soda
1/2 tsp. salt
2 cups white chocolate chips
1 1/2 cup whole, natural almonds

Preheat the oven to 375°F with the rack in the top position.

Cream the butter and sugars together.  Add the eggs and vanilla and mix until smooth.

Fit a food processor with the steel knife blade and process the oats.  Add to the batter along with the flour, baking powder, soda, and salt.  Mix until combined.  Stir in the white chocolate chips.

Reassemble the food processor without washing.  Add the almonds and pulse until roughly chopped.  Mix the almonds into the dough.

Drop mounded tablespoons of dough on the a cookie sheet spacing them 1 inch apart (DT: I used a medium ice cream scoop for a slightly bigger cookie).  Flatten each cookie slightly with the palm of your hand.  Bake the cookies 4 minutes, rotate the pan, and continue baking  3-5 minutes, until they show the barest amount of brown around the edges.  The centers should be soft but not gooey.  Cool completely, then store in an airtight container.


Grilled Vegetable Quesadillas

June 11, 2009

img_2586

As I was dreaming about Chilled Avocado Soup last week, I was also dreaming up what to make to accompany it.  I knew I wanted to go the Mexican route and that I wanted to keep the flavors really fresh and light to complement the soup.  There is an enchilada recipe that I love in Fields of Greens that stars zucchini and corn, but enchiladas make me a little crazy.  Frying corn tortillas in oil – even if it’s just to soften them – didn’t sound all that “light” to me.

img_2587

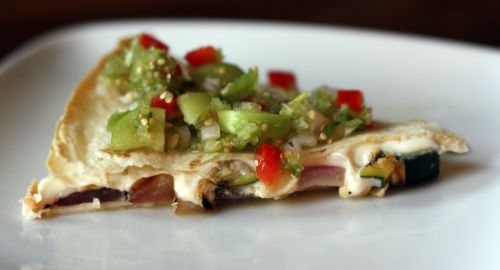
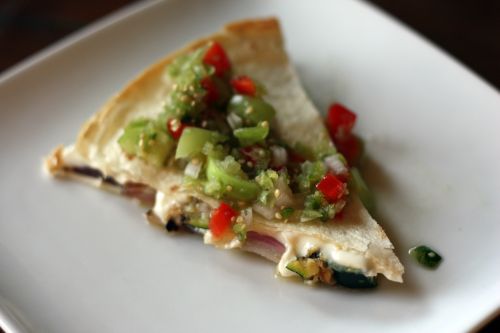
So, I decided to wing it and make giant quesadillas with the flavors I thought would play well with the soup.  I grilled red onions, zucchini and whole cobs of corn.  I cut the corn off the cob, chopped the other vegetables, and mixed them all together with plenty of cilantro and salt and pepper.  I packaged up that mixture for my clients, gave them some cheese and tortillas, and a homemade tomatillo salsa – along with the soup and a Mexican rice.

The beauty of Tuesday nights at our house is that we eat the menu I have created for my clients.  I was particularly interested in tasting the quesadillas because I just kind of winged it, which is unlike me, and am happy to say they were delicious.

A few notes about this recipe.  The method for cooking the quesadillas may seem a little unusual, but I love it because I can make more than one at once with no problem.  As written, the recipe will make three huge quesadillas – enough for six people, you can scale it down as need be.  I wanted to use cotija cheese because I love it’s crumbly texture and salty bite.  Sadly, Whole Foods – where I went because I knew they would have it – was out.  I bought a cheese I had never seen before and now can’t remember what it was called.  It started with an “A” and it was in the same section where the cotija should have been (along with queso fresco, etc) and it came pre-sliced.  It was very mild and melt-y – kind of like mozzarella.  For me, it wasn’t right for these quesadillas but Randy loved it.  Use any kind of cheese you like here.  Finally, if you made the Mexican Pizza and have any of the chipotle purée left over, it would be delicious thinly spread over the bottom tortilla.

One Year Ago:  Ina Garten’s Outrageous Brownies

img_2590


Grilled Vegetable Quesadillas
Dana Treat Original
Serves 6

I’m not going to give a specific amount of cheese here because I think cheese tolerance is so different for each person.  I love lots of vegetables and barely any cheese on my quesadillas.  Some people like the opposite.  I give you permission to use as much or as little as you like.  If you have a large enough grill to do all the vegetables at once, by all means, do so.

2 large red onions
4 large zucchini
3 large ears corn
Olive oil
Kosher salt and freshly ground black pepper
1/4 cup chopped fresh cilantro
12 burrito size tortillas

Preheat a grill to high.

Cut the top off each onion, leave the root end intact, and peel the onion.  Cut into 1/2 inch thick slices and place on a baking sheet.  Drizzle with olive oil and season generously with salt and pepper.  Place on the grill for 7-10 minutes per side – or until grill marks appear and the onion seems cooked through.  Remove and set aside on a plate.

Cut the ends off the zucchini and slice lengthwise into thick planks.  Place on same baking sheet and drizzle with olive oil and season generously with salt and pepper.  Grill for about 5 minutes per side – or until grill marks appear and the zucchini seems cooked through.  Remove and set aside on same plate as onions.

Husk the corn and place on same baking sheet.  Place on same baking sheet and drizzle with olive oil and season generously with salt and pepper.  Place on grill for a few minutes and then give the corn a quarter turn.  Repeat until the corn is lightly browned in spots.  Remove and set aside on baking sheet to cool.

Preheat oven to 425°F.

Once vegetables are cool enough to touch, cut the onions into 1 inch chunks, and the zucchini into 1/2 inch chunks.  Place in a large bowl.  Stand one end of a corn cob in the bowl and, using a sharp knife, slice the kernels off the cob.  Repeat with other cobs.  Mix in the cilantro.  Taste for seasoning and adjust as necessary.

Place 1 tortilla on a baking sheet (more if you can fit more.)  Scatter 1/6th of the vegetable mixture over the tortilla, then add as much (or as little) cheese as you like.  Top with another tortilla.  Repeat with remaining tortillas, vegetable mixture, and cheese.

Slide baking sheets into the oven and bake until the cheese melts and the tortillas firm up a bit, about 10 minutes.  Remove from oven and allow to sit for 5 minutes so all the cheese doesn’t slide out.  Slice into wedges and serve with tomatillo salsa.

Tomatillo Salsa
Adapted from Fields of Greens
Makes about 2 cups

I often use store-bought tomatillo salsa and really like it.  This is a totally different animal.  It is very light and fresh tasting and also quite sour.  It has none of the gumminess that store-bought can sometimes have.  It doesn’t last more than a day in the refrigerator so feel free to use lots on your quesadillas!

1 pound tomatillos, husked
2 or 3 jalapeños, seeded
1/4 cup finely diced red onion
1/2 red or yellow bell pepper, finely diced
1 tsp. lime juice
Salt
1 tbsp. chopped cilantro

Coarsely chop three-quarters of the tomatillos and purée them with the jalapeños in blender or food processor to make the base of the salsa.  Transfer to a bowl.  Chop the remaining tomatillos and add to the purée along with the onion, bell pepper, lime juice, and 3/4 tsp. salt.  Let the salsa sit for 1 hour to allow the flavors to blend.  Add cilantro just before serving.


« Older Posts Newer Posts »