Search Results:

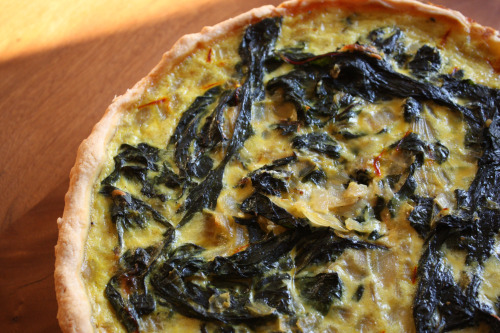
Chard and Saffron Tart

August 25, 2010

My husband calls my big dinners “Dana Meals”.  A big dinner is a meal to enjoy primarily but it also is a meal to impress.  Kind of the opposite of a weeknight meal.  Mine tend to include multiple courses and multiple components.  The ice cream usually matches the dessert.  You know.  Dana Meals usually happen on weekends spent with friends and/or family.  Sometimes, when someone special is in town, I cook one during the week.

Here is the problem.  Let’s say you cook a really nice meal for a very cool and very appreciative person thoughtful enough to bring along his beautiful wife and adorable baby daughter.  Let’s say that same person brings his whole work team over for dinner on another weeknight and you make an even more impressive and complicated meal.  Now what if that person comes for dinner all by himself?  On a Monday?  You can’t exactly serve cold pizza, right?  So a Dana Meal on a Monday it was.

Now a couple of weeks ago, Randy informed me that there would need to be a Dana Meal on a Wednesday for a philosophy group he is a part of.  Please don’t send me an email saying that if Randy needs a dinner for his club, he should make it.  Theoretically that is correct.  Philosophically even.  But I know my husband and if the dinner was left up to him, cold pizza it would be.  Randy is very good at lots of things but he does not cook.

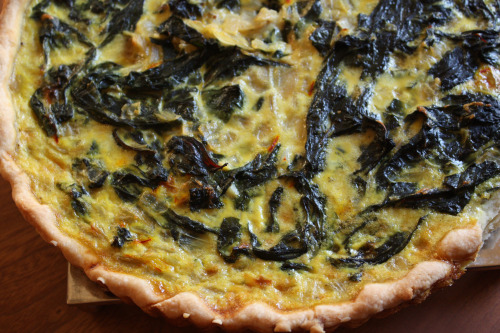
Just before that Wednesday night I had just found my perfect crust, so I opted to make two savory tarts for the philosophers.  One contained corn and white cheddar, the other had chard spiced up with saffron.  I expected the corn tart to be the runaway hit but the chard tart was so good it definitely took first place.  I loved it and couldn’t wait to make it again.  A sunny end-of-summer Monday evening with a visiting friend with high expectations seemed just right.  (I’m kidding about the high expectations.  Kind of.)

Truth be told.  Everything in the markets right now is so amazing that food can taste really exceptional with just a bit of coaxing.  Alongside the tart, I made a corn pudding that I loved and need to make as many times as possible before our fleeting corn season is over.  I sautéed some zucchini in just a bit of olive oil and then tossed the coins with strips of basil, lemon juice, and Pecorino Romano.  (This is my new favorite way to eat zucchini).  I made that tomato and burrata salad that I know I will cry remembering in November.  Not a ton of work and really delicious results.

So let’s talk about the tart.  If you happen to have tart dough in the freezer, this comes together very quickly.  After a blind bake for the crust, onions are sautéed, chard is wilted, eggs and milk are whisked together, saffron and lemon zest are added, everything stirs together and goes into the tart shell, and 40 minutes later you have a tart.  I happen to prefer my savory tarts warm and not hot, so this is a perfect dish for a dinner party.  It can sit and cool while you attend to other details.

One Year Ago: Tortellini Skewers with Parmesan Lemon Dip
Good Chard on Dana Treat: Chickpeas and Chard with Cilantro and Cumin

Chard and Saffron Tart
Adapted from The Greens Cookbook
Serves 4-6

1 recipe Tart Dough (recipe follows)
1 large bunch of chard, leaves only, roughly chopped
1 tbsp. butter
1 large yellow onion, chopped
2 cloves garlic, minced
Kosher salt and freshly ground black pepper
3 eggs
1½ cup whole milk
Large pinch saffron threads, soaked in 1 tablespoon hot water
Zest of 1 small lemon
3 tbsp. freshly grated Parmesan
Nutmeg
3 tbsp. pine nuts, toasted

Preheat the oven to 375ºF.  Roll out one disk of dough to a 14-inch circle.  Carefully transfer the dough to a 10-inch fluted tart pan.  Fold the edges over on themselves to create a thick crust.  Pierce the bottom of the dough with a fork in several places, then place in the freezer for 15 minutes.

Line the pan with foil and fill with pie weights or beans.  Bake in the oven until the edges of the crust are starting to brown and the bottom no longer looks doughy, about 25 minutes.  Remove from the oven and set aside to cool.

Heat the butter in a wide skillet; add the onion and cook it over medium heat until it is translucent and soft.  Add the garlic, and the chard leaves by handfuls, if necessary, until they all fit.  Sprinkle in a large pinch of salt.  Turn the leaves over repeatedly with a pair of tongs so that they are all exposed to the heat of the pan, and cook until they are tender, 5 minutes or more.

Make the custard.  Beat the eggs; then stir in the milk, infused saffron, lemon peel, grated Parmesan, and a few scrapings of nutmeg.  Stir in the chard and onion mixture.  Taste and season with salt and a few grinds of pepper.  Pour the filling into the prepared tart shell and bake until the top is golden and firm, about 40 minutes.  Scatter the pine nuts over top before serving.

Olaiya Land’s Tender Tart Dough

Note:  You will need only 1 disk of this dough for the tart so keep the other one in your freezer for next time!

3 cups all-purpose flour
2 tbsp. sugar
1¾ tsp. salt
1 cup plus 2 tbsp. (2¼ sticks) chilled unsalted butter, cut into ½-inch cubes
8 tbsp. (or more) ice water
1½ tsp. apple cider vinegar

Blend flour, sugar, and salt in a food processor.  Add butter; using on/off turns, process until coarse meal forms.  Add 8 tablespoons ice water and cider vinegar; blend until moist clumps form, adding more ice water by the teaspoon if dough is dry.

Gather dough together.  Turn out onto work surface; divide dough in half.  Form each half into ball and flatten into disk.  Wrap disks separately in plastic and refrigerate 1 hour.  (Can be made ahead.  Keep dough refrigerated up to 2 days, or enclose in a resealable plastic bag and freeze up to 1 month.  Thaw in the refrigerator overnight.)  Soften slightly at room temperature before rolling out.


Why Mess with Perfection?

October 10, 2012

In the 28 months that I have been making what I consider to be the best chocolate chip cookie in the universe, I have rarely considered making another.  Recipes come my way all the time, via books and the internet, and the only time I was tempted to stray was for this recipe.  We liked that one very much too.  But after they cleared out of the cookie jar, I went back to my favorite.  I make a lot of cookies and I have many that I like, but Ashley’s are my the tippy top favorite.

So why stray?  Why mess with perfection?  I am a recent subscriber to Saveur and it only comes out 10 times a year so it feels like a pleasant surprise when it arrives in my mailbox.  The most recent issue is terrific, 101 Classic Recipes.  Of course there is a chocolate chip cookie.  I would have just turned the page, chuckling that they got their recipe so wrong.  But when I saw how different it is from any other I have made, I decided to give it a try.  Unlike Ashley’s there is only one kind of sugar and unlike the New York Times (another very good cookie), there is only one kind of flour.  But there are four egg yolks and a completely different method for shaping the cookies.  Rather than scooping the dough out of the bowl and onto cookie sheets, you essentially roll out three sheets of dough, sprinkling chocolate in between them, and then use a biscuit or cookie cutter to cut them out.  Revolutionary or ridiculous?

I’m on the fence.  I found the method to be a royal pain in the butt.  I don’t like rolling out cookie dough.  The only cookie dough I roll out on a regular basis is for holiday cookies and that is because there would be a coup in my house if I didn’t make them.  There is a lot of chocolate and not a lot of dough in this recipe which means they make for lovely eating but are a little difficult to manhandle while you are stamping them out.  I like a cookie with some height and those three layers of dough work wonders for the height of the cookie.  They are soft in the middle and crisp around the edges and if I had remembered to sprinkle sea salt on top of each one, I might have been tempted to introduce this cookie into our family permanently.  Why don’t you bake up a batch of Ashley’s and a batch of these and bring them both over for an official taste test.

And at the end of this post, I have to say one thing.  As I was sitting here, writing about dough and cookies and the quest for the best, I pulled away to get inspiration.  It is something I often do when I get stuck.  I go to my favorite blogs to check in.  See what they are cooking, photographing, and writing about.  I read this post and I laughed and sobbed in the space of a few paragraphs.  And I came back here, feeling silly that I was writing about cookies.  My kids are growing so fast – why am I writing about cookies??  But in the end, cookies are important, especially to my little guys who love them so deeply.

One Year Ago:  Corn Chowder with Coconut Milk, Cocoa Nib Brownies
Two Years Ago:  Savory Rugelach, Ratatouille, Mushroom and Herb Polenta, Bittersweet Chocolate Pudding Pie
Three Years Ago:  Smoky Chard over Grilled Bread, Asian Coconut Noodle Soup, Pasta with Tomato Sauce and Arugula, Almond Praline Scones
Four Years Ago:  Five Lentil and Chard Soup, Quick Olive and Cheese Bread

Chocolate Chip Cookies
Saveur
Makes about 2 dozen

The recipe suggests you use a hand mixer, I used my stand mixer.  It also suggests you roll the dough into the desired shape, I thought it was easier to smoosh (technical term) and pat it into shape.  I kept patting the scraps out over and over again to maximize the number of cookies and they lost their height but not their taste.

2¼ cups flour
¾ tsp. baking soda
¾ tsp. kosher salt
16 tbsp. (2 sticks) unsalted butter, softened
¾ cup packed dark brown sugar
¾ cup sugar
1 tsp. vanilla extract
4 egg yolks
9 ounces bittersweet chocolate, roughly chopped

Preheat the oven to 375ºF.  Whisk together the flour, baking soda, and salt in a bowl; set aside.  Combine butter, both sugars, and vanilla in a large bowl; beat on medium-high speed with a hand mixer until smooth and fluffy, about 3 minutes.  Add yolks two at a time, beating after each addition; add dry ingredients; beat on low speed until just combined.  Transfer dough to a work surface; divide into 3 equal pieces.  Flatten each into a 4″ x 6″ rectangle; wrap in plastic wrap.  Chill for 30 minutes.

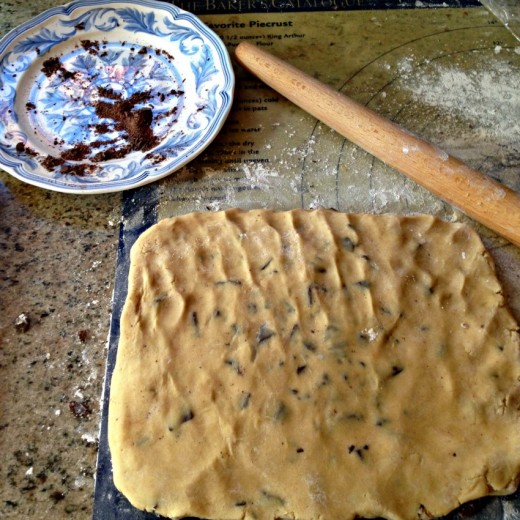
Place one dough rectangle on flour work surface; sprinkle with half the chocolate.  Top with another rectangle, sprinkle with remaining chocolate, and cover with last rectangle.  Using a floured rolling pin, flatten rectangles into a 9″ x 6″ x 1½” rectangle.  Using a 2″ round cutter, cut out cookies; transfer to parchment paper-lined baking sheets, spaced 3″ apart.  Gather scraps, reroll into a 1½” thick disk; cut out more cookies.  (See headnote.)  Bake, rotating baking sheets halfway through cooking, until lightly browned and set, about 15 minutes.


Yogurt and Oregano Pesto Soup

September 1, 2011


One of the greatest things about being a vegetarian, a vegetarian who likes food and likes to eat, is the introduction to other cultures and their food.  If you are looking to eat less meat and you want to eat things other than pasta and salad, you would do well to start investigating Southeast Asian cooking, Indian cooking, Mediterranean cooking, Middle Eastern cooking…  You get the idea.  So many of the world’s cooks use meat more as a garnish than as the focus of the plate.  Those cultures do wonders with meatless foods.

It does take an open mind to start this journey.  You will taste different combinations, foods you have never tried before, things will look different.  You might need to take a trip to a well-stocked specialty food store, though today’s regular grocery stores stock more and more interesting ingredients.  A great place to start might be this soup.

There are very few things I don’t like.  The list is short.  Okra, figs, dates, papaya.  I think that’s it.  If a food doesn’t have those things (or meat) in it, I will eat it.  And actually, I will eat vegetarian gumbo (okra), this salad (fig jam in the dressing), sticky toffee pudding (dates in the cake), and papaya if I don’t know it’s there.  So when I see a recipe for something stars things that I like but used in a different way, I’m always happy to give it a try.  Unusual is good.  Same old same old is boring.

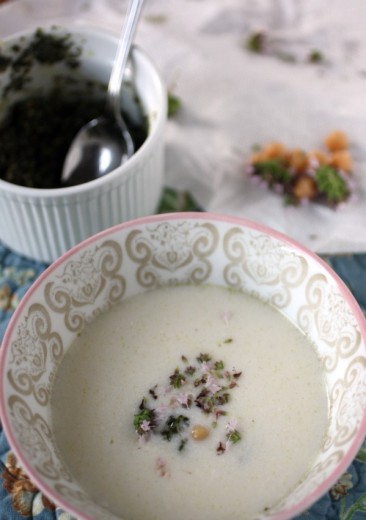
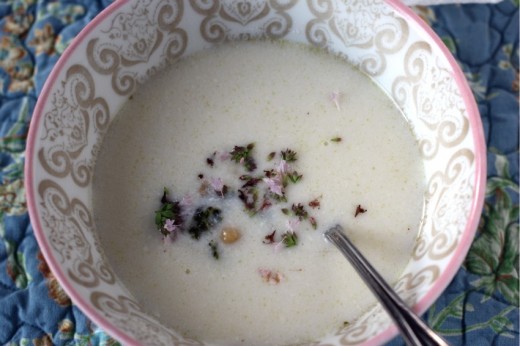
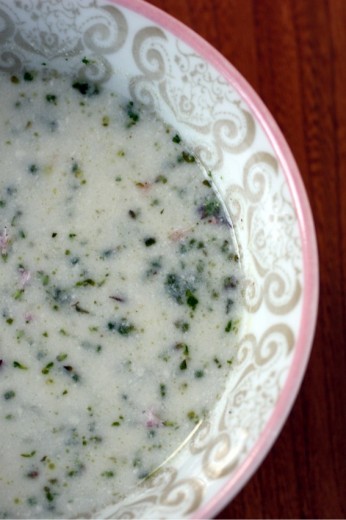
Here you make a simple stock and after it has been strained, you add just a bit of rice to give it body.  You mix together a bit of cornstarch, Greek yogurt that has been strained, and an egg yolk, temper it with a bit of stock, and add it back into the soup.  The whole thing gets a garnish of chickpeas and a pesto made with oregano leaves and their blossoms.  Originally I made this soup because I have a lot of oregano growing in my yard and, while I like it, I don’t find I use it all that often.  I also made it because it sounded so interesting and unusual and I wanted something delicious alongside my pilaf.  It was a huge hit.  A hint of sour in the soup, full body from the egg yolk, the heartiness of the rice and chickpeas, and the lemony oregano pesto made this an intoxicating bowl-ful of goodness.

As with previous recipes I have made from this book, I had to tweak.  I won’t bore you with what I did.  Just trust me when I say make this.  And make it this way.

One Year Ago:  Savory Scones
Two Years Ago:  Mint Filled Brownie Cupcakes
Three Years Ago:  Fresh Summer Rolls with Tofu and Hoisin Peanut Dipping Sauce

Yogurt and Oregano Pesto Soup with Oregano Flowers
Adapted from Purple Citrus & Sweet Perfume
Makes 4 smallish portions

If you are buying oregano and it doesn’t have blossoms, don’t worry, you just won’t have the pretty garnish.  I call for 7 ounces Greek yogurt here because I buy Fage brand and that is the size it comes in.  If you have a larger container, use 8 ounces.  I used their 2%.

For the oregano pesto:
24 sprigs of fresh oregano, leaves and flowers
2 garlic cloves, chopped
1 cup pine nuts
Kosher salt
1/3 cup olive oil
3 tbsp. freshly grated Parmesan

For the soup:
Olive oil
1 celery rib, chopped
1 carrot, chopped
1 small onion, chopped
3 sprigs fresh thyme
3 sprigs fresh oregano
1 bay leaf
Kosher salt and freshly ground black pepper
5 cups water or vegetable broth
2 tbsp. Arborio rice
½ tbsp. cornstarch
7 oz. Greek yogurt, drained in a cheesecloth-lined wire sieve for 1 hour
1 large egg yolk
½ tsp. red pepper flakes (optional)
½ cup cooked chickpeas (I used canned)

To make the oregano pesto:
Set aside some of the oregano flowers for the garnish.  Add the rest of the blossoms, oregano leaves, garlic, pine nuts, and a pinch of salt to a mini food processor.  Pulse to a paste.  Slowly drizzle in the olive oil and process until somewhat smooth.  It will still have texture.  If you prefer it smoother, you can add more olive oil.  Stir in the Parmesan by hand.  This will make more pesto than you need for the soup.  Cover and keep the rest in the refrigerator.

To make the soup:
Heat a large saucepan over medium heat.  Drizzle in just enough olive oil to coat the bottom and add the celery, carrot, and onion along with a large pinch of salt.  Cook, stirring occasionally, for 5 minutes.  Add the thyme, oregano, and bay leaf.  Pour in the water or broth.  Simmer gently for 15 minutes, then strain into another saucepan and discard the solids.  Add the rice to the strained stock and cook for 30 minutes, or until the rice is tender.

Spoon the cornstarch into a small bowl, add a little of the soup and mix well.  Pour the yogurt into a separate bowl and add about 3 tablespoons of the soup, whisk for a moment, then add the egg yolk and the cornstarch mixture.  Stir well.

Pour the yogurt mixture into the soup and cook over medium-low heat, just to a simmer and until slightly thickened.  Take care not to let it boil, as this will curdle the yogurt.  Add the red pepper flakes (if using) and season with salt and pepper.

To serve:
Serve hot in deep bowls.  Put a few chickpeas in the middle, top with a spoonful of the oregano pesto, and finish with the fresh oregano blossoms.


When Life Gives you Radicchio…

August 19, 2011

…you make a radicchio tart.  Which I will tell you about in a moment.  But first, yesterday was one of those days when the stars were in very strange alignment.  One of those days when coincidence became kind of creepy.  Not once but several times.  One of those days when I should have bought a lottery ticket because, clearly, the universe was trying to tell me something.  And, because I have approximately one million other things to do rather than tell you this story, I am going to tell you this story.

This was my day.  On the way out the door to take Graham to day camp, I saw my UPS guy.  I waved.  Walking Graham to the playground at camp, I started talking with another mom who was walking her daughter as well.  I had never met her before but her name is Jill and she teaches music at my old high school.  Kind of weird.  Spencer and I ran errands, went to the wading pool, and then got frozen yogurt.  As we walked in, we passed my UPS guy and while we were sitting and eating, Jill came in on her bike.  Pretty weird.  Then, last night, I taught a class.  One of the participants was a guest at a wedding my brother was in over the weekend, and two of the participants were former yoga students of mine from a regular class I taught in 2003.  They didn’t know it was me, their former yoga teacher, teaching the class, they came because one of their sisters-in-law recommended me.  Really quite weird.

Anyway, radicchio!  We all get surprising things in our inboxes, right?  A couple of weeks ago, I got an email from Emily at Royal Rose Radicchio.  She was offering to send me some radicchio straight from their farm in California.  Odd?  A  bit, yes.  But I do like radicchio and don’t buy it all that often.  It is terrific in salad for a little bitter bite and I love it grilled or roasted.  That bitterness mellows and a wonderful sweetness emerges under heat.  (My brother says it is great on a sandwich instead of lettuce.  Good call.)  So sure, I said, send me some of those gorgeous purpley-red heads of goodness.

Late last week, a giant box appeared on my doorstep.  Inside was no fewer than 20 heads of radicchio.  Now, I do like it but 20 of anything is a lot to get through, especially if it is highly perishable.  For the record, these were gorgeous specimens.  Tight heads, not a blemish in sight, heavy for their size, more beautiful than any I have seen in the store.  I gave some to the neighbors, gave some to the potluck people, roasted a bunch of it (it’s terrific on top of crostini topped with blue cheese and a bit of honey), and I made this tart.

I am a member of a very cool book club – a foodie book club.  Every book club I have ever been a part of has always been much more about the food and drink than about the book so I thought this was a brilliant idea.  Each member contributes a dish from the book we read.  This month we read a book of Julia Child’s letters and we had free reign to make one of her recipes from any of her books.  I have my mom’s copy of Mastering the Art of French Cooking which, truthfully, I had never even opened until this week.  With my plethora of radicchio, I figured it only made sense to try and use some of it.

Radicchio is a member of the chicory family along with things like endive, escarole, and other bitter greens.  I knew Julia wouldn’t have had access to radicchio in the 60’s but I knew, without even looking in the book, that there would be endive recipes.  I road a bike through five different regions of France when I was 16 and we had homestays with families in each of those regions.  I had endive, in various styles, in every single one of those homes.  The French like their endive.

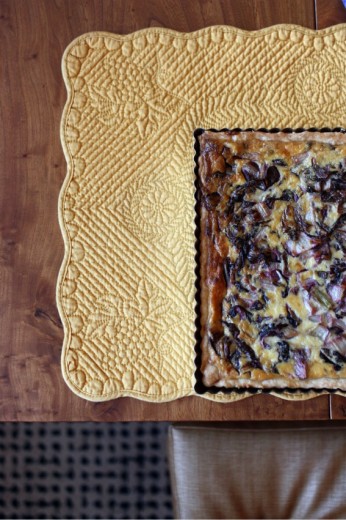
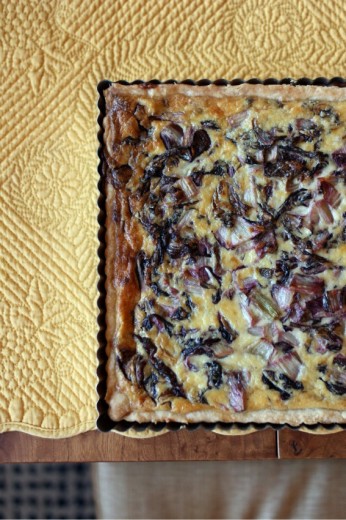
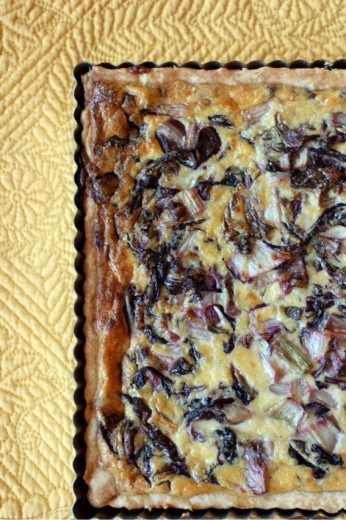
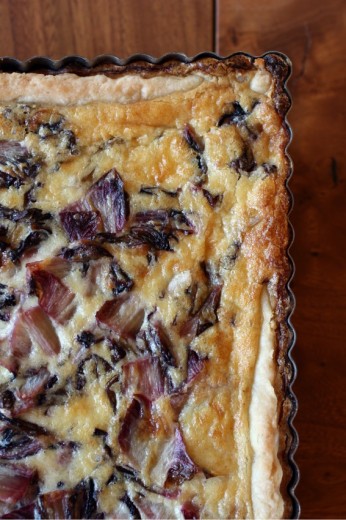
Mastering the Art of French Cooking boasts several endive recipes but as soon as I saw a tart, I knew that was the thing to make.  It does feel like sacrilege to change a Julia Child recipe but I made this my own by using my favorite tart dough, putting it in 9-inch square pan, and using a different chicory.  I planned to use half milk and half cream for the filling but found I was out of milk, so all cream it was.

One final note.  I made this tart in a 9-inch square pan which looked very snazzy, I must say. It  is a little tricky because not everyone gets a piece with crust.  You can certainly make the recipe in a 9-inch round pan but if you have a 10-inch (or even an 11-inch), I would use one of those.  Any way you slice it (ha!) you might not need all the filling and please resist the urge to overfill.  If you do, the liquid goes over the sides of the crust and makes the crust soggy and the tart difficult to remove from the pan.  Just to be safe, I always bake my tarts on a baking sheet to prevent any egg leakage on the floor of my oven.

One Year Ago:  Green Bean Salad with Mustard Seeds and Tarragon
Two Years Ago:  Heirloom Tomato Salad with Burrata, Torn Croutons, and Basil (if you have not made this, do so!)
Three Years Ago:  Black Bean Salad with Corn and Cotija Cheese

Radicchio Tart
Inspired by Mastering the Art of French Cooking
Makes one 10-inch tart

My plan was to use Gruyère cheese but I was out.  I opted for Parmesan instead.

1 medium head radicchio, outer leaves removed, cut in quarters, cored, and thinly sliced
½ cup water
Juice of ½ lemon
1 tsp. salt
3 tbsp. unsalted butter
3 eggs
1½ cups whipping cream
Pinch of nutmeg
Few grinds of pepper
½ cup freshly grated Parmesan cheese, divided

½ recipe Olayia’s Tender Tart Dough (recipe follows)

Preheat the oven to 400ºF.

Boil the radicchio over moderately high heat in a heavy-bottomed saucepan with the water, lemon juice, salt and butter until the liquid has almost evaporated.  Lower the heat and stew gently for 20 to 30 minutes until the radicchio is very tender and has lost its brilliant color.  Allow to cool slightly.

Beat the eggs, cream, ¼ cup of the Parmesan, and seasonings in a mixing bowl to blend.  Gradually stir in the radicchio.  Check seasoning.  Pour into the partially baked pastry shell.  Sprinkle on the other ¼ cup of cheese.  Bake in the middle of the oven for 25 to 30 minutes, or until puffed and browned.

Olaiya Land’s Tender Tart Dough

3 cups all-purpose flour
2 tbsp. sugar
1¾ tsp. salt
1 cup plus 2 tbsp. (2¼ sticks) chilled unsalted butter, cut into ½-inch cubes
8 tbsp. (or more) ice water
1½ tsp. apple cider vinegar

Blend flour, sugar, and salt in a food processor.  Add butter; using on/off turns, process until coarse meal forms.  Add 8 tablespoons ice water and cider vinegar; blend until moist clumps form, adding more ice water by the teaspoon if dough is dry.

Gather dough together.  Turn out onto work surface; divide dough in half.  Form each half into ball and flatten into disk.  Wrap disks separately in plastic and refrigerate 1 hour.  (Can be made ahead.  Keep dough refrigerated up to 2 days, or enclose in a resealable plastic bag and freeze up to 1 month.  Thaw in the refrigerator overnight.)  Soften slightly at room temperature before rolling out.
For this tart, use half the dough.  Roll out into a 13-inch circle or square.  Transfer the dough to the tart pan and prick the bottom all over with a fork.  Place in the freezer for 10 minutes.  Remove from the freezer and line the pan with parchment paper or foil.  Fill with pie weights or dried beans and bake for 10 minutes.  Remove the weights and bake for another 10 minutes, or until the crust is still pale, but dried out and starting to turn just a bit brown.  Proceed with the recipe.


Brown Sugar Pound Cake

April 18, 2011

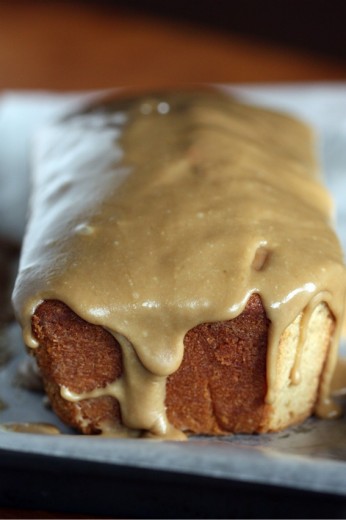
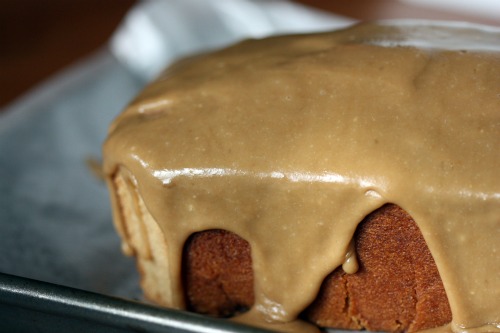
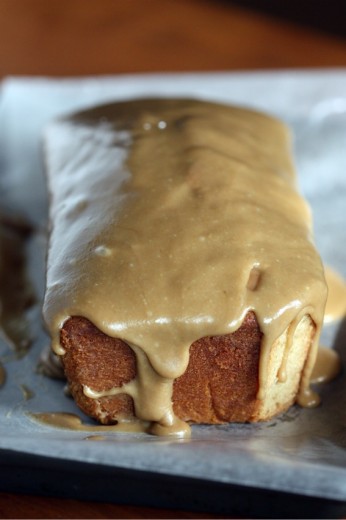
It is a shame I didn’t get a shot of a slice of this cake.  I could have, should have, but I didn’t.  Sorry about that.  If I had, you would have seen the glorious tight and dense crumb.  In my opinion, it is a tight and dense crumb that makes a pound cake great.  That and lots of butter.

This recipe comes by way of a memoir.  Normally, I am a little suspect of recipes in memoirs (unless we are talking about a food memoir like Cooking for Mr. Latte or A Homemade Life).  My thoughts are along the lines of “who is this person and why does he/she think she can just include a recipe at the end of each chapter?”  My friend Cheryl gave me a copy of Cakewalk last summer and it has been sitting on my “to read” pile for far too long.  It  is the story of a very interesting and troubled family.  It is well-written and although food is not the subject, the author does write about tantalizing treats.  Many of the end-of-chapter recipes spoke to me but I made this one because I had all the ingredients on hand.

(OK, so you may notice a small bit of the corner cut off.  For scientific purposes only!)

Sometimes I just want to bake.  If you like to bake, I’m sure you are familiar with this feeling.  For me, it isn’t even so much for the end result although ending up with a homemade baked good is nice.  Sometimes it is just the act of pulling out the flour and sugar, turning on the mixer, preheating the oven, anticipating the smells that will soon perfume my house…  When I just want to bake, I don’t want to fuss.  Cookies are too much trouble – all that shaping and switching baking sheets in the oven.  This is why I love simple cakes.

I did a little dessert party last night – a reception for a very moving play currently running at the New City Theatre in Seattle.  Sick tells of one woman’s struggle with pain and medication and the cracks we can all fall through in the American medical system.  You can read more about the play here.  Randy and I wanted to support the playwright and actress and we decided to invite some of our friends to attend.  We lured them with the promise of a compelling story and with treats afterward.

I made butterscotch pudding tarts and chocolate friands (recipes coming soon).  I made the most favorite chocolate chip cookies.  But several people pulled me aside to tell me this cake was their favorite.  It is comfort food at its most comfortable.  And the glaze!  Swoon.


Brown Sugar Pound Cake
Adapted from Cakewalk
Makes two 8×4-inch loaves

You can make this cake in one 9 or 10-inch tube pan, but I love the idea of having two cakes out of one recipe.  I served one cake the day I made it and wrapped and froze the other one.  The cake should be frozen unglazed, so if you do this, be sure to cut the glaze recipe in half.

3 cups all-purpose flour
1 tsp. baking powder
½ tsp. salt
1½ cups (3 sticks) unsalted butter, at room temperature
3 cups firmly packed light brown sugar
5 large eggs, at room temperature
1 cup whole milk
1 tsp. vanilla

Preheat oven to 325ºF.  Butter and flour two 8×4-inch loaf pans, knocking out excess flour.  Mix the flour, baking powder, and salt together in a bowl.  Set aside.

Beat the butter in the bowl of an electric mixer on medium speed for 3 minutes, until whipped looking.  Slowly add the sugar and beat for another 3 minutes, increasing the speed to medium-high.  The mixture should look very light and fluffy.  Add the eggs one at a time, beat well after each one.  Scrape down the sides of the bowl and beat again.

Combine the milk with the vanilla.  Add the flour in 3 portions alternately with the milk, beginning and ending with the flour.  Fold the last flour addition in by hand with a rubber spatula.  Turn the batter into the prepared pans.  Bake for 1 to 1½ hours, checking after 55 minutes and every 5 to 10 minutes thereafter, until a toothpick inserted near the center of the cake comes out with just moist crumbs attached.  If the cake is very brown after 55 minutes but not yet fully baked, cover the top with a sheet of aluminum foil.  When done, the cake will be springy to the touch and pulling away from the sides of the pan.  Let cool in the pan for 10 minutes, then turn out onto a wire rack to cool completely before glazing.

Brown Sugar Glaze

Remember, this amount will glaze both cakes.  If you are only glazing one, cut the recipe in half.

½ cup (1 stick) unsalted butter
½ cup firmly packed light brown sugar
¼ cup whole milk
¼ tsp. salt
1 tsp. vanilla
1 to 1½ cups confectioners’ sugar

Melt the butter in a heavy-bottomed saucepan over low heat, then add the brown sugar and raise the heat to medium.  Boil, stirring constantly, for 2 minutes.  Add the milk and return to a boil, stirring constantly.  Remove from heat and stir in the salt and vanilla.  Let cool for 10 minutes.

Sift 1 cup of the confectioners’ sugar over the mixture, stirring with a whisk until smooth.  If the glaze is thick enough for your liking, you can stop there.  If not, sift the additional ½ cup sugar in.  Place the cake (still on the wire rack) over a wax paper lined baking sheet.  Pour the glaze over the cooled cake and allow it to drip down the sides.  Allow the glaze to set completely before slicing and serving.  Wrapped carefully, this cake will keep for several days at room temperature.  If you happen to have some homemade caramel sauce on hand, it is amazing poured over top.


« Older Posts Newer Posts »