Category: Side Dish

Stellar Side

May 24, 2010

Recently, I have been thinking about side dishes.  Sometimes I feel like vegetarians get gypped in this category.  If you have a protein as the focus of your plate, sides make sense.  If you don’t – if your plate is vegetable heavy – why would you have a vegetable side dish?

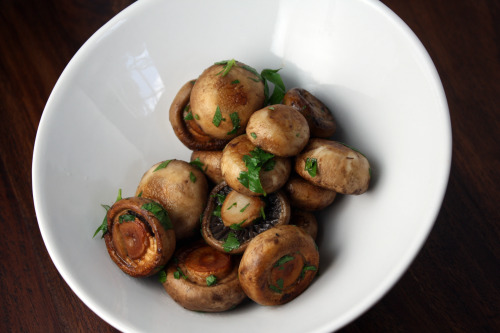
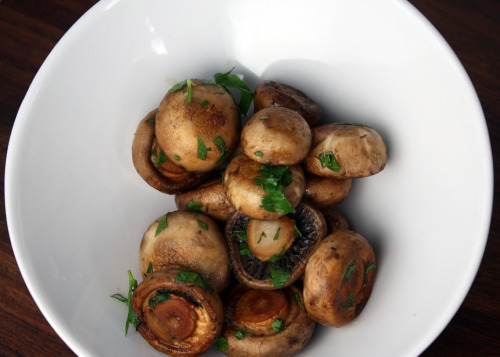
Here is where it fun to be a cook.  You can make your own rules.  Last night I made a spring vegetable risotto for dinner.  I also made a salad but I wanted another component to the meal.  I like variety and although I had some lovely green vegetables studding my arborio rice(asparagus!, snap peas!, English peas!), I wanted something else.  Enter these mushrooms.  I have been making these fungi for years.  I think I originally found the recipe on Epicurious but have long since stopped using the recipe and just do it by taste.

The concept is simple.  You brown a bit of garlic in some olive oil – just to flavor the oil.  The garlic itself gets discarded.  Once the oil is flavorful and hot, in go whole mushrooms.  They sear a bit and give off their liquid, then a quick pour of white wine goes in the pan.  Once that goodness evaporates, you season the mushrooms, give them a sprinkling of fresh parsley and dig in.  No matter how many I make, we eat all of them.  Last night it was a full pound.  When I make them for company, I make three pounds and haul out my biggest skillet.  There are never leftovers.  Which is kind of a bummer, really.

One Year Ago:  Tofu and Cucumber Salad and Individual Vegetable Tarts

Mushrooms with White Wine
Dana Treat Original
Serves 2-4

Usually I rinse my mushrooms to clean them, but here you will want them as dry as possible.  Use a damp paper towel to wipe them off.  Either button or cremini mushrooms will work great here.

Olive oil
1 large garlic clove, smashed and peeled
1 pound mushrooms, wiped clean and stems trimmed
¼ cup dry white wine
Salt and freshly ground black pepper
2 tbsp. chopped fresh parsley

Heat a large skillet over medium-high heat.  Add just enough olive oil to coat the bottom.  Add the garlic and sauté, stirring often, until garlic just starts to turn brown, about 3 minutes.  Do not allow garlic to burn.  Discard garlic.

Add mushrooms to hot oil.  Give them a good toss, then allow them to sit undisturbed so they can sear a bit.  After about 4 minutes, turn each mushroom over so that the other side can sear.  Once the pan is very dry and the mushrooms are nice and brown, pour in the wine.  (If the mushrooms give off a lot of liquid during this process, allow that liquid to evaporate before adding the wine.)  Cook, stirring frequently, until the wine evaporates.  Turn off the heat and stir in the parsley and salt and pepper to taste.


Side Dish for Mexican Food

April 8, 2010

The problem with being a self-described “cookbook cook” is that it takes a little more oomph for me to step outside the assurance of my books and just create a recipe.

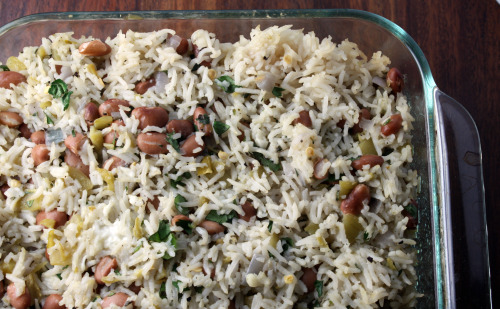
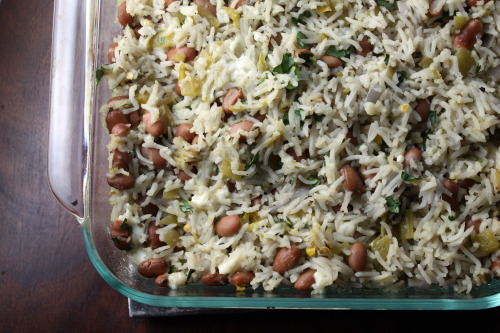
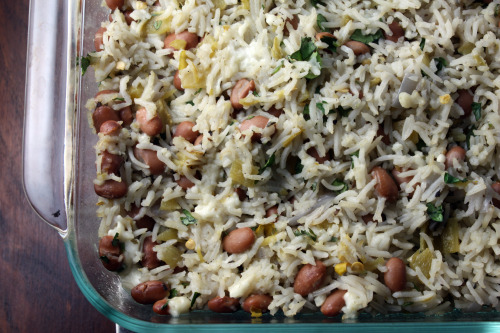
The other night, while making Black Bean Tostadas (recipe coming soon), I started imagining a good hearty rice dish as a side.  I almost started to go through the tedium of looking up “rice” in my cookbooks when I realized I had a very clear idea of what I wanted, why not just make it?

So I did.  And as with most things I have made without a recipe, I was very pleased with how it turned out.  (Note to self: cook more often without a recipe.)  I included some of my favorite flavors in here but, of course, this dish is infinitely adaptable.  I happen to love the slight punch and tang of canned green chiles, but if you like more spice, by all means add a fresh jalapeño or two.  I used queso fresco partly because I also needed it for the tostadas, but partly because I love how mild it is.  But you could certainly use Cheddar or Monterey Jack.  Like more cheese?  Add more and sprinkle some over the top before baking.

A rice note.  Unless I am making risotto or something where I specifically want brown rice (or if I am using sushi rice for this dish), I almost always use basmati rice.  I think it fluffs up beautifully and has terrific flavor.  Trader Joe’s has nice big (and affordable) bags of it.

One Year Ago:  Pasta with Broccoli Rabe and Chickpeas

Baked Rice with Chiles and Pinto Beans
Dana Treat Original
Serves 4-6

Canola or other neutral tasting oil
Small red onion, diced
3 garlic cloves, minced
1 tsp. dried oregano
1 cup white rice
2 cups water or vegetable stock
Salt
1 15-oz. can pinto beans, rinsed and drained
1 7-oz. can diced green chiles
¼ cup chopped cilantro
¾ cup queso fresco, crumbled

Heat a medium saucepan over medium heat.  (I used a 3 quart.)  Add just enough oil to coat the bottom, then add the onion and a healthy pinch of salt.  Sauté until softened, then add the garlic.  Cook for another 3 minutes, then add the oregano.  Sauté for another minute.  Add the rice and toss to coat with the fat and herbs, then pour in the water or stock.  Bring to a boil, then turn the heat down to low, cover and cook for 20 minutes.

Preheat oven to 400ºF.  Oil an 8×8 baking dish.  Once the rice is done cooking, allow it to sit, off the heat, for 5 minutes.  Remove the lid and, using a fork, carefully fluff the rice.  Add the chiles and the beans and, without mushing the rice, carefully stir them in.  Sprinkle on the cheese and cilantro and stir them in.

Scrape the rice mixture into the prepared pan, cover with foil, then bake until the cheese is starting to melt and the dish is hot throughout, about 20 minutes.  Remove the foil and allow to sit for 5 minutes before serving.

(This is totally the kind of dish you could make a day ahead.  Prepare up through putting the finished rice in the baking dish, allow the whole thing to cool, cover with foil, then refrigerate overnight.  From there, just put it directly into the oven and you will need to add 5-10 minutes to the baking time.)


Tempt You with Tempeh?

March 12, 2010

IMG_4890_picnik

So, we all know about Tara of Seven Spoons, right?  If you haven’t visited her incredibly special blog, you should head over there tout de suite.  Her writing is some of the best out there, food blog or no.  Her photos are spare, simple, and beautiful.  Her food is complex, but not overly so.  She always seems to be making exactly what I am in the mood for.  And here is another thing about her.  She is nice.  And I’m not just saying that because she sent me a cookbook.

I can’t remember the exact series of events, but somehow Tara ended up with some extra copies of a new book called Clean Food.  It is a vegetarian book and she sent me a message on Twitter asking if I wanted a copy.  How thoughtful is that?  As I have said here many times before, I have a lot of cookbooks and I have to say, this one is pretty different from others in my collection.  It is extremely healthy, gluten-free, and vegan.  There are those who say, “Why eat?” but those are very narrow-minded people.

IMG_4894_picnik

The book is arranged seasonally and while some of the recipes are overly healthy for me (I like seaweed as much as the next vegetarian, but I don’t need a whole salad of it), many of them sound like just what the title says – clean food.  I like clean food.  Not overly fussy and really tasty.  Having sampled two of the recipes the other night, I can tell you I am very excited to cook more from this book.

May will be the second anniversary of me starting this blog and I have never once mentioned tempeh (pronounced temp-ay).  If you are not familiar with it, tempeh is a soy product.  Technically, it is soybeans that have been put through a fermentation process to bind them into cake form.  Doesn’t that sound appetizing?  Although tempeh and tofu are both soy, they are very different.  Tempeh is much firmer, denser, and actually quite a bit higher in protein.  It also has a fairly distinctive taste which many people don’t like.

I do like it but don’t find it as adaptable as tofu.  It also takes a bit more work to make it taste good.  Tempeh almost always should be steamed first (this will remove the bitterness) and I have found that I like it best marinated and then roasted at a fairly high heat.  That gives the tempeh a nice crust and terrific flavor.

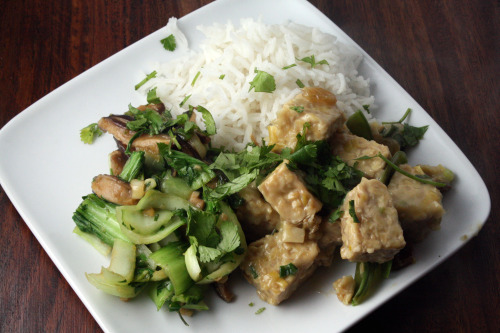
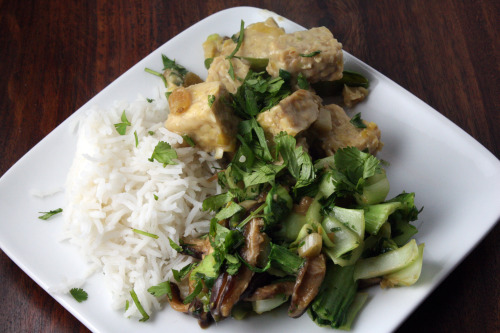
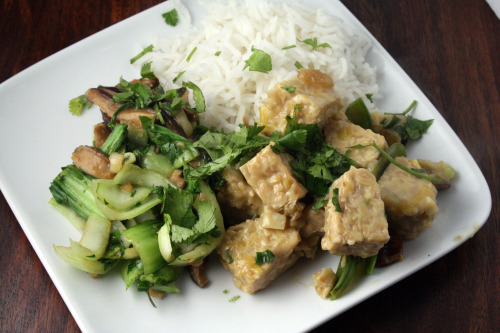
Now I have a new favorite way to eat it.  I was blown away by this dish.  Simple ingredients and fabulous flavor.  Tempeh braised in coconut milk is an excellent idea and I didn’t think I would like the raisins in there, but they add a terrific dimension.  The side dish (from the same book) was almost as good as the main dish.  Put the two together with some rice and you have my husband (who, remember, is not a vegetarian) saying, “This is so good.  Make it again next week.”  So glad he asked.   Thank you Tara!

IMG_4896_picnik

One Year Ago: Butternut Squash and Apple Galette and Goat Cheese Ravioli with Roasted Red Pepper Sauce

Sauteed Tempeh with Coconut Milk and Snow Peas
Adapted from Clean Food
Serves 4

I really loved both of these recipes but I made several changes.  I added some things, left some things out, and used more of other things.  The recipes below reflect those changes.  I would recommend that you do all the chopping in advance and put things in bowls so that you have everything at hand when you are ready to cook.  Yes, more dishes but no frantic running around the kitchen because the cooking time is actually quite short.

2 8-ounce packages tempeh
1 cup snow peas, trimmed
2 tbsp. vegetable oil
1 large shallot, thinly sliced
2 garlic cloves, minced
1 tbsp. fresh grated ginger
½ cup golden raisins
¾ of a 15-ounce can “lite” coconut milk, or more to taste
2 tbsp. tamari or other soy sauce
2 tbsp. maple syrup
1 tbsp. mirin
5 scallions, sliced
½ cup chopped fresh cilantro

Cut the tempeh into chunks and steam for 8 minutes.  Remove from the heat and set aside.

Place the snow peas in a bowl.  Pour boiling hot water over them, leave them for 2 minutes, then drain.  Rinse with cold water and set aside.

In a large skillet over medium heat, sauté the shallot for 3 minutes, or until it begins to get brown.  Add the ginger and garlic and sauté until soft, about 2 minutes.  Add the tempeh, raisins, tamari, syrup, mirin, and about 1/3 of the coconut milk.  Cook, adding more coconut milk as necessary to de-glaze the pan, until tempeh starts to brown, about 10 minutes.  Add the snow peas and cook 2 minutes longer.  Remove from the heat, top tempeh with scallions and cilantro and serve.

Bok Choy and Shiitake Mushroom Sauté
Adapted from Clean Food
Serves 4

2 tbsp. olive oil
1 large shallot, thinly sliced
3 garlic cloves, minced
1 tbsp. grated fresh ginger
½ pound fresh shiitake mushrooms, stems removed and thinly sliced
2 tbsp. tamari
1 tbsp. water
2 tbsp. mirin
8 cups chopped bok choy (4 medium heads or 8 small)
1 cup chopped scallions
½ cup chopped cilantro

In a large skillet over medium heat, sauté shallot in olive oil until starting to brown.  Add ginger and garlic and cook until soft, about 2 minutes.  Add shiitake mushrooms, half the tamari, water, and mirin and sauté until the mushrooms start to caramelize.  (Add more water as needed to de-glaze the pan.)  Add remaining tamari and mirin and sauté until the mushrooms are a deep brown but not burnt.

Stir in bok choy until it wilts.  Cover and steam for 1 minute.  Remove from heat and add scallions and cilantro.


Thanksgiving Worthy Squash

November 18, 2009

IMG_3820

Have you heard?  Thanksgiving is right around the corner.  I don’t know about you but I am totally freaking out.  Last year at this time, I had three clients who I was cooking dinner for twice a week.  One of them also asked me to help with all of the side dishes for their Thanksgiving feast plus we hosted a dinner at our house for 19 adults and 10 children and I felt more relaxed last year than this year.

I subscribe to the theory of inertia.  When I am busy, I just stay busy.  It seems the more cooking I do, the more I can do.  Planning my clients’ dinners just made me better about planning my own.  I was more present and prepared than I am this year.  I am no longer cooking for my clients but it’s not as though I’m not cooking (I am doing plenty of that).  I’m just not in the zone like I was last year.

I have a hunch that people might visit this site looking for vegetarian Thanksgiving options.  I am sorry to tell you that this year, as well as last year and all the years ahead into the forseeable future, a turkey will be on our table.  We have turkey lovers among our family members and loved ones.  I cannot deny them.  Thanksgiving will just have to be as it has always been for me – lots of delicious side dishes plus a big saucepan of vegetarian gravy and a big bird for the carnivores.

I’m still in the menu planning stages (yes, I know there are only 8 days until the big day) but I’m thinking this might be one our sides.  I have been making this squash dish for years.  It is about the simplest thing around but holy moly is it good.  I use delicata squash, but you can use any kind where the skin is edible.  I’ve made it using butter, but I have to tell you that olive oil tastes just as good here and I like the idea of offering my vegan readers a tasty dish as well.  Both of my kids are really good eaters but neither of them love vegetables.  I’m here to tell you that they inhaled this squash.

IMG_3823

One Year Ago:  Cranberry Walnut Braid (which I make every year for Thanksgiving)

Maple Roasted Delicata Squash
Dana Treat Original
Serves 6-8 as a side dish

1- 3-4lb. delicata squash (or another variety with an edible skin)
1/4 cup olive oil
1/4 cup maple syrup
1 tsp. kosher salt

Preheat oven to 425°F.

Cut the squash in half vertically.  Scrape out all of the seeds.  Cut each half into 3/4-inch thick slices.  Arrange slices on a large baking sheet and toss with olive oil, maple syrup, and salt.  Make sure to toss well so that each slice is coated.

Bake in the oven until tender and starting to brown, about 15-20 minutes.  Allow to cool slightly, then remove from the baking sheet.  Can be served warm or room temperature.


Tasty Timbale

September 6, 2009

img_3220

Sometimes you make something and you just say, “Wow, that is tasty.”  Maybe it isn’t the prettiest thing you’ve every made, or the most refined, or the most complex.  But it might be one of the tastiest.  This happened to me last night and I’m glad that we had friends on hand to share it with us.  This is one tasty timbale.

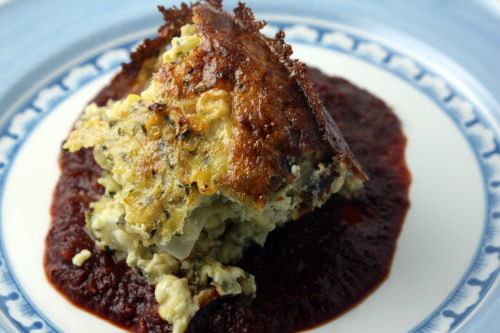
What is a timbale?  The best description I can come up with is that it is a crustless quiche but made in a round ramekin and then unmolded.  Two of the cookbooks that I have from the Greens restaurant in San Francisco (The Greens Cookbook and Fields of Greens) have recipes for timbales and I have been tempted for years to make them.  I always thought of them as client worthy meals but was almost positive that this is the kind of thing that needs to be served very soon after coming out of the oven.  I wasn’t sure how they would hold up after a several hour waiting period.

We had three couples over for dinner and I decided it was time to timbale.  For some reason, I have only 7 – 1 cup ramekins although I know I bought 8, so I decided to make this in a 2 quart soufflé dish and just scoop it out.  Yes, I lost something in the presentation but it was really not worth a last minute run to a kitchen store to buy an 8th ramekin.  (And yes, I did think about doing that.)

img_3224

The flavor here is incredible.  I mean, how can you go wrong with zucchini, corn, herbs, and sharp white cheddar?  But what really made the dish was the sauce.  I had my doubts about this blood red chile tomato sauce.  I made it the day before and was a little concerned about it being bitter.  Turning to Twitter, I learned from the ever knowledgeable Chef Gwen (who writes the lovely blog Pen and Fork), that I had probably over toasted the ancho chiles.  Her advice was to add a pinch or two of sugar and just a splash of apple cider vinegar.  That did the trick.  The sauce has an incredible smokiness and piquancy – a perfect foil for the richness and sweetness of the timbale.  All in all?  Very tasty.
img_3231

One Year Ago:  Chanterelle Risotto

Corn and Zucchini Timable with Ancho Chile Sauce
Adapted from The Greens Cookbook
Serves 6

I’m presenting the recipe more or less as written.  As stated above, I made this in a 2 quart soufflé dish which I did not put in a water bath.  If I were to make it with ramekins, I would do the water bath method.

1 pound zucchini
Salt
2 tbsp. butter
1 small yellow onion, diced
2 cups yellow corn kernels (about 4 ears)
4 tbsp. parsley, finely chopped
3 tbsp. cilantro, finely chopped
1/4 cup white wine
5 eggs
2/3 cup heavy cream
3 ounces or 1 cup sharp cheddar cheese, grated
1/4 tsp. cayenne pepper
Tabasco sauce to taste (optional)
3/4 cup bread crumbs
Ancho Chile Sauce (recipe follows)

Grate the zucchini by hand suing the large holes on a grater, or process it in a food processor.  Place in a colander and toss it with salt.  Let it sit for half an hour, then squeeze out the water, either using your hands or putting the mass in a clean kitchen towel and twisting hard several times.

Melt the butter, add the onion, followed a minute later with the corn, parsley, and cilantro.  Stir together and cook over medium heat for a minute;  then add the zucchini and wine, lower the heat, and cook covered for about 3 minutes.  Remove the lid and cook off any remaining liquid.  Taste and season with salt, if needed.

Beat the eggs, whisk in the cream, then add the vegetables and cheese.  Season with the cayenne and Tabasco sauce if using, and taste again for salt.

Preheat the oven to 325°F.  Generously butter 1-cup-capacity ramekins, or a large mold, and coat them with the bread crumbs.  Mix any extra bread crumbs into the custard; then ladle it into the ramekins, making ure there is an even distribution of vegetables.  Set the ramekins in a deep pan and add enough hot water to come halfway up the sides.  Bake until the tops puff up and are browned, about 1 hour.  Prepare the Ancho Chile Sauce while the custards are baking.  Take the custards out of the oven and let them sit for a few minutes, then unmold them.  Serve them top side up on a plate with the sauce spooned around or over them.

Ancho Chile Sauce
Makes about 3 cups

To count down on time, I used two 15 ounce cans of Muir Glen’s fire roasted tomatoes instead of grilling or broiling as described below.

2 pounds tomatoes, fresh or canned
20 large garlic cloves, unpeeled
3 to 4 ancho chiles
2 tsp. dried oregano
Salt

If possible, grill the tomatoes over a charcoal or wood fire until they are soft but the skins have not blackened.  Otherwise, broil them for 5 to 8 minutes, turning them frequently, until they are soft and the skins are blistered.  Purée in a blender and set them aside.

Preheat the oven to 350°F.  Roast the garlic cloves until they are soft inside and slightly browned on the outside, about 20 minutes.  Let them cool briefly; then peel.  Put them in the blender with about 1/4 of the tomato purée and blend until smooth.

Roast the ancho chiles in the oven until they puff up and are fragrant, about 3 to 5 minutes.  Remove the stem, seeds, and veins, tear into pieces, then blend in a small blender jar or spice mill.  (DT: I use a coffee grinder for grinding chiles and spices.)  Roast the oregano in a dry skillet until it is aromatic, and remove it to a dish to stop the cooking.

Heat the tomatoes; season them with the garlic purée, chiles, oregano, and salt and simmer for 15 to 20 minutes.

« Older Posts Newer Posts »