Category: Side Dish

Labor Day Cauliflower

September 6, 2010

It is Labor Day in the U.S. and for many that means barbecues.  It means sending summer off with a bang with things like burgers, potato salad, and large slices of watermelon.  There will be no barbecue here on this cold and rainy day.  I could link to barbecue friendly food from past posts but instead, I am going to talk about cauliflower.  (OK, here is one dish that I truly love that even involves a grill!  And while I am in parentheses, I should tell you that Seattle has a wonderful music festival every Labor Day weekend and it is called Bumbershoot because it always rains.)

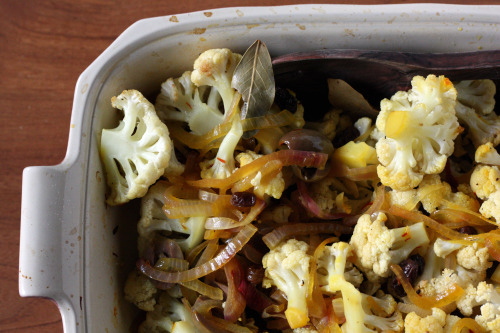
Cauliflower.  I have a relatively new appreciation for cauliflower.  It started when I learned that roasting it at high heat produces something of utterly transcendent sweetness.  Nothing like the sad bowl of plain steamed stuff sitting on my childhood kitchen table, or the pile of raw browning florets untouched at nearly every salad bar and on every crudité platter.  Because of my new relationship with this member of the brassica family, I have been more open to recipes starring cauliflower.  That is a good thing because this beauty just got a permanent spot in my repertoire.

I recently read somewhere that there is a crisis in the saffron world.  Because it is so labor intensive to harvest and so expensive, much of the saffron we pay so dearly for is not actually saffron.  In other words, it is not the stamen of the crocus flower but the stamen of other flowers, most notably safflower.  Saffron’s  aroma is unmistakable (like pot’s aroma is unmistakable – sorry), so be sure to take a whiff of whatever you buy.  The high price is worth it for the scent, gorgeous color, and subtle pungent flavor.

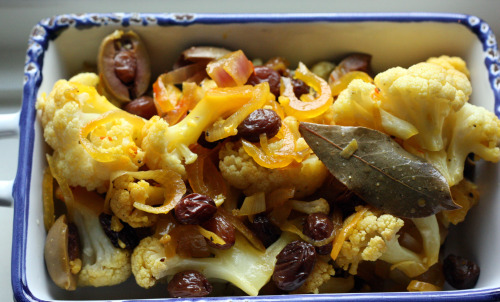
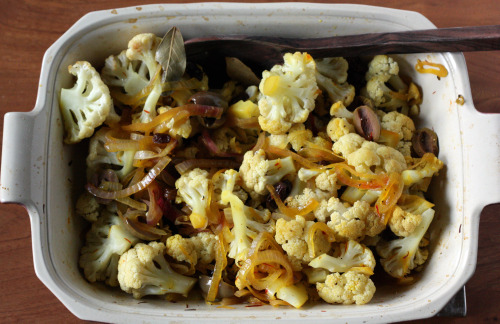
Just a pinch here flavors this whole dish.  Sure there are also olives, bay leaves and raisins, plus red onions that get cooked down so much and so nicely that even I, who am not usually a huge onion fan, didn’t pick them out.  But the saffron is what makes the dish.  Buy carefully.  I made this as a side dish served warm one night and served it cold as a salad the next.  Overnight in the refrigerator made the color of the cauliflower more golden and the flavor more intense, so don’t hesitate to make this ahead of time.

One Year Ago: Holly B’s French Bread
Two Years Ago: Chocolate Peanut Toffee

Saffron Cauliflower
Adapted from Plenty
Serves 4-6

Because this is an English cookbook, all the measurements are metric.  I chose to eyeball the ingredients rather than whip out my scale which you will see reflected below.

Large pinch saffron strands
¼ cup boiling water
1 large cauliflower, broken into medium florets
1 large red onion, cut in half and then thinly sliced
1 handful raisins
1 cup green olives, sliced in half
4 tbsp. olive oil
2 bay leaves
Salt and freshly ground black pepper

Preheat the oven to 400ºF.  Put the saffron strands in a small bowl and pour over the boiling water.  Leave to infuse for a minute, then pour the saffron and water into a large mixing bowl.  Add the remaining ingredients plus a large pinch of salt and a few grinds of pepper, and mix everything together with your hands.

Transfer the mix to a medium ovenproof dish, cover with foil, and place in the oven.  Cook for 40-45 minutes, or until the cauliflower is tender but not too soft.  Halfway through the cooking time, remove the dish from the oven and stir well, then cover again and return to bake.

Once the cauliflower is cooked, take it out of the oven and remove the foil.  Season to taste with salt and pepper and serve warm or room temperature.


Good Green Beans

August 17, 2010

I tend to like my green beans pretty plain.  Like broccoli.  I could pounds and pounds of those two veggies just steamed with a healthy sprinkle of salt.  Maybe a squeeze of lemon.  That is how my husband likes them too.

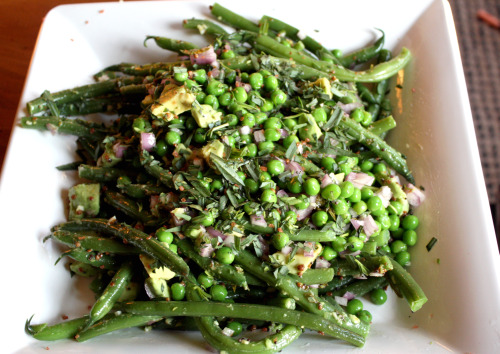
But the green beans are so gorgeous at our markets right now.  Plump, long, incredibly fresh.  I felt like I wanted to celebrate their beauty more and make something a little more substantial.  I found this recipe in my new Plenty cookbook but knew instinctively that some changes had to be made to the method.  I was instructed to toss cooked beans, snow peas and peas in a warm spiced oil, then scatter crushed garlic, lemon zest, chopped chile and tarragon over the top.  I don’t know about you, but crushed garlic and lemon zest don’t “scatter” too well for me.  I wouldn’t welcome a big bite of raw garlic-laced green bean or a fuzzy lemon-zested one.  I certainly am not interested in getting a big bite of jalapeño either.

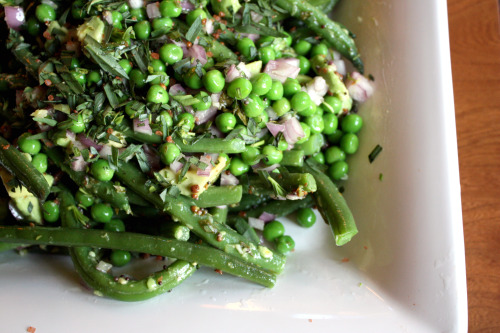
Instead of following directions like a good oldest child, I made more of a dressing including the juice of the lemon as well, and poured tossed the mixture with the vegetables.  I am not a huge snow pea fan and would normally have substituted snap peas, but instead I just upped the green beans and threw in a diced avocado.  The oil with crushed coriander seeds and mustard seeds really made this dish.  I loved their smoky flavor and subtle crunch along with the tartness of the lemon.  I guess I could eat pounds of green beans this way too.

One Year Ago: Sharlyn Melon Soup with Cucumber Chile Ice
Two Years Ago: Chilled Tomato Red Pepper Soup with Mint

Green Bean Salad with Mustard Seeds and Tarragon
Loosely adapted from Plenty
Serves 4

1½ pounds green beans, ends trimmed
1 cup frozen peas
2 tsp. coriander seed, roughly crushed with a mortar and pestle
1 tsp. mustard seeds
3 tbsp. olive oil
1 large shallot, finely chopped
1 large avocado, chopped
1 jalapeño, seeded and finely chopped
1 garlic clove, pressed
Grated zest and juice of 1 lemon
Kosher salt and freshly ground black pepper
2 tbsp. chopped tarragon, plus more for garnish

Fill a medium saucepan with water and bring it to a boil.  Have a large bowl of ice water ready.  Add 2 tablespoons of salt and then the green beans.  Cook for 3 minutes, then add the peas.  After 30 seconds, scoop all the vegetables out into the ice bath, adding more ice if necessary.  When cool, drain well, then place in a large bowl.  Add the chopped shallots and avocado.

Put the coriander seeds, mustard seeds, and oil into a small frying pan and turn the heat to medium.  When the seeds begin to pop, remove the pan from the heat and allow to cool slightly.  Meanwhile put the garlic, lemon juice and zest, chile, and tarragon in a bowl or jar.  Add a large pinch of salt and a few grinds of pepper.  Pour the oil over and shake or whisk to combine.  Pour the dressing over the vegetables and gently toss to combine.  This dish looks best on a platter garnished with additional tarragon leaves.


Impulse Buys

August 5, 2010

I’m a careful Costco shopper.  Did you know Costco started in Seattle?  We’ve been members for as long as I can remember.  We go about every other month and I buy the same things over and over.  Paper towels, toilet paper, canned tomatoes, chickpeas, garbage bags, olive oil, string cheese, Diet Pepsi, beer, wine.  Occasionally I buy Ziploc bags, dish washing detergent, kids vitamins, ibuprofen, butter, Dijon mustard, dried pasta, some kind of cookbook, and nuts.  I am very very happy to tell you that I no longer need to buy diapers or wipes.  Or formula.  Hallelujah.

My point here is that I don’t get sucked in.  I know what I need and what I have room for.  I see people’s carts and wonder “where are these people putting all this stuff?”.  I am lucky in that I have plenty of room for impulse purchases, but I hate to have things on hand that I know I won’t use.  So there is not a lot of impulse shopping at Costco.

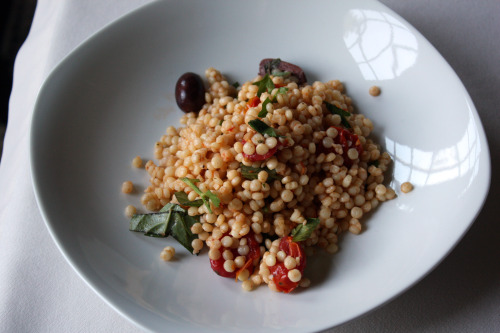
Once in a great while, I see something and I pounce without thinking too carefully.  I get sucked in by cheap pretzels and quinoa.  About a year ago, I found a 5 pound bag of Israeli couscous and very happily put it in my cart.  I love the stuff and it is not always that easy to find in regular grocery stores.  That 5 pound bag has been mocking me from the basement storage room.  Yes, thankfully I have a basement storage room for things like giant bags of Israeli couscous, but still.  What I have realized is that, while I love Israeli couscous, it’s not something I use all that often.

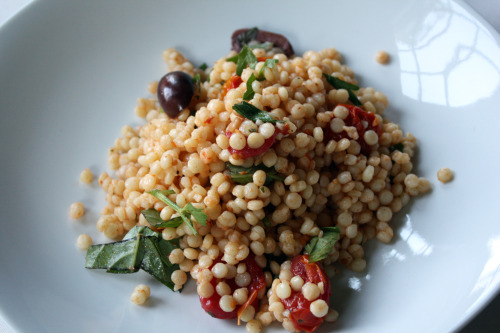
In my searches for a salad for the summer yoga retreat, I was thrilled to remember this one tucked away in one of my notebooks.  The flavors sounded wonderful, all things that I love, and it uses a lot of Israeli couscous.  Because I knew there were going to be 18 of us, I doubled the recipe.  The salad was a hit and partly because I loved it and partly because I still had lots of couscous, I made another giant portion of it to bring to a block party.  I even held back some of it so I could serve it as a side dish at a dinner party the night after the block party.   And yes, I still have couscous in that bag.  A lot of it.

Israeli Couscous previously on Dana Treat: Couscous and Mograbiah with Oven-Dried Tomatoes
One Year Ago: Grilled Potato Slices with Salt and Vinegar

Israeli Couscous with Olives and Roasted Tomatoes
Adapted from Gourmet
Serves 6-8

For roasted tomatoes and dressing
2 pints red grape or cherry tomatoes (1½ pounds)
3 large garlic cloves, left unpeeled
¼ cup olive oil, plus extra for drizzling
¼ cup warm water
Juice of ½ a lemon
1 tsp. kosher salt
½ tsp. freshly ground black pepper

For couscous
2½ cups vegetable broth
2 cups Israeli couscous
½ cup Kalamata olives, pits removed and sliced in half
½ cup basil, thinly sliced
¼ cup parsley, chopped

Roast tomatoes and make dressing
Preheat oven to 400ºF.  Place tomatoes and garlic, still in its peel on a baking sheet.  Drizzle with olive oil and sprinkle with a healthy pinch of salt and a few grinds of pepper.  Bake in the oven until the tomatoes are quite soft and starting to brown, about 20 minutes.  Remove and allow to cool slightly.

Peel garlic and purée with oil, water, lemon juice, salt, pepper, and ½ cup roasted tomatoes in a blender until dressing is very smooth.  Set aside.

Make couscous
Bring broth to a boil in a large heavy saucepan and stir in couscous.  Simmer for about 3 minutes then cover pan and remove from the heat.  Let stand for 10 minutes.  Spread couscous in 1 layer on a baking sheet and cool 15 minutes.

Transfer couscous to a large bowl and stir in remaining ingredients, dressing, roasted tomatoes, and salt and pepper to taste.  You may not need all the dressing so hold a bit back.

(DT: I found it best mix this salad with my hands so the tomatoes don’t get too squished.  You can make the couscous and dressing a day ahead and store them separately.  The couscous will stick together but add some of the dressing and work it with your hands before adding the rest of the ingredients.)


For Your Next Potluck

July 13, 2010

One of the things that can be challenging in vegetarian cooking is creating a colorful and interesting dinner plate.  I don’t mean the meal as a whole, I mean what you actually find as your main course.  If you eat meat, your plate is probably something like protein, starch, green vegetable.  In England they call that meat and two veg.  There used to be a vegetarian restaurant in London called Eat and Two Veg which I thought was hilarious.  Anyway.  On our plates, that diversity is harder to accomplish.  You can’t just swap out the steak for tofu.

When I am making a special dinner, I try really hard to come up with a three part main course.  I always have at least one course preceding the main, but I like that main to look really colorful and appetizing.  I found a recipe for this wonderful couscous dish and knew I wanted to make it for my brother’s special dinner.  If I make a starchy side, I try to make a protein-heavy dish along with a clean vegetable.  Galettes are great for dinner parties but in this case, I thought the crust and the couscous would be starch overload.  This time, I made a crustless quiche with kale and zucchini and that amazing blasted broccoli.

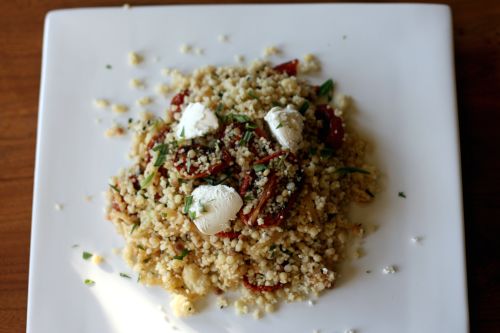
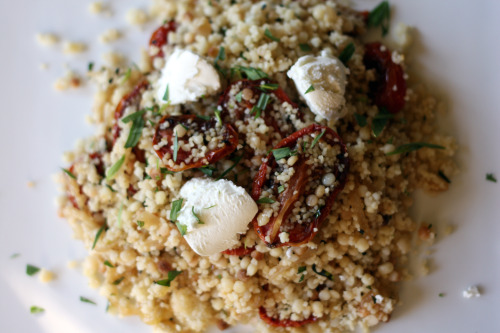
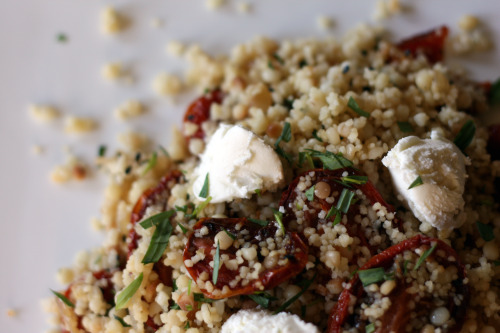
This dish was so lovely.  Two kinds of couscous mixed with slow roasted tomatoes, caramelized onions, and fresh herbs makes for a substantial and delicious side.  The recipe instructs you to top it with dollops of homemade labneh – a type of strained yogurt cheese, but I opted out of that easy but time-consuming step.  I could have probably bought some labneh, but I opted out of that time-consuming third stop on my grocery shopping tour and just bought fromage blanc.  Really, after tasting the dish, I would probably use something more pungent next time – like a Montrachet or even feta cheese.

If you make this as written, you will end up with approximately one ton of couscous, so it would be a great addition to your next party or potluck.  Never a bad thing.

Ottolenghi calls the larger couscous mograbiah which apparently is the Lebanese name for what we call Israeli couscous.  It is about half the size of a pea.  Sometimes it is difficult to find so when I see it, I buy it.  I have used a small Italian pasta as a substitute (not acine de pepe or orzo) the name of which, for the life of me, I cannot find.  I liked it in this dish because the color is not so uniform so it had a more rustic look and texture.  Anyone know the name of what I describe?  (Update 7-16-10: Thank you to Mary for reminding me of the name – fregola!  If you can find that type, use it here.)

One Year Ago:  Chocolate Chip Pretzel Bars
Two Years Ago:  Leek Frittata

Couscous and Mograbiah with Oven-Dried Tomatoes
Adapted from Ottolenghi, The Cookbook
Makes a lot

I know this seems like a crazy amount of tomatoes, but just make them and use them in other things if you don’t want to add them all to the couscous.  They are delicious.

16 large, ripe plum tomatoes, cut into halves lengthwise
2 tbsp. muscovado sugar (DT: or sub brown sugar)
Olive oil
2 tbsp. good balsamic vinegar
2 onions, thinly sliced
8 oz. Morgrabiah or Israeli couscous
1 2/3 cups vegetable stock
Pinch of saffron threads
8 oz. couscous
2 tbsp. chopped fresh tarragon (DT: basil would be good here too)
4 ounces fromage blanc, Montrachet, or feta cheese
Kosher salt and freshly ground black pepper

Preheat the oven to 300ºF.  Arrange the tomatoes halves on a baking sheet, skin side down, and sprinkle them with the sugar, some olive oil, the balsamic vinegar, salt and pepper.  Place in the oven and bake for 2 hours, or until the tomatoes have lost most of their moisture.

Meanwhile, place a large skillet over medium-high heat and drizzle in just enough olive oil to coat the bottom.  Add the onions and saute, stirring occasionally, until the onions are a dark golden color – 15 to 20 minutes.  Set aside.

Bring a large saucepan of water to boil.  Add the mograbiah and cook it as you would pasta until tender but not overcooked, about 10 minutes. http://www.bingo-game.org/   Drain and rinse well with cold water.  Drain again.

In a separate pot, bring the stock to boil with the saffron and a little salt.  Add the (small) couscous, give it a stir, then immediately turn cover the pot and turn off the heat.  Let stand for 5 minutes, then use a fork to fluff up the couscous.

In a large bowl, stir together the mograbiah, couscous, tomatoes, tarragon, and onions.  You will most likely need to add olive oil to keep things from sticking together and a couple good pinches of salt.  Turn the whole dish out onto a platter.  Scoop some of the fromage blanc over top or crumble one of the suggested cheeses.


Polishing Off a Side Dish

June 6, 2010

So.

I’m back from an amazing week in the state of Massachusetts.  When we weren’t pahking the cah in Hahvahd Yahd, we were traipsing around the lovely crooked streets of Provincetown, and being shown incredible East coast beaches by our friend Maryann.  It was so nice to see the sun, walk out in the evening without a jacket (!) and to realize that the very difficult times of traveling with small children are almost behind us.  It wasn’t easy, but both the flights and all the transitions (cabs, ferries, cars, ferries, cabs again – it wasn’t us pahking the cah in Hahvahd Yahd) went smoothly.  I actually read almost the whole way to and from Massachusetts.  Yahoo!

Oh yes, and I got a tattoo.  I so wanted to post a photo today but it is in the process of losing the scab which looks about as attractive as it sounds.  Story coming after healing process is over.  From the precious few people who have seen it (including Erin who I got to meet over coffee), I have gotten thumbs up.

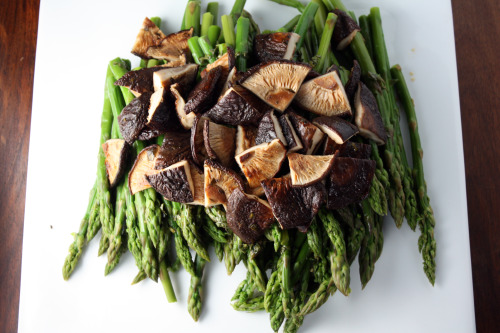
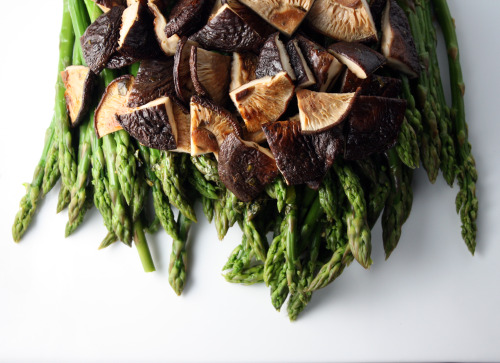
I made this wonderful side dish before we left and just didn’t have time to write about it.  Often when I am making Asian food, I will just steam some broccoli to serve on the side.  I could eat my weight in steamed broccoli but when I made these noodles, I wanted something with a little more oomph.  In case you have never had asparagus together with shiitake mushrooms in a soy sauce spiked dressing, I highly encourage that you try it.   The recipe said 8 to 10 servings but 5 of us polished it off even with a little fighting over the last few asparagus spears.  The dressing might sound a bit odd – tarragon in a Asian inspired side? – but it worked beautifully in this dish.  If you live in a climate where you can stand outside and grill without looking like the victim of a flood, then I highly recommend the grill rather than the safe-and-dry oven inside that I had to use.

One Year Ago:  Mexican Pizza with Corn and Tomatillos
Two Years Ago:  Gazpacho (still my tried and true recipe)

Asparagus and Grilled Shiitake with Soy Vinaigrette
Adapted from Food and Wine
Serves 8-10 (not in my family)

2 tbsp. olive oil
2 tbsp. soy sauce
1 tbsp. lemon juice
1 tbsp. rice vinegar
2 tbsp. chopped tarragon
Salt and freshly ground black pepper
1½ pounds fresh shiitake mushrooms, stemmed
2 pounds thin asparagus

Light a grill.  In a small bowl, mix the olive oil, soy sauce, lemon juice, vinegar, and tarragon and season with salt and pepper.

Brush the shiitake with 2 tablespoons of the soy vinaigrette; season with salt and pepper.  Grill over moderate heat, turning once, until just tender, about 6 minutes.  (DT: I roasted them in a 400° oven until they had absorbed the marinade and were tender, about 10 minutes.)  Transfer the shiitakes to a bowl; cut any large mushrooms into quarters.

bring a large skillet of salted water to a boil.  Fill a large bowl with ice water.  Add the asparagus to the skillet and cook until crisp-tender, about 3 minutes.  Transfer to the ice water to cool.  Drain and pat dry with paper towels.

Arrange the asparagus on a platter.  Drizzle with about half the remaining dressing.  Spoon the shiitakes over the asparagus followed by the rest of the dressing.  Serve right away.

(Make ahead: The dressing, grilled shiitakes, and blanched asparagus can each be refrigerated separately overnight.  Reheat the shiitake in a 400° oven for about 4 minutes and bring the asparagus and dressing to room temperature before serving.)


« Older Posts Newer Posts »