Category: Quick and Easy

Julie’s Salad

August 1, 2011

Let me ask you this – do you think about salad?  Do you crave it?  When you serve yourself from the salad bowl, does a small mountain of greens appear on your salad plate?

If your answer is no, then this post will probably not make much sense to you.  No judgment; I understand if you say no.  Bad salad runs the gamut from agonizingly boring to downright disgusting.  In restaurants, especially in un-veg-friendly restaurants, salad is often my only choice.  I feel like I have had them all and most of them are bad.

I have always thought of myself as a good salad maker.  We eat one with our dinner several nights a week (or more) and I made endless varieties in the three years I worked as a personal chef.  But I have now met my salad match.  This recipe which, as you will see below, is one I am obsessed with.  I can’t get enough.  My dear friend and former neighbor Julie brought this over for an impromptu dinner this past spring and I have asked her to make it several times since then.  I have also started making it on my own although I never like it as much as when Julie makes it.  You might not know Julie but you probably know Ashley and this salad is originally her creation.

Each post I write suffers through several edits.  In an early version of this one, I totally geeked out.  I detailed out what Julie and I agree upon and what we do differently and where we both stray from Ashley’s original vision.  It was not, ahem, interesting reading.  So let me just streamline it for you and then offer you the recipe for how I make The Salad, which is how Julie and I refer to it.

Some musts:  Good lettuce – Julie is partial to the butter lettuce mix at Trader Joe’s, I am obsessed with the basketball size heads I find at my farmers’ market.  I buy two of those babies and they last me all week.  A high proportion of herbs to lettuce is necessary – I say 1 part herbs to 3 parts lettuce and Julie uses even more.  Dill must be in there as well as tarragon – otherwise use whatever you have growing in your garden or whatever bits and pieces are lying in your crisper drawer.  Radishes lend a wonderful bite here but if you want them to be on the mellower side, do as Julie does and slice them with a mandoline.  If you prefer more crunch and more bitterness, thinly slice them with a knife.  Yes, it makes a difference.  Yes, I am a salad geek.  Finally, once everything is in the bowl but before you dress the salad, sprinkle a healthy pinch of kosher salt over the leaves.  Lettuce is a vegetable and vegetables need salt – this step will make this or any salad taste loads better and will require less dressing.

Some options:  On our Lopez trip last weekend, I found the sweetest English peas I have ever tasted and couldn’t resist buying a huge bag of them.  I added them raw to the salad and they fit in perfectly with the mix.  I have since started adding thawed frozen peas and am kind of on the fence about whether I want them in there or not.  Since fresh peas are probably long gone from your markets, keep this step in mind for next spring.  Julie adds nubs of goat cheese to the greens and while I do love the cheese in there, I think it is equally delicious without.  Use about 2-3 ounces of the soft stuff for salad for 4.  (She also made it once with a log of herb studded goat cheese on the side so that people could serve up however much cheese they wanted onto their plate.  Genius.)  Ashley makes her dressing with a bit of crème fraîche, Julie doesn’t, I’ve tried it both ways and also with an egg yolk instead of the crème fraîche.  All good.  Just make sure your proportion of vinegar is higher than a traditional vinaigrette.  You want a lot of bite here.

So yes, I have written 692 words about salad.  You probably think I am crazy, obsessed, or just downright weird.  Try it and then decide.  You can find Ashley’s original post about this salad and much better photos here.

One Year Ago:  Grilled Summer Vegetable Soft Tacos
Two Years Ago:  Muhummara Dip

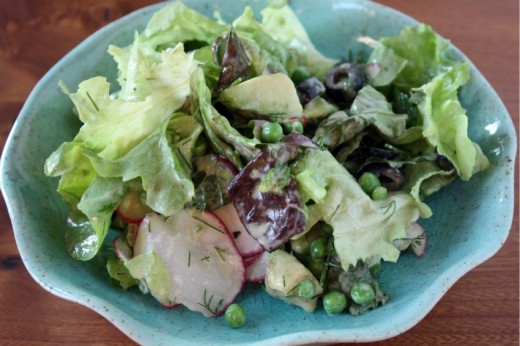
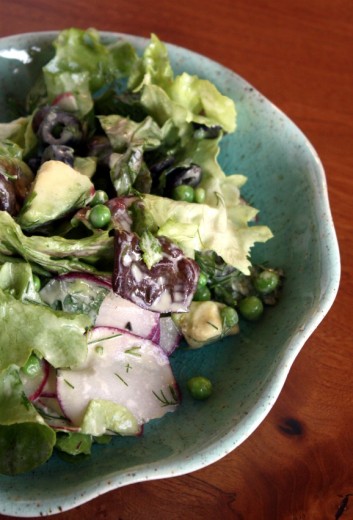
Soft Lettuces with Herbs and Avocado
Inspired by Ashley Rodriguez and Julie Hubert
Serves 4

You might spy a couple of sliced olives on my salad plate.  I had a handful left over from making the kids pizza and thought I would throw them in.  Mistake.  With the possible exception of the peas, this salad needs no embellishment from other “stuff”.  The amounts here are obviously fluid – Randy and I polish off this amount between the two of us.  Finally – finally! – Julie chops her lettuce so that the overall feel is more like a chopped salad, but I can’t bring myself to take a knife to those beautiful leaves so I tear them into big pieces.

For the salad
1 head soft butter lettuce, leaves washed and torn, spun dry
One cup roughly chopped herbs, such as tarragon, mint, dill, basil, chives, etc.
4 large radishes, thinly sliced
1 medium avocado, cut into 1-inch chunks
1 small handful fresh peas, optional
Kosher salt

For the dressing
1 egg yolk
2 tbsp. water
2 tsp. Dijon mustard
¼ cup Champagne vinegar
1 tsp. honey
Kosher salt and freshly ground black pepper
¾ cup olive oil
1 large shallot, minced

Make the dressing
Place the egg yolk, water, mustard, vinegar, honey, a large pinch of salt, and a few grinds of pepper in the bowl of a food processor fitted with the steel blade.  Whir to combine.  Open the feed tube and slowly add the olive oil and process until the dressing thickens.  Stop and taste adjust seasoning to your taste with more honey, salt, pepper, or vinegar.  Pour the dressing into a bowl and stir in the shallots.  (This recipe will make more dressing than you need for one salad.  Cover and store in the refrigerator I keep my dressing in recycled salsa or jam jar with a lid.  Good for shaking.)

Make the salad
Place the lettuce, herbs, radishes, avocado, and peas in a large bowl.  Sprinkle the whole mix with a pinch of kosher salt.  Pour on the dressing carefully (you probably won’t need much) and toss gently to combine.  Serve right away.


Birthday Dinner

July 27, 2011


Thank you to all of you who entered to win the Keurig coffee maker.  I asked my contact there to pick a number between 1 and 239.  She told me that her favorite number is 2, so she picked comment #222.  Francesca wrote:

I moved from Italy to California where I am trying to colonize the locals. My husband has already been assimilated and happily consumes copious amounts of olive oil (the good stuff) and aceto balsamico tradizionale.

It seems fitting that an Italian won a great coffee maker, does it not?  Francesca, I will be sending you an email!

It seems these days that social media is a common topic.  People like to talk about the pros and cons of things like Facebook, Twitter, StumbleUpon, Pinterest, etc.  I have very specific uses for Facebook and Twitter.  Keeping up with far-flung friends (Facebook), directing people to my blog, networking in the Seattle food community, and getting answers to cooking and dining questions (Twitter), and making sure I get as many birthday wishes as possible (both).  If you have ever felt down on a birthday, then you probably aren’t on Facebook or Twitter.  Yesterday was my 41st (bummer), on a Tuesday (bummer), and it was raining (double bummer).  If that doesn’t sound depressing, then I don’t know what does.  But through the magic of the internet, I got so much love and attention that my little Leo heart was full.

Now you might be wondering why I cooked on my birthday.  Did I mention that it was my 41st, on a Tuesday, and it was raining?  Plus, my brother is fond of saying that the best vegetarian restaurant in Seattle is actually my house.  Would I be the most arrogant person in the world if I said that I agree?  I’m not saying the best food in the city can be eaten here – far from it – but if you are going to take me out for veg food, I’d rather eat my cooking.  Plus, I like to cook.

Sometimes I feel like I should only post grand recipes here.  Like blow your socks off things that I have spent hours in the kitchen making.  Never mind that I don’t make things like that all that often (unless we are talking dessert) and that the truth is, I am a huge fan of simple dishes.   If something tastes great and doesn’t take a lot of effort, I will sing its praises.  From the feedback I get about my recipes here and requests for upcoming classes, I would say that many of you are wanting more and more “weeknight” type recipes.  So here you go.

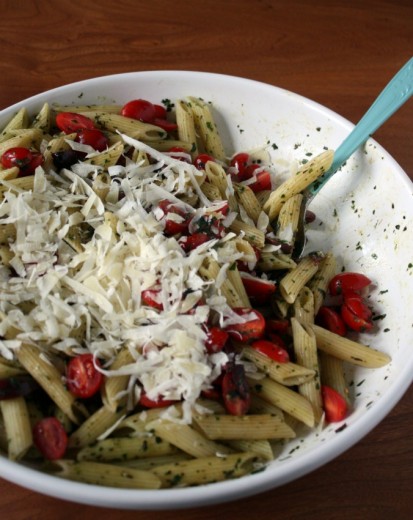
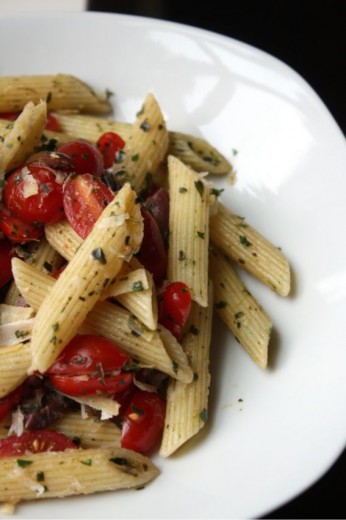
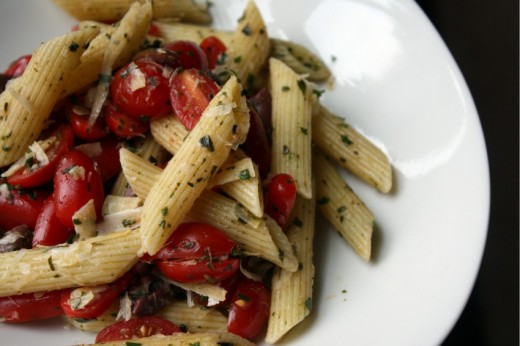
I know much of America thinks that we vegetarians eat only pasta and salad.  It is true that I eat a lot of salad but the last pasta recipe I posted was way back in February.  I do crave it in the summer when fresh and light sounds just right and I want to keep cooking time to a minimum.  Here, lots of fresh herbs were pureed with some olive oil and garlic – think pesto without the nuts or cheese.  I tossed warm pasta with that mixture and then stirred in cherry tomato halves and Kalamata olive quarters.  The whole dish got a healthy sprinkling of Pecorino cheese which is truly a favorite of mine.  It took about 15 minutes start to finish and the dish can sit for hours before serving.  Pretty perfect weeknight meal – even for a birthday.

Two Years Ago: Indian Spiced Chickpea Salad with Yogurt and Herbs
Three Years Ago: Creamy Eggplant with Peas

Penne with Cherry Tomatoes, Olives, and Pecorino
Adapted from Food & Wine
Serves 6

1 pound penne
½ cup olive oil
1 cup basil leaves
½ cup flat-leaf parsley leaves
2 garlic cloves, sliced
2 tsp. coarsely chopped thyme leaves
2 tsp. coarsely chopped marjoram leaves
Kosher salt
1 pound cherry tomatoes, halved
1/3 cup Kalamata olives, pitted and quartered
1 cup coarsely grated Pecorino cheese (about 3 ounces)
Freshly ground black pepper

Bring a large pot of salted water to a boil.  Add the penne and cook according to package directions until the pasta is just al dente.  Drain and allow to cool slightly.

Place the herbs, garlic, and olive oil in the bowl of a mini food processor or the jar of a blender and purée.  Stir in a large pinch of salt and scrape the purée into a large pasta bowl.  Pour in the pasta and toss well to coat, you may need to add a bit of olive oil if the pasta seems to dry.  Stir in the tomatoes and olives and let stand at room temperature for at least 10 minutes for the flavors to develop.  Just before serving, add the Pecorino and season to taste with pepper.  Toss well.   (Can be made up to 2 hours ahead.)


Might Be in the Top 10

July 13, 2011

As a food blogger, the photography portion is not my strong point.  I know this.  I consider myself to be on the low side of decent.  I’m better than many and worse than many.  I am at peace with my place in the food photography world.  When I have the time and some creative juices are flowing, I may take a picture that is better than decent.  But most of the time I am rushing, fighting against the waning light or the ticking of the clock and my husband’s appetite and patience.  You might notice that my sweet shots tend to be better than my savory.  That is because I can shoot cookies the morning after I have made them and when I don’t have anyone wondering when we are going to be ready to eat already.

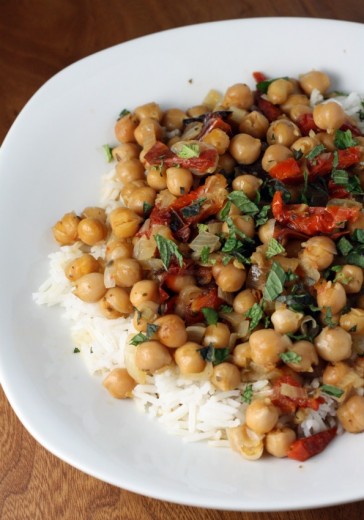
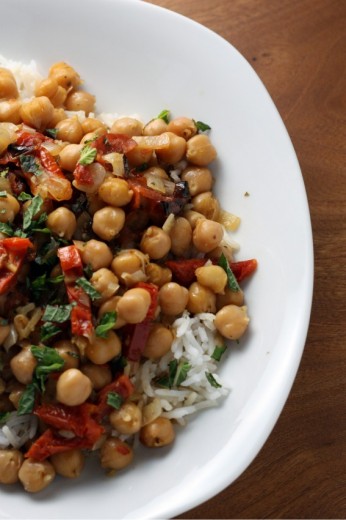
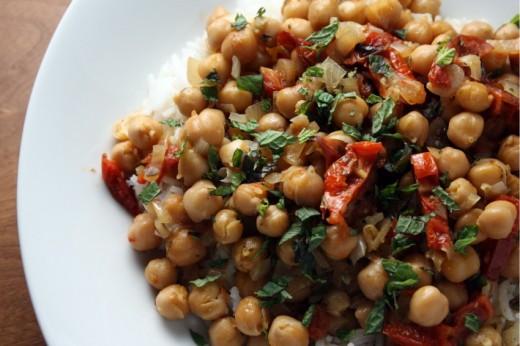
I mention this now because it is truly a shame that I don’t have the skills or the tools to make this dish look more exciting than it does in these photos.  You might look at them and think, “Chickpeas – yum.”  You might look at the recipe and think, “That’s it?”  Have you been reading this site for a while?  Do you trust me?  You know I am not prone to hyperbole, right?  That I am the first to admit when something does not live up to my expectations or didn’t turn out right, or was just so-so?  I have to say, this is one of the best dinners I have made in a while.  And if we are talking about dinners that take next to no effort, then this might be Top of 2011 So Far.  Randy, who always says, “Thank you for a nice dinner” but often just plows his way through his plate without fully appreciating what is there, said no fewer than six times, “Oh wow this is yum!” and got up to get his own seconds.  Except there were none!  (Hint: Double the recipe!)

How is this possible?  It’s shallot, a few dried herbs, chickpeas, broth and lemon juice.  Oh, but wait.  There are also some slow roasted tomatoes and slow roasted cloves of garlic that make an appearance just before serving time and those two things add so much depth, such savory umami-ness, almost creaminess to this dish.  I am no stranger to slow-roasted tomatoes or to roasted garlic.  But I would never have thought to include them in a chickpea stew and shame! on! me! for not doing this sooner.

So, I made two mistakes.  Mistake #1 was that I opted out of making a full batch of the tomatoes.  My thinking went along the lines of “why on earth do I need to buy 8 pounds of tomatoes and have 5 jars of slow roasted tomatoes and garlic in my refrigerator?”  Silly silly Dana.  If I had made the full batch, we could have this dinner once a week which would make both of us very happy.  I could also use those tomatoes and garlic in all manner of things.  Mistake #2 was not listening to my gut when it told me that 325º is far too high for slow roasting anything.  Sure enough, after about an hour the edges of the tomatoes were starting to turn one shade of brown past caramelization and I pulled them out.  Sometimes I feel this blog exists so that I can make mistakes so you don’t have to…

One Year Ago: Fresh Pea Soup with Pea Jelly
Two Years Ago: Chocolate Chip-Pretzel Bars
Three Years Ago: Raspberry Cream Sandwiches

Lemony Chickpea and Oven-Dried Tomato Stew
Adpated from Food & Wine
Serves 2-3

I think this was originally meant as a side.  If you are making it as a main, I would definitely double it, even for 2.  Leftovers would be amazing but I wouldn’t know since we didn’t have any.  Because I didn’t have enough tomatoes, I added some sun-dried ones as well to bulk my stew up.  Don’t be tempted to skip making the oven-dried ones though.  Trust me.  Finally, I sprinkled a bit of chopped mint over top for color – normally I use parsley but I was out.  We both liked the flavor of the mint so that is a keeper step.

Olive oil
1 large shallot, finely chopped
1 19-ounce can chickpeas, drained and rinsed
½ tsp. dried oregano
1 bay leaf
¼ tsp. crushed red pepper
Kosher salt
3 cups vegetable broth
Juice of 1 lemon
1 cup Oven-Dried Tomatoes, coarsely chopped, plus 4 garlic cloves from the jar
2 tbsp. chopped fresh mint

Place a large saucepan over medium heat.  Drizzle in just enough olive oil to coat the bottom, then add the shallot along with a large pinch of salt and cook over moderate heat, stirring, until softened, about 5 minutes.  Add the chickpeas, oregano, bay leaf, and crushed red pepper.  Cook, stirring frequently, until the herbs are fragrant, about 5 minutes.  Add the broth and lemon juice and bring to a boil.  Simmer the stew over moderately low heat until the broth is reduced by half, about 20 minutes.  Stir in the Oven-Dried Tomatoes and the garlic and simmer for 5 minutes.  Discard the bay leaf.  Season the stew with salt and serve over with rice or with crusty bread.  Garnish with chopped mint.

Oven-Dried Tomatoes
Makes 2½ pints

8 pound firm but ripe plum tomatoes, cored and halved lengthwise
½ cup olive oil, plus more for packing
2 heads garlic, cloves separated but not peeled
12 large thyme sprigs
Salt and freshly ground black pepper

Preheat oven to 250º and position 2 racks just above and just below the middle of the oven.  Working over a medium bowl, pry the seeds and pulp out of the tomatoes and discard.  Pour ¼ cup of the olive oil onto each of 2 very sturdy, rimmed, light-colored baking sheets.  Arrange the tomatoes, cut side down on the baking sheets and scatter the garlic and thyme all around.  Make a tiny slit on each tomato.

Bake the tomatoes for about 45 minutes, until the skins begin to wrinkle.  Shift the pans from top to bottom halfway through.  Carefully pinch off the skins.  Flip each tomato and bake until the surface looks dry, about 1 hour.  Flip the tomatoes again and continue baking until the surfaces look dry but the tomatoes are still slightly plump, about 2 hours longer.  Season the tomatoes with salt and pepper and let cool completely.

Discard the thyme sprigs and peel the garlic cloves.  Layer the tomatoes with the garlic in five ½-pint jars.  Add enough olive oil to cover the tomatoes by at least 1 inch.  Slide the blade of a knife along the side of each jar to release any air bubbles.  Seal the jar and refrigerate for up to 2 months or freeze for up to 6 months.


Super Simple Appetizer

July 2, 2011

I will admit that I’m not always the best about posting super simple recipes.  This might be the place you come for treats, tofu, and tasty vegetarian fare, but it’s probably not your first choice of blogs if your guests are coming in five minutes and you need a recipe.  I like super simple as much as the next person but I am, inexplicably, drawn to more tedious and complicated things in the kitchen.

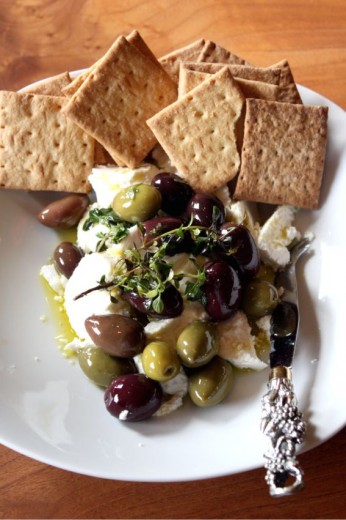
No more!  Give me :10 and you’ve got something pretty and delicious.  There is no effort here beyond slicing goat cheese and heating up some oil.  I always have these ingredients on hand and also always have crackers, so if you are coming to my house any time soon, you know what we are having as an appetizer.


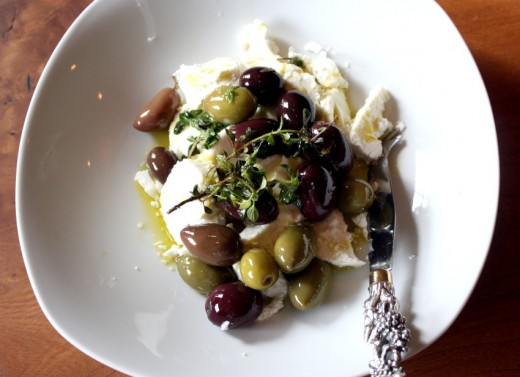
Goat Cheese with Olives, Lemon, and Thyme
Adapted from Gourmet
Serves 4-6

½ cup assorted olives
3 fresh thyme sprigs (use lemon thyme if possible)
3 tbsp. extra-virgin olive oil
Zest of 1 lemon
4-5 ounces soft goat cheese (such as Montrachet), sliced

Heat olives, thyme, oil, zest, and ¼ tsp. pepper in a small skillet or saucepan over low heat until fragrant (do not simmer).  Cool to room temperature.  Serve olive mixture over goat cheese.  (This dish can be prepared 2 hours ahead and kept, covered, at room temperature.)


A Need for Something Green

June 4, 2011

Friends – once again it has been a crazy week.  In a very good way.  We spent last weekend on Lopez Island (more on that with cute boy photos on the way), came home to a birthday party for my brother on Sunday, spent a relaxing Memorial Day doing not much of anything, and then Tuesday I flew to Scottsdale to talk about ovens and cooktops. Thermador, a brand I am now officially simultaneously in love with and coveting, has come out with an incredible new option for your stove/oven and I was lucky enough to get a first peek.  I have lots more to say and will do so in my next post.

I returned from Scottsdale on Thursday afternoon and, gulp, catered a party that night.  Recently I have been getting a lot of questions along the lines of “how do you get it all done?”  I think that is a good subject for – you guessed it – an upcoming post.  Within two paragraphs, I have promised you three new posts all having nothing to do with the food you probably come here for.  So, for now, let’s talk food, shall we?

For Thursday night’s party, I had to do most of the work in advance since I had a very short window between the time I landed and the time the party started.  As I was sitting on the plane going through the food I had planned, I realized that there would be a lot of brown and red.  I made those amazing peppers, Muhummara dip, gougères (which I forgot to bring – damn!), nuts, and a couple of other things.  I needed something green.  I’ve had this pea and ricotta tart in my head ever since seeing it on Stacey’s site a few weeks ago and I figured I could work out something with a similar feel.

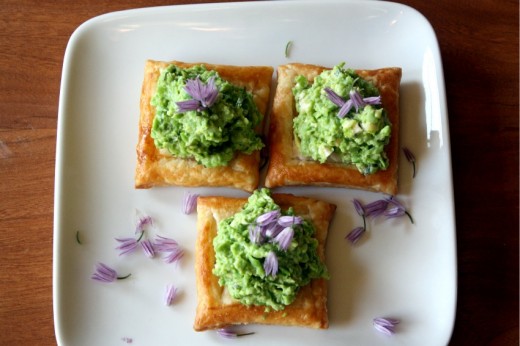
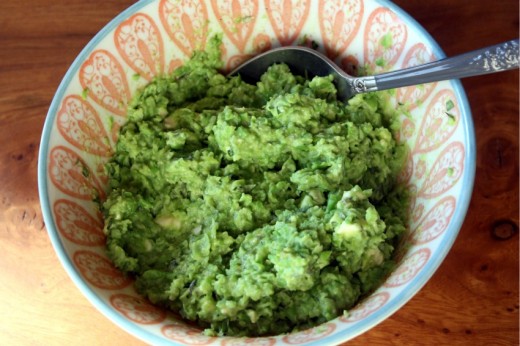
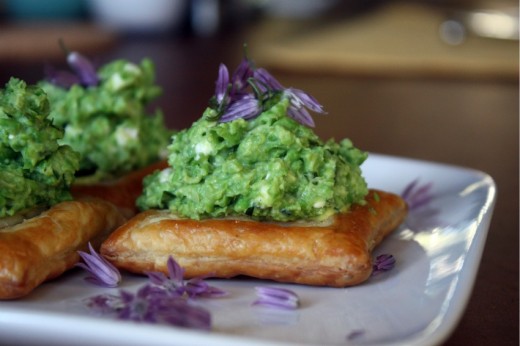
Alas, no ricotta in my refrigerator and no time to go to the store meant that I had to work with what I had.  I won’t bore you with what my original vision was vs. how it turned out.  I feel confident that my made-up appetizer turned out much better than the imaginary one I started off with.  In the end, I pulsed peas, a bit of cream cheese, olive oil, salt, and pepper in the food processor, stirred in some chopped tarragon and finely crumbled feta cheese, and spooned it into little pastry cups that, miraculously, were waiting for me in my pantry.  They were only about 1 inch across and were perfect for party food.  I got more questions about those little morsels than anything else I brought.  Sadly, the only other thing I forgot besides the gougères, was my camera.

So, I made them again.  This time I used a square biscuit cutter on puff pastry for a more fork and knife-type appetizer.  You could certainly make them even larger and serve them as more of a main course.  In this second go-around, I was out of feta and used a bit of Gorgonzola instead.  I really liked both cheeses and I know a very finely chopped Pecorino would taste terrific too.  I also swiped the bottom of each pastry square with the dreamiest French tarragon mustard.  That little spicy bite made all the difference.

One Year Ago: Pull-Apart Cheesy Onion Bread, Holly B’s Rhubarb Bette, Radishes with Butter and Chive-Sage Salt
Two Years Ago: Greek Pasta Casserole, Green Bean and Fennel Salad, Rosemary Raisin Pecan Crisps
Three Years Ago: Gazpacho (still the recipe I use)

Puff Pastry Squares with Pea and Tarragon Purée
Dana Treat Original
Makes 12 appetizer portions

You could, of course, just put this purée on crostini  instead of the puff pastry to make it simpler.  Or serve it with pita chips as a dip.  If you choose the latter, I would thin it with more olive oil when you are making it in the food processor.

12 ounces puff pastry
1 egg beaten with 1 tbsp. water (for egg wash)
Tarragon mustard or other Dijon mustard (optional)
6 ounces frozen peas
2 tbsp. cream cheese
2 tbsp. olive oil
Kosher salt and freshly ground black pepper
2 stalks tarragon, leaves stripped and chopped
2 ounces feta or blue cheese, crumbled into small bits
Chive blossoms, for garnish (optional)

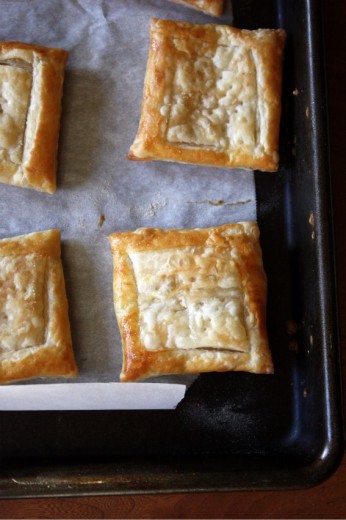
Preheat the oven to 400ºF.  Dust a work surface with flour and lay unfold the puff pastry onto the surface.  Using a floured rolling pin, gently roll the puff pastry just enough to flatten the seams.  Using a biscuit cutter, a cookie cutter, or a paring knife, cut out 12 squares and transfer each to a parchment paper lined baking sheet.  (You want about 3-inch squares.)  Brush each square with the egg wash.  Using a paring knife, score a border, about ½-inch wide without cutting all the way through the pastry.  Using a fork, dock holes in the bottom of each pastry, inside the border.  Place the baking sheet in the freezer for 15 minutes.

Place the baking sheet in the oven for 15 minutes, or until the pastry squares are nice and golden brown.  You might need to poke your fork back into the bottoms of the pastry to deflate them a bit as they bake.  Remove from the oven and allow to cool.

Bring a small saucepan of water to boil.  Add the peas and cook for 1 minute.  Drain and immediately rinse with very cold water.  Place the peas in a food processor fixed with the steel blade.  Add the cream cheese, olive oil, and pinch each of salt and pepper.  Keep in mind that the cheese you add will be pretty salty so use a light hand with the salt.  Pulse the mixture until it is combined but still chunky.

Place the mixture in a bowl and gently stir in the cheese and tarragon.  Taste for seasoning and add more salt and pepper if necessary.  Swipe just a bit of mustard across the bottom of each square.  Scoop the purée onto each and garnish with chive blossoms if you like.


« Older Posts Newer Posts »