Category: My Favorites

Happy Birthday Randy

January 3, 2011

First things first.  The chocolate winners.  My trusty assistants picked their numbers, I took their picture, and I accidentally deleted that picture.  I just realized this.  So, I turned to a random number generator which gave me the following:

38 86

Random numbers generated Jan 2 2011 at 16:14:41 by www.psychicscience.org
Free educational resources for parapsychology, psychical research & mind magic.

So, #38 is Jackie whose best gift was healthy children and a hot shower without interruption from children (I completely understand the value of that gift).

#86 is Sonnet whose best gift was coming home to a cat who had not ripped up her apartment!

Please contact me within a week at danatreat{at}gmail{dot}com so I can get your addresses!

Thank you to everyone who shared your holidays gifts.  I was so moved by many of the things I read.  I have such thoughtful readers!

I know this first post of the new year should be something healthy, right?  Has everyone gone on their post holiday/resolution diet?  Well today, January 2nd, is Randy’s birthday.  It is probably the worst day to have a birthday of the entire year.  Everyone is sick of eating, drinking, spending money, and partying.  Everyone has just given up drinking, or sworn off dessert, or vowed to put a hold on spending.  Poor guy.  So I always try and do something nice for his birthday.  And I always bake.  This year, his parents are in town so we are having a weekend-long celebration and we are also doing a party next weekend.

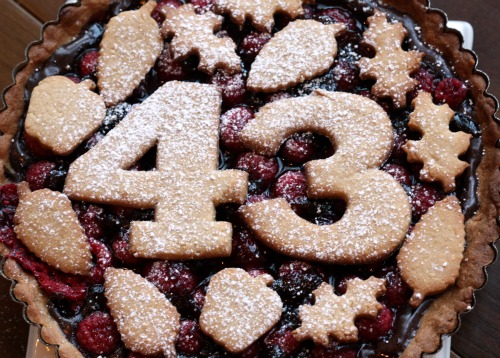
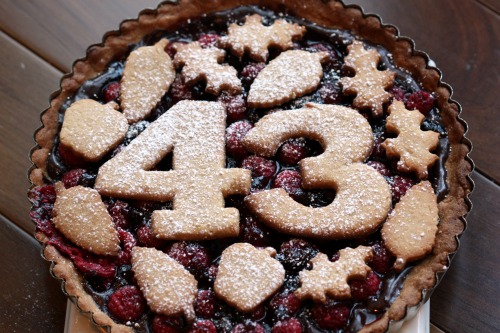
This is a riff on a linzer tart.  Rather than be filled with just jam, it has a layer of chocolate and fresh raspberries.  And rather than the traditional lattice crust, you cut out cookies from the crust dough to make a more playful presentation.

Years and years ago, before I was much good at baking, my mom made this tart to bring to Christmas dinner.  I fell in love with it as did everyone at the table.  She confided in me that it was actually surprisingly easy to make.  I was having friends over for dinner a week later and I decided to make the tart.  My friend John asked me, in all seriousness, where I had bought it, and my journey on the baking path started.  I made this lovely dessert several times that year, always to rave reviews, and then it fell by the wayside.

In thinking of desserts for Randy’s birthday, I came back to this tart.  It was just time for it to reappear in my life.  I know that in previous incarnations, I have used small heart cookie cutters or small star cookie cutters for the top, but in looking for them, I found my number cookie cutters from my childhood.  So yes, Randy turns 43 today.  Happy birthday honey!

One Year Ago: Chickpea. Lentil and Vegetable Stew and Orecchiette with Roasted Beets, Fennel, and Toasted Almonds

Linzer Tart
Makes one 9-inch tart

The recipe I have is copied from my mom’s and is in my own handwriting.  I’m not sure where it came from originally but probably either Bon Appétit or Gourmet.  In my experience, the jam that is brushed on the berries make the topping kind of wet.  You will want to carefully put the cookies on top so they don’t get soaked and ruin the look.  I would not travel with this tart for that reason.

Crust
2/3 cup golden brown sugar, packed
1 stick (½ cup) unsalted butter, room temperature
1 egg
1½ cup flour
½ cup ground toasted blanched almonds
¾ tsp. cinnamon
½ tsp. baking powder
½ tsp. salt

Filling
6 ounces bittersweet chocolate, chopped
2 pints fresh raspberries
½ cup seedless raspberry jam
Powdered sugar

Beat the sugar, butter, and egg until creamy.  Add flour, almonds, cinnamon, baking powder, and salt.  Beat until just well combined.  Measure ¾ cup of the dough.  Flatten that portion into a disk, wrap in plastic, and put in the refrigerator.  Using floured fingertips, press the remaining dough into bottom and up sides of a 9-inch tart pan.  Pierce several times with a fork.  Refrigerate at least one hour and up to one day.

Roll out the rest of dough on floured surface to ½-inch thickness.  Use 2 or 3-inch star cookie cutters and cut out as many cookies as possible.  Do not reroll dough.

Preheat oven to 375ºF.  Bake crust until light golden, pierce with toothpick if it bubbles, about 15 minutes.  Put on rack and cool.  Bake cookies about 6 minutes until light golden.  Transfer to a rack and cool.

Melt the chocolate in a double boiler or a bowl set over a pan of simmering water.  Spread the chocolate over the cooled crust.  Arrange berries over the chocolate, spacing evenly.  Stir the jam in a small saucepan until liquid and smooth.  Carefully brush the jam over the berries.  Bake for about 30 minutes, covering with foil if the crust starts to get too brown.  Transfer to a rack and cool.

Once completely cool, arrange the cookies on top so they are touching.  Dust with powdered sugar.  Serve with whipped cream or ice cream.


The Best (?) Brownie

December 18, 2010

Okay.  Allllllll right.  Deep breath.

Ever since I can remember, I have adored the combination of chocolate and caramel.  I grew up in a house where my mom cooked good and healthy food almost every night.  But there were also cabinets that housed candy bars, chips, and cookies, and there were always several kinds of ice cream in the freezer.  For dessert each night, we could have candy if we chose and I knew where my priorities lay.  My favorite was a Marathon bar (whatever happened to those?) but I would gladly settle for Rolos, or the Rice Krispie studded $100,000 Bar.  Once in a great while, there would be a gigantic Carmello from which I was allowed to break off a row.  My mom favored Cadbury chocolate with nuts (something I still don’t understand), so the Carmello was mine and I loved every square of it.

Now, I don’t know who started the salted caramel frenzy but I think it might have been Fran.  Do you have Fran’s chocolate where you live?  She of the Gold Bar or the truffles or the simple salted caramels.  Fran started her empire in a small shop located in the neighborhood where I went to school.  There was no bus service and both my parents worked, so I had to wait until about 5pm if my mom could pick me up and until after 7pm if it was my dad.  On those long days, more often than not, I would walk up to Fran’s and treat myself to something.  Sometimes it was just a truffle (although nothing is ever just a truffle in my world) and when I was feeling flush, I had a mini chocolate torte.  This mound of heaven was a crisp chocolate shell with a layer of dark chocolate ganache inside and topped with a generous amount of chocolate mousse.  It was garnished with the most delicate of candied violets and it was served on the cool side so you could eat it out of hand without leaving tell-tale traces of mousse on your face.

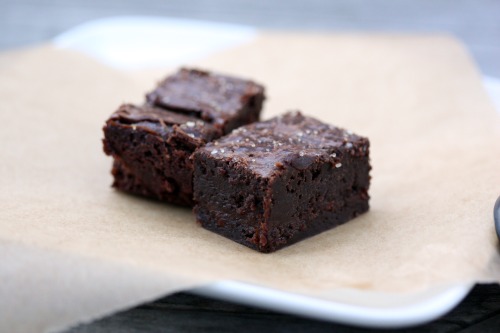
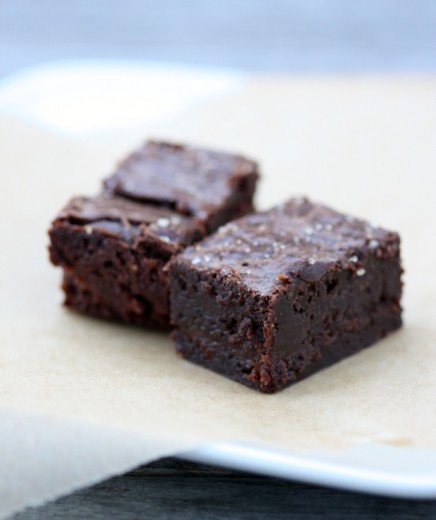
Ahem.  Let’s bring it back around to the brownies, shall we?  I find brownies difficult to photograph.  And there is no way to make you understand through pictures how amazing these are.  Are they so very different than the original Baked brownies?  Not very.  But different enough for me to make them, write about them, and plan on making them again next week.  The caramel is subtle here but so welcome against the backdrop of the rich chocolate.  Maybe I’m not clear.  If I were to be offered a last meal, I would have a bit of a hard time deciding an entrée but dessert would be a brownie.  I love chocolate cake but there is something pure about a brownie.  And this brownie is the best.  At least I think it is.  Maybe I should have another one to make sure.

Oh, and by the way.  I have a back log of things I need to tell you about.  I’m thinking a post a day until Christmas.  What do you think?

One Year Ago: Chocolate Gingerbread Bundt Cake
Two Years Ago: Jalapeño Cheddar Cornbread

Sweet & Salty Brownie
Baked Explorations
Makes 12 large brownies or 24 small ones

For the filling
1 cup sugar
2 tbsp. light corn syrup
½ cup heavy cream
1 tsp. fleur de sel
¼ cup sour cream

For the brownie
1¼ cups flour
1 tsp. salt
2 tbsp. dark unsweetened cocoa powder
11 ounces quality dark chocolate (60 to 72%), coarsely chopped
1 cup (2 sticks) unsalted butter, cut into 1-inch cubes
1½ cups sugar
½ cup firmly packed light brown sugar
5 large eggs, at room temperature
2 tsp. vanilla extract

For the assembly
1½ tsp. fleur de sel
1 tsp. coarse sugar

Make the caramel
In a medium saucepan, combine the sugar and corn syrup with ¼ cup water, stirring them together carefully so you don’t splash the sides of the pan.  Cook over high heat until an instant-read thermometer reads 350ºF, or until the  mixture is dark amber in color (keep a close eye on the caramel at all times, as it goes from golden brown to black and burnt very quickly), 6 to 8 minutes.  Remove from the heat, and slowly add the cream (careful, it will bubble up) and then the fleur de sel.  Whisk in the sour cream.  Set aside to cool.

Make the brownie
Preheat the oven to 350ºF.

Butter the sides and bottom of a glass or light-colored metal 9-by-13-inch pan.  Line the bottom with a sheet of parchment paper, and butter the parchment.

In a medium bowl, whisk together the flour, salt, and cocoa powder.

Place the chocolate and butter in the bowl of the double boiler set over a pan of simmering water, and stir occasionally until the chocolate and butter are completely melted and combined.  Turn off the heat, but keep the bowl over the water of the double boiler, and add both sugars.  Whisk until completely combined and remove the bowl from the pan.  The mixture should be at room temperature.

Add three eggs to the chocolate mixture and whisk until just combined.  Add the remaining eggs and whisk until just combined.  Add the vanilla and stir until combined.  Do not overbeat the batter at this stage or the brownies will be cakey.

Sprinkle the flour mixture over the chocolate.  Using a spatula, fold the dry ingredients into the wet ingredients until there is just a trace amount of the flour mixture visible.

Assemble the Sweet & Salty Brownie
Pour half of the brownie mixture into the pan and smooth the top with a spatula.  Drizzle about ¾ cup of the caramel sauce over the brownie layer in a zigzag pattern, taking care to make sure the caramel does not come in contact with the edges of the pan or it will burn.  Use your offset spatula to spread the caramel evenly across the brownie layer.  In heaping spoonfuls, scoop the rest of the brownie batter over the caramel layer.  Smooth the brownie batter gently to cover the caramel layer.

Bake the brownies for 30 minutes, rotating the pan halfway through the baking time, and check to make sure the brownies are completely done by sticking a toothpick into the center of the pan.  The brownies are done when the toothpick comes out with a few moist crumbs.

Remove the brownies from the oven and sprinkle with the fleur de sel and coarse sugar.  Cool the brownies completely before cutting and serving.  The brownies can be stored, tightly wrapped at room temperature, for up to 4 days.  (DT: I find them easier to get out of the pan neatly when they have rested a bit in the refrigerator.)


Moules et Frites

November 1, 2010

One of the questions I get most often is whether or not I make meat for Randy.  The answer is not.  I have never cooked meat or poultry.  Or lamb or pork or rabbit – do those count as meat or are they in another category?  Anyway, no I don’t make meat for him.  I wouldn’t know the first thing about cooking it.  I stopped eating meat when I was 16 and started cooking when I was around 22, so I have never cooked meat of any kind.  I also really like to taste my food – if for no other reason than to make sure it is properly seasoned – so I would not feel comfortable making something I won’t eat.

However, once in a great while, I make fish.  In the summer, Randy likes to grill salmon outside but occasionally I am moved to do something with it in the oven (but not moved enough to eat it).  I’ve made these crab cakes a number of times and even though I have never tasted them, I know they are great because people go absolutely crazy for them.  Theirs is always the first empty platter.

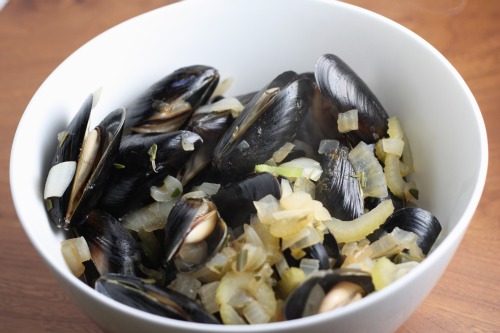
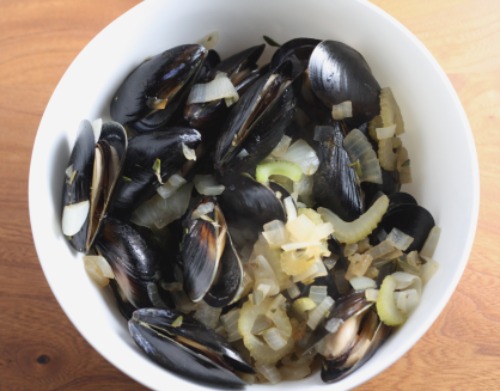
The non-vegetarian thing I make most often is mussels.  Why?  I don’t eat them.  But Randy loves them and they are, by far, one of the easiest and quickest meals I make.  I also make mussels because mussels are moules in French and you can’t have moules without frites.

French fries are my favorite food in the entire world.  Hands down, no questions asked.  I always told Randy that whenever I found out I was pregnant, I would have french fries for dinner that night.  And I did.  Both times.  For me, two of the most wonderful things about being pregnant were eating dessert after dinner every single night (real dessert – like cake) and ordering my veggie burger with fries instead of salad every single time.  And not feeling guilty about it.

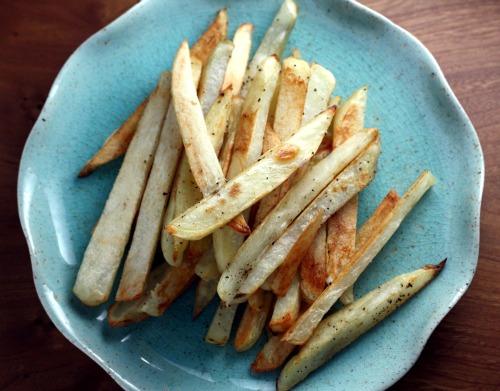
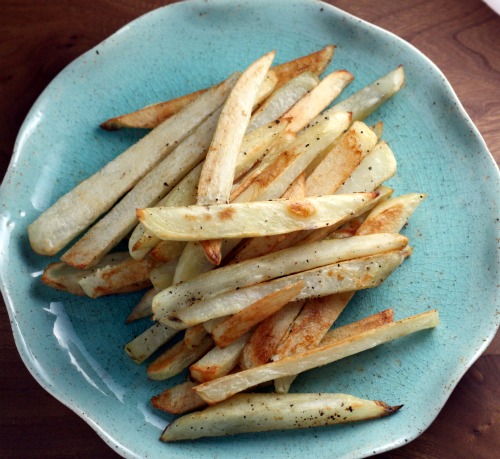
So yes, I love my fries but I also love my skinny jeans and the two do not go together.  Believe me.  That is why I love making them in the oven.  Some people would say that they are not technically fries since they are not, um, fried.  I really don’t care.  For me, they are just as satisfying and really even more so, since I can truly enjoy them without a second thought.  Lots of ketchup is key for me too.

So before I tell you how I make my frites, allow me to tell you how I make my moules.  This recipe is for one (since I don’t eat them) and I adapt it depending on what I have in my refrigerator.  Someone from the onion family, someone aromatic, someone herby, and white wine are the keys here.

Moules for One
Dana Treat Original

Just so you have an idea of how versatile this recipe is, I have swapped out leeks, onions, scallions, fennel, thyme, and sherry for the ingredients you see listed here.  Randy always loves them.

Olive oil
1 large shallot, diced
1 stalk celery, thinly sliced
Kosher salt
1 pound mussels, rinsed well and beards pulled off
¼ cup white wine (preferably one you would drink)
1 tbsp. fresh rosemary, chopped

In a medium Dutch oven with a lid, heat just enough olive oil to coat the bottom.  Add the shallot and celery and adjust the heat to medium.  Add a large pinch of salt and sauté just until the vegetables start to get soft, about 5 minutes.  Carefully pour in the mussels and give them a good stir.  Pour in the wine and then sprinkle in the rosemary.  Give it another good stir, then lower the heat to medium-low and cover the pot.  Allow to cook for six minutes, giving the pot a good shake a couple of times.  Remove the lid and discard any mussels that haven’t opened.  Pour into a shallow bowl and serve with grilled bread.  And frites.

I have made these countless times and believe it or not, it is a little tricky getting them to turn out right.  If you love potatoes as much as I do, these will never be bad but use my tips to make them great.  For two people I would start with 2 large russet potatoes, 1½ tablespoon of olive oil, at least a teaspoon of salt and a lot of black pepper.  You will want your oven at 400ºF.  They will bake anywhere from anywhere from 20 to 30 minutes for the first leg.  It all depends on how brown you like them, how thin you cut your potatoes, your oven, etc.  After I do the flip, it’s just another 5 minutes or so to completely warm them through.  Here are my tips to get the most out of your frites.  (You don’t have to peel them but I do.)

1)  Trim your potatoes. Unless you are someone who likes a bit of burnt stuff on the ends of your frites (I know people who do), I would trim off the ends of your potatoes.  If I have a particularly bulbous one, I will trim off the sides too.  Then try to cut them in the as even pieces as possible.  That way they will bake and brown evenly.

2)  Soak your potatoes. Fill a large bowl with cold water and place the cut-up potatoes in the bowl for at least an hour.  This will remove some of the excess starch and which will keep them from sticking to the baking sheet and also make them crispier.

3)  Dry your potatoes. After their hour-long bath, it is important to dry them as well as possible.  I throw them in a kitchen towel and rub for a minute or two, then dry each one individually.  Lovingly.

4)  Don’t crowd your potatoes. For maximum flavor and texture, you want contact with the pan.  If you put too many frites on any pan, they will start to steam rather than bake.  Make sure each frite is touching the pan, not lolling about on another frite.  If you are making a lot, use more than one pan or bake them in batches.

5)  Go easy on the oil. I don’t just say this for healthy reasons.  If you use too much oil, the potatoes are likely to get soggy.  1½ tablespoon is about enough for 2 potatoes – 2½ tablespoons at most.  Just make sure you take the time to really mix coat all the frites with oil.  You could do this coating thing in a bowl, but why?  Just do the coating, mixing and salting directly on the baking sheet.  And speaking of salt…

6)  Be generous with salt. Potatoes of any kind need lots of salt.  These are no exception.

7)  Don’t move them around too much. Resist the urge to keep pulling them out of the oven and turning them over.  This is the tip that took me the longest to embrace.  I was always sure they were sticking and would try to move them around which would leave me with lots of severed frites.  The key is to actually let them stick and then cook – that way they will release.  Trust me.  They will not be browned on all sides.  The Earth will continue to spin on its axis.

8)  Be sure to make enough. People love these.  It’s not just me.  Be sure to plan on at least one potato per person and more if you have big eaters.  Moules are a light meal so you will be surprised how many frites you will want to eat alongside them.


Buckeyes

October 20, 2010

One of the most wonderful things about our truly amazing babysitter Erika, is the friends she has brought into our lives.  Basically every single person who has every babysat for my kids is a friend of Erika’s.  Catherine is our other regular and our boys love her as much as Randy and I do.  She is a southern girl making a fulfilling life for herself in Seattle.

Catherine brings her sweet spirit, cute accent, and beautiful smile to our house about every other Friday for a date night.  She is a very enthusiastic eater of my food so I love having little things hidden away for her in the refrigerator or in the cookie jar.  When Catherine turned 30 last fall, she asked me to cater a dinner for her.  I was very touched that she asked and had a lot of fun deciding on a menu.  Graham loved sharing his house with 20 beautiful women dressed in their best party clothes.  After the holidays, Catherine brought me two huge bags of pecans from her parents’ tree.  Yes, we love her.

I made these crack-like concoctions the other day for our yoga retreat and, since Catherine babysat on Friday night, I saved her a few.  She walked in and really, before saying hello to me or the boys said with wide eyes, “Are those Buckeyes?”  A Southern girl who knows her treats.

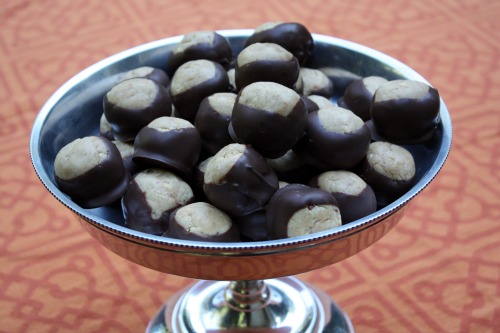
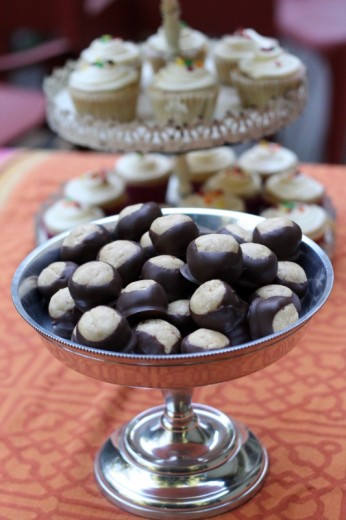
Being an almost lifelong Pacific Northwesterner, I had never heard of Buckeyes.  My loss!  These over-the-top treats are a mixture of cream cheese, graham crackers, butter, and peanut butter dipped in chocolate.  It may not surprise you to know that I got the recipe from the new Baked cookbook.  It may also not surprise you to know that the other treat I made for the retreat also came from that cookbook.  And if neither of those things surprise you, then you probably know that I want to make every single thing in that book, like, tomorrow.  I think it may even surpass the first one in terms of decadence and all around yuminess.

One Year Ago: Fettucine with Oil-Cured Olives, Tomatoes and Goat Cheese
Two Years Ago: Gnocchi with Winter Squash and Seared Radicchio

Buckeyes
Baked Explorations
Makes 36 to 42 buckeyes

¼ cup cream cheese, softened
1½ cups peanut butter
1 cup graham cracker crumbs (about 9 full graham crackers)
3 cups confectioners’ sugar
10 tbsp. (1¼ sticks) unsalted butter, melted and cooled
12 ounces good quality dark chocolate, coarsely chopped

Make the candy
In the bowl of a standing mixer fitted with the paddle attachment, beat the cream cheese and peanut butter until combined.  Add the graham cracker crumbs and beat on medium speed for 10 seconds.  Add the confectioners’ sugar and butter.  Beat at low speed for 20 seconds to prevent the sugar from spilling over, then gradually increase the speed until the mixture is completely combined.  Scrape down the sides and bottom of the bowl and beat again.  The mixture will feel slightly dry.  Set the peanut butter filling aside while you melt the chocolate.

In the top of a double boiler set over hot water, melt the chocolate, stirring frequently until it is completely smooth.  Pour the chocolate into a small, deep bowl.  Let cool to tepid (about 100ºF, body temperature) while you shape the peanut butter centers.

Assemble the Buckeyes
Line a sheet pan with parchment paper.  Scoop out slightly more than 1 tablespoon’s worth of filling and use your hands to form it into a ball.  Place the ball on the prepared sheet pan and repeat the process until all the filling has been shaped.  The balls can sit fairly close to each other, just make sure they are not touching.

One by one, using a fork or large skewer, dip each ball into the chocolate.  Roll the ball around from side to side to cover almost the entire peanut butter center, leaving a small amount uncovered.  Manipulate the buckeye so that the dripping chocolate covers the holes made by the fork.  Let the excess chocolate drip back into the bowl and return each chocolate-covered buckeye to the pan.  Refrigerate the entire sheet pan for about 30 minutes to set the chocolate before serving.

(Buckeyes will keep for up to 3 days, tightly covered, in the refrigerator.)


Fall Salad Perfection

October 15, 2010

Back in May of 2008, I started this blog.  In the beginning I think I had three readers.  My husband, my brother Michael, and my friend Mara.  Mara is a co-op preschool friend and we have two major things in common.  She also has two boys who are about the same age as my boys and she is vegetarian.  She has been an enthusiastic reader from the start and I am happy to have been able to share so many recipes with a friend.

When our little group last got together, Mara brought a salad that she had spotted in Vegetarian Times.  I know we all have eaten our share of fall salads that star pears and goat cheese, but I have to tell you that I thought this salad was extraordinary.  All of us at the table went crazy over it and I kept insisting to Mara that she give me the recipe.  She told me she was flattered to be giving me a recipe (awww) but I think I will be permanently in her debt for passing this one along.

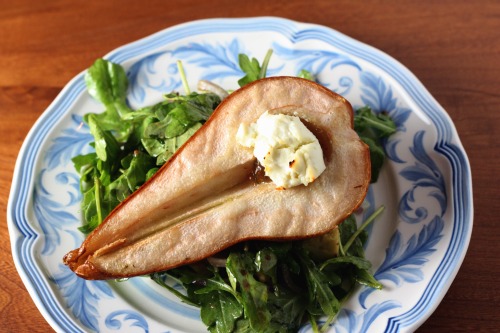
These pear halves get a dollop of fig jam in their hollowed out core and then a round of goat cheese.  Olive oil is drizzled over the top and into a 375º oven they go.  The pears bake long enough to warm through and soften up a bit and to let the cheese start to brown.  Meanwhile, arugula and slices of red onion get tossed with a mustard-y dressing that also stars fig jam.  Mara put walnuts and blue cheese in her salad (as the recipe instructs) but I was out of blue cheese so just opted to add avocado instead.  I really liked it both ways so feel free to add what you like.  I served the pears warm from the oven over the greens which wilted them a bit.  Both Randy and I loved the balance of warm and cool but you can always let your pears cool a bit more.  This is a dinner party worthy salad that is easy enough for any night.  Thank you Mara!

Pear Salad Previously on Dana Treat: Honey Roasted Pear Salad
One Year Ago: Blue Cheese Dressing

Roasted Pear Salad with Chèvre and Fig Vinaigrette
Adapted from Vegetarian Times
Serves 4

I made this just for two of us and I bet if I had made enough for four, we would have eaten it all.

2 Bosc, Comice, Concorde or Barlett pears (I used Bosc), halved and cored
4 tsp. plus 1 tbsp. fig jam, divided
2 oz. soft goat cheese, cut into 4 slices
2 tbsp. olive oil, plus more for drizzling
2 tbsp. lemon juice
1 tsp. Dijon mustard
Kosher salt and freshly ground black pepper
4 cups baby arugula
1/2 small red onion, thinly sliced (1/2 cup)
1 small avocado, cut into 1-inch chunks

Preheat over to 375ºF.  Place pear halves cut-side up on a baking sheet.  Spoon 1 tsp. jam in center of each pear half.  Top with goat cheese rounds, and lightly drizzle with oil.  Bake pears 30 minutes, or until cheese begins to brown.

Whisk together remaining 1 tablespoon fig jam, lemon juice, and mustard in bowl.  Add a good pinch of salt and a few grinds of pepper.  Whisk in 2 tablespoons olive oil.  Taste and adjust seasoning as necessary.

Place arugula, onion, and avocado in a mixing bowl.  Very lightly drizzle on dressing and toss to coat.  Divide among salad plates and top each with a pear half.  Drizzle with a bit more dressing to taste.


« Older Posts Newer Posts »