Category: Grains

Lunch with Friends

July 8, 2010

Here is something you probably hear over and over.  Food bloggers are a friendly and fun group.  I live in a city where there are so many good ones and I have had the good fortune to meet some wonderful people locally just through keeping a blog.

Also, just in the last year, I have had lunch with Stacey in New York, Erin in Boston, Allison in San Francisco, and Ele and Hilary in London.  (Is it crazy ridiculous that I have traveled that much this year?  This is not usually my life.)  These are all women who, previous to our lunches, I had never met in person, just through their writing.  In every single case, I was delighted with the women I met and look forward to a chance to see each and every one of them again.

When I mentioned to Ele and Hilary that I was coming to London for one day, they immediately responded that we should go to Ottolenghi for lunch.  The restaurant is named after the owner who is originally from Israel.  He has turned his amazing food and aesthetic into a thriving business with four locations and a weekly column in the Guardian.  He himself is not a vegetarian but his column and his most recent cookbook is.

Periodically I have mentioned my imaginary Dana Treat restaurant.  You know, the one that is only open from 10-3pm?  The one where there I get to make whatever I want, change it up daily, where everyone loves my food and pays me well for it, and very nice magic fairies appear out of nowhere to do all the clean-up?  That restaurant.  Well, I would love my place to be a little like Ottolenghi.

Imagine.  Clean white space.  Big communal table and lots of little ones.  Huge bowls of the daily sides and salads that the servers come and take from throughout lunch.  Gorgeous and rustic sweets arranged just so – the kind you wish you had time to make yourself.  I could learn a lot from Ottolenghi – we all could.

Fortunately, there is that cookbook!  Actually there are two.  I bought the brand new one, Plenty, while in San Fransisco and then Ele and Hilary bought me the first one at the end of our lunch (so sweet!).  Please don’t ever quote me on this (and Randy! avert your eyes!) but I kind of feel like I could throw away all my other cookbooks and just cook out of these two books for the rest of my life.  They are that good.  Plenty is a wonder to behold.  The look of the book, quality of the paper, and the photographs are enough to justify the price, but then the recipes!  Swoon.  All vegetarian and all sound amazingly delicious.  The first book, Ottolenghi The Cookbook, features some meat and fish recipes but with plenty for the vegetarians and also has breads and sweets.  I’ve started with this book.

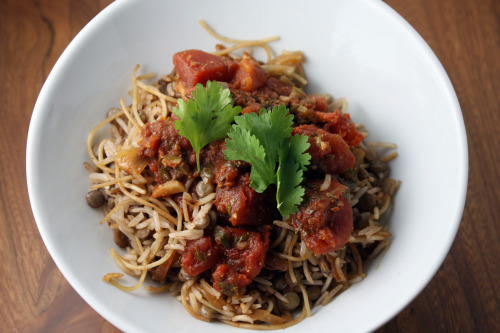
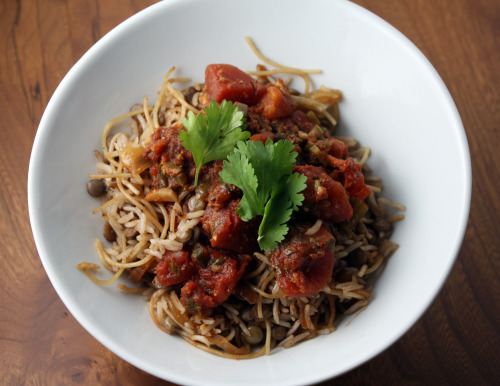
I have only been home for nine days, and already I have made three things from it.  All amazing.  This dish isn’t going to win any beauty contests but it was so incredibly tasty.  Thin pasta, rice, caramelized onions, and lentils make for a very brown dish so I would highly recommend making the (very tasty) tomato sauce to top it.  I don’t always like sweet flavors in my savory dishes, but the touch of cinnamon was most welcome here.

One Year Ago: Coconut Bars
Two Years Ago: White Beans with Roasted Tomatoes (still a fave, and yes, I made the same cake this year)

Kosheri

Adapted from Ottolenghi, The Cookbook
Serves 4-6

Being an English cookbook, all his measurements are in grams and milliliters.  In addition to changing that, I also played a bit with the proportions a bit.  I have found the Kitchen Pro app on my iPhone incredibly helpful.  There are lots of components here but the onions and the sauce can be done days ahead of time.

1 cup lentils
1 heaping cup basmati rice
2 oz. angel hair pasta, broken in to 2-inch pieces
1 2/3 cups vegetable stock or water
½ tsp. grated nutmeg
1½ tsp. ground cinnamon
1½ tsp. salt
½ tsp. black pepper
4 tbsp. olive oil

Spicy Tomato Sauce
4 tbsp. olive oil
2 garlic cloves, minced
2 red hot chiles, seeded and finely diced (I used a jalapeño)
2 14-oz. cans diced tomatoes
1½ cups water
4 tbsp. cider vinegar
2 tsp. salt
2 tsp. ground cumin
¼ cup cilantro leaves, roughly chopped

Start with the sauce.  Heat the olive oil in a saucepan, add the garlic and the chiles and fry for 2 minutes.  Add the tomatoes, water, vinegar, salt, and cumin.  Bring to a boil, then reduce the heat and simmer for 20 minutes, until slightly thickened.  Remove the sauce from the heat, stir in the cilantro and then taste.  See if you want more salt, pepper, or cilantro.  Keep hot or leave to cool; both ways will work with the hot kosheri.

To make the kosheri, place the lentils in a large saucepan and then cover with cold water.  Bring to a boil, then reduce the heat and simmer for about 20 minutes.  The lentils should be tender but far from mushy.  Drain in a colander and set aside.

In a large skillet with a tight-fitting lid, melt the butter over medium heat.  Add the raw pasta, stir, and continue frying and stirring until the pasta turns golden brown.  Add the rice and mix well until it is coated in the butter.  Now add the stock or water, nutmeg, cinnamon, salt and pepper.  Bring to a boil, cover, and then reduce the heat to a minimum and simmer for 12 minutes.  Turn off the heat, remove the lid, cover the pan with a clean kitchen towel, and put the lid back on.  Leave like that for about 5 minutes; this helps make the rice light and fluffy.

Heat the olive oil in a large frying pan, add the onions and sauté over medium heat for about 20 minutes, until dark brown.  Transfer to paper towels to drain.

To serve, lightly break up the rice with a fork and then add the lentils and the onions.  Taste for seasoning and adjust accordingly.  Serve hot with the tomato sauce.


Tabasco and Asparagus Quinoa

April 16, 2010

You know when you get a new accessory – say, a pair of earrings or some awesome shoes – and you just want to wear them with everything?  Or a new lipstick shade that looks just right no matter what you have on?

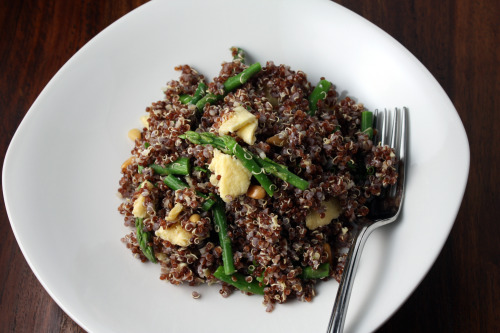
That is kind of how I feel about this quinoa dish.  I want to eat it everyday.  I want to eat it straight out of the bowl and I also want to gussy it up by filling giant portabello caps with it, and roasting it in the oven with a sprinkling of cheese.  I want to feed it to the people I love.  There are a lot of people I love but that’s okay because this recipe gives you a lot of quinoa.  And it keeps beautifully.

This dish comes to you by way of 101 Cookbooks, a lovely site and one I turn to when I want über-healthy food or when I just need more whole grains in my life.  That Heidi knows her way around quinoa, let me tell you.  Let me also tell you what I love about this dish.  If you have tried quinoa, you probably like it.  It has a mild nutty flavor and a delightful little pop under the tooth.  Here it is tossed, while still warm, with a little butter that has been mixed with Tabasco, lemon juice, salt and mustard.  An intoxicating combination if there ever was one.

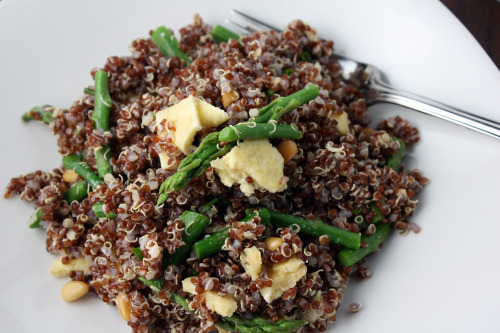
I had a lonely little bag of red quinoa sitting on my “grains” shelf (yes, I am annoying – I have a large pantry) so I used that but regular old quinoa is fine, of course.  (Although I have to say I really liked that red stuff and since I have a grains shelf, I plan to buy more.)  Heidi mentioned that she ate this dish the next day fried rice style with some egg added in.  I decided to add it from the start since we can always use more protein around here and, being a baker, I always have eggs in my refrigerator.

As I mentioned up top, this makes a lot of quinoa.  We ate it three nights in a row and the third night I shared it with three other people.  It tasted as good the third day as the first and because I shocked the asparagus in ice water so they would keep their lovely green color, it looked as good too.  We doused ours with extra Tabasco one night, spooned on a tomatillo salsa the next, and dabbed it with an Asian sweet chile sauce the third.  Very adaptable – just like the perfect pair of shoes.

One Year Ago:  Gruyère Gougères

Tabasco and Asparagus Quinoa
Adapted from 101 Cookbooks
Serves many

2 cups quinoa
3 cups water
¼ cup (½ stick) unsalted butter, room temperature
1 tsp. Dijon mustard
15 drops Tabasco sauce
Juice of half a lemon
¼ tsp. salt
1 pound asparagus, cut into 1-inch segments
1/3 cup pine nuts, toasted
¼ cup plain whole milk yogurt (optional)
3 eggs, beaten

Rinse the quinoa in a fine mesh sieve.  Bring the 3 cups of water to a boil in a medium saucepan along with a large pinch of salt.  Add the quinoa, allow  it to return to a boil, then cover and reduce heat to a simmer.  Cook for about 25 minutes, until the quinoa is tender and the water is absorbed.

Place the butter in a medium bowl and mash it with a fork.  Add the mustard, Tabasco, lemon juice and salt and mash well to combine.  Add to the pot of quinoa and stir to combine well.

Boil the asparagus in a large pot of salted water for just a minute or so.  Immediately remove them to a bowl of ice water.  Once they are completely cool, drain well.

Heat a small non-stick pan over medium heat.  Melt a bit of butter in the pan and then add the eggs.  Allow them to cook, occasionally lifting up the edges and allowing the raw egg on top to go to the bottom of the pan.  Once the eggs are cooked, slide the omelet onto a cutting board and cut into 1-inch pieces.

Add the asparagus, pine nuts, eggs, and yogurt to the quinoa and stir well to combine.


Side Dish for Mexican Food

April 8, 2010

The problem with being a self-described “cookbook cook” is that it takes a little more oomph for me to step outside the assurance of my books and just create a recipe.

The other night, while making Black Bean Tostadas (recipe coming soon), I started imagining a good hearty rice dish as a side.  I almost started to go through the tedium of looking up “rice” in my cookbooks when I realized I had a very clear idea of what I wanted, why not just make it?

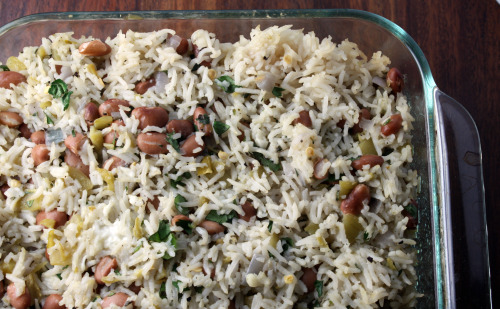
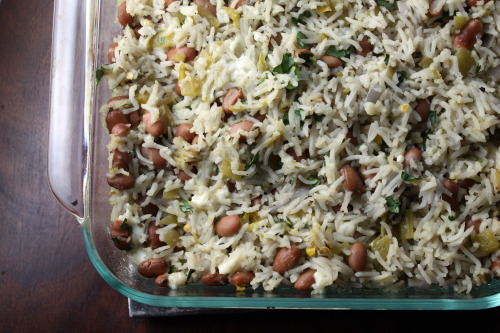
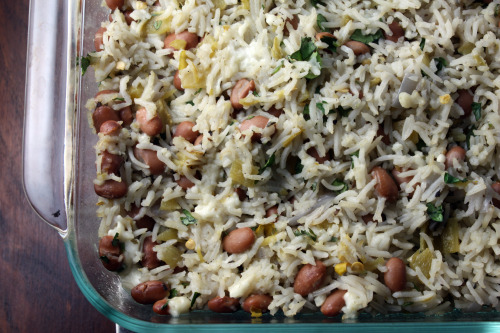
So I did.  And as with most things I have made without a recipe, I was very pleased with how it turned out.  (Note to self: cook more often without a recipe.)  I included some of my favorite flavors in here but, of course, this dish is infinitely adaptable.  I happen to love the slight punch and tang of canned green chiles, but if you like more spice, by all means add a fresh jalapeño or two.  I used queso fresco partly because I also needed it for the tostadas, but partly because I love how mild it is.  But you could certainly use Cheddar or Monterey Jack.  Like more cheese?  Add more and sprinkle some over the top before baking.

A rice note.  Unless I am making risotto or something where I specifically want brown rice (or if I am using sushi rice for this dish), I almost always use basmati rice.  I think it fluffs up beautifully and has terrific flavor.  Trader Joe’s has nice big (and affordable) bags of it.

One Year Ago:  Pasta with Broccoli Rabe and Chickpeas

Baked Rice with Chiles and Pinto Beans
Dana Treat Original
Serves 4-6

Canola or other neutral tasting oil
Small red onion, diced
3 garlic cloves, minced
1 tsp. dried oregano
1 cup white rice
2 cups water or vegetable stock
Salt
1 15-oz. can pinto beans, rinsed and drained
1 7-oz. can diced green chiles
¼ cup chopped cilantro
¾ cup queso fresco, crumbled

Heat a medium saucepan over medium heat.  (I used a 3 quart.)  Add just enough oil to coat the bottom, then add the onion and a healthy pinch of salt.  Sauté until softened, then add the garlic.  Cook for another 3 minutes, then add the oregano.  Sauté for another minute.  Add the rice and toss to coat with the fat and herbs, then pour in the water or stock.  Bring to a boil, then turn the heat down to low, cover and cook for 20 minutes.

Preheat oven to 400ºF.  Oil an 8×8 baking dish.  Once the rice is done cooking, allow it to sit, off the heat, for 5 minutes.  Remove the lid and, using a fork, carefully fluff the rice.  Add the chiles and the beans and, without mushing the rice, carefully stir them in.  Sprinkle on the cheese and cilantro and stir them in.

Scrape the rice mixture into the prepared pan, cover with foil, then bake until the cheese is starting to melt and the dish is hot throughout, about 20 minutes.  Remove the foil and allow to sit for 5 minutes before serving.

(This is totally the kind of dish you could make a day ahead.  Prepare up through putting the finished rice in the baking dish, allow the whole thing to cool, cover with foil, then refrigerate overnight.  From there, just put it directly into the oven and you will need to add 5-10 minutes to the baking time.)


Successful Party Food

May 31, 2009

img_2486

The party was a success.  The birthday boy was happy with the food and everything I tasted was great (I didn’t taste the two shrimp dipping sauces because, well, I don’t eat shrimp.)  I continue to have this lingering feeling that I didn’t make enough food but my husband, who has a healthy appetite, assures me there was enough.

I had a lot of fun catering this party and not just because the clients are such good friends.  I made a nice mix of tried and true recipes and new-to-me recipes.  I chose a mix of things that could be made ahead and things that needed to be made day of.  I stuck to my daily task list and never felt overwhelmed by what I had to do.  And once I spent an hour or so finishing everything up at their house, I was able to walk out of the kitchen and enjoy the party.

img_2461

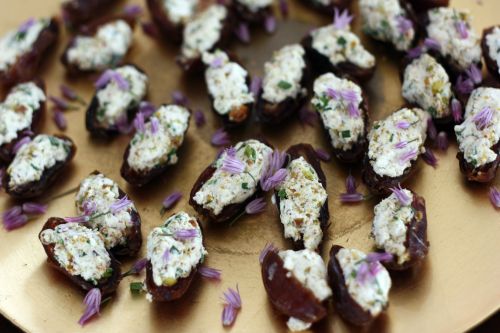
I’ve made these dates probably 10 times now and am always blown away by how much people like them.  I think the only person who doesn’t rave about them is me.  I don’t really like dates but I love how easy this recipe is and the fact that the filling can be made a day in advance.  You can find the recipe in this post – scroll to the bottom.

img_2454

Here is another recipe I have made many times.  You are basically guaranteed rave reviews.  My friend Lauren said the tomatoes tasted like sunshine.  Another one you can make well in advance and just assemble before serving.  You can find the recipe in this post.

img_2478

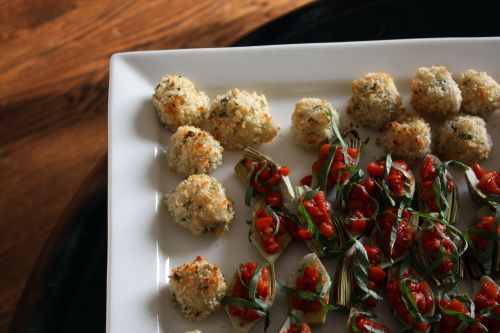
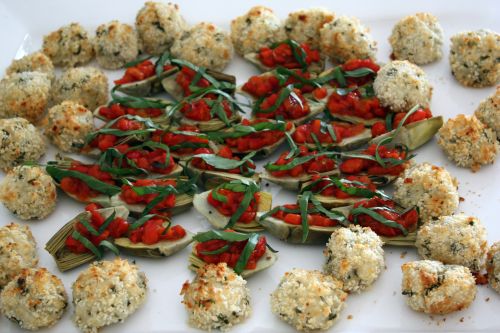
I was really happy with how both dishes on this platter turned out.  Neither of which I had made before but both I will make again.  Roasted Artichokes with Red Pepper Relish and Oven-Fried Rice Balls with Gruyère.  I could easily have eaten about half the rice balls on that platter – they were that good.  I made them the night before and just let them rest in the refrigerator on a baking sheet.  They tasted incredible just out of the oven but were still good after sitting out for an hour or so.

Oven-Fried Rice Balls with Gruyère
Adapted from Food and Wine
Makes 20-30 rice balls

1 tbsp. olive oil
1 medium shallot, minced
1 garlic clove, minced
1 cup arborio rice
2 cups water
3/4 cup shredded Gruyère cheese (2 1/2 ounces)
1/2 cup freshly grated Parmesan cheese (1 1/2 ounces)
1/4 cup mixed chopped herbs (DT: I used lemon thyme, oregano, and basil)
Salt and freshly ground black pepper
2 large egg whites
1/2 cup panko (Japanese bread crumbs)

1.  Preheat oven to 450°.  Heat the olive oil in a medium saucepan.  Add the shallot and garlic and cook over moderate heat until softened, about 4 minutes.  Add the rice and cook, stirring for 30 seconds.  Stir in the water and bring to a boil.  Cover and simmer over moderately low heat, stirring occasionally, until the water has been completely absorbed, about 10 minutes.  Scrape the rice into a bowl and let cool to room temperature.

2.  Stir the Gruyère, 1/4 cup of the Parmesan and all the chopped herbs into the rice.  Season the rice with salt and pepper.

3.  In a medium stainless steel bowl, beat the egg whites with a pinch of salt until firm peaks form.  Stir one-fourth of the whites into the rice to loosen the mixture, then stir in the remaining whites.  Roll the rice into 1 1/2 inch balls.  (DT: Periodically wetting your hands will keep the rice from sticking to you and will allow you to make more compact rice balls.)

4.  In a shallow bowl, toss the panko with the remaining 1/4 up of Parmesan.  Dredge the rice ball in the panko crumbs and transfer to a large baking sheet.  Bake the rice balls in the upper third of the oven for 25 minutes or until golden and crisp.  Let stand for 5 minutes then transfer to a platter and serve.


Thoughts on Quinoa

May 12, 2009

img_2129

We all know about quinoa, right?  The amazing grain that’s not really a grain but a seed.  It’s ancient, originated in Peru, and is a complete protein.  It shows up on all kinds of lists as a “super food”.  And there you have it.  The extent of my knowledge about quinoa except for one last thing.  It’s delicious.

Not in dip-your-spoon-in-and-take-a-big-mouthful way like, say, chocolate sauce.  (Not that I would know anything about that.)  All by it’s lonesome, it’s kind of plain.  But it absorbs flavors like a pro and is equally at home in lots of different kinds of cuisines.  It also has a delightful texture – soft with just the slightest crunch.

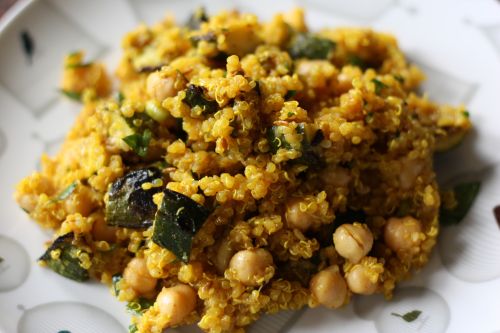
This salad is pretty healthy but even if you are not the healthy food loving type, it’s a good one to have in your arsenal.  I love having go-to salads like this for things like potlucks and barbecues.  It’s vegan and wheat free so just about anyone can eat it.  It doesn’t have to be refrigerated and it can be made in advance.  The flavors are crowd pleasers – lots of cumin, garlic, and smoked paprika – not to mention grilled zucchini and my beloved chickpeas.  If you wanted to add dairy, I think feta cheese or a soft goat cheese would be delicious.  Or even crumbles of ricotta salata for something a little different.

img_2119

One Year Ago:  Spring Challenges

Quinoa with Grilled Zucchini, Chickpeas, and Cumin
Serves 6-8

I cut this out of a magazine but I don’t recognize the font.  Since I get Bon Appetit, Gourmet, and Food and Wine, I can assure it’s from one of those.  Quinoa generally needs to be rinsed before using so it is not bitter.  If you buy Bob’s Red Mill brand, it does not need to rinsed.

1 15-oz can chickpeas, drained
3 tbsp. fresh lemon juice
5 tbsp. olive oil, divided
2 garlic cloves, peeled
2 tsp. cumin seeds
1 tsp. tumeric, divided
1 tsp. smoked paprika, divided
2 cups water
1 cup quinoa, rinsed well (if necessary), drained
1 tsp. kosher salt
1 1/2 pounds zucchini, trimmed, quartered lengthwise
1 1/2 tsp. ground cumin
4 green onions, thinly sliced
1/4 cup chopped fresh Italian parsley

Combine chickpeas and lemon juice in a large bowl.  Add 3 tbsp. oil; pressin garlic and stir to combine.  Let marinate at least 15 minutes and up to 2 hours.

Heat 1 tbsp. oil in medium saucepan over medium-high heat.  Add cumin seeds, 1/2 tsp. tumeric, and 1/2 tsp paprika; stir until fragrant, about 1 minute.  Add 2 cups water, quinoa, and coarse salt; bring to simmer, sirring occasionally.  Reduce heat to medium-low.  Cover and simmer until all water is absorbed, about 20 minutes.

Meanwhile, prepare barbecue (medium-high heat).  Place zucchini on rimmed baking sheet.  Drizzle with 1 tbsp. oil.  Sprinkle with ground cumin, 1/2 tsp. tumeric, and 1/2 tsp. paprika.  Toss to coat evenly.

Place zucchini on grill; sprinkle generously with salt and pepper.  Grill until tender and browned on all sides, 10-12 minutes.  Transfer to work surface.  Cut crosswise into 1/2-inch pieces.  Add zucchini, green onions, and parsley, then chickpea mixture to quinoa.  Toss to blend.  Season to taste with salt and pepper.  (Can be made up to 1 day ahead.  Cover and refrigerate.  Bring to room temperature before serving.)


« Older Posts Newer Posts »