Category: Dessert

How to Win Fans

September 6, 2011

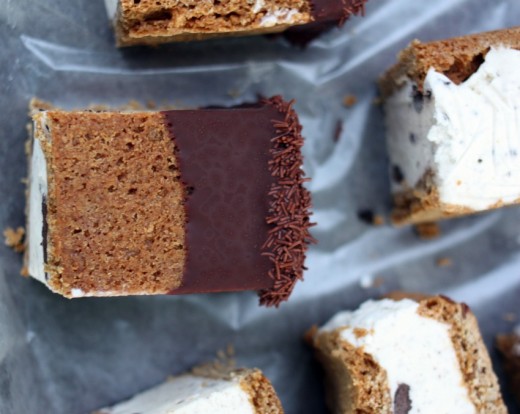
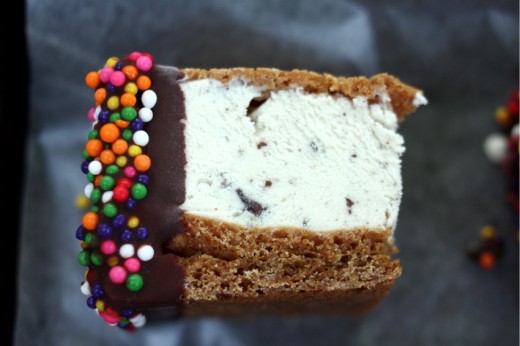
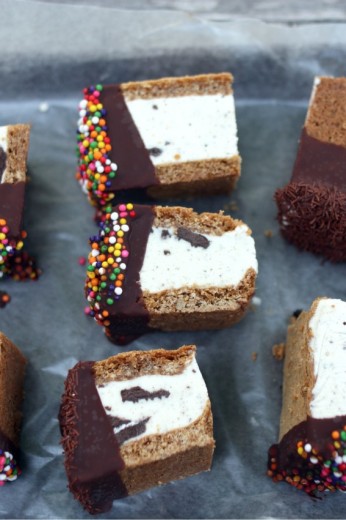
It’s simple really.  Homemade ice cream sandwiches.  Chocolate dipped.  Sprinkles.

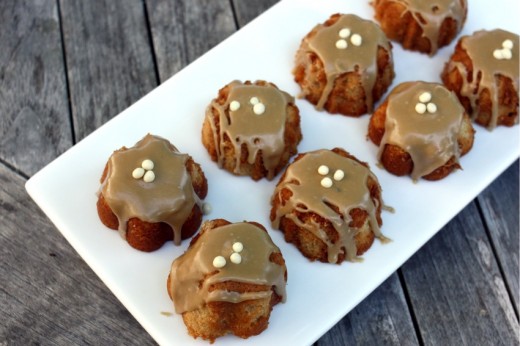
But first!  I have to tell you about a way that you can try one of my treats, if you live in the Seattle area.  Do you know about Savour?  It’s a fabulous specialty foods store in Ballard.  In addition to having a wide selection of carefully selected and very fine goods, they also have an incredible cheese counter (burrata!), and prepared foods.  They serve sandwiches and quiches all day and really the place could not be any lovelier.  My friend Julie (she of Julie’s Salad) works there and has started a new program called Savour September.  Each week, the store will feature a local food blogger and a treat of their choice.  I am the first!  So, if you would like to try my now-famous-and-much-requested Brown Sugar Pound Cake in mini form, head down to Savour.  And say hi to Julie!

We had some friends over for Labor Day.  We were 8 adults and 8 kids.  I needed to make a cake to thank our friend Brad for fixing my oven but I also wanted to make something special for the kids.  Few things are better than seeing a child’s entire face light up at mention of a special dessert.  Soon after photographing these treats, the kids descended on them.  Some asked that they be cut into slices because they couldn’t get their mouths around them.  Others (my Spencer included) just chowed right down on them.  I sat with the kids.  The girls all eyed me carefully.  “Did you make these?”,  they all asked, one and then another and then another.  Shock and awe.  What a great feeling.

These are huge sandwiches and one by one, the kids brought the remnants into the dining room so the adults could taste them (except Spencer, who was the 2nd youngest kid there and the only one to finish his sandwich).  I’m glad I got a taste because these are really good.  I mean, of course they are.  They are homemade ice sandwiches for crying out loud.  But I was surprised by how well they turned out and by how good the cookie part was.  This is a surefire way to win fans young, middle (ahem), and old.

One Year Ago:  Grilled Padrón Pepper Pizza
Two Years Ago:  Corn and Zucchini Timbale with Ancho Chile Sauce
Three Years Ago:  Chocolate Peanut Toffee

Chocolate-Dipped Ice Cream Sandwiches
Adapted from Bon Appétit
Makes 8 large sandwiches

Nonstick vegetable cooking spray
1 cup all-purpose flour
¼ tsp. baking soda
Pinch of salt
½ cup (1 stick) unsalted butter, cut into 4 pieces
½ cup packed brown sugar
2 tbsp. light corn syrup
2 large egg yolks
½ tsp. vanilla extract
3 cups premium ice cream (I used cookies and cream), softened
8 ounces bittersweet or semisweet chocolate, chopped
2½ tbsp. vegetable oil
Assorted decorations (I used colored and chocolate sprinkles, you can use nuts, toffee bits, whatever you want)

Preheat the oven to 325ºF.  Line a 13x9x2 metal baking pan with foil, leaving 1-inch overhang on long sides.  Lightly coat with nonstick spray.

Whisk flour, baking soda, and pinch of salt in medium bowl.  Melt butter in medium skillet over medium heat.  Cook until milk solids on bottom of pan turn deep golden brown, stirring often, about 5 minutes.  Transfer browned butter to small bowl.

Place sugar and corn syrup in large bowl.  Pour browned butter over.  Whisk to combine (mixture will not be smooth).  Whisk in egg yolks and vanilla.  Add flour mixture; stir just to blend.  Transfer soft dough to prepared pan; press into an even layer.

Bake cookie layer until golden brown around edges and sides are just beginning to pull away from pan edges, 15 to 17 minutes.  Cool completely in pan on rack.

Using foil overhang as aid, lift cookie layer from pan and place on work surface.  Place sheet of plastic wrap lengthwise in same pan, leaving overhang on both short sides of pan.  Place another sheet of plastic wrap in pan, leaving overhang on long sides of pan.  Cut cookie layer in half crosswise.  Return 1 cookie half, top side down, to pan, placing snugly in 2 short end of pan.  Slightly soften ice cream in microwave in 15-second intervals.  Spread ice cream evenly over cookie in pan.  Place second cookie half, top side up, atop ice cream, pressing slightly to adhere.  Fold plastic wrap up and over ice cream-filled cookie.  Freeze until firm, at least 4 hours.

Line baking sheet with parchment paper or wax paper.  Unwrap ice cream-filled cookie; place on work surface.  Using serrated knife, cut cookie lengthwise in half, then cut each strip crosswise into 4 sandwiches (8 in total).  Place on sheet; freeze.

Stir chocolate and oil in medium metal bowl set over saucepan of barely simmering water until melted and smooth; cool to lukewarm.  Arrange decorations on plates.  Working with 1 ice cream sandwich at a time, dip half of sandwich in melted chocolate, allowing excess chocolate to drip back into bowl.  Press sandwich gently into decorations on plate.  Return to sheet in freezer.  Freeze until chocolate sets and freezes, about 1 hour.  (Can be made 2 days ahead.  Wrap each sandwich individually in foil and keep frozen.)


Yep, Me Too

August 15, 2011

If you read any food blogs other than this one, chances are you have had your fill of posts about peanut butter pie.  If you have no idea what I am talking about, food bloggers around the world have spent the past few days making peanut butter pie, and writing about it, because one in our midst lost her husband unexpectedly.  When someone experiences tragedy, our natural reaction is to want to help – even if we don’t know the person who is suffering.  I always offer food to people in need but seeing as Jennie lives clear across the country, cooking dinner for her and her daughters was not realistic.

Jennie took to her blog and wrote a heartbreaking post about her husband’s love for peanut butter pie and that, if we wanted to help her, we should all make one in his honor.  She said that she never made it often enough for him, that there was always tomorrow or the next week and other dishes, or even just plain old life, got in the way.  I think this emotion resonated with so many people and it is the reason that there is peanut butter pie everywhere you look.  We all assume that if our families are intact today, the same will be true tomorrow.  We all know life is fragile, relationships are tenuous, and yet we soldier on as if everything will last forever.  Of course we do.  If we didn’t, we would be living in a state of constant fear and that isn’t good for anyone.

Randy travels frequently for work, I send my kids off to school/preschool/camp, where they are in the hands of airline captains, teachers, and counselors.  If I wondered every single day whether that plane ride or bus ride or car ride was going to be their last, I would not be able to get out of bed in the morning.  But hearing of the death of a beloved spouse and father of two young children certainly gives me pause and makes me reflect on what I have and how fortunate we are.

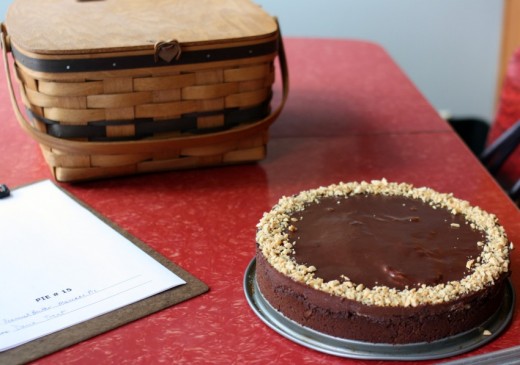
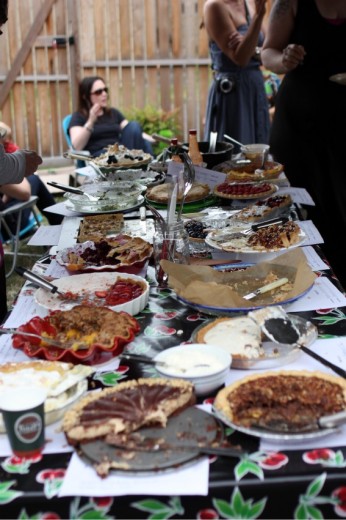
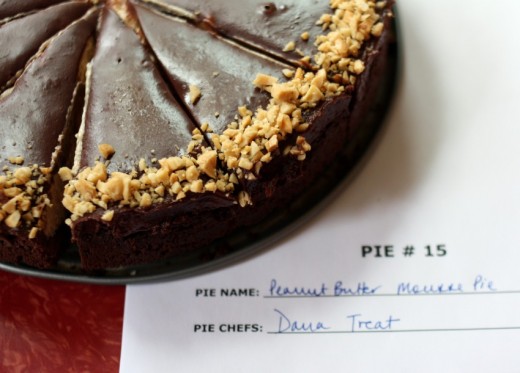
Anyway, more eloquent writers than me have done a much better job of writing about Jennie, about loss, about this amazing community of food bloggers who rally around our own.  I’m a little late to the party but I did make a peanut butter pie.  I didn’t make Mikey’s version, I made one that has been in my “to make” file forever and I brought it to a pie party.  Every year, our friends Matt and Jessica throw a pie party where there are categories, judging, and prizes.  I am not a competitive type but I do have a reputation to uphold and truthfully, I had plans to bring a different kind of pie.  One that celebrates summer in Seattle with nectarines and blackberries or apricots and raspberries.  But I couldn’t make a pie and not make a peanut butter pie.  I didn’t win and I didn’t care – the pie was delicious.  Bittersweet though.

Double-Chocolate Peanut Butter Pie
Food & Wine
Makes one 9-inch pie

Chocolate Crust
4 ounces semisweet chocolate, chopped (½ cup)
½ stick unsalted butter, cut into tablespoons
8 ounces chocolate wafer cookies (from a 9-ounce package), finely ground (2 cups)

Peanut Butter Filling
8 ounces cream cheese, softened (1 cup)
1 cup chunky peanut butter
½ cup sugar
2 tsp. pure vanilla extract
1 cup well-chilled heavy cream
¾  cup salted roasted peanuts, chopped
Kosher salt

Chocolate Topping
4 ounces semisweet chocolate, chopped (½ cup)
½ cup heavy cream

Make the chocolate crust
Preheat the oven to 375ºF.  In a medium glass bowl, combine the chocolate and butter and microwave at high power in 20-second intervals until the chocolate is melted.  Stir well, then stir int eh cookie crumbs.  Press the cookie crumbs over the bottom of a 9-inch springform pan and 1½ inches up the side.  Bake the crust for 10 minutes, or until set; the crust will continue to firm up as it cools.

Make the peanut butter filling
In a large bowl, using a handheld mixer, beat the cream cheese with the peanut butter, sugar, and vanilla extract until blended.  In another large bowl, using the same beaters, whip the chilled cream until firm.  Fold one-third of the whipped cream into the peanut butter mixture to loosen it, then fold in the remaining whipped cream and ½ cup of the chopped peanuts.  Spoon the filling into the crust, smoothing the surface.  Sprinkle lightly with salt and refrigerate until set, about 3 hours.

Make the chocolate topping
In a medium glass bowl, combine the chocolate with the heavy cream and microwave at high power in 20-second intervals until the chocolate is melted and the cream is hot.  Stir the chocolate topping until blended and then cool to barely warm, stirring occasionally.

Spread the chocolate topping over the peanut butter filling and refrigerate until just firm, 15 minutes.  Sprinkle with the remaining ¼ cup of chopped peanuts around the edge of the pie.  Carefully run a thin knife around the edge of the pie, then remove the springform ring.  Using a sharp knife, cut the pie into wedges.  Run the knife under hot water and dry between each cut.

Make ahead
The pie can be covered and refrigerated overnight.  Garnish with chopped peanuts right before serving.  Serve the pie chilled or slightly cooler than room temperature.


Um….

July 19, 2011

Do you know what SEO stands for?  Search Engine Optimization.  I’ve been to two food blogging conferences and both times there was a lot of talk about SEO.  I don’t make any money on this blog so truthfully, I kind of tune out when people start talking about metrics and how to drive more traffic.  I do remember talk of how to title your posts and write content so that search engines send eager clickers your way.

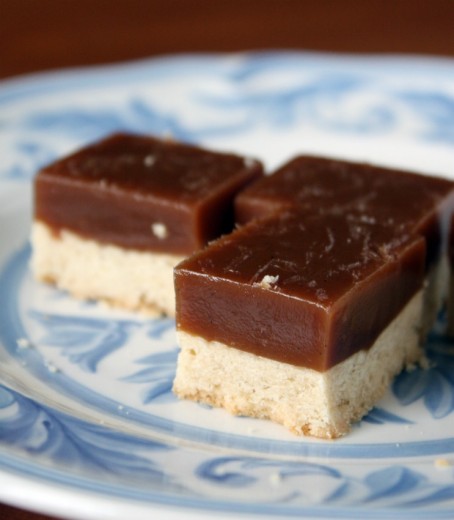
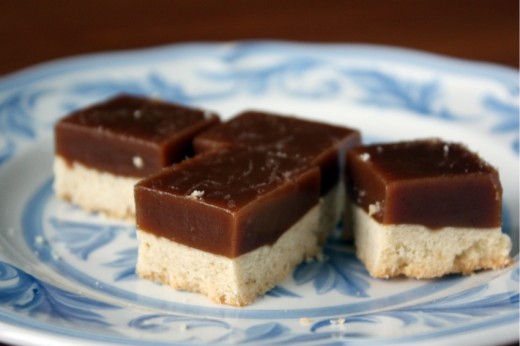
Obviously, the people who know a thing or two about SEO would be horrified by the title of this post.  But what else could I call it?  Salted Caramel Squares I guess would have been a good alternative but even typing that I get a little misty-eyed and spacey and just start thinking, “Um…..”

You see, I love chocolate.  You probably know that if you visit here even semi-frequently.  I also love caramel.  Maybe more than chocolate.  I don’t know.  Don’t make me choose! A while back, a friend gave me a box of salted caramels wrapped in pretty gold foil and I hid them from my family.  When I ran out of my secret stash, I panicked and bought Kraft caramels only to curse them and throw them away because they were not as good as I wanted them to be, and then I cursed myself for throwing them away and leaving my house caramel-free.  Oh wait.  I think I may have just over-shared.

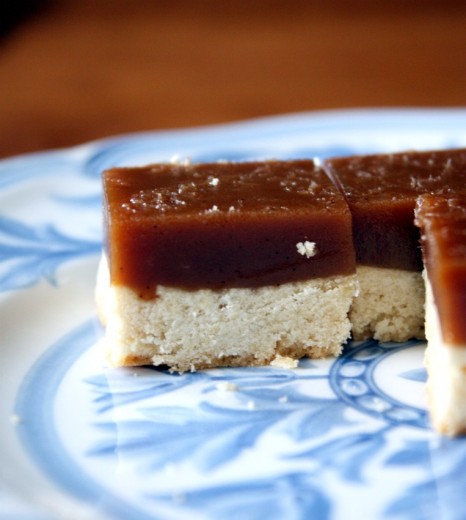
Solution!  Make these unbelievable squares.  Yes, there are two parts and a candy thermometer is involved but do not let either of those facts deter you.  The two steps are easy, a candy thermometer is a good thing to have in your house anyway, this recipe makes a ton of bars (especially if you cut them bite-size which is what they should be), and they keep well.  The only thing I would do differently next time is to sprinkle just a bit of sea salt over top for a step into perfection.

One Year Ago: Chocolate Pavé and Romesco Filled Potatoes
Two Years Ago: Honeyed Goat Cheese Tart with Pistachio Crust and Blasted Broccoli
Three Years Ago: Orzo with Broccoli, Feta, and Olives

Salted Caramel Squares
Food & Wine
Makes 32 squares (more if you cut them smaller)

Note that this recipe calls for kosher salt in both the crust and the caramel.  Do not substitute table salt – they will be way too salty. I like Diamond Brand.

Pastry Shell
1 stick unsalted butter, softened
1 cup confectioners’ sugar
2 large eggs, beaten
2 cups all-purpose flour
1 tsp. kosher salt
1 large egg white, beaten

Caramel
2¼ cup heavy cream
1 vanilla bean, split, seeds scraped
2¼ cups sugar
1¾ sticks unsalted butter
2½ tsp. kosher salt

Prepare the shell
Preheat the oven to 350ºF.  Line a 9-by-13-inch baking pan with parchment paper, leaving a 2-inch overhang on the short sides.  In a large bowl, using a handheld mixer at low speed, cream the butter.  Beat in the confectioners’ sugar.  Add the whole eggs and beat until incorporated, then beat in the flour and salt.  Press the pastry into the prepared pan in an even layer, ¼-inch thick.  Freeze until firm, 10 minutes.

Line the pastry with parchment paper and fill with pie weights.  Bake for 35 minutes, until just set.  Carefully remove the pie weights and parchment paper.  Brush shell with the egg white and bake for 20 minutes longer, until golden and cooked through.  Let cool.

Make the caramel
In a saucepan, bring the cream, vanilla bean, and seeds to a simmer.  Cover; keep warm.

In a large heavy saucepan, stir the sugar into  ¼ cup of water.  Simmer over moderate heat, without stirring, until a deep amber caramel forms, 7 minutes.

Remove the caramel from the heat and carefully add the cream.  (DT: It will bubble up vigorously so slow as you go.)  When the bubbling subsides, stir in the butter.  Insert a candy thermometer and cook over moderately high heat, stirring with a wooden spoon, until the caramel reaches 240º, 10 minutes.  Discard the vanilla bean and stir in the salt.  Pour the caramel over the shell.  Refrigerate until firm, 4 hours or overnight.  Remove the bar from the pan using the parchment overhang; cut into squares.  (DTIn my experience, these squares kept well for several days but I did not cut them all at once.  I cut off what I needed and wrapped the rest, carefully, in foilThey are equally good cold or at room temperature.)


Prediction: Ice Cream

July 5, 2011

I have a prediction and I can almost guarantee it will come true.  Guar – an – tee.  Like sure enough that if I was a betting woman and if they placed bets on things like ice cream or cookbooks or ice cream cookbooks, I would clean up in Vegas.

The internet is soon going to become overrun with recipes pulled from the Jeni’s Splendid Ice Creams at Home book.  For real.  It’s going to hit big and it’s going to hit hard, maybe not with the same strength as No-Knead Bread or the New York Times chocolate chip cookies, but strong all the same.  This time I am on the cutting edge, not joining in the club two years after it has formed.

“What is the big deal?”, you might ask.  Have you ever made ice cream?  Used lots of yolks, and had to strain out the scrambled bits?  Made a truly delicious treat but with just a bit more iciness than you would like in your ice cream?  This woman, Jeni, she has been making ice cream for years and she has nine ice cream shops (and counting) to prove that she knows her stuff.  She doesn’t use eggs.  At all.  What she does is use a bit of cream cheese and cornstarch and a couple of tablespoons of corn syrup.  The cooking method is streamlined – milk and cream get boiled together for exactly four minutes.  A cornstarch slurry is stirred in and then the mixture boils for exactly another minute.  Whisk the whole thing into cream cheese with a bit of salt, and you have the base for your ice cream.  I’ve always thought that making ice cream was so easy for how delicious it is – now I think it’s even easier.

In addition to coming up with and streamlining this process, Jeni has shared her treasure trove of recipes in a delightful book.  They are arranged seasonally – seasonal ice creams!  Who knew?  I’m a person who likes to chew when eating ice cream and I love that there are plenty of add-ins, mix-ins, and pairings that make even the most routine flavor exciting.

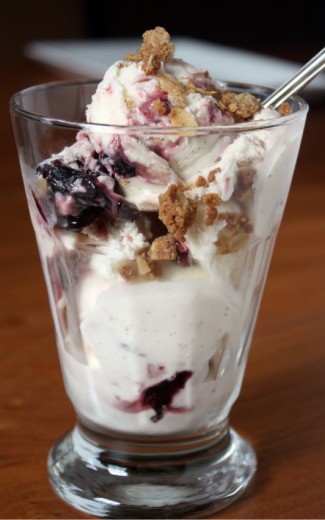
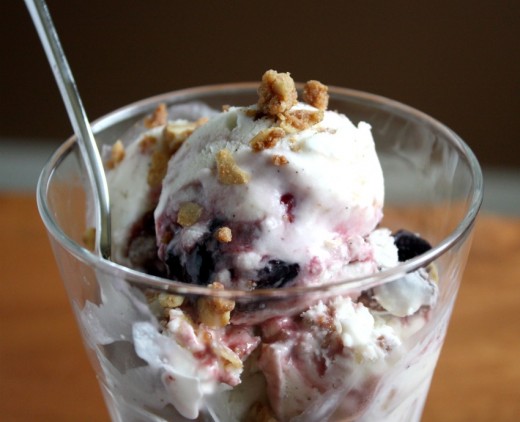
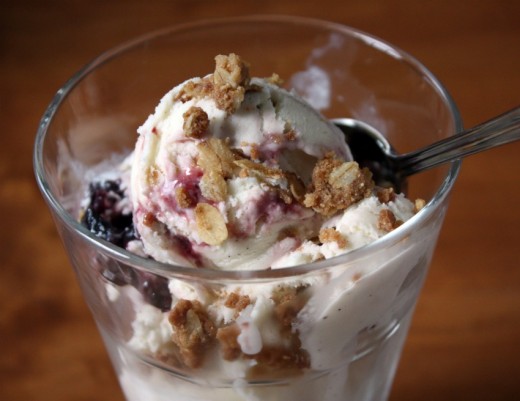
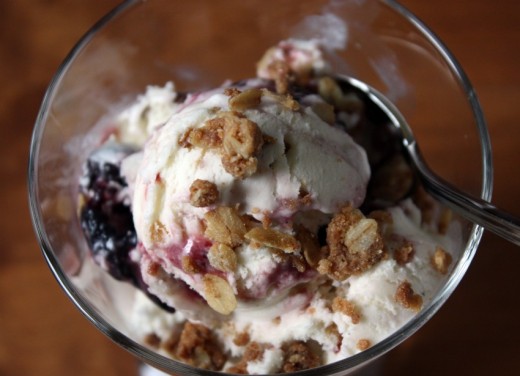
Graham’s eyes got really big when he saw the cover of the book.  He immediately pointed to the scoop that looked like it had cherries in it.  We made Cherry Crisp Ice Cream.  We roasted cherries, made the crispy bits (think a streusel on a cherry crisp), and used our new technique to make the ice cream.  We licked the paddle (swoon!), alternated the vanilla bean ice cream with the other goodies in the container, and put it away in the back of the freezer to firm up.  The result?  The boys did not like it.  I had a feeling they wouldn’t.  Their ice cream tastes are more simple.  They probably won’t like the Sweet Corn and Black Raspberry Ice Cream which intrigues me, or the Black Walnut Divinity Ice Cream which does not.  It might be that I have to use my other more traditional ice cream cookbook when making that special treat for them.

As for Randy and I…well.  Randy said it was the best ice cream I have ever made.  Most recently I made a strawberry version (from another book) and both of us were turned off by how icy it was.  This was the opposite.  So creamy, velvety, not a hint of an ice crystal.  This is totally Randy’s type of ice cream flavor and totally not mine.  But holy cow was this good.  I’m a little worried.  If a totally-not-my-type-of-flavor has me dipping my spoon directly into the container over and over again, what am I going to do when I make a totally-me flavor?

One Year Ago:  Big French Salad
Two Years Ago:
Coconut Bars
Three Years Ago:
Panzanella with Artichokes, Olives and Manchego

Cherry Crisp Ice Cream
Adapted from Jeni’s Splendid Ice Creams at Home
Makes about 1 quart

For the ice cream
2 cups whole milk
1 tbsp. plus 1 tsp. cornstarch
1½ ounces (3 tbsp.) cream cheese, softened
1/8 tsp. fine sea salt
1¼ cups heavy cream
2/3 cup sugar
2 tbsp. light corn syrup
1 vanilla bean, split, seeds scraped out, seeds and bean reserved
1 recipe roasted cherries (recipe follows)
About 1 cup Crisp Streusel (recipe follows)

Mix about 2 tbsp. of the milk with the cornstarch in a small bowl to make a smooth slurry.  Whisk the cream cheese and salt in a medium bowl until smooth.  Fill a large bowl with ice and water.

Combine the remaining milk, the cream, sugar, corn syrup, and vanilla seeds and bean in a 4-quart saucepan, bring to a rolling boil over medium-high heat, and boil for 4 minutes.  Remove from the heat and gradually whisk in the cornstarch slurry.  Bring the mixture back to a boil over medium-high heat and cook, stirring with a heatproof spatula, until slightly thickened, about 1 minute.  Remove from the heat.

Gradually whisk the hot milk mixture into the cream cheese until smooth.  Pour the mixture into a 1-gallon Ziploc freezer bag and submerge the sealed bag in the ice bath.  Let stand, adding more ice as necessary, until cold, about 30 minutes.

Remove the vanilla bean.  Pour the ice cream base into the frozen canister and spin until thick and creamy.

Spread about ½ of the cherries over the bottom of a freezer safe container.  Scoop out about 1/3 of the ice cream and sprinkle with 1/3 of the streusel.  Top with the other half of the cherries, another 1/3 of the ice cream, and another 1/3 of the streusel.  Repeat with the remaining ice cream and streusel.  (There will be quite a bit of streusel left over.  Use it for another ice cream or for a pie or crisp topping.)  Press a sheet of parchment directly against the surface and seal with an airtight lid.  Freeze in the coldest part of your freezer until firm, about 4 hours (if you can wait that long.)

Roasted Cherries
2 cups pitted fresh or frozen (not thawed) red or black cherries
2/3 cup sugar
2 tsp. cornstarch

Preheat the oven to 400ºF.

Combine the cherries, sugar, and cornstarch in a 9-inch square baking dish, tossing to mix.  Roast for 30 to 45 minutes, until the juices are thickened and bubbly, stirring every 15 minutes.  Let cool completely, then chill in the refrigerator.

Crisp Streusel
½ pound (2 sticks) unsalted butter, cut into ½-inch cubes and chilled
1½ cups all-purpose flour
1/8 tsp. ground cinnamon
¾ cup packed light brown sugar
½ tsp. salt
1½ cups old-fashioned oats

Preheat the oven to 350ºF.

Put all the ingredients except the oats in the bowl of a food processor and pulse until mixture looks like coarse sand.  By hand, add the oats and mix well.  Spread out on a baking sheet and break up any large clumps into crumbs about ½-inch in size.

Bake for 30 to 35 minutes, until toasted and browned, stirring occasionally to prevent burning, especially in the corners, and to turn over the unbaked portions.  Let cool completely, then freeze until ready to use.  The streusel can be frozen for up to 1 month.


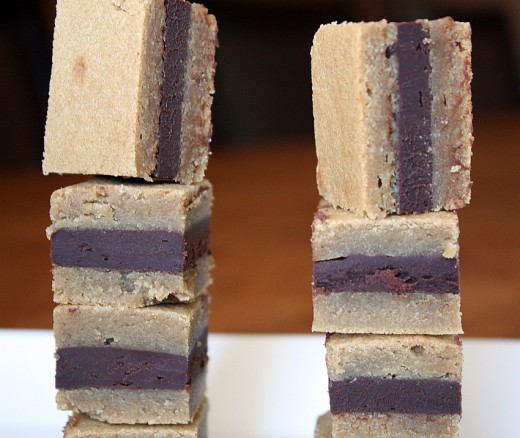
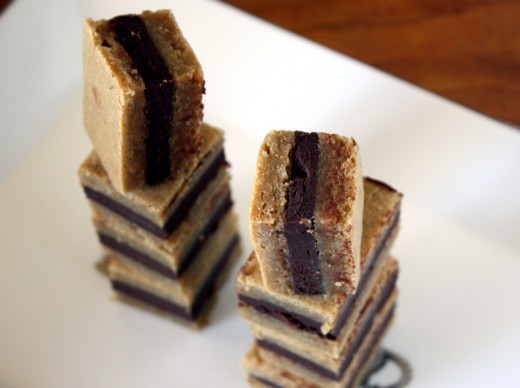
Ganache-Filled Brown Sugar Bars

June 30, 2011

Friends, it’s that time of year.  It seems that ever since I have kept this blog, I go out of town around the end of June/beginning of July.  Last year, I went to Cannes/Paris/London.  This year, I am going to Delaware.  Ahem.  Not that there is anything wrong with Delaware it’s just not, well, um, Cannes, Paris, or London.  I don’t think I will be shopping for copper pots or taking a train underneath the English Channel.  What I will be doing is getting quality time with Randy’s huge extended family.

Here is what I expect: a plane ride complete with ridiculous amounts of technology and lots of usually-forbidden snacks, two boys spending a week covered in sand and smelling of sunscreen and Popsicles, eating lots and lots of carbs, getting forced to sing and play guitar in front of  50+ family members, roller coasters and cotton candy on the boardwalk, and truly enjoying a vacation.

This has been a busy month.  I taught six classes in three weeks.  I didn’t do much cook-for-my-family cooking.  But I did manage to squeeze some yummy things in.  I have time to share the food but I don’t have time to write super witty and topical posts to accompany the recipes.  Forgive me?  I think after this treat you just might.

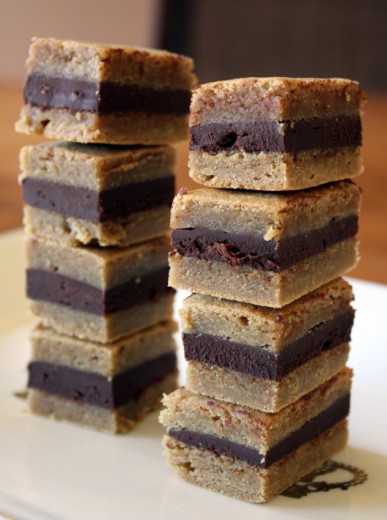
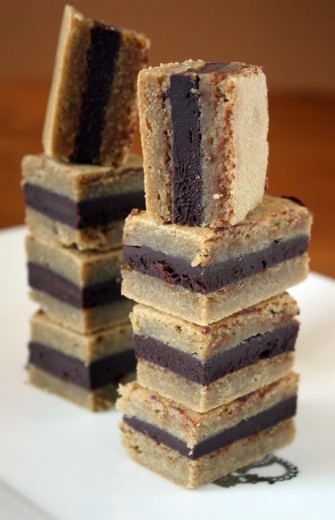
Sometimes I look at a recipe with few ingredients and scoff.  A “how could this be good?” kind of thing.  I’ll tell you how this can be good – brown sugar bars with chocolate ganache sandwiched in the middle.  The components of these bars are super easy to make.  Assembly is a little tricky.  Learn from my experience and mistakes:

Do butter and flour the pan well and definitely use the wax paper that is suggested.
Do dollop the batter all over the pan, this will make it easier to spread.
Do use a palette knife to smooth the top.
Don’t underbake.  Or overbake.
Do use a palette knife to coax the wax paper away from the pan before turning out onto a rack.
Don’t move the cake part around too much, this will make it crack.
Do make sure you put the cake on a cutting board that will fit in your refrigerator.
Do wipe your knife off in between cuts so you don’t get chocolate residue on the edges.  If you care about that sort of thing.  (I didn’t do this.)
Do use a ruler to make sure you get all your pieces the same size.  If you care about that sort of thing.  (See above.)
Do cut these in small pieces and be prepared for children in your life to go absolutely nuts for them.

Ganache-Filled Brown Sugar Bars
Adapted from Food & Wine
Makes 32 bars (or more if you cut them smaller)

½ cup heavy cream
½ pound bittersweet chocolate, very finely chopped
1¾ cups all-purpose flour
¼ tsp. salt
2 sticks (½ pound) unsalted butter, at room temperature
1 2/3 cups packed dark brown sugar
2 large eggs, at room temperature
1½ tsp. pure vanilla extract

Place the chocolate in a mixing bowl.  Bring the cream to a boil over moderate heat.  Pour the cream over the chocolate and allow to sit for one minute.  Using a rubber spatula, gently stir the two together until smooth.  Let stand until firm, 30 minutes to 1 hour.

Preheat the oven to 350ºF.  Lightly butter a 10-by-15-inch baking pan.  Line the pan with wax paper; butter and flour the paper.

Whisk the flour with the salt.  In a large bowl, using an electric mixer, beat the butter and brown sugar at medium speed for 3 minute.  Beat in the eggs 1 at a time.  Beat in the vanilla.  At low speed, beat in the flour in 3 additions; the batter will be fairly stiff.  Spread the batter in the pan.  Bake for 18 to 20, or until a cake tester inserted in the center comes out clean.  Transfer to a rack to cool completely.

Cover the baking pan with a large wire rack and invert.  Remove the pan and peel off the wax paper.  Invert the cake onto a large cutting board.  Using a serrated knife, halve the cake crosswise.  Spread the ganache evenly over one of the cake halves, leaving a 1/8-inch border.  Top with the other cake half.  Cover and refrigerate until the ganache is set, at least 2 hours.

Trim the edges of the cake.  Cut the cake lengthwise into 4 strips, then cut each strip crosswise into 8 bars.  Serve chilled or at room temperature.


« Older Posts Newer Posts »