Category: Cookies

Pedestrian Tastes

May 16, 2011

The other day I was talking with my friend Julie about pedestrian tastes.  Like, no matter how much you love food and no matter how great your palate is, there are some pedestrian things that you just love.  Pedestrian as in low-brow, even a little trashy perhaps.  I remember reading that Jeffrey Steingarten – food columnist for Vogue, judge on Iron Chef, and food snob extraordinaire – always travels with a stash of Milky Way bars because they are his favorite and he wouldn’t want to be stranded somewhere without one.  Now, I am not a food columnist or a judge for a TV show but I can be kind of a food snob.  But boy, do I love Chex Mix.  And Kettle Korn.  And while I have not stepped foot in a McDonalds in probably 15 years, I still remember their fries as being some of the best I have ever tasted.  And speaking of fries  – Red Robin.  Love them.

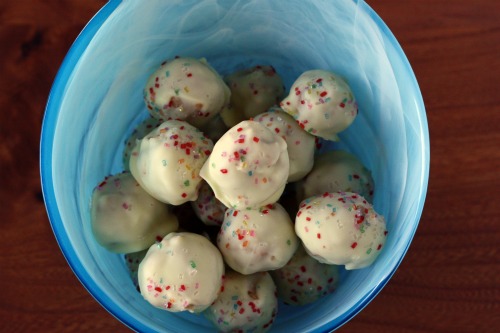
So here we are.  This is a no-bake slightly white-trash morsel disguised as something fancier.  Rice Krispies made round with peanut butter (Jif brand if you are me) and sugar, rolled in melted white chocolate and dusted with sprinkles.  I made a double batch of them so I would have enough for last weekend’s yoga retreat and for various treat-needing functions.  My boys eyed them in a “I don’t know what that is but it has sprinkles on it, so I will try it” kind of way and then gave me their highest praise.  “You’re a good cooker Mommy!”

By the way, check back Tuesday and Thursday this week for more giveaways.  And you have one more day to enter to win the Guy Fieri cookbook.

One Year Ago: Chickpeas with Lemon and Pecorino Romano and Potato Salad with Snap Peas
Two Years Ago: Moroccan Carrot and Hummus Sandwiches and Quinoa with Grilled Zucchini, Chickpeas, and Cumin

White Bark Balls
The Essential New York Times Cookbook
Makes about 3 dozen balls

1½ cups Rice Krispies
1 cup crunchy peanut butter
1 cup confectioners’ sugar
2 tbsp. unsalted butter, softened
¾ pound white chocolate
Colored sugar for sprinkling (optional)

1.  Combine the Rice Krispies, peanut butter, confectioners’ sugar, and butter in a medium bowl, and mix until very well combined.  Firmly compress into balls 1½ inches in diameter.  Place on a baking sheet, cover, and refrigerate until well chilled, at least 4 hours, or overnight.

2.  Line a baking sheet with wax paper.  Melt the white chocolate in a double boiler over medium-low heat, stirring until completely smooth.  Pour the chocolate into a wide shallow bowl.  Working quickly, in small batches, roll the chilled balls in the chocolate, turning gently with a fork.  Transfer to wax paper.  If desired, sprinkle the tops of the cookies with colored sugar.

3.  Place the baking sheet in the refrigerator long enough for the chocolate to become firm, 30 minutes to 1 hour, then transfer the ball to an airtight container.  (The balls can be stored in a cool place for up to 3 days or refrigerated for up to 3 weeks.)


Poor Randy

April 4, 2011

One of the great joys of having children is reading childrens’ books.  When we found out I was pregnant with Graham, we each bought our favorite from our childhood to start our baby’s collection.  Randy bought Where the Wild Things Are and I bought Madeline.  Having two boys, we have read the former much more often than the latter.

In addition to all the ones I know and love from my childhood, we have been introduced to so many new classics.  There is Knuffle Bunny (by the same author as Don’t Let the Pigeon Drive the Bus! – another favorite), How Do Dinosaurs Say Goodnight, Too Many Toys, and so many others.  Some of them are pure sweetness, others make me laugh.  One in particular, Bad Kitty, is hilarious.  A cat-owning family runs out of cat food and using the alphabet, describes all the healthy food that they bought for the kitty (asparagus, beets, cauliflower, dill).  Then, again using the alphabet, it goes through all the terrible things the cat does in anger (ate my homework, bit Grandma, clawed the curtains, devoured my new book).  Lo and behold, the family buys the right kind of food (an assortment of anchovies, buffalo burrito, chicken cheesecake, a donkey named Dave), and Bad Kitty does all kind of nice things (apologized to Grandma, bought me new toys, cleaned her cat box, drove me to school).  It is well illustrated and really funny.

We also have Poor Puppy by the same author.  All Poor Puppy wants to do is play with Bad Kitty who won’t have anything to do with him, so he dreams of around the world adventures and games he will someday play with his feline pal (quoits in Qatar for example).  Throughout the book the phrase “poor puppy” is repeated many time.  Poor poor poor puppy.

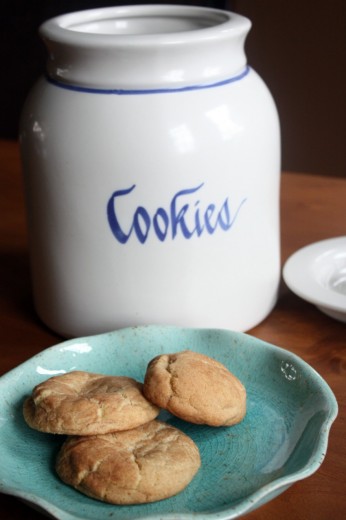
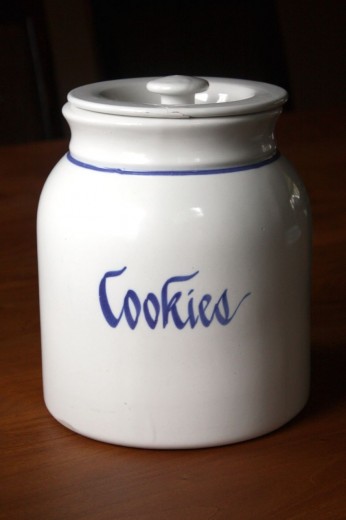
Why on Earth am I talking about this book and showing your photos of Snickerdoodles and the cookie jar from my childhood?  Randy has been in a “poor Randy” phase for the past couple of days.  This happens sometimes when I am really busy with cooking.  Just this past weekend, I catered two parties and taught two brunch classes.  In 48 hours.  Poor Randy says things like, “You cook for all these other people, why not for me?” or – my favorite – “Why are there no cookies in the cookie jar?  You used to always have cookies in the cookie jar.”  Poor Randy.  Poor poor poor Randy.

So in between the loading and unloading of my car, the set-up and take down of two parties, and the clean-up and destruction of my kitchen, I made these cookies.  Snickerdoodles were always a favorite in my house growing up.  I’m not sure how something that looks so unassuming can taste so good but they do.  My sister-in-law gave us some last weekend and they were perfect.  Soft, cakey, not too sweet, and lots of cinnamon.  She found this gem on All Recipes and this is now my go-to for Snickerdoodles.  I tinkered with the method a bit and with the baking time and temp, but otherwise, I give all credit to Mrs. Sigg – whoever she may be.

One Year Ago: Swiss Chard Tart with Goat Cheese, Currants, and Pine Nuts
Two Years Ago: Spicy Sweet Potatoes with Lime

Mrs. Sigg’s Snickerdoodles
Adapted from All Recipes
Makes about 48

I didn’t feel like forming 48 cookies, so I made mine much larger and got about 24.

½ cup (1 stick) unsalted butter, room temperature
½ cup vegetable shortening
1½ cups granulated sugar
2 eggs
2 tsp. vanilla extract
2¾ cups flour
2 tsp. cream of tartar
1 tsp. baking soda
¼ tsp. salt
2 tbsp. granulated sugar
2 tsp. cinnamon

Preheat the oven to 375ºF.

Cream together the butter, shortening, and sugar until light and fluffy, about 4 minutes.  Beat the eggs in one at a time, scraping down the bowl as necessary.  Add the vanilla and beat one minute.  Add the flour, cream of tartar, soda, and salt and mix until combined well.

Mix the two tablespoons of sugar with the 2 teaspoons of cinnamon.  Using a tablespoon (or a soup spoon) scrape out bits of dough and roll into balls.  Roll the balls in the sugar mixture and place on a baking sheet at least 2 inches apart.

Bake 8 to 10 minutes, or until set but not too hard.  Remove immediately from baking sheets and cool on a rack.


Malted Milk Sandwich Cookies

March 14, 2011

I have a wonderful friend and neighbor whose name is Julie.  Her house is almost exactly the same as mine, just everything is flip flopped.  (They were built by the same person.)  She is a foodie extraordinaire.  She is totally up on all the new restaurants in our city and beyond.  She does incredible amounts of research when she travels and is the type of person who will go way out of her way to find the perfect baguette in Paris.  (I am the same way.)  Julie is an enthusiastic and tremendous cook.  Our kitchens complement each other well.  It seems that whatever I don’t have, she does and vice versa.  Our texts to each other are not, “Can I borrow a cup of sugar?” but “Do you have an extra mini muffin pan?” or “What size pastry tips do you have?”

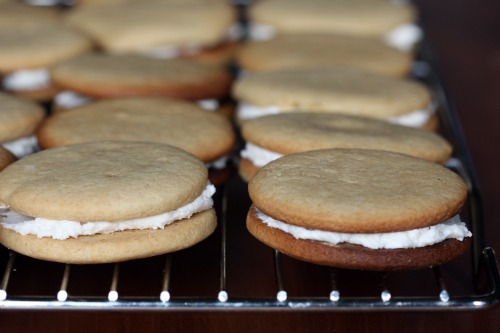
On top of all that fun stuff, Julie is a very kind and generous person.  She is incredibly quick to offer her help whether it is with cooking classes, catering, or just getting Graham off the bus now and then.  I deeply deeply appreciate her.  A few months ago, she borrowed my Baked cookbook and found a lot of inspiration there.  As a thank you to her for help with a recent party, I bought her the new one, Baked Explorations.  Very soon after, she made these malted cookies.  She brought a few over for us to try one morning.  I left them on the counter, went about my day, and came home only to find that my husband had eaten them.  All of them.  And then he had the nerve to rave about them.  They have been on my mind ever since.

I have a good relationship with the flavor of malt.  When I was a kid my mom would sometimes make us a chocolate malted in the blender.  I loved them.  To this day, the smell that comes from my blender, even if I am puréeing soup, reminds me of those malteds.  (Side note: What is that smell and why does the same smell come from every blender?)  One of my very favorite candies, the one I cannot resist, is the candy coated chocolate malt balls that the Easter bunny brings.
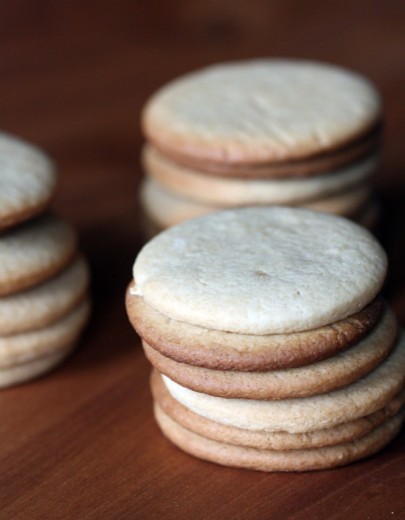
So, you would think I would have made these Malted Milk Sandwich Cookies the very next day.  But theses are roll-out-and-cut cookies which are not my favorite.  Just the added fuss of pulling out the rolling pin, flouring the board, refrigerating the dough can feel like too much in my already busy kitchen.  I am happy to tell you that this dough is very well behaved and the cookies are super easy to make.  The dough is quite sticky, even after a good rest in the refrigerator, but with enough flour I was able to shape these easily.  Much more so than Christmas cookies.
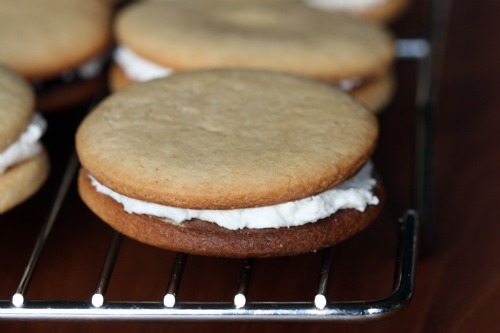
One Year Ago:  Pizza Bianca
Two Years Ago:  Tropical Gazpacho

Malted Milk Sandwich Cookies
Baked Explorations
Makes about 30 sandwich cookies

For the cookies
4 cups all-purpose flour
¾ cup malt powder
2 tsp. baking powder
½ tsp. baking soda
½ tsp. salt
2 sticks unsalted butter, room temperature
1 cup firmly packed dark brown sugar
1 cup granulated sugar
2 eggs
1/3 cup sour cream
2 tsp. vanilla extract

For the vanilla filling
5 ounces vegetable shortening, at room temperature
4 tbsp. (½ stick) unsalted butter, cut into small chunks, at room temperature
3¼ cups confectioners’ sugar, sifted
½ tsp. salt
1 tbsp. vanilla extract
1 tsp. light rum

Make the cookies
In a large bowl, whisk together the flour, malt, baking powder, baking soda, and salt.  Set aside.

In the bowl of a standing mixer fitted with the paddle attachment, beat the butter and sugars together until light and fluffy.  Scrape down the bowl and add the eggs, one at at time, beating until each is incorporated.  Add the sour cream and vanilla and beat until just incorporated.  Add half of the dry ingredients all at once and beat for 15 seconds.  Again scrape down the bowl, then add the remaining dry ingredients and beat until just incorporated.  The mixture should come together almost in a ball.

Loosely shape the dough into two balls, wrap them tightly in plastic wrap, and refrigerate for at least 3 hours.

Preheat the oven to 350ºF.  Line two baking sheets with parchment paper.

Divide each dough ball in half, to make four portions.  Place on portion on a lightly flour-dusted work surface and return the other three to the refrigerator.

Roll out the dough so that it is ¼-inch thick.  The dough will be sticky, so you may have to flip and lightly flour it a few times while you work.  Use a 2-inch round cookie cutter to create the sandwich tops and bottoms, and transfer them to the prepared baking sheets, leaving about 1 inch of space around each cookie.  Extra dough scraps can be refrigerated and rerolled once more, if desired.

Bake the cookies for 10 to 12 minutes, or until they are just slightly browned.  Place the baking sheets on wire racks to cool for 5 minutes.  use a spatula to transfer the cookies to the racks to cool completely.  While the cookies cool, prepare the filling.

Make the vanilla filling
In the bowl of a standing mixer fitted with the paddle attachment, beat the shortening and butter until lump free and smooth.  Add the sugar in three parts, mixing each part until just combined.  Add the salt, vanilla, and rum and beat again for 10 seconds.  The filling should be thick but spreadable (like the inside of an Oreo).  If it is too thick, add a drop or two of water as needed.  Keep adding water to reach desired consistency, but do not add too much or the filling will be too thin.

Alternatively, if the mixture is too thin, add a few tablespoons of confectioners sugar.

Assemble the Malted Milk Sandwich Cookies
Use a pastry bag or a small spoon to apply about 2 tablespoons of filling to the flat side of a cookie.  Place another cookie, flat side down, on top.  Press down slightly so that the filling spreads to the edges of the cookie.  Repeat until all the sandwich cookies are made.  Let them set up for about 15 minutes before serving.  Store the cookies at room temperature in an airtight container for up to 3 days.


Trust the Expert

March 2, 2011

I’ve spent a lot of my adult life in the kitchen.  I’ve taught myself to cook and bake by reading good books and through practice.  Over time, I have learned to trust myself.  If something sounds wrong in a recipe, I trust my gut and I am usually right.  I have learned tricks and short cuts and generally accepted practices.  Once in a while, I get humbled.

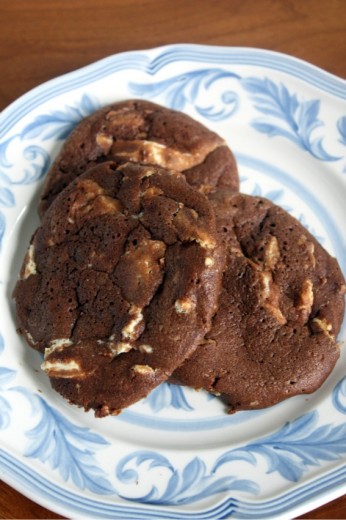
Nancy Bagget’s The All American Cookie Book is a book I turn to over and over for cookie inspiration.  Her recipes are incredibly well-researched and written with that perfect mixture of clarity but not condescension.  I have never made anything less than delicious from that book.  In looking for a new treat, I decided on Chocolate Espresso White Chocolate Chunk Cookies.  As I was making them, I started composing this post in my head.  (If you have a food blog, tell me you do this as well.)  I was planning on titling it “Pulling a Fast One” and talking about how something Randy hates (coffee) and something Randy loves (white chocolate) are in one cookie and that the white chocolate managed to disguise the coffee.  But then I ignored Bagget’s advice to allow three inches between each cookie on the sheet and I also ignored her advice to lay parchment paper on the baking sheets.  Which meant that many of the cookies stuck and many of them oozed into one another.

Did it matter?  Only in the looks department.  I know white chocolate is something that makes some chocolate lovers turn up their noses.  According to that kind, it’s not real chocolate.  I myself am not nearly so snobby.  Sure, I prefer the brown version, but I do think that white chocolate can play a nice role in a cookie – especially one that is so intense with the flavor of bittersweet chocolate held together with the just the smallest amount of flour.  The white stuff distracts you for a moment, takes away from the richness but in a good way.  Much the way that nuts would do, if I let nuts near my cookies.

Randy’s response?
“I know I say I don’t like chocolate, but this is a really good cookie.”
“There is coffee in there.”
“Hmmm.  Doesn’t matter, I don’t taste it.”

Fast one pulled.

One Year Ago: Cucumber Raita and Grilled Haloumi Cheese and Lemon
Two Years Ago: Rosemary Flatbread with Blue Cheese, Grapes and Honey

Chocolate Espresso White Chocolate Chunk Cookies
The All-American Cookie Book
Makes about 20 cookies

I actually doubled this recipe and got 36 large cookies.  It is essential here to use great chocolate.

5 ounces bittersweet or semisweet chocolate, broken or coarsely chopped
½ cup (1 stick) unsalted butter, cut into chunks
¼ cup plus 1 tbsp. flour
2 tbsp. unsweetened cocoa powder
¾ cup sugar
1/8 tsp. salt
2 large eggs
1 tbsp. plus 1 tsp. instant espresso powder or granules, dissolved in 1 tbsp. hot water
1½ tsp. vanilla extract
8 ounces top-quality white chocolate, coarsely chopped

In a medium, microwave-safe bowl, microwave the bittersweet or semi-sweet chocolate and butter on 100-percent power for 1 minutes. Stir well.  Continue microwaving on 50-percent power, stirring at 30-second intervals.  Stop microwaving before the chocolate completely melts and let the residual heat finish the job.  (Alternatively, in small, heavy saucepan, melt the chocolate and butter over lowest heat, stirring frequently; be very careful not to burn.  Immediately remove from the heat.)  Let cool to warm.

In a medium bowl, thoroughly stir together the flour and cocoa powder; set aside.  In a large bowl, with an electric mixer on medium then high speed, beat together the sugar, salt, eggs, espresso mixture, and vanilla for 2 to 3 minutes, or until well blended, slightly thick, and lightened.  Beat in the melted chocolate mixture, then the flour mixture, until well blended.  Stir in the white chocolate until evenly incorporated.  Refrigerate the dough for at least 1½ hours, or until firm enough to shape.

Preheat the oven to 350ºF.  Line several baking sheets with parchment paper.

Divide the dough into quarters.  Divide each quarter into 5 or 6 equal pieces.  Shape then into balls with lightly greased hands.  Place on baking sheets, spacing them about 3 inches apart.  Pat down the balls just slightly.

Bake the cookies, one sheet at a time, in the middle of the oven for 9 to 12 minutes, or until barely firm when pressed in the centers.  Reverse the sheet from front to back halfway thought baking to ensure even browning.  Transfer the sheet to a wire rack and let stand until the cookies firm up slightly, 2 to 3 minutes.  Slide the cookies, still attached to the parchment paper, onto a wire rack.  Let stand until completely cooled.  Carefully peel the cookies from the parchment.

These cookies are best when fresh but may be stored in an airtight container for up to 4 days or frozen up to 1 month.


K.I.S.S

January 25, 2011

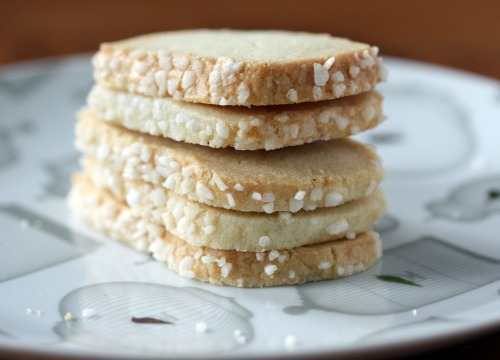
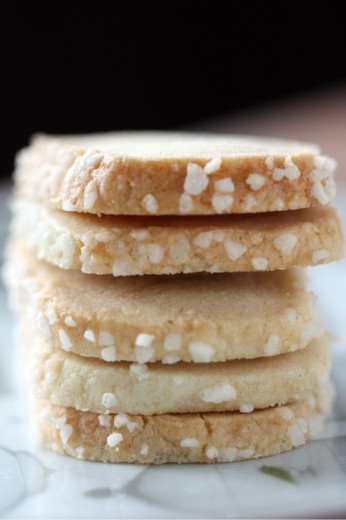
Remember those Danish butter cookies?  The kind that come in the blue tin?  I LOVED those cookies as a kid.  We used to get them every year around the holidays and we would slowly make our way through them.  I liked the round ones with the grooves but the rectangular shaped ones with the sugar were my favorite.

The only time I ever see those cookies these days is when we go to cut down our Christmas tree.  We have gone to several different farms over the years and all of them seem to have bad coffee, overly sweet hot cider, and tins of those cookies.  My kids go nuts over them and even though my palate is much more sophisticated than it once was, I still like those buttery cookies.

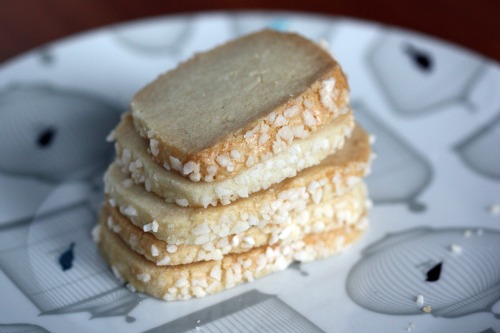
Making these Simple Sweet Diamants was an exercise in K.I.S.S.  I trust you are familiar with this term.  Keep It Simple Stupid.  Or Keep It Simple Silly since, in our house, stupid is a bad word.  Anyway.  I feel like I’ve been making a lot of aggressively flavored treats recently.  Most of the time, I would pick a cookie laden with stuff over a simple one.  I had the Compost Cookie at Momofuku’s Milk Bar a couple of years ago and OMG was it good.  This simple butter cookie is about the opposite of that one.  But as we all know, sometimes simple is best.

One Year Ago: Chickpea, Chard, and Couscous Soup
Two Years Ago: Orange Pound Cake

Simply Sweet Diamants
Baking for All Occasions
Makes about 3 dozen cookies

My only quibble with this recipe was the yield.  I was supposed to get 5 dozen but looking at the quantity of ingredients, I didn’t see how that was possible.  I doubled the recipe and got 5 dozen.

6 ounces (1½ sticks) unsalted butter, soft
½ cup granulated sugar
½ tsp. vanilla extract
1¾ cups all purpose flour
1/8 tsp. salt
1 cup pearl or sanding sugar
1 large egg white, lightly beaten

In the bowl of a stand mixer fitted with the paddle attachment, beat together the butter, granulated sugar, and vanilla on the lowest speed until creamy and well blended, 1 to 2 minutes.  Maintaining the same speed, add the flour and salt and mix just until combined.

Divide the dough into thirds.  On a clean work surface, roll each piece into a log 1¼ inches in diameter.  (DT: This dough is extremely crumbly so I found it impossible to roll it out that much.  Furthermore, I had to shape it more into a cube rather than a roll to keep it from cracking.)  Wrap the logs separately in plastic wrap and chill until firm, about 2 hours or up to 2 weeks.  For longer storage, overwrap with aluminum foil, label the contents and date, and freeze for up to 1 month.  Thaw in the refrigerator for 8 hours or overnight.

Center a rack in the oven and preheat the oven to 325ºF.  Line 2 large baking sheets with parchment paper, so you can get a second pan ready while the first one is baking.

Remove the logs from the refrigerator.  Spread the pearl sugar in a large rectangular pan.  One at a time, brush each log with the egg white, and then roll in the pearl sugar to coat evenly.  Press lightly so the sugar sticks to the dough.  Using a sharp knife, cut 1 dough log into slices 1½-inch thick.  Place the slices on a prepared baking sheet, spacing them 1 inch apart.

Bake the cookies just until they are ivory colored on top and lightly golden on the bottom, about 12 minutes.  Using a metal spatula, transfer the cookies to wire racks to cool completely.  Repeat with the remaining logs.

Stack the cooled cookies in an airtight container and store at room temperature for up to 10 days.


« Older Posts Newer Posts »