Category: Beans

Thoughts on Quinoa

May 12, 2009

img_2129

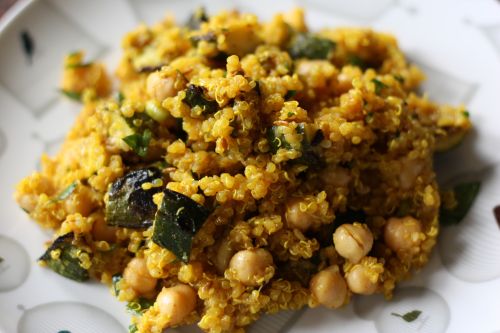
We all know about quinoa, right?  The amazing grain that’s not really a grain but a seed.  It’s ancient, originated in Peru, and is a complete protein.  It shows up on all kinds of lists as a “super food”.  And there you have it.  The extent of my knowledge about quinoa except for one last thing.  It’s delicious.

Not in dip-your-spoon-in-and-take-a-big-mouthful way like, say, chocolate sauce.  (Not that I would know anything about that.)  All by it’s lonesome, it’s kind of plain.  But it absorbs flavors like a pro and is equally at home in lots of different kinds of cuisines.  It also has a delightful texture – soft with just the slightest crunch.

This salad is pretty healthy but even if you are not the healthy food loving type, it’s a good one to have in your arsenal.  I love having go-to salads like this for things like potlucks and barbecues.  It’s vegan and wheat free so just about anyone can eat it.  It doesn’t have to be refrigerated and it can be made in advance.  The flavors are crowd pleasers – lots of cumin, garlic, and smoked paprika – not to mention grilled zucchini and my beloved chickpeas.  If you wanted to add dairy, I think feta cheese or a soft goat cheese would be delicious.  Or even crumbles of ricotta salata for something a little different.

img_2119

One Year Ago:  Spring Challenges

Quinoa with Grilled Zucchini, Chickpeas, and Cumin
Serves 6-8

I cut this out of a magazine but I don’t recognize the font.  Since I get Bon Appetit, Gourmet, and Food and Wine, I can assure it’s from one of those.  Quinoa generally needs to be rinsed before using so it is not bitter.  If you buy Bob’s Red Mill brand, it does not need to rinsed.

1 15-oz can chickpeas, drained
3 tbsp. fresh lemon juice
5 tbsp. olive oil, divided
2 garlic cloves, peeled
2 tsp. cumin seeds
1 tsp. tumeric, divided
1 tsp. smoked paprika, divided
2 cups water
1 cup quinoa, rinsed well (if necessary), drained
1 tsp. kosher salt
1 1/2 pounds zucchini, trimmed, quartered lengthwise
1 1/2 tsp. ground cumin
4 green onions, thinly sliced
1/4 cup chopped fresh Italian parsley

Combine chickpeas and lemon juice in a large bowl.  Add 3 tbsp. oil; pressin garlic and stir to combine.  Let marinate at least 15 minutes and up to 2 hours.

Heat 1 tbsp. oil in medium saucepan over medium-high heat.  Add cumin seeds, 1/2 tsp. tumeric, and 1/2 tsp paprika; stir until fragrant, about 1 minute.  Add 2 cups water, quinoa, and coarse salt; bring to simmer, sirring occasionally.  Reduce heat to medium-low.  Cover and simmer until all water is absorbed, about 20 minutes.

Meanwhile, prepare barbecue (medium-high heat).  Place zucchini on rimmed baking sheet.  Drizzle with 1 tbsp. oil.  Sprinkle with ground cumin, 1/2 tsp. tumeric, and 1/2 tsp. paprika.  Toss to coat evenly.

Place zucchini on grill; sprinkle generously with salt and pepper.  Grill until tender and browned on all sides, 10-12 minutes.  Transfer to work surface.  Cut crosswise into 1/2-inch pieces.  Add zucchini, green onions, and parsley, then chickpea mixture to quinoa.  Toss to blend.  Season to taste with salt and pepper.  (Can be made up to 1 day ahead.  Cover and refrigerate.  Bring to room temperature before serving.)


Geographical Vegetarian

April 29, 2009

img_2031

I recently heard the term “geographical vegetarian”.  It was introduced to me by a man who eats meat but whose wife does not.  He eats vegetarian in their home but eats meat outside of it.  I was thrilled to hear this term because now I can attach a name to what my husband is.  As in, Q: “Is your husband a vegetarian?”  A: “My husband is a geographical vegetarian.”  Aside from a little fish that he grills now and then (and mussels I make for him once in a great while), no meat eating goes on in our house.  People are confused by this.  How could a red-blooded carnivore be forced to eschew his meat-eating ways in his own home?

It’s simple really.  I’m a good cook.  He likes my food.  He eats meat for lunch at work and when we go out.  Food is not his be all end all as it is for me.  And I make Mexican food, which is his favorite, often.

Truthfully, I could make the same Mexican meal three nights a week and he would be happy.  As long as there is guacamole and some kind of beans – I would never hear a complaint.  But I would complain.  I need variety so I am always trying to mix it up.

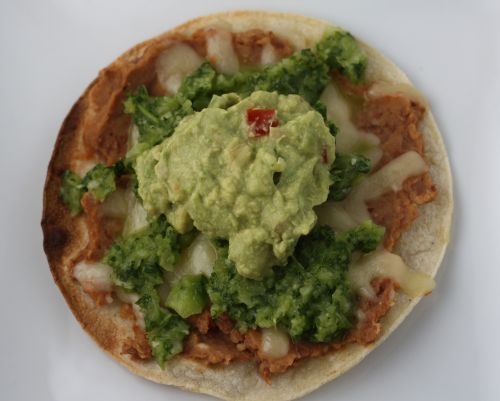
I read about a salad on For the Love of Cooking that I was dying to try.  The dressing featured lots of cilantro and lime juice and the salad had corn, beans, Cotija cheese, avocado, and all kinds of other yummy things in addition to romaine lettuce.  I’m a sucker for a salad with lots of “stuff” in it.  To go with it, I made these tostadas.  They are relatively simple but with a powerful flavor punch from this sofrito.  You will get more sofrito than you need for these tostadas, but you can use it to flavor rice, soup, beans, or anything else in your next Mexican meal.

Bean Tostadas with Sofrito
Adapted from Simple Vegetarian Pleasures
Serves 4

Personally, I don’t really like the taste of raw onion and using a whole onion in the sofrito was too strong for me.  Next time I will use half. You could streamline this recipe by using canned re-fried beans thinned with a little water.

Sofrito
3-4 cups lightly packed cilantro, stems included
1 small jalapeño pepper, seeded and chopped
1 small green pepper, cored and chopped
2 garlic cloves, minced
1 small onion, chopped
1/3 cup olive oil
1/4 cup cider vinegar
1/2 tsp. salt

Beans
1 (15 oz) can pinto or kidney beans, rinsed well and drained
1 tsp. chili powder
1/4 cup water
1/4 tsp. salt

Tortillas
8 small (6-inch) soft corn tortillas
2-3 tbsp. canola oil
1 cup grated Monterey Jack cheese

1.  To make the sofrito, combine all the sofrito ingredients in a food processor or blender and puree until smooth.  Pour into a container with a cover and set aside.

2.  To prepare the beans, combine them with the chili powder, water, and salt in the container of a food processor and purée.  Scrape into a bowl.

3.  Preheat the broiler.  Brush both sides of each tortilla with some of the oil, and place the tortillass on a baking sheet.  (You may have to do this in batches.)  Broil on both sides until golden and crisp.  (The tortillas can be prepared up to this point 24 hours in advance.)

4.  Divide the bean mixture and spread some on each tortilla.  Top each with some of the grated cheese.  Broil the tostadas until the cheese has melted and they are hot throughout.  Serve with little spoonfuls of sofrito dotted on top of each tostada.  (DTI also topped them with guacamole.)


Inspired by San Francisco

April 9, 2009

img_1800

Last summer, when Randy and I went to Portland for my birthday, I obsessed about where to eat.  I cross-referenced  Chowhound, magazine articles, and advice from friends.  I whittled our choices down to five restaurants and chose the winning two based on their menus.  I did a good job.

For last weekend’s trip to San Francisco, I didn’t work nearly as hard.  I think I was a little overwhelmed by sheer number of choices, seeing as SF is one of the country’s – if not the world’s – great food cities.  I think I was also just so thrilled to be having a weekend away that the food (gasp!) wasn’t really my focus.  I had some recommendations and would probably have looked into them, but then my monitor died and, well, I was lost without being able to get online.  So I called the concierge of our hotel and asked for his help.

Let me just say that soon after I started this blog, I realized that I was not going to be writing restaurant reviews here for a few reasons.  One is that I almost always find restaurant meals disappointing.  I figured after a few cycles of complaining about how vegetarians get the short end of the stick in restaurants, people would start to snore.  I also figured that many of my readers would not live in Seattle and would therefore not really care about the restaurants where I am consistently disappointed.  So, I did not take notes on the food I ate in San Francisco and can’t tell you with much precision about what I ate, except for one dish which I decided to recreate.

What I can tell you our dinner meals were wildly different experiences.  I can also tell you that I finally have realized that, when it comes to eating out, I would much rather go to the great neighborhood place, rather than the fancy schmancy place.  Friday night was at a place called Spruce.  The place had a very cool vibe, although they seated us in the back room which, while nice and quiet, was a bit like being in a ship’s stateroom.  The food was refined, lovely, and expensive.  They brought out main courses out on gorgeous wide extremely shallow bowls, and there was a lot of white plate.

Saturday night, we had tickets to see Beach Blanket Babylon which a friend had recommended.  We needed to eat somewhere close by and the concierge sent us to Ideale Restaurant.  This was a total neighborhood joint with big personalities and big food.  Our portions were easily double the previous night, the prices were half, and everything we ate, we liked.

When we first arrived, we sat at the bar to wait for our table.  The bartender brought a dish of pasta out to the woman next to us that looked and smelled divine.  It was orecchiette with what looked like a super chunky basil pesto and a flurry of Parmesan cheese.  I knew what I was ordering.  But it turned out that the chunky pesto was actually broccoli rabe that had been cooked down until almost melted, and the cheese was Pecorino Romano.  It was quite delicious but I couldn’t seem to reconcile what my brain was telling me it looked like and what my tastebuds were telling me it tasted like.

img_1786

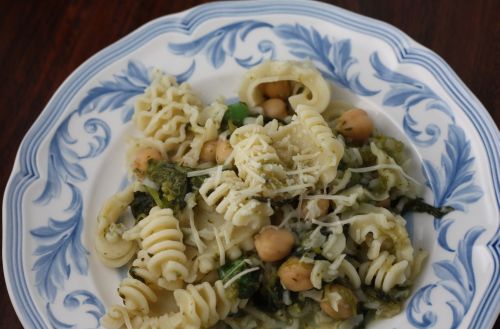
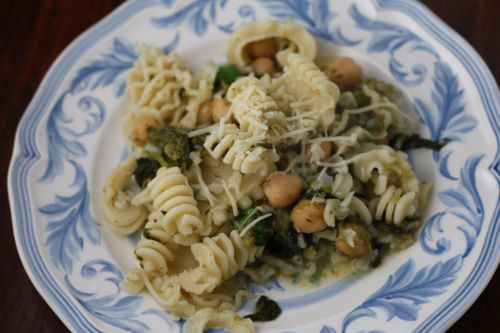
So, I decided to make something like it for myself.  I looked in three different stores and couldn’t find orecchiette (which is shaped like a little ear) so I just used these giant radiattore I had in the pantry.  I chose to add chickpeas because I love them and because I feel like I’ve seen broccoli rabe and chickpeas together in other recipes.  I contemplated adding pesto, since that is what I thought I would be tasting, but decided it would overpower the dish.  Instead, I just added some fresh basil at the end.  The verdict?  Quite delicious if I do say so myself.  I like my food spicy so I would perhaps up the red pepper next time.  If you are not a spice fan, the recipe below will be just fine for you.

img_1797

Pasta with Broccoli Rabe and Chickpeas
Dana Treat Original
Serves 4-6

I cooked the broccoli rabe down until it was quite soft and almost falling apart, which is what they did at the restaurant.  If you would like a little more texture, cook until just tender.  In the photo, you will notice some fresh peas which I added because I had some rolling around my produce drawer.  I don’t think they added that much so I didn’t include them in the recipe below.

Olive oil
1 tbsp. butter
1 large shallot, minced
2 garlic cloves, minced
1/4 tsp. red pepper flakes
1 large bunch broccoli rabe, ends trimmed and cut into 1 inch long pieces
1 cup vegetable stock
1 lb. short pasta
1 14 oz. can chickpeas, rinsed and drained
1/2 cup basil leaves, thinly sliced
1/2 cup grated Pecorino Romano cheese, plus additional for serving

Heat a large skillet over medium heat.  Add butter and just enough olive oil to coat the bottom of the pan.  Throw in the shallot and garlic and saute until softened, 2-3 minutes, then add the red pepper flakes.  Add the broccoli rabe, give it a good stir, then pour in the vegetable stock.  Bring to a boil and then reduce the heat to a simmer and cover.  Allow to cook until the broccoli rabe is tender.

Meanwhile, bring a large pot of water to boil.  Add pasta and cook until al dente.

Right before the pasta is done, add the chickpeas to the broccoli rabe, followed by the basil and the cheese.  Stir well.  Using tongs or a spoon, add the pasta directly to the chickpea mixture, tossing well.  (Alternatively, you can drain the pasta in a colander and add it from there.)  Serve in shallow bowls with additional cheese grated over the top.


For the Chickpea Lovers

April 6, 2009

img_1766

The humble chickpea.  I love them more than almost any food that is not a french fry, chocolate, or caramel.  I love them pureed into hummus, I love them in soups, I love them in grain salads, I love them in green salads.  I love them straight out of the can.  If I weren’t vegetarian, I would probably like them with green eggs and ham.

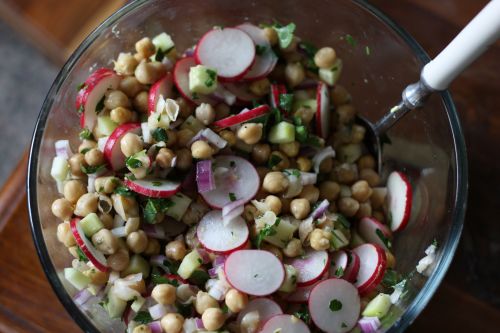
This salad is a great one when you want something healthy and crunchy but with some heft.  The chickpeas marinate for at least half an hour in an intoxicating mixture of olive oil, garlic, cumin, and lemon juice.  If you plan ahead and let them swim around overnight in the refrigerator, they taste even better.  Before you serve it, you add slivers of red onion, thinly sliced radishes and chunks of cucumber.  It comes together quickly and lasts well in the refrigerator for another day or so.  It’s also nice and flexible.  You can serve it as a side (just make sure it’s room temperature instead of cold), or make it more salad like by adding lots of arugula and a little more olive oil and lemon juice.

Marinated Chickpea Salad with Radishes and Cucumber
Inspired by Food and Wine
6 servings

The original recipe calls for only one can of chickpeas but I double that amount here.  If you prefer your salad to be more vegetable heavy and less bean-y, use only one can.  If you are going to use a regular cucumber (rather than an English one), be sure to peel it and scrape out the seeds.

1/8 cup olive oil, or more to taste
Juice of  1 medium lemon
1 garlic cloved, minced
1 tsp. finely grated lemon zest
1/2 tsp. ground cumin
Salt and freshly ground black pepper
2 15-ounce cans chickpeas, rinsed and drained
1 large English cucumber, halved lengthwise, then thinly sliced crosswise
6 large radishes, thinly sliced
1/2 medium red onion, thinly sliced
1/4 cup finely chopped flat-leaf parsley

In a large bowl, combine the olive oil, lemon juice, garlic, lemon zest, and cumin and season with salt and pepper.  Add the chickpeas and let marinate for at least 30 minutes, stirring occasionally.  If you plan to marinate longer than 2 hours, cover and refrigerate.  Before serving, stir in the cucumbers, radishes, onion, and parsley and season with salt and pepper.


Pasta with a Side of Memories

March 19, 2009

img_1623

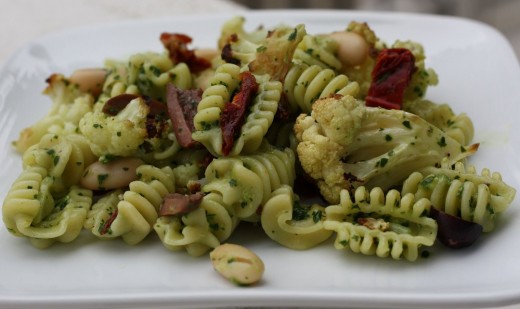
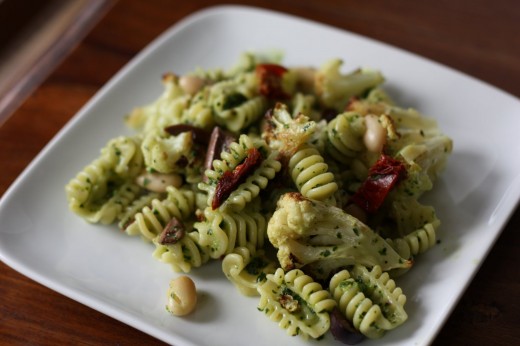
I made this pasta the other night to go with the garlic bread and roasted tomato caprese. Although this is only the second time I have made it, I can honestly say it is a favorite of mine. It has so many delightful flavors and textures and it is very versatile. Parts of it can be made in advance, and the whole dish can be made a day ahead without suffering any ill effects.

This dish comes from a cookbook called From the Earth to the Table which was written by John Ash, one of the pioneers of California wine country cooking. This cookbook is not vegetarian, although over half of the recipes are meat-free, and it is one that I turn to over and over, especially when I am craving exceptionally fresh and flavorful food. Ash has a fabulous restaurant in Santa Rosa – just north of the Napa Valley – where I was lucky enough to have a lovely, if solitary, meal.

I’m sure we all have some time in our lives that we would like to, if not forget, then to go back and live differently. Mid-1998 to the end of 2000 was like that for me. I went through a messy divorce, began a relationship with a not-so-good guy, and worked at a job that I hated. In March of 2000, I quit my job and took a road trip to clear my head. First, I went to Arizona to visit the not-so-good guy, but after that the trip got much better. I spent a few days in L.A. with my dear friend Karen, I flew to Mexico on a free ticket, and once back in the States, I slowly meandered my way up the West Coast enjoying the incredible scenery on offer.

For the most part, I ate very cheaply, but I did splurge at John Ash. I dressed up, brought my book, and treated myself to a nice dinner. I don’t remember what I ate, although I do remember that I was blown away by how fresh and tasty everything was. I remember that I was reading The Grapes of Wrath – savoring every word on the page – and I remember that I wished I had a date across the table from me. I did not wish it was the not-so-good guy.

A week or so later, I arrived back in Seattle. It took me another month or two, but I did break it off with the not-so-good guy. A few months later, I met my husband who has been a wonderful dinner date every since.

img_1629

A few words on the recipe. The first time I made it, I used fresh cranberry beans that I bought at the Farmer’s Market. Sadly, I don’t have any left in my freezer, so I just used good canned cannelini beans and they blended in beautifully. Ash suggests that the sun-dried tomatoes are optional, I think they are essential both for color and flavor. I made some changes that I won’t bore you with, just personal preferences. This pasta is really a beauty because it is great at room temperature as well as hot.

For the pesto, you will want to roast about 3 large cloves of garlic. To do so, place the unpeeled cloves on a small piece of foil, drizzle them with olive oil, fold them up in the foil packet and then put them in a 400 degree oven for about 20 minutes. A toaster oven is perfect for this if you have one. They should feel soft to the touch. Squeeze the garlic out of the skins and proceed with the recipe.

Pasta with Roasted Cauliflower and Parsley Pesto
Adapted from
From the Earth to the Table
Serves 6
generously

You can make the pesto five days and roast the cauliflower one day before you finish the pasta. Slicing the cauliflower (as opposed to just breaking it into florets) give you more surface area for caramelization – a good thing.

1 medium cauliflower (2 pounds or so), sliced 1/2 thick vertically
Olive oil

Kosher salt and freshly ground black pepper

1 lb. tubular shaped pasta, such as penne or rigatoni

Parsley Pesto (recipe follows)

3/4
cup pitted Kalamata olives
1/2
cup sun-dried tomatoes, thinly sliced
1 can cannelini beans, rinsed and drained

Thinly shaved or grated Parmesan cheese for garnishing

Preheat the oven to 425 degrees. Sprinkle both sides of the cauliflower lightly with olive oil, then liberally with pepper and salt. Arrange on a single layer on a baking sheet. Put in th eoven ad roast for 15 to 20 minutes or until the cauliflower is lightly browned and tender. Break into large irregular pieces and set aside.

In a large pot of lightly salted boiling cooking water, cook the pasta until just al dente. Drain, reserving 1/2 cup of the cooking water. Toss the hot pasta with the Parsley Pesto, cauliflower, olives, tomatoes, and beans, adding a bit of the reserved water if the mixture seems to dry. Top with cheese and serve warm or at room temperature. (Can be made one day ahead. Allow to cool completely and then store, covered, in the refrigerator. Bring to room temperature before serving or reheat until it is warm.)

Parsley Pesto
Makes a generous cup

4 cups packed fresh parsley leaves and tender stems, coarsely chopped
1 tbsp. roasted garlic

2 tbsp. pine nuts

2 tbsp. Parmesan or Asiago cheese

=”font-family:trebuchet ms;”>
Grated zest of 1 lemon

1/3
cup olive oil
Kosher salt and freshly ground black pepper

Combine the parsley, garlic, pine nuts, cheese, lemon zest, and olive oil in a food processor or blender, and process until smooth. Season to taste with salt and pepper.


« Older Posts Newer Posts »