Category: Bars

Coconut Bars

July 8, 2009

img_2717

Is it fair to say that everyone has a hard time coming back from vacation?  I know I always do.  Back in the days when I had a desk job, I would feel an almost overwhelming depression when I was finally back in my house and realizing I had to go to work the next day.

Now that my life is very different, I don’t feel that same despair but it certainly is hard to get back into the regular routine.  This time around it’s especially hard because my husband is going to basically be gone for the next three weeks, essentially making me a single parent.  When Randy is not here, I don’t put that much effort into cooking.  I know some people delight in cooking for one, but I am not one of those people.  In some ways I welcome the break.  In other ways I miss cooking.

I am lucky to have my family living close by and when Randy is out of town, I always invite my parents and my brother Michael over for dinner.  I invite them most weeks anyway, but it’s especially nice to have them here when I’m flying solo.  I welcome the company but I also welcome the chance to cook.  They are enthusiastic eaters of my food.
img_2723

Since my brother is a cookie monster of the highest order, I can’t have them here without some kind of baked good to send him home with.  I usually make something I’m certain he will like, but since he really loves anything in bar or cookie form, this time I decided to cater to my parents.  Both my mom and dad love coconut.  I have a recipe from Food and Wine for a sophisticated take on a Mounds bar that I have been meaning to make.  The problem is, it’s one of those recipes that takes up the entire page of the magazine.  There are three elements to the bar, each one fairly time consuming and complicated.  Not quite the right thing to tackle this week.

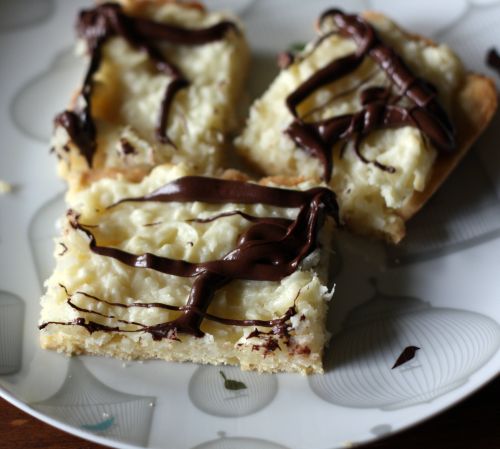
Instead I offer you this fairly simple Coconut Bar from Vegetarian Classics.  It’s not perfect but it’s easy.  If you are a coconut fan, this is a great way to satisfy a craving.
img_2742

One Year Ago:  Tasty Asparagus and Brown Rice, Artichoke Panzanella, White Beans with Roasted Tomatoes

Coconut Bars
Adapted from Vegetarian Classics
Makes 16 bars

The original recipe calls for only 1/2 cup of chocolate chips but I used a full cup.  Because I am a chocolate person, I think it could have used even more but I’ll leave that up to you to decide.

The Crust:
8 tbsp. (1 stick) unsalted butter, at room temperature
1/4 cup sugar
1 large egg
1 tsp. vanilla extract
1 cup flour
1/4 tsp. salt

The Topping:
6 oz. Neufchatel (light cream cheese), softened
3 tbsp. butter, room temperature
1/2 cup sugar
1 large egg
1/4 tsp. almond extract
1 1/2 tbsp. flour
3 cups (about 12 ounces) sweetened coconut
1 cup semisweet chocolate chips

1.  Preheat the oven to 350°F.  Lightly butter a 9×13 baking pan.

2.  In a large bowl, using an electric mixer, beat the butter and sugar together until blended.  Beat in the egg and vanilla until smooth and creamy.  Sprinkle in the flour and salt, and beat just until combined.  Scrape the batter into the prepared dish and use a rubber spatula to spread it evenly on the bottom.  It will be very thin.  Bake 15 minutes.

3.  Meanwhile, make the topping using the same bowl and beaters (you don’t have to wash them.)  Beat the cream cheese and butter until smooth.  Add the sugar, egg, and almond extract, and beat until combined.  Stir in the coconut.

4.  When the crust is done, spoon the batter into it.  Carefully spread it around to cover the crust evenly.  Bake 18-20 minutes, or just until the top off the batter begins to get a tiny bit of color.  Place on a wire rack to cool.

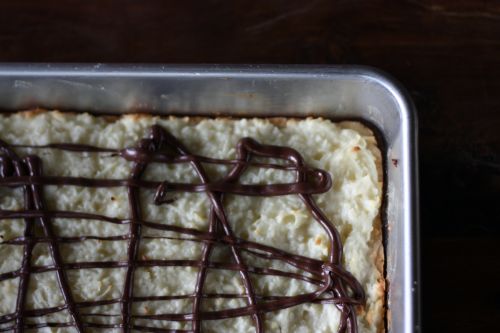
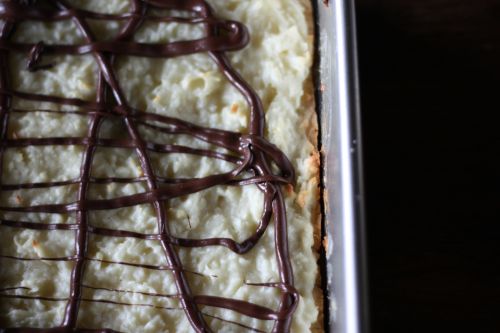
5.  While the bars are still hot, fill a medium-size saucepan halfway with water, bring to a boil, and remove the pan from the heat.  Place the chocolate chips in a small Ziploc bag and tilt the bag so the chocolate chips collect in one corner.  Lower the bag into the water, keeping the chips in the corner, and let them melt, about 2 minutes.  Squeeze the chips occasionally to see if they are melted.  Remove the bag from the water.  Keeping the bag tilted, snip off a very tiny piece of the corner.  Squirt the chocolate all over the coconut surface in an abstract pattern.  When everything is completely cooled, cut into bars.


Raspberry Almond Bars and Dave Matthews

May 15, 2009

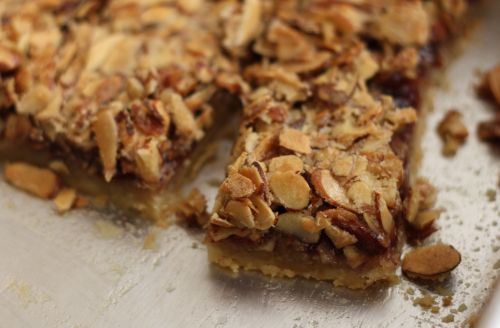
img_21711

And now for a story that has nothing to do with these Raspberry Almond Bars.

My 4.5 year old is a very friendly and affectionate kid.  He almost always has a smile on his face and he just loves people.  He gives hugs to random people all over town but he is not always an equal opportunity hugger.  He especially loves women, the prettier the better.  He does hug men, just not as often.

Yesterday, we went to the park to meet up with my friend Brooke and her kids.  We were running a little late because the boys had extra long naps.  As I was herding them into the park (herding them is something I do often), I noticed she was talking to a guy.  As we got closer, I realized that the guy was Dave Matthews.

Now, Dave Matthews lives in our neighborhood.  My husband has seen him recently at our local vegan doughnut shop (don’t knock it ’til you’ve tried it) and at this same park.  I have seen him around and also met him on various occasions back when I worked in radio.  I used to be  a *big* fan and can now just call myself a fan.  I have met a lot of famous people, mostly musicians, and even so – I get totally star struck.  My heart started beating faster and before I could even think to myself just play it cool Dana, my son ran right up to him and did what every mom in the park at that moment wanted to do.  He threw his arms around Dave.

The best part about the whole thing is that Dave was lovely about it.  He hugged him back and said something along the lines of “thanks for a nice greeting”.  I said something along the lines of “the kid has good taste”.  I wanted to thrust my business card at him and tell him to call me if they wanted a personal chef, but I controlled myself.  We both went to watch our kids get dirty in the sandbox and I listened to his voice as he talked on his cell phone.  I love that voice.

And there you have it.  My story that has nothing whatsoever to do with raspberry bars.  Sometimes a mother just has to brag.

I made these bars last week for the Motherasana lunch I catered.  I wanted to have another dessert alternative to the chocolate chip cookies and these bars seemed to fit the bill.  They are really more an almond bar than a raspberry bar.  The raspberry comes from jam and there isn’t much of it spread over the shortbread base.  There are 3 cups of almonds in the topping, plus a whopping teaspoon of almond extract (that is a lot for almond extract), so if you don’t love almonds – don’t make these bars.  People seemed to like them, but not as much as the cookies.


Raspberry Almond Bars
Adapted from Food and Wine
Makes 2-3 dozen bars

The original recipe calls for one stick of butter and one stick of margarine.  I couldn’t justify buying margarine for the sole purpose of this recipe (I don’t use it for anything else), so I just used 2 sticks of butter.  The crust may have been less crisp, but it was delightfully tasty.

2 sticks (8 ounces)  unsalted butter, softened, plus 3 tbsp. melted
1 1/2 cups flour
1 cup confectioner’s sugar
3/4 cup seedless raspberry jam
3 cups sliced natural almonds (about 3/4 pound)
1/2 cup light brown sugar
1/2 cup granulated sugar
2 large eggs, lightly beaten
1 tsp. vanilla extract
1 tsp. almond extract

1.  Preheat the oven to 350 degrees.  Lightly butter a 9-by-13-inch baking pan.  In a standing mixer, beat the softened butter until smooth.  Add the flour and confectioner’s sugar and beat on low speed until combined.  Pat the dough evenly in the bottom of the pan and bake in the middle of the oven for about 30 minutes, or until golden.  Let cool slightly, the spread with the jam.  Leave the oven on.

2.  Toast the almonds for 7-8 minutes, or until golden and fragrant.  Let cool.

3.  In a medium bowl, whisk the brown and granulated sugars with the melted butter, eggs and vanilla and almond extracts until smooth;  fold in the almonds.  Spread the topping over the jam in an even layer.  Bake for about 25 minutes, or until set and golden.  Let cool completely in the pan.  Using a sharp knife, cut into 24 or 36 bars depending on your size preference.


Peanut Butter Cup Brownies

May 13, 2009

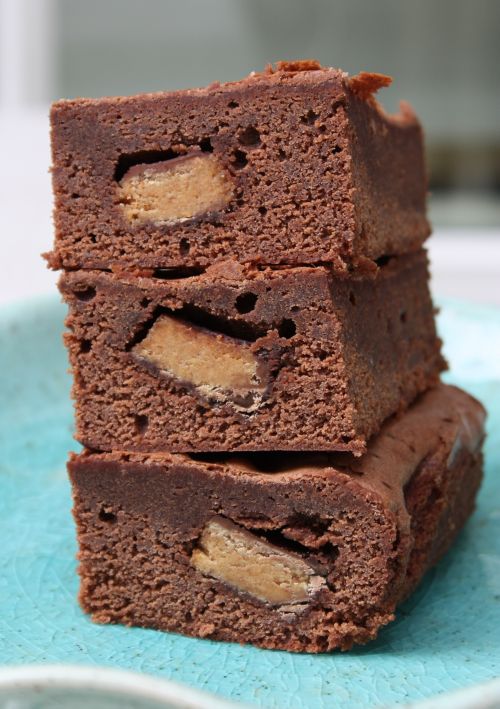
img_2239

Sometimes old recipes just pop into my head.  I’ve been cooking and baking a long time and many of the recipes I used in the beginning of my journey have fallen by the wayside.  Things that once seemed complicated that are now too easy, or things that just didn’t turn out at all.

I would guess the first time I made these brownies was about 12 years ago.  My friends tease me that I have an amazing memory for dates and I have to say that it’s true.  I just remember what was going on in my life and can attach the year and time of year to it.  In this case, I was married to my first husband (we split in 1999) and we were heading off for a camping trip with some friends.  If  I was camping in the Seattle area, then it must have been July or August and I assume that it was 1997 because in the summer of 1996 we had just gotten married, and in the summer of 1998, things were already in a serious downward spiral.  So there you go, 12 years ago.  See how my brain works?

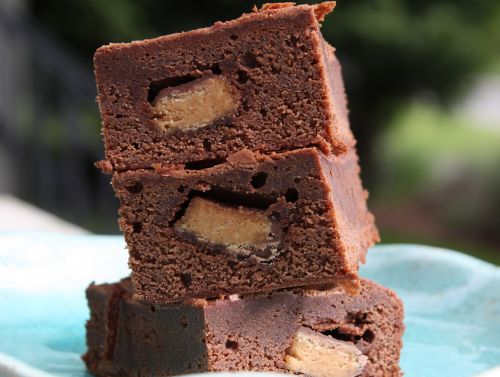
img_2244

Anyway, I think the brownies stuck out in my mind because a) they were really special (who doesn’t love biting into a brownie and finding a Reese’s peanut butter cup in there?) and b) things were already not feeling right in my marriage.  I went with it for a while and then decided not to and we split.  If I make it sound like it all was neat and tidy, please know that it was not.  It was messy and heartbreaking but it is the 4th best thing that I have done in my adult life – the first being marrying Randy, the second being having my first son, and the third being having my second son.  Got that?

Since that time 12 years ago, I have made these brownies several times, but not recently.  This was one of those recipes that just fell by the wayside as I got seduced by other bars involving chocolate.  But I thought of them the other day when I got word that a good friend of mine had a baby girl.

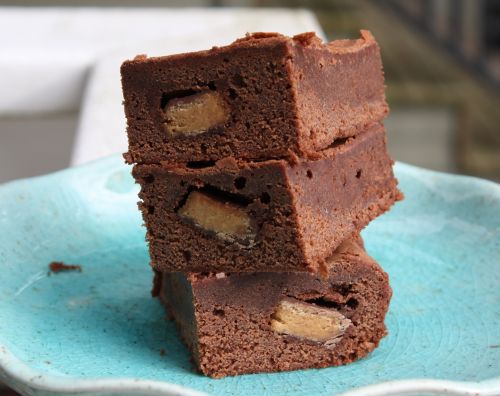
When both my boys were in their first few months of infancy, I absolutely had to have chocolate.  Given my professed love for chocolate, this may not seem strange, but it wasn’t something I wanted.  It was something I needed.  Brownies were the perfect thing for me because they packed a lot of chocolate into each bite and they could be held in my hand – something a nursing mother can appreciate.  I decided to make these for my friend because she shares the need for chocolate when caring for a newborn.  She also has two other little ones who I think will appreciate the Reese’s peanut butter cups.

img_2247

One Year Ago:  Beet Salad with Greens, Green Beans, and Lemon Honey Vinaigrette

Fudgy Peanut Butter Cup Brownies
Adapted from the Godiva web site (long ago)
Makes 16-24 brownies

I was unable to find mini-Reese’s this time, so I just cut 4 full size ones into quarters.  I cut my brownies larger and got 16 but you could cut them very small and get 24.

12 tbsp. (1 1/2 sticks) unsalted butter, cut into tablespoons
12 oz. semisweet chocolate, coarsely chopped
6 large eggs, at room temperature
1 3/4 cup granulated sugar
2 tsp. vanilla extract
1 1/2 cups flour
1/4 tsp. salt
24 miniature chocolate covered peanut butter cups (such as Reese’s)

1.  Position a rack in the center of the oven and preheat to 350 degrees.  Line a 13-by-9 inch baking pan with aluminum foil so that the foil extends 2 inches beyond the long sides of the pan.

2.  Melt the butter and chocolate in a double boiler, or in a heatproof bowl set over simmering water (be sure the bottom of the bowl doesn’t touch the water.)  Cool until tepid.

3.  In a medium bowl, using a wire whisk, beat the eggs until foamy.  (DT:  I used my mixer with the whisk attachment for this part.)  Add the sugar and beat until blended.  Add the cooled chocolate mixture and mix until smooth.  Stir in the vanilla.  Stir in the flour and salt until well combined.

4.  Scrape half the batter into the prepared pan and smooth the top with a rubber spatula.  Arrange the peanut butter cups evenly over the batter, in four rows of six cups each.  Press down lightly on cups.  Pour the remaining batter into the pan and carefully spread level over the peanut butter cups.  Bake the brownies for 25-30 minutes, until a toothpick inserted in to the center comes out with a few moist crumbs clinging to it.

5.  Cool the brownies completely in the pan set on a wire rack.  Using the two ends of the foil as handles, lift the brownies out of the pan.  Cover with plastic wrap and refrigerate at least four hour or overnight.


Mexican Brownies

May 4, 2009

img_2082

To tell you the truth, I’m not sure why these are called Mexican Brownies.  As I’m sure we all know, Cinco de Mayo is coming up tomorrow which also happens to be my client day.  I am making (what else?) Mexican food and I wanted the “treat” to fit in with the theme.  A quick search on Epicurious brought me here.

img_2078

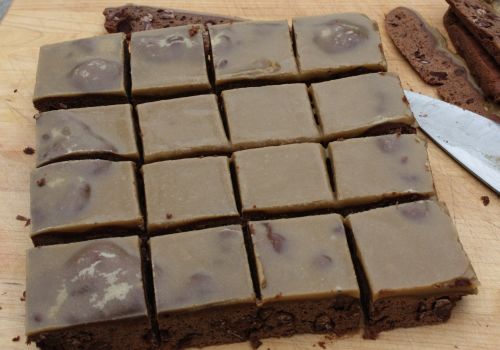
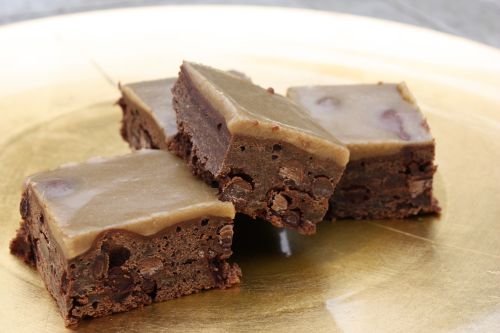
I know Mexican chocolate has cinnamon in it and this brownie batter calls for a whopping tablespoon of the stuff.  I don’t know what the topping contributes to making them Mexican.  I remember reading that Latin America likes it’s desserts really sweet (how about that for a gross generalization?), and if that is true, these should please a Latin American palate.  They are very sweet.  Kind of like brown sugar fudge on top of a cinnamon-y brownie.

You could, of course, leave off the topping all together and have a very tasty (and incredibly easy) bar.  I like sweet things but this was a little much for me.  I’ll let Randy and the boys eat these and I will turn my attention to the slices of 6 layer chocolate cake that my neighbor brought over.

I made a few changes here.  After reading some of the comments following the recipe, I bumped up the amount of cinnamon from 1 tablespoon to 1 1/2.  I also added semi-sweet chocolate chips instead of milk chocolate because I could sense these were going to be super sweet as it was.  Also, I opted to leave the sliced almond topping out, because I don’t think chocolate and nuts belong together.

img_2083

Mexican Brownies
Adapted from Bon Appétit
Makes 16

For brownies
4 oz. unsweetened chocolate, chopped
1/2 cup (1 stick) unsalted butter
1 1/4 cups (packed) golden brown sugar
1 1/2 tbsp. ground cinnamon
1/4 tsp. salt
3 large eggs
1 tsp. vanilla extract
3/4 cup flour
1 cup semi-sweet chocolate chips (about 6 ounces)

For brown sugar topping
1 cup (packed) golden brown sugar
1/4 cup whipping cream
1 tbsp. unsalted butter
3/4 tbsp. vanilla extract

Make brownies:

Preheat oven to 325 degrees.  Line 8-inch square baking pan with foil, extending foil over sides.  Stir unsweetened chocolate and butter in heavy large saucepan over low heat until melted and smooth.  Cool 5 minutes.  Whisk in sugar, cinnamon, and salt.  Whisk in eggs, 1 at a time, then vanilla.  Continue to whisk until batter is smooth, about 2 minutes.  Add flour and whisk just until blended.  Stir in chocolate chips.  Pour batter into prepared pan, smoothing surface.  Bake until tester inserted into center comes out with a few moist crumbs attached, about 30 minutes.  Cool completely in pan on rack.

Make topping:

Whisk suar, cream and butter in heavy small saucepan over low heat until mixture is smooth and comes to boil.  Remove from heat; mix in vanilla.  Cool 10 minutes.  Whisk and then allow to come to a thick enough texture to spread, whisking occasionally.  Spread over brownie.  Let stand until topping sets, about 1 hour.  (Can be made 1 day ahead.  Cover and refrigerate.)

Using foil as aid, lift brownie from pan.  Cut brownie into 16 squares.  Serve cold or at room temperature.


Fair Warning

January 23, 2009

(Note: There are some who think that one should only write about successes in a food blog. I think it humanizes us all to read about occasional failures especially if tips are given on how to succeed next time.)

If you yourself write a food blog, or if you read a fair number of them, you will have noticed that there are certain trends that bounce around the blogosphere. One is the no-knead bread that I still haven’t made, another is the chocolate chip cookie recipe that appeared in the NY Times this past summer. Recently, it seems that everyone is enamored with the Baked cookbook. One of my favorite blogs, Smitten Kitchen, has been raving about this book since before it actually came out so, of course, I bought it.

It is a very cool book. Terrific photography and very interesting and different recipes. I have a lot of baking books and whenever I open a prospective purchase, something has to really catch my eye. I have lots of recipes for chocolate cakes and chocolate chip cookies and gingerbread in my 20-something baking books so I want to see something new and different. Baked has some things I never thought of (pumpkin whoopie pies anyone?) and some classics done with a twist.

I now have made three things from it and I have to say I am, um, underwhelmed. I know three recipes does not a cookbook review make, but I am feeling a little bummed by the book. The whoopie pies were great and my clients loved them, but the proportions of the recipe were totally off (for me anyway.) I also made their Chocolate Pecan Pie for Thanksgiving and was just not happy about how it turned out, although my brother Michael (a pecan pie lover) thought it was great. And now these bars.

First let me say that I LOVE lemon bars. For a chocolate and caramel lover that is saying something. My go-to recipe is actually from the Betty Crocker cookbook. It is totally no frills and for that reason it is perfect. The Baked recipe caught my eye because the bars masquerade as lemon bars but are actually much more sophisticated. The crust, instead of being more or less shortbread, is made from graham cracker crumbs, butter, sugar, and toasted coconut. The filling is a lemon and lime curd with lots of fresh juice and zest. I thought I would knock it out of the park with this one because almost everyone I know loves lemon bars.

Let me just detail out the dishes involved in making these little guys:

Food processor for grinding graham crackers
Small saucepan for melting butter

Baking sheet for toasting coconut

Reamer for juicing lemons and limes

Zester for zesting lemons and limes

Large saucepan for mixing curd

Whisk for mixing curd

Fine mesh strainer for straining curd

Knife for slicing bars

Spatula for excavating bars

Pan bars were made in

Now, I recognize that dishes are a necessary evil of cooking and especially baking. I curse them while I do them but when the end result is delicious, I forget about them. Here is what I thought about the end result here…

The first problem is that I couldn’t get them out of the pan in time to bring them to my Tuesday clients. The recipe says that you need to refrigerate them at least 2 hours, which I did, but even then the filling was so mushy and the crust was firmly cemented to the pan (in spite of the fact that I buttered it well.) So I waited a fully 24 hours before I tried again to pry out a square and had to sacrifice 3 other innocent squares to get my photo candidate out. One of those, of course, had to be tasted and boy oh boy were they SWEET! Between the coconut and the graham crackers in the crust and the almost 2 cups of sugar in the curd – they made my teeth ache.

So, no thank you Baked. I am going to stick with Betty Crocker on this one. If you have the Baked cookbook and are dying to try their recipe (after the above rousing endorsement), here are some things I would suggest. Bake the crust until it is starting to brown – I may have pulled mine out too soon which resulted in it not releasing from the pan. Add a little less sugar to the curd – maybe just 1 1/2 cups. The crust is plenty sweet so if the curd is a little sour, it will balance better. And finally, refrigerate these (after they have cooled) at least 24 hours and preferably 48. The crust may get a tad soggy but you will be able to get them out of the pan. Be sure to use a very thin metal spatula to lift them out or you will lose half your crust.

Or, you can just save yourself heartache and many dishes and make the alternative recipe below.

Lemon Bars
Adapted from The Betty Crocker Cookbook

Makes 16 small bars

1 cup flour
1/2 cup butter, softened

1/4 cup powdered sugar

2 eggs

1 cup granulated sugar

1/2 tsp. baking powder

1/4 tsp. salt

2 tbsp. lemon juice

Preheat oven to 350 degrees. Mix flour, butter, and powdered sugar in an electric mixer until the dough starts to come together. Press into
an ungreased 8 x 8 inch pan, building up an edge. Bake 20 minutes, until light brown.

Wipe out bowl. Beat remaining ingredients for 3 minutes until light and fluffy. Pour over hot crust. Bake another 25 minutes longer, or just until no imprint remains when touched lightly in center. Allow to cool completely, then sprinkle with powdered sugar and cut into squares.


« Older Posts Newer Posts »