Category: Baked Goods

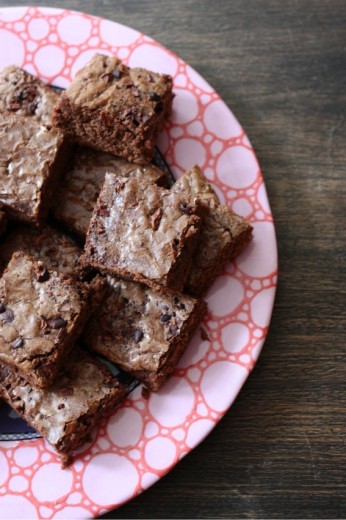
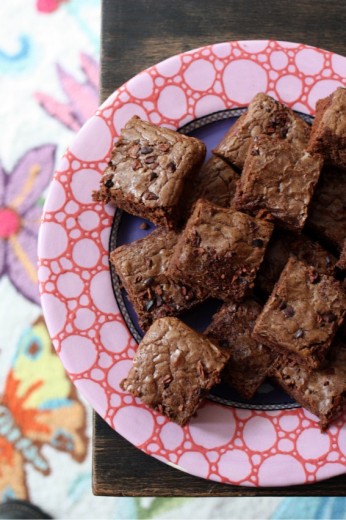
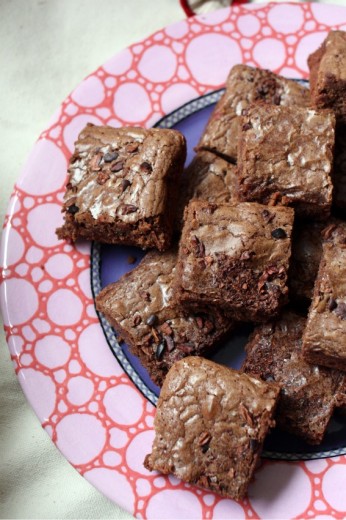
Brownies for the Adults

October 7, 2011

Let me get this out of the way.  These are not pot brownies.  I have not made or eaten pot brownies.  Not that there is anything wrong with pot brownies – they are just really not my thing.  I have to say that because I bet there is at least one person out there who sees “brownies for adults” and assumes they must have weed in them.

And here, rather than just tell you why I think these brownies are for adults (cocoa nibs!  but my kids loved them too!) and why I liked them very much although they are quite different from my favorite (cakier!  less intense!), and why I made them (yoga retreat!), I have to tell you about my dad.

My dad is a retired oncologist.  He spent 30-something years treating people with cancer and doing so with kindness and empathy.  The man who would famously tell his kids and wife, sort of jokingly, “Take 2 aspirin and call me in the morning” when one of us was sick, was the most compassionate kind of doctor.  I know because he really is a compassionate dad and I also know because every single person I have ever met who was either in his care or had a family member in his care, practically swoons at the mention of his name.  Nurses too.  And nurses know.

One Wednesday this past summer, I brought my parents to our neighborhood farmers’ market along with the boys.  It is something we like to do together when the timing is right.  Outside, a man was gathering signatures to introduce a measure to legalize medical marijuana in Washington state.  My dad stopped, broke away from us, and went over to sign the ballot.  He is not the ballot-signing type so I was surprised.  I know his views on drugs are more liberal than the average 68 year old but still.  I asked why he felt so strongly.  I asked if he thought that pot does actually help people who are nauseated by chemotherapy.  He said, “Not at all.  Medically, I don’t think it helps.  But if someone has cancer and is that ill, and their immune system is compromised and their hair is falling out and they can’t eat because everything nauseates them, and they think that the pot helps?  Then they should be able to smoke all they want.”  Go Dad.

So yes, I know that this is a bit of a stretch – brownies with cocoa nibs to pot to my dad and ballot measures, but sometimes stories just must be told.

Onward!  I have a lot of brownie recipes here at Dana Treat.  As a chocoholic, I consider brownies a perfect treat.  And because I love chocolate, my perfect brownie is dark, dense, and intense.  But sometimes it is nice to have a brownie that is more like a little piece of cake than a piece of fudge and that is where this guy comes in.  It is not a wimpy brownie, I would say it’s very pleasant.  Well-behaved.  Slightly elegant but also quirky with a bit of crunch.  If you have not tasted cocoa nibs before, they can fool you a bit.  For me, in the first second, I taste chocolate, then coffee, then a bit of bitter.  I like chocolate chips in brownies because I like the break in texture from smooth and rich.  But sometimes some less sweet, less chocolate-y, is welcome.

One Year Ago:  Ratatouille and Mushroom and Herb Polenta
Two Years Ago:  Asian Coconut Noodle Soup and Pasta with Tomato Sauce and Arugula
Three Years Ago:  Mediterranean Five Lentil Soup

Cocoa Nib Brownies
The Modern Baker
Makes about 24 brownies

8 ounces (2 sticks) unsalted butter, cut into 12 pieces
9 ounces bittersweet (not unsweetened) chocolate, cut into ¼-inch pieces
1¼ cups dark brown sugar, firmly packed
4 large eggs
½ tsp. salt
¾ cups granulated sugar
1 tbsp. vanilla extract
1¼ cups flour
½ cup cocoa nibs

Line a 13x9x2-inch pan with foil.  Butter foil and set aside.  Set a rack in the middle level of the oven and preheat to 350ºF.

Put the cut-up butter into a medium saucepan and place over medium heat.  Let the butter melt, stirring 2 to 3 times, then allow it to bubble for about 10 seconds.  Remove the pan from the heat and add the chocolate.  Gently shake the pan to submerge the chocolate in the hot butter and set aside for a few minutes so that the chocolate melts.  Use a small whisk to mix smooth.

Place the brown sugar in the bowl of an electric mixer.  Beat in 1 egg on lowest speed using the paddle attachment.  Add the remaining eggs, one at a time, beating smooth after each.  Add the salt, sugar, and vanilla and beat smooth.

Remove the bowl from the mixer and use a large rubber spatula to mix in the chocolate and butter mixture.  Mix in the flour followed by ¼ cup of the cocoa nibs.

Scrape the batter into the prepared pan and smooth the top.  Scatter the remaining ¼ cup cocoa nibs on the batter.

Bake the brownies until they are firm, but still very moist in the center, about 30 minutes.

Cool the brownies in the pan on a rack.

Wrap the pan in plastic wrap and refrigerate the brownies for several hours or overnight before attempting to cut them – they are very moist.
Savory Muffins on a Saturday

July 17, 2011

Early Saturday morning saw me on a ferry bound for the magical island of Bainbridge and another yoga retreat with my awesome friend Jen.  We are into our third year of joining forces on these day-long celebrations and they are a true anchor of stability and centered-ness in our chaotic lives.  Forgive me if I sound a little woo-woo – I’m still coming down off the yoga high.

Memories from last year’s summer retreat include scenes from a bright sunny day – lunch outside at picnic tables and towels laid out on the grass for chatting and post-lunch snoozing in the sunshine.  This year, through the window of the yoga studio, I watched the rain drip down from the sky at approximately the same rate as the sweat dripped off my body (the morning session is hot yoga).  Summer?  What summer?  As I write it is 30 degrees cooler here than it was on the Eastern shore last week.  Sigh.

But even though the weather is not co-operating, my body is still telling me it is summer by the food that it craves.  The thermometer may say butternut squash and mushrooms, but my cravings run more along the lines of berries and salads.  So, I made salads for the retreat.  Four of them including this potato salad which got rave reviews.  I thought about doing some kind of sandwich but in the end opted for two kinds of savory baked goods.  One was a corn bread featuring a corn relish and the other was this muffin.

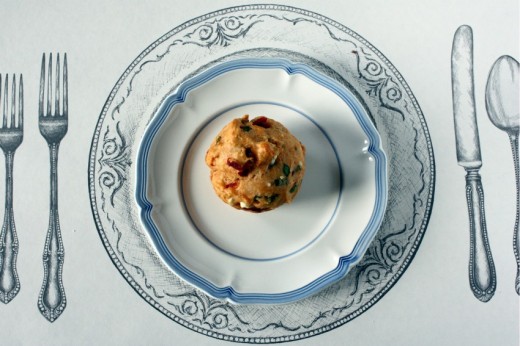
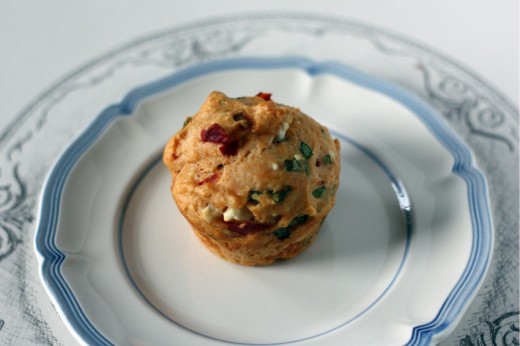
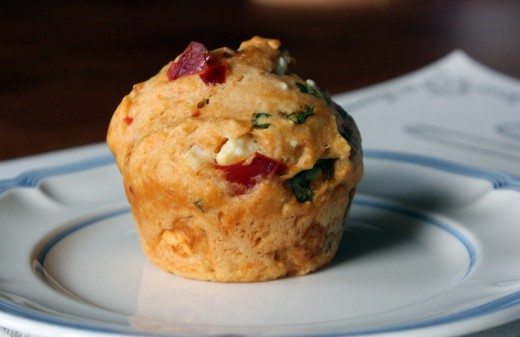
This is a Savory Spinach, Feta, and Peppadew Muffin and it was my favorite thing I made for the retreat.  Actually no, my favorite thing was the Salted Caramel Squares which I will share with you next.  But as far as savory goes, the muffins were tops.  They are easy to make, beautiful, just the tiniest bit sweet (from a bit of sugar) and the tiniest bit spicy (from the Peppadews) and they keep well overnight in the refrigerator.  I would love them alongside a bowl of soup, with a hearty salad, or all by their lonesome.

(By the way, I’m sure I’m bound to get questions about those placemats.  They are paper (recyclable!) and I got them at an adorable stationery store in our neighborhood called Paper Delights.  They come 50 to a pack and I’ve been using them for my classes.)

Peppadews Previously on Dana Treat: D’Lish Peppadew Peppers
One Year Ago: Couscous and Mograbiah with Oven-Roasted Tomatoes
Two Years Ago: Roasted Tomato and Olive Galette with Fontina
Three Years Ago: Leek Frittata

Savory Spinach, Feta, and Peppadew Muffins
Adapted from Bon Appétit
Makes 12 standard muffins

You can find Peppadew peppers in one of two places.  Either on the condiment aisle nearby the jarred roasted red peppers or on the olive bar if your grocery store has one.  I have seen them whole and sliced – either would work here since you need to chop them anyway.

Non-stick vegetable oil spray
2¾ cups all-purpose flour
¼ cup sugar
2 tsp. baking powder
½ tsp. sweet paprika
½ tsp. smoked paprika
¾ tsp. salt
¾ cup whole milk
½ cup vegetable oil
2 large eggs
1 cup thinly sliced spinach leaves
¾ cup crumbled feta cheese
½ cup drained mild Peppadew peppers or roasted red peppers, chopped

Preheat oven to 375ºF.  Spray 12 standard (1/3-cup) muffin cups with nonstick spray.  Whisk flour, sugar, baking powder, both paprikas, and salt in medium bowl.  Whisk milk, oil, and eggs in large bowl to blend.  Add dry ingredients; whisk just until blended.  Add spinach, feta, and peppers; fold to incorporate evenly.  Divide batter among prepared muffin cups (cups will be filled to top).

Bake muffins until tester inserted into center comes out clean, 25 to 28 minutes.  Cool 5 minutes.  Run knife around muffins to release from pan.  Invert pan to release muffins, then turn muffins right side up to cool completely.

(DT: I made these the night before, allowed them to cool completely, wrapped them, and stored them in the fridge.  I let them come to room temp before serving.)


The New Favorite Cracker

May 3, 2011

Let’s take a little quiz.  In each of the following scenarios, which would you choose?

Store-bought cracker or store-bought cookie?
Store-bought cracker or homemade cookie?
Homemade cracker or store-bought cookie?
Homemade cracker or homemade cookie?

It might surprise (shock? repulse?) you to know that I would choose the cracker.  Yes, if the store-bought cracker was nice and salty, like maybe a Triscuit, I would choose it over a homemade cookie.  What can I say – I’m a savory girl.

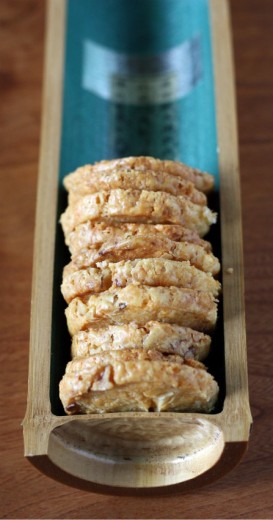
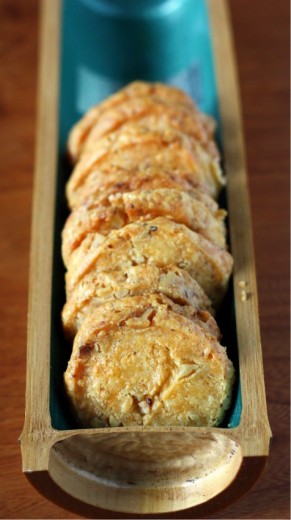
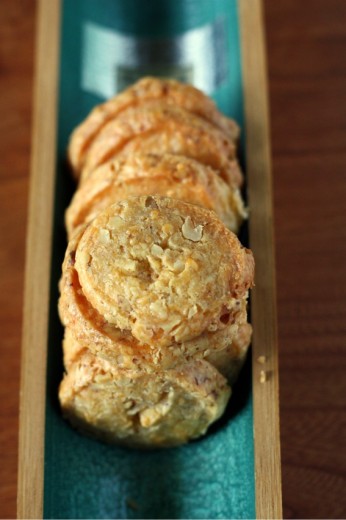
Knowing that, it probably won’t surprise you to hear that I have fallen head over heels in love with these crackers.  I have been a big fan of making my own crackers and until recently, I had my two favorites.  But move over kids, there is a new cracker in town.  I just served these to my Vegetarian Basics class last week.  One of my attendees – a good friend – suggested I call them (Crack)ers.  Has someone else copyrighted that name yet?  It’s perfect.

This is about as easy as it gets.  Soften butter, toast nuts, grate cheese, and you are basically there.  Having made them several times now, I can give you some tips.

1)  This is the time for good Cheddar cheese.  We always have some mild stuff in the cheese drawer for kids quesadillas and you probably do too.  Don’t use that cheese.  Buy something special and yummy.  It will make a difference.

2)  Chop the walnuts nice and fine.

3)  Double the recipe.  Form the dough into two logs, bake one off and wrap and freeze the other.  Tiny bit more work for double the crackers and the dough freezes beautifully.

4)  If you follow tip #3 and you use a Beater Blade for your standing mixer, switch to the metal blade.  This is a very stiff dough and when I quadrupled the recipe (what?  2 sticks and butter and 2 pounds of cheese – I’m not scared), I broke my beater blade.  You have been warned.

5)  As you are mixing in the flour, you might think to yourself, “This needs some liquid, like milk perhaps.”  It doesn’t.  (Made that mistake!)  Be patient and the dough will come together.

6)  Make sure the walnuts are distributed well throughout the dough, otherwise it can be a little tricky to get to the dough to roll out into a snake without falling apart.  Totally do-able, just a little annoying.

7)  Finally, prepare yourself for the smell coming out of your oven.  Ah-mazing!

Crackers Previously on Dana Treat: Parmesan Thyme Crackers, Rosemary Raisin Pecan Crisps
One Year Ago: Chocolate Truffles
Two Years Ago: Classic Currant Scones, Rhubarb Struesel Tart, Bean Tostadas with Sofrito

Cheddar Crackers

Tartine

I’m not giving you a yield here because it totally depends on how small your dough logs are, how thin you slice your crackers, etc.  The original recipe said you can get fifty 1-inch round crackers, but honestly I don’t see how that is possible.

¾ cup all-purpose flour
1 tsp. salt
¼ tsp. cayenne pepper
¾ tsp. freshly ground black pepper
2 1/3 cups (8 ounces) grated sharp Cheddar cheese
¼ cup (½ stick) unsalted butter, at room temperature
2/3 cup walnuts, chopped fine

In a small mixing bowl, stir together the flour, salt, cayenne pepper, and black pepper.  Set aside.  In the bowl of a stand mixer fitted with the paddle attachment, combine the cheese and butter and beat on medium speed until combined.  Add the flour mixture and beat on low speed until incorporated.  Stop the mixer and scrape down the sides of the bowl with a rubber spatula.  Mix in the walnuts on low speed.  The dough should be fairly stiff with small chunks of cheese and walnut visible.

Transfer the dough to parchment paper, waxed paper, or plastic wrap and shape into a log about 1-inch in diameter.  (DT: I found it difficult to get the dough this small, so my crackers were bigger.  Darn.)  Wrap well and place in the refrigerator until hard, about 2 hours.

Preheat the oven to 400ºF.  Line a baking sheet with parchment paper or a non-stick liner.

Unwrap the log and cut crosswise into ¼-inch thick slices.  Arrange the crackers on the prepared pan, spacing them apart about 1 inch.

Bake the crackers until golden brown on the edges and lighter in the center, 7 to 10 minutes, depending on size and thickness.  Transfer to a wire rack and let cool completely.  The crackers will keep in an airtight container in cool dry place for up to 2 weeks.


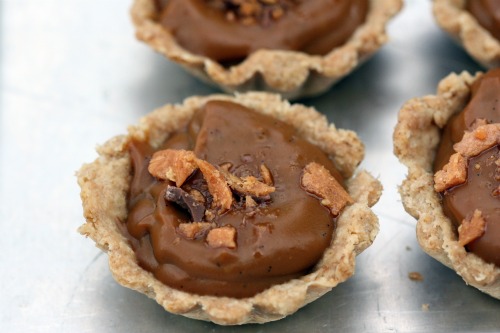
Butterscotch Pudding Tarts

April 20, 2011

Remember Snack Pack pudding?  I guess that question isn’t a huge stretch because it is still around.  The packaging looks nothing like it did when it sat in my Donny and Marie lunchbox, just waiting to be eaten with a plastic spoon.  I thought that pudding, chocolate flavor only please, was the best thing about  bringing lunch to school.  I didn’t get it every day but it was a happy day when I did.

Graham, my kindergartner, has never heard of Snack Pack pudding and I’m pretty sure, up until recently, he had never had pudding at all.  In case you think that is because I don’t give him sweets, or I only give him whole grain treats or even just homemade treats, you would be mistaken.  I am liberal with my sweet giving.  This is another post for another time, but suffice it to say that while I prefer him to eat things that I have made, the lure of Halloween/Valentine’s Day/Easter candy can be great.  I do try to draw the line at certain things (which would probably seem arbitrary to a more strict mother), and pudding that does not have to be refrigerated and is full of things I can’t pronounce is one of those lines.

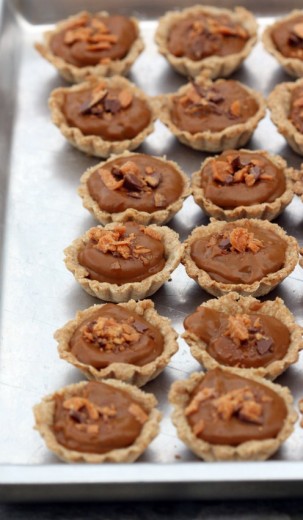
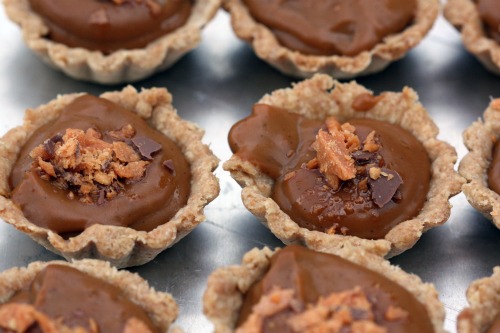
While pudding is not a dessert that pops into my mind with any regularity, it certainly has its place.  Comfort food at its most comfortable.  And how about if the pudding is butterscotch and sitting inside a tart shell?  Mini tart shells?  Not long ago, I purchased 24 mini tart pans.  At 79 cents a pop this was not a huge investment.  And they have allowed me to make super cute appetizers and desserts.  I had no problem getting 24 rounds of dough out of the recipe and I actually had some pudding left over once they were all filled.  I filled two small bowls with the butterscotch pudding and gave it to my boys.  Neither of them liked it.

By the way, who was on your favorite lunchbox?

One Year Ago:  Zucchini and Olive Salad
Two Years Ago:  Mississippi Mud Cupcakes

Butterscotch Pudding Tarts
Baked
Makes 8 (4-inch) tarts or 24 mini tarts

Below is the recipe as written for the larger tarts.

For the oat wheat pie crust
1 cup rolled oats
½ cup whole wheat flour
1 cup all-purpose flour
¼ cup firmly packed dark brown sugar
½ tsp. salt
¾ cup (½ stick) cold, unsalted butter, cut into cubes
¼ cup milk

For the butterscotch pudding
6 large egg yolks
¾ cup granulated sugar
¼ cup heavy cream
½ cup firmly packed dark brown sugar
1/3 cup cornstarch, sifted
1 tsp. salt
3 cups whole milk
1 vanilla bean
1 tbsp. unsalted butter
2 tbsp. whiskey

To assemble
1 Butterfinger candy bar, broken into small pieces

Make the oat wheat pie crust
Put the rolled oats in a food processor and process for about 30 seconds, until ground but not powdered.  Add the flours, brown sugar, and salt and pulse until combined.

Add the butter and pulse until the butter pieces are small and the dough looks crumbly, like coarse sand.  Add the milk and pulse for a few seconds..

Scoop the dough out of the food processor and form it into a large disk.  Wrap tightly in plastic and refrigerate for at least 1 hour and up to 3 hours.

Dust a work surface with a sprinkling of flour.  Unwrap the disk of chilled dough and put it directly on the work surface.  Cut the dough into eight equal pieces, about 2 ounces each, and gently shape each piece into a smooth disk.  The dough will be sticky.  Make sure to turn the dough over (use a spatula or a bench knife) as needed and keep the working surface floured.  Put the dough disks in the refrigerator for 10 minutes.

Using a rolling pin, roll each dough ball into a 6-inch round just over 1/8-inch thick.  Place a round over a 4-inch tart pan and very gently press the dough into the pan.  Roll the rolling pin over the pan to trim off excess.  Repeat with the remaining dough rounds.

Preheat the oven to 325ºF.  Put the tarts pans in the freezer for 30 minutes.

Remove the tarts pans from the freezer and arrange on a baking sheet and gently prick the dough with a fork.  Bake on the baking sheet until golden brown, 12 to 15 minutes, rotating the baking sheet halfway through the baking time.  Transfer the tart pans to wire racks and let cool completely.

Make the butterscotch pudding
Put the egg yolks in a large heatproof bowl and set aside.  (DT: I find it helpful here to put a damp paper towel under the bowl with the yolks.  That way, when you go to whisk it later, the bowl stays still on your counter.  I do the same thing when making ice cream.)

In a small saucepan, combine the granulated sugar and ¼ cup water and stir gently with a heatproof spatula; do not splash the sides of the pan.  Cook over medium heat until the sugar is dissolved, then increase the heat to medium-high and cook until the mixture begins to turn a dark amber color.  Swirl the pan, if necessary, to create an even color, but do not stir.  Remove from the heat, let stand for 1 minute, then use the heatproof spatula to stir in the cream.  Pour the caramel into a small bowl.  Set aside.

In another small saucepan, combine the brown sugar, cornstarch, and salt.  Stir in the milk and whisk to combine.

Cut the vanilla bean in half lengthwise, and, using the tip of the knife or a small teaspoon, scrape the seeds into the saucepan with the milk.  Add the vanilla bean to the milk as well.  Cook over medium-high heat, whisking occasionally, until the mixture comes to a boil.  Remove from heat and add the caramel.  Whisk together until combined, then pour one third of the mixture over the eggs.  Keep whisking the egg mixture and add another third of the hot milk mixture.  Transfer the egg mixture back to the saucepan with the milk mixture and, whisking constantly, bring to a boil over medium-high heat.  Boil for 2 to 3 minutes, or until very thick.

Remove from the heat and add the butter and whiskey.  Keep whisking vigorously for about 1 minute to cool the pudding slightly.  Let the pudding sit for about 15 minutes, then remove the vanilla bean.

Assemble the tarts
Whisk the pudding one more time until smooth.  Divide the pudding equally among the tart shells and sprinkle the crumbled candy bar over the pudding.  Cover the tarts with plastic wrap and put the in the refrigerator for about 2 hours before serving.

The tarts can be stored, tightly covered, in the refrigerator for up to 2 days.


Date Bars Gone Bad, Or Maybe Not

March 22, 2011

You know what I hate?  Poorly written recipes.  You know what else I hate?  Wasting quality ingredients.  Which is why I will never make these bars again.*

In searching fora different book, I came across my copy of Sticky, Chewy, Messy, Gooey.  I wondered, “Why haven’t I been using this book more?”  Now I know.  First there was the unclear directions about refrigerating the dough and then there was the fact that there was a full third too much of that dough.  I essentially threw out 10 tablespoons of butter.  Add to that the fact that the final baking time was off.  Way off.  Like the recipe said the bars would be done at 30 minutes.  Mine were done at 60.  I understand accommodating for oven differences and add 10 minutes here and there.  But double the amount of time?  Did anyone test this recipe?

This was the weekly treat and I’m sure the crew will enjoy them and might even request the recipe.  But my math skills would need to be much better in order to tell you how to either successfully cut the recipe for the dough by a third, or to increase the amount of date filling for an additional set of bars in a smaller pan to accommodate the leftover dough.  Ahem.  Too. Much. Trouble.

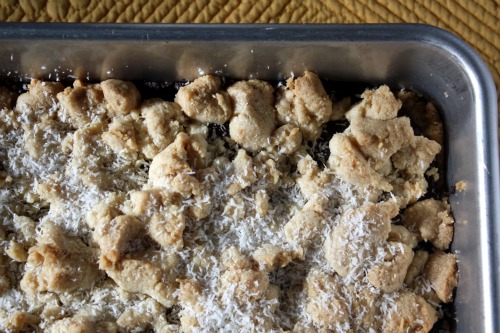
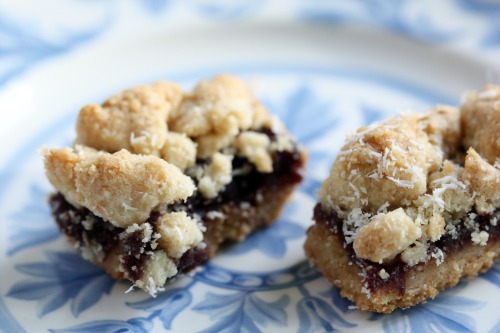
*But here is the thing.  I wrote the above paragraphs as I was checking the pan in the oven and while I was waiting for the bars to cool.  I was fully prepared to hate them.  I sheepishly have to tell you they are delicious.  A totally wonky, poorly written, proportionately-off delicious recipe.  What do you do with that?

I’m going to give you the recipe as written.  If one of you out there in Internet land can figure out a better way to make these bars, of if one of you makes them successfully using this recipe as written, will you let me know?  Please and thank you.

(UPDATE: I just want to clarify that the book in question is Sticky, Chewy, Messy, Gooey by Jill O’Connor – NOT Chewy, Gooey, Crispy, Crunchy.  The latter is the most recent book by Alice Medrich and has been celebrated by everyone who has used it.  Note to self: do not use a four adjective title for any future cookbooks.)

One Year Ago: Baked Pasta with Tomatoes and Mozzarella
Two Years Ago: Pasta with Roasted Cauliflower and Parsley Pesto

Chewy Date Bars
Sticky, Chewy, Messy, Gooey
Makes 24 bars

A couple of hints.  I was not clear on whether I was supposed to refrigerate the dough pressed into the pan as well as the topping dough.  I did just to be safe.  You will need a stand mixer for the dough.  I have the “professional” size Kitchen Aid and it struggled.  Do not attempt to mix it on medium.

1 pound (4 sticks) unsalted butter, at room temperature
1 cup granulated sugar
1½ cups confectioners’ sugar
2 tsp. vanilla extract
1½ tsp. salt
4 cups all-purpose flour
2 tsp. baking powder
1 1/3 cups desiccated coconut

For the date filling
1 pound dates, preferably Medjool, pitted and coarsely chopped
1½ cups water
¼ cup granulated sugar

Combine the butter and sugars in a large bowl.  With an electric mixer set at medium speed, beat the butter and sugars together until creamy.  Add the vanilla and salt and beat to combine.  Beat in the flour, baking powder, and 1 cup of the coconut just until a soft dough forms.

Spray a 9-by-13-inch pan with nonstick cooking spray.  Press one-third of the dough into the pan to form a bottom crust.  Wrap the remaining dough in plastic wrap and refrigerate until firm, at least 30 minutes.

Meanwhile, make the filling.  Combine the dates, water, and granulated sugar in a heavy-bottomed saucepan over medium heat.  Cover the pan and cook the dates, stirring occasionally, until they are very soft and have turned into a glossy brown mass, 10 to 15 minutes.  There still may be chunks of dates in the mixture.  Remove from the heat and let cool slightly.  Transfer the date mixture to a food processor fitted with a metal blade and, using short pulses, grind the dates to a fine paste.

Position a rack in the middle of the oven and preheat to 325ºF.  Bake the bottom crust until firm and just beginning to turn golden around the edges of the pan, 20 to 25 minutes.  Let cool slightly.  Spread the date filling evenly over the crust.  Crumble the remaining dough over the date filling to form a pebbly, crumbled topping.

Return the pan to the oven and continue baking until the topping is firm and crisp and just beginning to color, about 30 minutes.  Remove the pan from the oven and sprinkle with the remaining 1/3 cup coconut.  Let cool to room temperature on a wire rack.  Using a sharp knife, cut into 24 bars.


« Older Posts Newer Posts »