Category: Appetizer

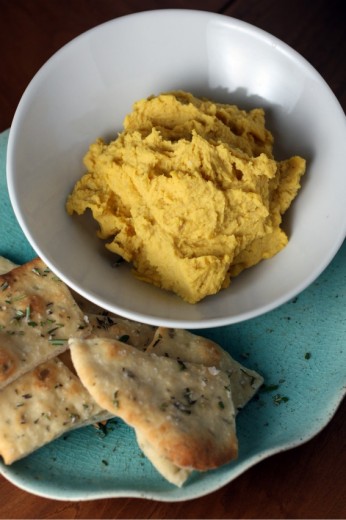
Squash Hummus and Homemade Flatbread

November 16, 2011

If you have been reading here for any time at all, then you know I have two children.  Boys.  First grade and pre-K.  If you have been reading for a bit of time, you might know that those two boys are vegetarian.  Like me.  I’m sure they will eat meat at some point but for now, I am the cook in the family and I only cook vegetarian.  And to keep things uncomplicated and black and white, the boys are veg.

What you may not know is that my boys, the ones who are, ahem, vegetarians, don’t really eat vegetables.  Not for lack of trying.  We offer, they decline.  They like carrots and will eat an alarming amount of celery if it has peanut butter and raisins on it, but that is pretty much it.  And actually, I really should say that Graham (older) will eat broccoli and peas but Spencer (younger, pickier) will not.  We went to a friends’ house recently and they served the boys peas and Spencer put one in his mouth at a time and washed it down with a gulp of milk.  Just like he was taking a pill.

Do I worry about this lack of vegetable eating?  No.  I remember my pediatrician saying that ideally a child eats both fruits and vegetables but as long as they eat one or the other, there is no need to worry.  Considering that my boys eat fruit at all three meals and sometimes for a snack, and considering that I prefer not to worry if worrying is not necessary, I don’t worry.  I also don’t believe in hiding vegetables to try and trick my kids into eating them.  If I put a vegetable in something, like this mac and cheese, I tell them it’s there.

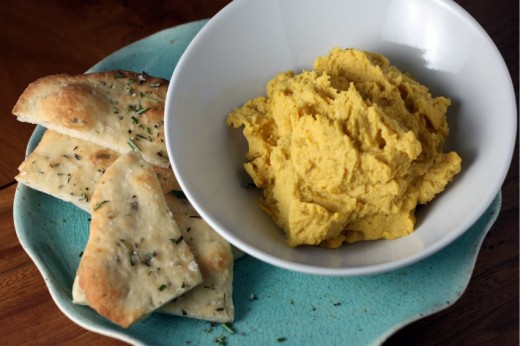
So last night, I made squash hummus.  My timing was good – Graham’s school is starting a new program where each grade works with a certain vegetable and the rest of the school has an assignment to actually eat that vegetable.  This week it is squash.   He was actually assigned to eat squash.  He was telling me this as I was literally taking it of the oven and he looked at me with that sweet almost 7 year-old wonder of, “My mom is magic!”

Normally, I would have to say I’m a hummus purist.  Hummus is chickpeas, tahini, lemon juice, a small clove of garlic, salt, pepper, olive oil, and maybe a sprinkle of cumin.  That is how I make it, that is how I like it.  Calling something that does not have chickpeas or tahini in it “hummus” bothers me.  But adding something, a vegetable I happen to love, to hummus can still be called hummus, according to the Dana Treat rules.

So how was it?  Good.  Sweeter and more yellow than my regular hummus.  Thicker too.  Most importantly, my kids loved it.  I called it squash hummus – there was no trickery going on here.  Spencer requested that I keep his squash separate and when I told him that was impossible, he just dug in anyway.  I was helped by the fact that I made flatbreads to go with it which fascinated the boys.  They scooped, ate, and scooped again.  The other boy in my family – that would be my husband – was equally smitten with both the flatbreads and the hummus, the latter of which he started eating with a spoon when the bread ran out.

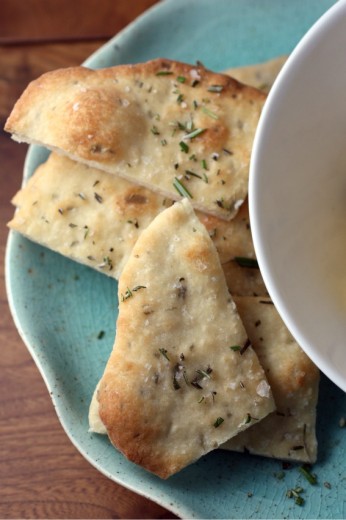
Two notes.  The hummus recipe calls for a 2/3 pound butternut squash.  I know we live in squash country and they grow nice and big in our climate, but I have never seen anything close to a squash that small.  In many grocery stores, they sell pre-cut and seeded chunks of squash which is what I bought.  It doesn’t matter what type it is.  And if you suffer from yeast/dough fear, this flatbread is a great place to start.  It is foolproof and if you roll it into shapes that are other than circles, it will look extra cool.


Squash Hummus
Adapted from Fresh from the Garden
Makes about 3 cups

All food should be done to your taste but I think this is especially true of things like hummus and salad dressing.  Start with this recipe and then add more olive oil (or more water) if you want a looser consistency and be sure to add more salt if it needs it.  I added a bit more lemon juice to mine too.

1 small squash (about 2/3 pound)
1 15-ounce can chickpeas, rinsed and drained
1 small garlic clove, minced
2 tbsp. tahini paste
Juice of 1 lemon
2 tbsp. olive oil
2 tbsp. water
Sea salt and coarsely ground black pepper

Preheat the oven to 375ºF.  Cut the squash in half and scrape out the seeds.  Drizzle the cut surfaces with olive oil, then wrap it in foil.  Bake for about an hour – until a knife easily pierces the flesh.  Set aside to cool enough to handle.

Scrape out the squash flesh into the bowl of a food processor fitted with the steel blade.  Add the chickpeas, garlic, tahini, lemon juice, a large pinch of salt and a few grinds of pepper.  Pulse to combine.  With the machine on, pour the olive oil and then the water through the feed tube.  Stop and scrape down the sides, then continue to process until you have a nice smooth consistency.  Adjust the seasoning to your taste.

Rosemary Flatbread
Makes 6 medium-sized breads

I make bread often and it is rare, unless I am making the no-knead version, to have the dough actually double in size in a short period of time.  Don’t worry about it, just continue with the recipe.

1½ cups all-purpose flour
½ tsp. dried yeast
2 tbsp. fresh rosemary, finely chopped, plus extra for topping
1 tbsp. olive oil plus extra for brushing
Sea salt

Place the flour in a medium bowl and add the yeast.  Add 2/3 cup tepid water, the rosemary, olive oil, and a pinch of salt, and start mixing it all together to form a rather sloppy dough.  If your mix is too dry, add a bit more water.  If the mix is too wet, add a little more flour.

Once you have a ball of dough, take it out of the bowl and knead on a floured surface for 5 minutes, until it is elastic and slightly tacky.  Leave the dough to rest in a warm place under a damp kitchen towel for 1 hour; until it has about doubled in size.

Preheat the oven to 400ºF.  Line two baking sheets with parchment paper.

Break off about 1/6th of the dough and, using your hands, roll it into a ball.  Place on a floured surface and roll out to a thickness of about 1/8th of an inch.  Repeat until you have used all the dough.  Transfer to the prepared sheets and brush each flatbread with olive oil.  Sprinkle with a little salt and more rosemary.

Place the sheets in the oven for 12 to 15 minutes, until the surface of the breads starts to bubble and turn golden brown.  Don’t cook them too long or they will turn into cardboard.  Serve immediately.


Stilton Tart with Cranberry Chutney

November 11, 2011

Ever since moving into my first apartment many many years ago, I have subscribed to food magazines.  The roster has changed a bit, but receiving at least one and as many as five magazines full of glossy food pages has been a constant in my cooking life.  I do love cookbooks, oh how I love cookbooks, but I also love how current magazines are and I also love the monthly inspiration.  My routine was that every couple of months, I would sit down and tear out recipes that I had flagged, then I would cut them out, then I would tape them into binders I have that are filled with almost twenty years of magazine recipes.

Then life got super super busy.  I have an over two year backlog of magazines in our bulging magazine holder and a whole other pile of recipes that are cut out but need to be taped.  Periodically I feel guilty.  So many recipes waiting to take up residence in my cute binders!  So many things waiting to be cooked!  And then the end of the day comes and I am spent and the last thing I feel like doing is dealing with my magazines.  So I put them off again.  Periodically, I think about just recycling all of those old magazines and starting fresh with the December issues.  But there are treasures in there.  Like this recipe.

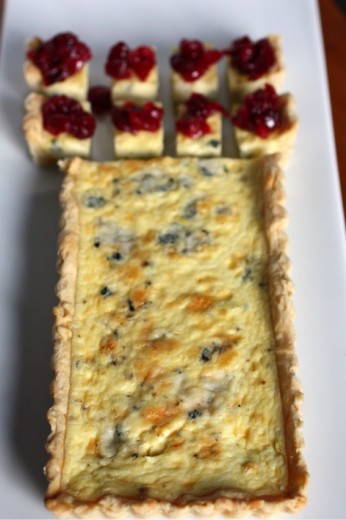
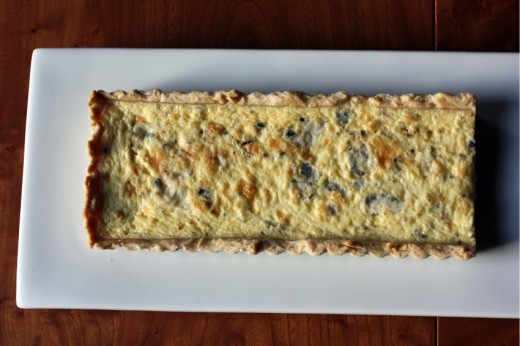
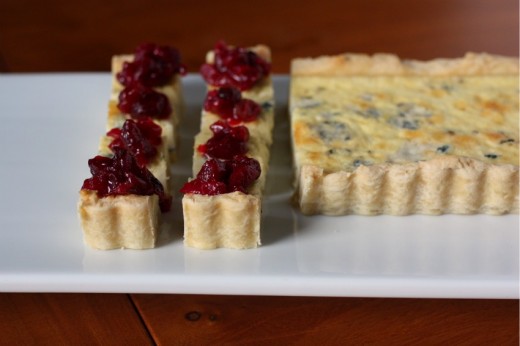
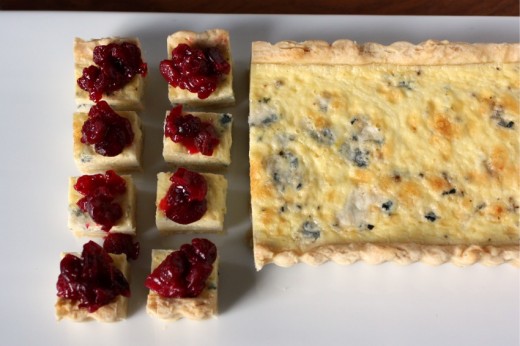
I cut this out years ago, the actual recipe is from Gourmet (sob!) back in 2001.  I cut out the photo as well and every time I page through the appetizer section of that binder, I look at it longingly.  You see, up until recently, I did not have a rectangular tart pan.  Of course, I could have made it in a round pan but that didn’t seem right to me.  I wanted to serve it in little bites, just like the photo in the magazine.

Last week was the last of my catered openings at the art gallery (although I hope to do more next year).  I’ve paid off my spoons.  This opening was for Erik Hall, the gallery owner (along with his amazing wife) and an incredibly talented artist.  I have been waiting for the right excuse to make this tart ever since I bought that pan and November and an art opening seemed just right.

After gazing at the photo for so many years and cursing the fact that I did not have a rectangular pan, it might have turned out that the tart was a disappointment.  Nope.  Very easy to make, very pretty, holds well, and a terrific contrast of flavor and texture.  The crunch of the crust, the creaminess of the filling, the sharpness of the cheese, and then the sour bite of the chutney combines for a delicious bite.  I can only say this with authority because I made the tart twice.  The first time, at the gallery, it got devoured before I had a chance to try a piece.  So because I wanted to taste it, and because I wanted to share the recipe with you, and because I was smart enough to double the crust recipe, and because the chutney makes a lot, I can now say, without hesitation, Make This Tart!  It would be a beautiful way to welcome your Thanksgiving guests.  Or, if you travel by car for the holiday, you can still make it.  Just bring the tart in its pan and cut and top it at your destination.

One Year Ago:  Romaine Leaves with Caesar Dressing and a Big Crouton
Two Years Ago:  Holly B’s Gingersnap Cookies
Three Years Ago:  Bulgur and Green Lentil Salad with Chickpeas

Stilton Tart with Cranberry Chutney
Gourmet
Makes 32 appetizer portions (more if you cut the pieces larger)

For the pastry dough:
1¼ cups all-purpose flour
¾ stick (6 tablespoons) cold unsalted butter, cut into 1/2-inch cubes
2 tablespoons cold vegetable shortening
¼teaspoon salt
2 to 4 tablespoons ice water

Blend together flour, butter, shortening, and salt in a bowl with your fingertips or a pastry blender (or pulse in a food processor) just until most of mixture resembles coarse meal with small (roughly pea-size) butter and shortening lumps. Drizzle evenly with 3 tablespoons ice water and gently stir with a fork (or pulse in processor) until incorporated.

Squeeze a small handful: If it doesn’t hold together, add more ice water, 1/2 tablespoon at a time, stirring (or pulsing) until just incorporated, then test again. (If you overwork mixture, pastry will be tough.)

Turn out mixture onto a lightly floured surface and divide into 4 portions. With heel of your hand, smear each portion once or twice in a forward motion. Gather dough together with scraper and press into a ball, then flatten into a 5-inch disk. Chill dough, wrapped in plastic wrap, until firm, at least 1 hour.

For the tart:
1 recipe Pastry Dough (see above)
1 cup heavy cream
1 whole large egg
2 large egg yolks
¼ teaspoon salt
¼ teaspoon black pepper
5 oz chilled Stilton, rind removed and cheese crumbled (1½ cups)

Make tart shell:
Preheat oven to 350°F.

Roll out dough on a lightly floured surface with a floured rolling pin into a 17- by 8-inch rectangle and fit into tart pan. Trim excess dough, leaving a 1/2-inch overhang, then fold overhang inward and press against side of pan to reinforce edge. Lightly prick bottom and sides all over with a fork. Chill until firm, about 30 minutes.

Line pastry shell with foil and fill with pie weights. Bake in middle of oven 20 minutes, then carefully remove foil and weights and bake until golden, 10 to 15 minutes more. Cool shell in pan 20 minutes.

Reduce oven temperature to 325°F.

Make filling:
Whisk together cream, whole egg, yolks, salt, and pepper until combined.

Put tart shell (still in pan) on a baking sheet and scatter cheese evenly in shell. Slowly pour custard into shell and bake in middle of oven until golden around edge and custard is just set, 30 to 35 minutes. Cool tart completely in pan on a rack.

Cut tart into 32 rectangles and serve at room temperature, topped with chutney.

(Dana’s Make Ahead Tips:  You can make the pastry dough up to one month in advance, wrap it well, and freeze it.  Allow it thaw overnight in the refrigerator before using.  You can blind bake the shell earlier in the day and let it cool completely before filling and continuing to bake.  Finally, you can wrap the whole tart well, still in its pan, and refrigerate it overnight.  Allow it to come to room temperature for several hours before serving or heat it for about 10 minutes in a low oven.)

Cranberry Chutney
Makes about 2 cups

You will have more chutney than you need for this recipe but it’s delicious and it keeps well.

2 large shallots (3 oz), coarsely chopped
1 tablespoon vegetable oil
1 (12-oz) bag fresh or frozen cranberries (not thawed)
2/3 cup sugar
3 tablespoons cider vinegar
1 teaspoon minced garlic
1 teaspoon minced peeled fresh ginger
½ teaspoon salt
1/8 teaspoon dried hot red pepper flakes

Cook shallots in oil in a 3-quart heavy saucepan over moderate heat, stirring occasionally, until softened, about 3 minutes. Stir in remaining ingredients and simmer, uncovered, stirring occasionally, just until berries pop, 10 to 12 minutes, then cool.  (The chutney will keep for a week, covered, in the refrigerator.)


Bulgur Salad Stuffed Peppers

November 9, 2011

First, pears.  The winner of the Harry and David pear six-pack is commenter #74 – DVS – who tells us:

love love love H&D pears, though I haven’t had one in years. My favorite gift are the hand-decorated tiny gingerbread cookies my 92 year-old grandmother-in-law sends us every year.

Congratulations!  Send me an email so we can get you those pears!

A question that I get on a semi-frequent basis is whether or not I went to culinary school.  I did not.  I am a self-taught cook.  I learned by reading cookbooks, cooking a lot, and taking an occasional class here and there.  I love taking classes and always walk away with something that makes the cost and the time worth it.  I have two dear friends who attend all my cooking classes and they call all the little things they learn the “worth the price of admission tips”.  My friends have offered to write a guest post with their top ten of my tips.  Hopefully we’ll have that within the next month or so.

Anyway, we had a vegetarian cookbook author named Lukas Volger come to Book Larder recently.  He has a book called Vegetarian Entrées That Won’t Leave You Hungry.  The book is great.  I pick up a  lot of vegetarian cookbooks and 90% of the time, I put them back down because they contain the same old recipes that I have many versions of already.  Not this book.  The food is different  but not “out there”.  Hearty but not heavy.  Food I want to cook.  And eat.

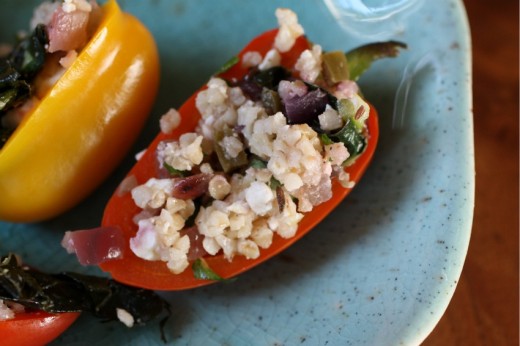
Lukas is young and wiry and adorable.  He was effortless in the kitchen but not cocky.  He made three delicious dishes.  (Full disclosure, I did the prep work.)  When making this super tasty bulgur salad, he turned the heat up higher than I would have and got a nice char on the red onions.  The onions became not just a barely noticeable background flavor and texture but a full fledged lusty ingredient in their own right.  I always sauté my onions the same way, so it was nice to watch something different and then get to taste it.

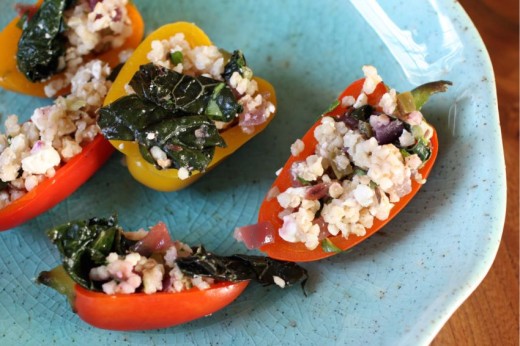
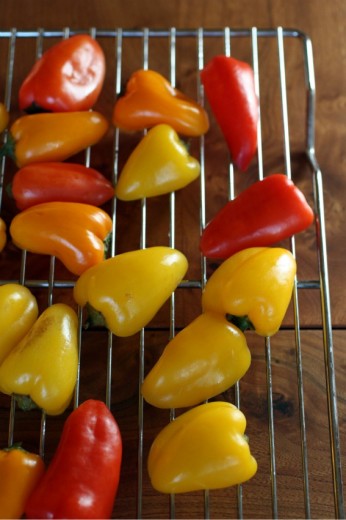
Lukas allowed us to all taste the salad and then we stuffed it into bell peppers that had been steamed.  I thought it was a lovely entrée and one day, when I spied bags of little bell peppers in the produce section, I knew bite-size versions were going on my next catering menu.

The recipe for the bulgur salad makes quite a bit so you can be confident that, even it if you use it to stuff peppers, you will get some delicious lunches out of it.  Just as an added note, you can steam peppers, large or small, by cutting them in half and scraping out the seeds and veins.  Place them in a large skillet (one with a lid) and pour in a bit of water.  Bring to a simmer and cover for 3 minutes, turn over and steam for another 3 minutes.  When Lukas made the larger peppers in the store, he placed them, filled, in a baking dish and covered it with foil.  They went into a 400º oven for about 20 minutes.  I didn’t bake my small ones.

One Year Ago:  Roasted Mushroom with Shallots and Fresh Herbs
Two Years Ago:  Creamy Artichoke Dip
Three Years Ago:  Spinach and Jerusalem Artichoke Soup

Bulgur Salad with Kale and Feta
Vegetarian Entrées That Won’t Leave You Hungry
Serves 4-6

If you are going to stuff small peppers, I recommend you dice the onions and cut the kale into smaller pieces so that you don’t have any bits that are too large.

1 cup bulgur
2 cups water
1 tbsp. canola oil or other neutral oil
2 tsp. cumin seeds
1 small red onion, sliced into strips
2 jalapeño peppers, minced (seeded for a milder heat level)
2 garlic cloves, minced
½ tsp. salt
¼ cup dry white wine or water
½ bunch kale, cut into thin strips
3 scallions, white and green parts, thinly sliced
½ cup coarsely chopped fresh cilantro
3 ounces feta cheese, crumbled
1 tbsp. olive oil

Combine the bulgur and water in a small saucepan over high heat.  Bring to a boil, then lower the heat, cover, and simmer for 15 minutes, until tender.  Strain off any water that hasn’t been absorbed.

Heat 1 tablespoon of the neutral oil in a sauté pan over medium-high heat.  Add the cumin seeds and let sizzle until fragrant, about 30 seconds.  Add the onion and cook until it’s browned around the edges, about 6 minutes.  Stir in the jalapeños, garlic, and salt.  Pour in the wine to deglaze the pan, scraping up any browned bits with a wooden spoon or spatula.  Add the kale and cook, tossing from time to time, until wilted, about 4 minutes.  Transfer to a mixing bowl and allow to cool slightly.  Stir in the scallions, cilantro, feta, cooked bulgur, and olive oil.  Taste and adjust the seasonings.  Serve warm, room temperature, or cold.  (Stored in an airtight container, this salad will keep for up to 3 days in the refrigerator.)


A Dip I Once Made for Thanksgiving

November 6, 2011

As if I wasn’t already having a hard enough time finding time to write a decent post, I just, five seconds ago, got this error message:

“Your attempt to edit this post ** has failed.”

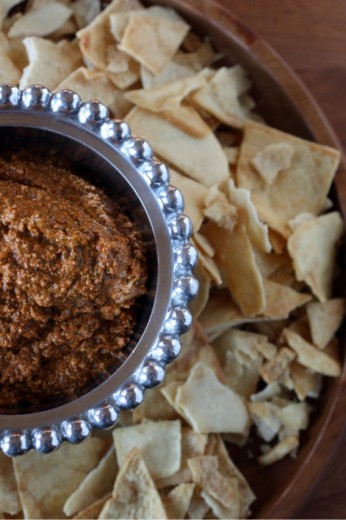
Whole post.  Photos, text, recipe.  It was a decent post, not one of my best.  I’m not going to re-create it.  Here is the short version – I once made this dip for Thanksgiving.  Roasted red peppers and cilantro don’t scream fall harvest dinner to me now but I thought it sounded good then and I was right.  This is a dip that people go crazy for – just serve it with pita chips.  And now, I’m just going to share the recipe and the photos.  This is a great dip.  You should make it.  People love it.  The end.

Roasted Pepper, Almond, and Cilantro Pesto
Adapted from Food & Wine
Makes about 2 cups

1 14-ounce jar roasted red peppers, drained
½ cup cilantro leaves
1 tbsp. tomato paste
1 tbsp. sherry vinegar
Juice of 1 small lemon
1 clove garlic
1 tsp. sea salt
½ tsp. smoked paprika
½ tsp. chile powder
¼ tsp. cayenne pepper
1 cup blanched almonds, roughly chopped

Place everything except the almonds in the bowl of a food processor fitted with the steel blade.  Pulse until everything is well combined, scrape down the sides of the bowl and pulse again.  Add the almonds and pulse until smooth and combined.  (The pesto can be made up to four days ahead.  Cover and refrigerate.)


Chex Mix Again

September 15, 2011

I grew up in a house with a lot of food.  My family all likes to eat and I have two younger brothers, one of whom grew to be 6’4″ and the other grew to 6’1″.  (I’m 5’3″.  But I got the small nose gene.)  My mom is a good cook and she made virtually all of our meals.  Breakfast was usually cereal but she packed our lunches and made us dinner every night.  She often baked so we had homemade treats for after dinner.  But she never made snack food.  My mother is not a snacker.  Like, she never snacks.  Ever.  It is admirable really because I recently read that the average American consumes over 500 calories a day in mindless snacking.  Ahem.

In the two months since I last made Chex Mix, I have found myself discussing the stuff more than you would expect.  It turns out that I am not the only one who loves it.  Many people have memories of taking Chex Mix on camping trips or having it around during the holidays.  Why don’t I have those memories?  Oh yes, the no snacking thing.  It’s not that we didn’t snack – my brothers had (and have) huge appetites.  Alex, my middle brother, once ate 98 shrimp skewers each with three shrimp.  I can’t count that high but that’s a lot of shrimp.  The boys ate a lot.  So there were snacks.  But not homemade.

In my conversations with people about Chex Mix (what? is that weird?), I found that people are partial to certain things being in there.  Katie, the woman who waxes my eyebrows (what? is this weird too?) says that her mom not only puts all the different kinds of Chex cereal in (not just the rice), but also Cheerios and Cheerios soak up all the butter and taste the best.  On the list for next time.  But overall, I’m pretty happy with how this one turned out.

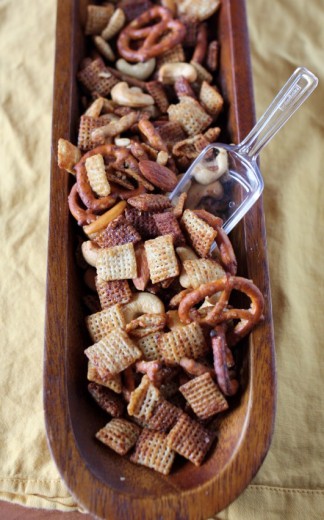
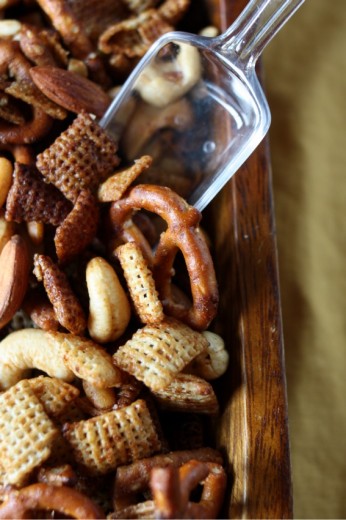
Here we find salty from soy sauce, rich from butter, sweet from maple syrup, and spicy from Thai curry paste.  The spice is very background although you could certainly add more paste to make it spicier.  I like all the crunch additions here – almonds, cashews, rice crackers, pretzels, and, of course, the Chex cereal.  This recipe makes approximately one ton of mix but it keeps well and you will win friends with it as you bring it over for playdates, to accompany cocktails, or to accompany cocktails at playdates.  :)

One Year Ago:  Tomato, Semolina, and Cilantro Soup
Two Years Ago:  Chickpeas and Chard with Cilantro and Cumin
Three Years Ago:  Pissaladière

Maple-Soy Snack Mix
Food & Wine
Makes about 27 (!) cups

12 cups Rice Chex cereal (12 ounces)
1½ pounds roasted mixed salted nuts (I used cashews and almonds), 6 cups
3 cups Asian rice cracker mix (7 ounces)
3 cups sesame sticks (8 ounces)
3 cups pretzel nuggets or mini pretzels (8 ounces)
2 sticks unsalted butter
½ cup maple syrup
1/3 cup soy sauce
1 tbsp. Thai red curry paste or sambal oelek
Kosher salt and freshly ground black pepper

Preheat the oven to 275ºF.  In a large bowl, combine the cereal with the nuts, rice cracker mix, sesame sticks, and pretzels.

In a medium saucepan, combine the butter, maple syrup, soy sauce, and curry paste and bring to a simmer, whisking to dissolve the curry paste.  Pour the mixture over the snack mix and toss to coat completely.  Season generously with salt and pepper and spread on 3 large rimmed baking sheets.  Bake for 35 minutes, stirring 2 or 3 times and shifting the sheets, until nearly dry and toasted.  Let cool completely, stirring occasionally.  (The snack mix can be stored in an airtight container at room temperature for up to 2 weeks.  Recrisp if necessary.)


« Older Posts Newer Posts »