Search Results:

Corn Pudding and a Rant

August 18, 2011

And now, for a bit of a rant.

Like most parents, my mom and dad tried to teach my brothers and I certain things.  There was a long list but some were more non-negotiable than others.  One was Clean Up Your Room.  And Always Be On Time.  Also If Someone Extends an Invitation Do Your Very Best to Be There.  The first one didn’t stick with me but the other two did.  Randy and I are always on time and we also make a big effort to attend any event/party/gathering to which we are invited.  I’m always amazed when people don’t follow suit.  Occasionally, I send out an invitation to something and most people take forever to respond if they do at all.  Is this a Seattle thing?  Does our casual lifestyle mean that we don’t need to RSVP?  Does this happen in your city?  The only thing that bothers me more than the people who don’t respond is the people who decide, on the day of the event, that they can’t make it.  Manners, people.

Done!  Moving on.

The fabulous Jen Yu breezed into town this week.  Do you know Jen?  Her site is one of the very first blogs I read.  Her talent, strength, determination, and her serious cooking and baking chops have made Use Real Butter a must read for me for years.  Jen and her husband were in town for a very limited time and I suggested a potluck at our house to gather the people she wanted to see.  She gave me her list, I sent an evite, and I was surprised by the quick response.  Apparently, Jen rates highly.  I decided to make several dishes to highlight our spectacular produce but, as per usual, on the day of the potluck, I got several cancellations.  I opted to be realistic and bag one of the planned dishes, a corn pudding I have been wanting to try since the corn left the markets last fall.  There was plenty of delicious food for everyone and we had a truly wonderful evening.

But I still had a bag of corn waiting to be used.  My good friend Deb came for dinner last night with her kids and I thought it was time to try out that pudding.  The original recipe uses four ears of corn and feeds 10 people.  I cut the recipe in half and microwaved the other two ears (it’s ok! Melissa Clark does it!) for the kids to eat straight off the cob.  My Graham is now missing both his front teeth so I cut his off the cob for him.  As I watched the corn tumble onto his plate, I had one of those memories that nearly knock you off your feet of my mom doing the same for me at a long-ago kitchen table in a long-ago house.

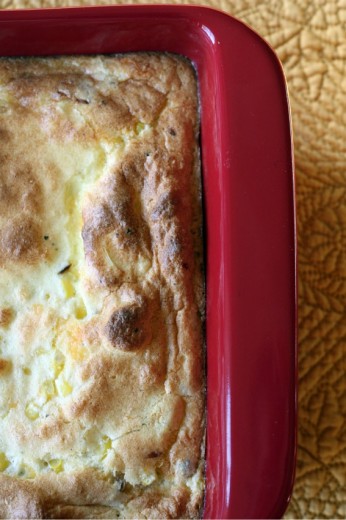
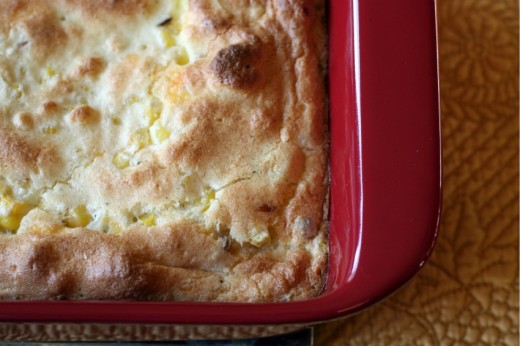
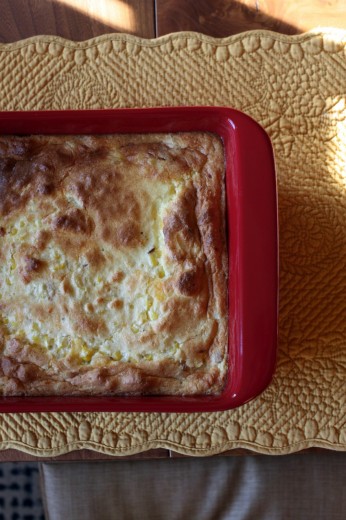
Anyway, this is not the kind of recipe you usually find here unless you are baking.  Butter, cream, milk, cheese, eggs.  I eat all those things, just not usually all together in one dish.  I thought it might be too heavy, a gut bomb.  But it wasn’t at all.  This is a dish where everything works together in harmony so that you don’t taste too much of any one thing and the only true standout is the summer’s pitch perfect corn.  The only bad thing I can say about this recipe is that it doesn’t look like much on the plate.  But looks aren’t everything.

One Year Ago:  Lavender and Honey Tea Cakes and (more corn in my red baking dish! and much prettier on the plate!) Polenta Baked with Corn, Basil, and Tomatoes
Two Years Ago:  Mushroom, Walnut, and Rosemary Pâté
Three Years Ago:  Chilled Roasted Tomato Soup with Mint

Corn Pudding
Adapted from Food & Wine
Serves 4-6  (4 as a main, 6 as a side)

1 cups milk
¼ cup heavy cream
2 ears of corn, shucked
1 tbsp. olive oil
1 large shallot, finely chopped
½ stick of unsalted butter (4 tablespoons)
¼ cup cornmeal
3 large eggs, separated
½ cup grated sharp Cheddar cheese
½ tsp. plus a pinch of salt
Black pepper

Preheat the oven to 350ºF.  Butter an 8-inch square baking dish.  In a saucepan, bring the milk and cream to a simmer over moderate heat.  Add the corn, cover, and cook over moderately low heat, turning a few times, until tender, about 10 minutes.

Meanwhile, in a medium skillet, heat the olive oil.  Add the shallot and cook over moderate heat until softened, about 4 minutes.

Transfer the corn to a plate and let cool.  Remove the saucepan from the heat and swirl in the butter until melted.  Let cool to room temperature.  Using a large knife, cut the kernels off the cobs and add to the saucepan.  Scrape the shallot into the saucepan.  Whisk in the cornmeal, egg yolks, Cheddar, and the ½ teaspoon of salt along with a few grinds of pepper.

In a large stainless steel bowl, beat the egg whites with the pinch of salt at high speed until firm peaks form.  Fold the whites into the corn mixture and pour into the prepared baking dish.  Bake for about 30 minutes, until the corn pudding is puffed and golden brown.  Let the pudding rest for about 5 minutes before serving.  (DT:  I served this about 30 minutes after it came out of the oven.  It had fallen slightly but the texture was still nice and light.)


Butterscotch Pudding Tarts

April 20, 2011

Remember Snack Pack pudding?  I guess that question isn’t a huge stretch because it is still around.  The packaging looks nothing like it did when it sat in my Donny and Marie lunchbox, just waiting to be eaten with a plastic spoon.  I thought that pudding, chocolate flavor only please, was the best thing about  bringing lunch to school.  I didn’t get it every day but it was a happy day when I did.

Graham, my kindergartner, has never heard of Snack Pack pudding and I’m pretty sure, up until recently, he had never had pudding at all.  In case you think that is because I don’t give him sweets, or I only give him whole grain treats or even just homemade treats, you would be mistaken.  I am liberal with my sweet giving.  This is another post for another time, but suffice it to say that while I prefer him to eat things that I have made, the lure of Halloween/Valentine’s Day/Easter candy can be great.  I do try to draw the line at certain things (which would probably seem arbitrary to a more strict mother), and pudding that does not have to be refrigerated and is full of things I can’t pronounce is one of those lines.

While pudding is not a dessert that pops into my mind with any regularity, it certainly has its place.  Comfort food at its most comfortable.  And how about if the pudding is butterscotch and sitting inside a tart shell?  Mini tart shells?  Not long ago, I purchased 24 mini tart pans.  At 79 cents a pop this was not a huge investment.  And they have allowed me to make super cute appetizers and desserts.  I had no problem getting 24 rounds of dough out of the recipe and I actually had some pudding left over once they were all filled.  I filled two small bowls with the butterscotch pudding and gave it to my boys.  Neither of them liked it.

By the way, who was on your favorite lunchbox?

One Year Ago:  Zucchini and Olive Salad
Two Years Ago:  Mississippi Mud Cupcakes

Butterscotch Pudding Tarts
Baked
Makes 8 (4-inch) tarts or 24 mini tarts

Below is the recipe as written for the larger tarts.

For the oat wheat pie crust
1 cup rolled oats
½ cup whole wheat flour
1 cup all-purpose flour
¼ cup firmly packed dark brown sugar
½ tsp. salt
¾ cup (½ stick) cold, unsalted butter, cut into cubes
¼ cup milk

For the butterscotch pudding
6 large egg yolks
¾ cup granulated sugar
¼ cup heavy cream
½ cup firmly packed dark brown sugar
1/3 cup cornstarch, sifted
1 tsp. salt
3 cups whole milk
1 vanilla bean
1 tbsp. unsalted butter
2 tbsp. whiskey

To assemble
1 Butterfinger candy bar, broken into small pieces

Make the oat wheat pie crust
Put the rolled oats in a food processor and process for about 30 seconds, until ground but not powdered.  Add the flours, brown sugar, and salt and pulse until combined.

Add the butter and pulse until the butter pieces are small and the dough looks crumbly, like coarse sand.  Add the milk and pulse for a few seconds..

Scoop the dough out of the food processor and form it into a large disk.  Wrap tightly in plastic and refrigerate for at least 1 hour and up to 3 hours.

Dust a work surface with a sprinkling of flour.  Unwrap the disk of chilled dough and put it directly on the work surface.  Cut the dough into eight equal pieces, about 2 ounces each, and gently shape each piece into a smooth disk.  The dough will be sticky.  Make sure to turn the dough over (use a spatula or a bench knife) as needed and keep the working surface floured.  Put the dough disks in the refrigerator for 10 minutes.

Using a rolling pin, roll each dough ball into a 6-inch round just over 1/8-inch thick.  Place a round over a 4-inch tart pan and very gently press the dough into the pan.  Roll the rolling pin over the pan to trim off excess.  Repeat with the remaining dough rounds.

Preheat the oven to 325ºF.  Put the tarts pans in the freezer for 30 minutes.

Remove the tarts pans from the freezer and arrange on a baking sheet and gently prick the dough with a fork.  Bake on the baking sheet until golden brown, 12 to 15 minutes, rotating the baking sheet halfway through the baking time.  Transfer the tart pans to wire racks and let cool completely.

Make the butterscotch pudding
Put the egg yolks in a large heatproof bowl and set aside.  (DT: I find it helpful here to put a damp paper towel under the bowl with the yolks.  That way, when you go to whisk it later, the bowl stays still on your counter.  I do the same thing when making ice cream.)

In a small saucepan, combine the granulated sugar and ¼ cup water and stir gently with a heatproof spatula; do not splash the sides of the pan.  Cook over medium heat until the sugar is dissolved, then increase the heat to medium-high and cook until the mixture begins to turn a dark amber color.  Swirl the pan, if necessary, to create an even color, but do not stir.  Remove from the heat, let stand for 1 minute, then use the heatproof spatula to stir in the cream.  Pour the caramel into a small bowl.  Set aside.

In another small saucepan, combine the brown sugar, cornstarch, and salt.  Stir in the milk and whisk to combine.

Cut the vanilla bean in half lengthwise, and, using the tip of the knife or a small teaspoon, scrape the seeds into the saucepan with the milk.  Add the vanilla bean to the milk as well.  Cook over medium-high heat, whisking occasionally, until the mixture comes to a boil.  Remove from heat and add the caramel.  Whisk together until combined, then pour one third of the mixture over the eggs.  Keep whisking the egg mixture and add another third of the hot milk mixture.  Transfer the egg mixture back to the saucepan with the milk mixture and, whisking constantly, bring to a boil over medium-high heat.  Boil for 2 to 3 minutes, or until very thick.

Remove from the heat and add the butter and whiskey.  Keep whisking vigorously for about 1 minute to cool the pudding slightly.  Let the pudding sit for about 15 minutes, then remove the vanilla bean.

Assemble the tarts
Whisk the pudding one more time until smooth.  Divide the pudding equally among the tart shells and sprinkle the crumbled candy bar over the pudding.  Cover the tarts with plastic wrap and put the in the refrigerator for about 2 hours before serving.

The tarts can be stored, tightly covered, in the refrigerator for up to 2 days.


Bittersweet Chocolate Pudding Pie

October 7, 2010

Five years ago this month, I joined a preschool co-op with my older son Graham.  He was 11 months old at the time.  I had been told, by multiple friends, that co-op was the way to go.  Not so much for the children but for the community with other moms.  To all my friends who made this recommendation – thank you.  I now have lifelong friends because of the time we spent at that co-op.

We were extremely lucky to end up in a wonderful class.  Sometimes groups of people just gel and ours certainly did.  Most of us were new moms and we were all struggling through the same issues.  The group provided tremendous support and we actually really bonded through food.  The class met from 11am – 1pm once a week and we took turns bringing lunch.  I think the original intent was to provide food for the kids but it quickly morphed into a full blown lunch for the mommies as well.  (I wonder if I had anything to do with that…)

We were only in that co-op for two years but a small group of us still gets together on a regular basis.  We usually go out for dinner and sometimes we allow the husbands to come along with us.  Last week met up at someone’s house and the timing happened to coincide with our friend Kimrick’s birthday.  When I asked her what kind of dessert she wanted she said chocolate.  That’s my girl.

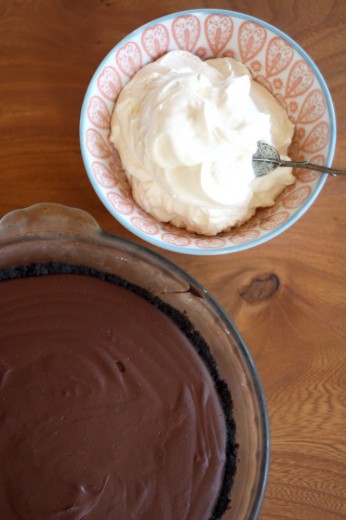
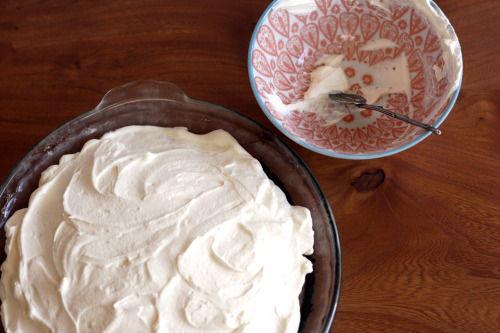
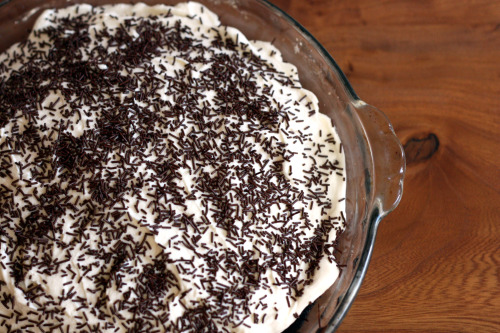
Because I had just made a cake, I opted to go the tart route this time.  This one features a chocolate cookie crust, a chocolate pudding middle, and a crème fraîche whipped top.  The only slightly negative thing I can say about his magical creation is that it isn’t all that easy to cut.  There are worse problems to have.  I’m a sucker for a chocolate cookie crust – even though it is nothing but chocolate wafers, sugar, and butter.  But the star here is the pudding.  As I was making it, I remembered the snack packs my mom used to put in my school lunch box.  I thought that chocolate pudding was the most delicious thing I had ever tasted.  I’m still a sucker for chocolate pudding especially with a topping as decadent as this one.

One Year Ago: Asian Coconut Noodle Soup

Bittersweet Chocolate Pudding Pie with Crème Fraîche Topping
Adapted from Bon Appétit
Serves 8-10

For some reason, those chocolate cookie wafers can be hard to find.  I have successfully used the Whole Foods brand of chocolate cookie grahams.

Crust
1 cup chocolate wafer cookie crumbs (about half of one 9-ounce package, finely ground in processor)
2 tbsp. sugar
5 tbsp. unsalted butter, melted
2 ounces bittersweet chocolate, finely chopped

Filling
1/3 cup sugar
1/3 cup unsweetened cocoa powder
2 tbsp. cornstarch
¼ tsp. salt
1¾ cups whole milk, divided
¼ cup heavy whipping cream
4 ounces bittersweet chocolate, finely chopped
1 tbsp. dark rum
1 tsp. vanilla extract

Topping
1 cup chilled crème fraîche
1 cup chilled heavy whipping cream
¼ cup sugar
1 tsp. vanilla extract

Bittersweet chocolate curls or chocolate sprinkles (optional)

Crust
Position rack in center of oven; preheat to 350°F.  Blend cookie crumbs and sugar in processor.  Add melted  butter; process until crumbs are evenly moistened.  Press crumb mixture onto bottom and up sides (not rim) of 9-inch-diameter glass pie dish.  Bake until crust begins to set and no longer looks moist, pressing gently with back of fork if crust puss, about 12 minutes.  Remove crust from oven, then sprinkle chopped chocolate over bottom of crust.  Let stand until chocolate softens, 1 to 2 minutes.  Using offset spatula or small rubber spatula, spread chocolate over bottom and up sides of crust to cover.  Chill crust until chocolate sets, about 30 minutes.

Filling
Whisk sugar, cocoa, cornstarch, and salt to  blend in heavy medium saucepan.  Gradually add 1/3 cup milk, whisking until smooth paste forms.  Whisk in remaining milk, then ¼ cup cream.  Using flat-bottom wooden spoon or heatproof spatula, stir mixture constantly over medium heat, scraping bottom and sides of pan until pudding thickens and begins to bubble at edges, about 5 minutes.  Add chocolate; stir until mixture is smooth.  Remove from heat; stir in rum and vanilla.  Pour hot pudding into crust and spread evenly.  Cool 1 hour at room temperature.  Cover with plastic wrap; chill overnight.  (Can be made 2 days ahead.  Keep refrigerated.)

Topping
Using electric mixer, beat crème fraîche, whipping cream, sugar, and vanilla in medium bowl just until stiff peaks form and mixture is thick enough to spread (do not overbeat or mixture may curdle).  Spread topping decoratively over top of pie, swirling to create peaks, if desired.  (Can be made 6 hours head.  Cover with cake dome (DT: or foil) and refrigerate.)

Sprinkle chocolate shavings or sprinkles decoratively atop pie.


Feels Like the First Time

August 19, 2012

I don’t know about you, but I feel like the first time I cook something is always the best.  Not bake, cook.  When I bake something more than once, it is almost always better the second or third time than it was the first.  Baking can be tricky and I usually am able to fix any little glitches in a recipe or my technique after I have already made a dessert or a bread.

There have been so many times that I have repeated a recipe merely for the sake of this blog.  I cook first and foremost so that I can eat and feed family and friends.  Photographing and blogging about food is secondary.  But often I am midway through a meal and I think to myself, “I really should write about this” or someone at the dinner table asks me, “Are you going to write about this?”  So then I repeat the recipe the next week and I can say, almost without exception, that it was better the first time.

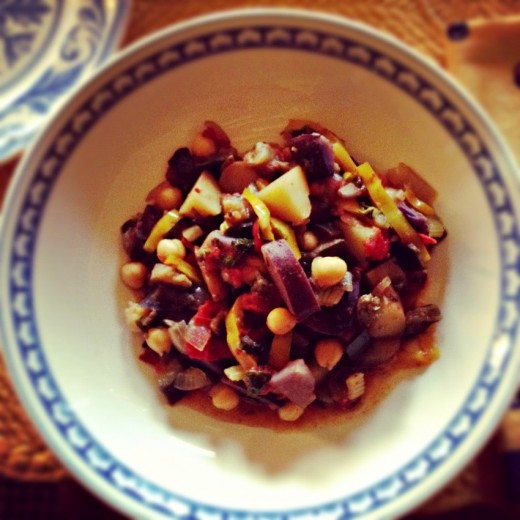
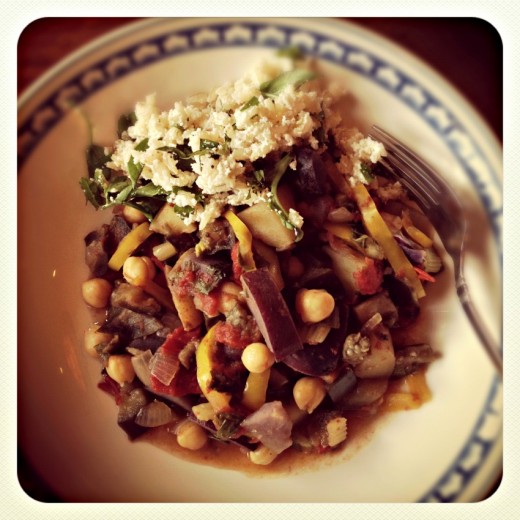
This was a lovely Italian stew the first time I made it.  I was thinking about how good it tasted and my parents and brother were ooohing and aaahing and asking when it would be on the blog, so I stood up and snapped a photo with my phone.  And then I realized that that photo would not do and I was going to have to make it again.

So I made it again.  And I didn’t pay as careful attention to the recipe, I forgot the saffron, and I used dried beans because I didn’t have any more fresh shelling beans stashed away in my freezer and the stew that was so mind blowingly tasty – the kind of thing where you sit back and ask yourself how vegetables can taste so good and maybe there is something to that vegan thing after all – was just a good dinner.

Make it.  Follow the recipe.  Use fresh shelling beans if you can, this is their season and they can pretty easily be found at farmers’ markets.  If you don’t have access to fresh, soak some dried beans overnight and cook them separately from the stew, then add them once they are cooked.  As much as I love their convenience, this is not the place for canned beans.

One Year Ago:  Double Chocolate Peanut Butter Pie, Corn Pudding
Two Years Ago:  Green Bean Salad with Mustard Seeds and Tarragon,
Three Years Ago:  Tortellini Skewers, Bocconcini (Marinated Mozzarella)

Country-Style Vegetable Stew (Cianfotta)
Adapted from Verdura, Vegetables Italian Style
Serves 4

Whenever I use saffron, I always allow it to “bloom” in liquid before adding it to the dish.  It helps bring out the delicate flavor of the saffron.  I served the stew, both times, with a brown rice tossed with ricotta and lots of herbs.  It was nice but not necessary.

1 small pinch of saffron
Olive oil
1 onion, peeled and chopped
2 celery stalks, sliced crosswise
2 garlic cloves, minced
1 tbsp. thyme leaves
1 small eggplant, trimmed and cut into medium dice
1 large yellow pepper, seeded, membranes removed, cut into medium dice
4 medium peppers, a mix of colors if possible, cut into medium dice
4 ripe tomatoes, seeded, cut into chunks
1 pinch red pepper flakes
Kosher or sea salt and freshly ground black pepper
8 ounces cooked beans
2 tbsp. chopped fresh parsley
2 tbsp. chopped fresh basil

Pour a few tablespoons of hot water into a bowl.  Add the saffron and set aside.

Place a wide shallow pan over medium heat.  Drizzle in just enough olive oil to coat the bottom, then add the onion and celery and a large pinch of salt.  Sauté until starting to soften, then add the garlic, saffron, and the thyme.  Cook for another 2 minutes, then add the rest of the vegetables.  Add another pinch of salt and a few grinds of pepper, stir well, and cover.  Turn the heat down to low.  Stir the mixture occasionally and if it seems too dry, add a few tablespoons of water.  Repeat if necessary.  Add the beans during the last 5 minutes of cooking.  Stir in the herbs just before serving and season to taste with salt and pepper.


Soup for a Hangover

September 14, 2010

(Note:  After I wrote about a corn pudding in my post about the Chard Tart, I got some email asking when I would be sharing that recipe.  It’s up now at Amazon Fresh.  Go check it out – it’s a new favorite!  Depending on when you read this, you may have to scroll down a bit on that page.)

Sometimes I have these moments when writing posts for my blog when I wonder, “Am I revealing too much here?”  A while ago, I wrote a post which included a story about drinking too much.  And here I am again with a suggestion for good food to eat when you have a hangover.  My last post was about the mixed emotions I have about my kids growing up and now a recipe that came after a night of overindulging.  Is that weird?

I know a lot of wonderful women, some mothers and some not, who love their beer/wine/cocktails.  I’m guessing if you stop by here often and have come to know a little about who I am, the fact that I love a good glass of wine or three will not be surprising to you.  Because I am vegetarian, because I really sincerely like healthy food, because I am in shape, and because I have a dedicated yoga practice, some people might assume that all I drink is vitamin water and freshly brewed tea.  But that is not the case.

Last Sunday night, I probably would have been fine if I had alternated vitamin water or freshly brewed tea with the I-lost-count-of-how-many-bottles of wine we had at our dinner party.  But I did not and I woke up feeling, um, not great.  I have kids who are really good sleepers but if there is one thing I can count on, it is that if I need them to sleep in a bit, they will wake up earlier than usual.  And then, they will need to be entertained.  And fed.  The nerve.

In this particular instance, Randy was worse off than I was, so I took the boys out of the house and attempted to run them in the rain.  This is a pretty standard activity for a weekend day but in this case, I was also trying to insure that they would take a nap.  As I revealed in my last drinking post, I tend to feel worse as the day wears on.  Last Monday was no exception.  I took comfort in the fact that I didn’t have to cook that night and could just lie still for a few hours while the boys napped.

But I happened to pick up my already much-loved copy of Plenty while on my back and without searching found this recipe for Tomato, Semolina, and Cilantro Soup.  Like most people, what I want to eat when I have a hangover is a huge plate of greasy eggs and hashbrowns.  With a side of Tabasco.  At the same time, when I have a hangover, I feel -well, puffy.  I want grease but I need something really healthy and light.  In this instance, because I felt particularly bad, I wanted something comforting.  I also wanted something to show for myself after wasting a perfectly good holiday (Labor Day) doing basically nothing.

I had everything on hand for this soup and it came together beautifully.  Now, to keep it from essentially tasting like savory Cream of Wheat (not that there is anything wrong with that), I added some texture with some small cooked pasta that I had in my refrigerator.  I prefer something to chew on in my soup so I loved the noodles in there.  I also thought chickpeas would be a great addition but opted to keep it simple and close to the original recipe.  The soup thickens as it sits so you will want to thin it with some water if you make it in advance.  I would also recommend seasoning repeatedly throughout the process because it needs a lot of salt.  After eating this soup and a salad for dinner and a good night’s sleep, I felt like a new person the next day.

One Year Ago: Nectarine and Mascarpone Tart in Gingersnap Crust
Two Years Ago: Chantarelle and Corn Risotto with Fresh Thyme and Basil

Tomato, Semolina, and Cilantro Soup
Adapted from Plenty
Serves 4-6

Olive oil
1 medium onion, finely chopped
1 celery stick, finely chopped
2 tsp. ground coriander
2 tsp. ground cumin
1½ tsp. sweet paprika
2 tsp. finely chopped fresh thyme
½ cup roughly chopped fresh cilantro
2 tbsp. tomato paste
1 pound fresh tomatoes, peeled, seeded and finely chopped
6 cups water, plus more for thinning if necessary
1½ tbsp. sugar
1 cup semolina
1 cup cooked pasta
Juice of 1 lemon
Greek yogurt (for garnish)
Kosher salt and freshly ground pepper

Put a medium soup pot over medium heat.  Add just enough olive oil to coat the bottom and then add the onion and celery along with a good pinch of salt.  Sauté for 5 minutes, stirring frequently, then add the coriander, cumin, paprika, thyme, and half the cilantro.  Sauté until the onion is golden and soft and the mixture is very fragrant, about another 5 minutes.  Add the tomato paste, another pinch of salt and a few grinds of pepper, and the tomatoes; cook for another minute.  Pour in the water and sprinkle in the sugar and bring to a boil.  Simmer for 20 minutes.

Next, add the semolina to the simmering soup in a slow steady stream as you whisk vigorously.  Keep on cooking for 10 minutes whisking occasionally to avoid lumps.  Add the pasta and squeeze in the lemon juice.  Season to taste with salt and pepper.

Before serving, add more water if the soup is too thick for your liking.  Ladle into bowls and spoon yogurt on top.  Garnish with the remaining cilantro.


« Older Posts