Archive for March, 2011

Spring Classes Announced!

March 9, 2011

I am excited to announce my class schedule for spring.  This information will live under my “classes” tab but wanted to allow you to see all the yummy things coming up.  Please contact me to sign up or for more information.

Vegetarian Cooking – Beyond Pasta and Salad, Spring Focus
(choose your date) $55/person
April 14th – 6:30-9:30pm
April 28th – 6:30-9:30pm

Spring is truly a transitional season in our little part of the world.  The calendar and the weather are not always in harmony.  The markets start showing peas, artichokes, and asparagus, but we often just want to turn on the oven and make comfort food.  In this class, we will honor the duplicity of Seattle spring by making cozy warming dishes (Baked Couscous with Spinach and Fontina) along with seasonal specialties using the best of the produce (Spring Vegetable Paella).  We will also make a wonderful salad that can be served as a starter or main course, a dish that beckons the sun and warmer temperatures.  Recipes will include:

Fava Bean and Pecorino Crostini
Vegetable Salad with Spiced Goat Cheese Rounds
Baked Couscous with Spinach and Fontina
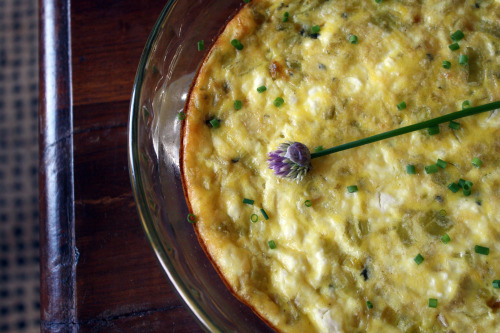
(Almost) Crustless Leek Tart
Spring Vegetable Paella


Seasonal Spring Feast
(choose your date) $65/person
May 12th – 6:30-9:30pm
May 26th – 6:30-9:30pm

This season’s feast will celebrate the lightness and brightness that spring produce brings to us.  Shades of green will be featured in a truly special meal – an elegant dinner party that we will kick off with a classy cocktail and end with a Rhubarb Tart and Brown Sugar Sour Cream Ice Cream.  In all, there will be four courses designed so that you can either recreate the whole feast at home for a special dinner party, or you can use one or two recipes at a time to accompany your favorite meals.  You will also get some entertaining tips!  Recipes will include:

Haloumi with Fresh Fava Beans, Peas, and Mint
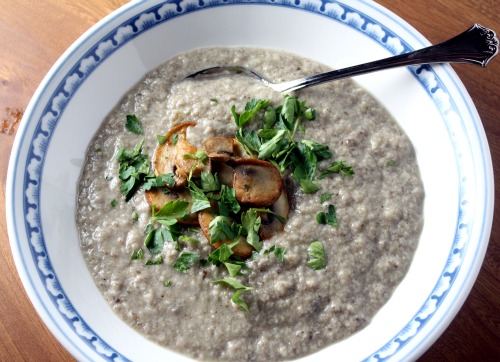
Morel Mushroom Veloute
Risotto Croquettes with Shaved Spring Vegetables
Savory Feta, Ricotta, and Herb Pie
Rhubarb Tart with Brown Sugar Sour Cream Ice Cream

Vegetarian Thai Cooking
(choose your date) $60/person
June 9th – 6:30-9:30pm
June 23rd – 6:30-9:30pm

There is no shortage of Thai food in our city.  You probably have a favorite place to get your pad thai fix.  Like so many things, Thai can food can taste just as good, if not better, if you make it at home.  In this class, I will de-mystify some of the ingredients commonly found in Thai cooking (rice wine vinegar, rice papers, tamarind, lemongrass) and show you how easy it is to make your curry paste and a delicious rice noodle dish.  Also, each person will get to practice salad roll techniques to make their own roll.  Recipes will include:

Lemongrass Broth with Chile Roasted Mushrooms
Fresh Salad Rolls with Rice Noodles, Cucumber, and Peanut Hoisin Dipping Sauce
Yellow Curry with Pineapple and Peas
Jasmine Rice with Coconut and Ginger
Rice Noodles with Coconut Bean Sauce

What To Do with Sun-Dried Tomato Onion Jam?

March 8, 2011

I am not a particularly organized person.  I am not a list-maker and I can be very scattered.  I really try to have structure and to be fair, I do juggle a lot of balls on any given day, but things often fall through the cracks.  I tend to be forgetful and I lose things easily.

Except when I am in the kitchen.  I am streamlined, focused, and organized, and I rarely make mistakes.  In all the years of being a personal chef and all the parties I have catered and all the classes I have taught, I have never forgotten a single dish.  That is because, unlike in my personal life, I make lists.  I have ingredient lists, dish lists, and lists of things to remember to bring.  That last list has food on one side of the paper and equipment on the other.  I have a system and I continually check in with it.

Last week, I catered an art gallery opening for some friends and for no good reason, I didn’t check in with my list.  I trusted my brain to remember everything which, if you are a mom, is something you should never ever do.  Mommy brain is real!  Not only did I forget to make one dish (in spite of the fact that I had prepped it the day before) but I forgot to bring a Sun-Dried Tomato Onion Jam for the cheese plate.  As I started to unload my bags, I realized what I had done and literally sank to the floor.  Then, I got up and moved on.

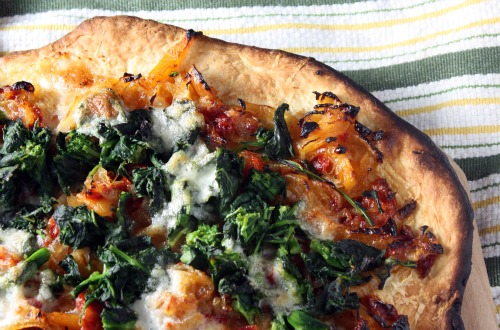
Two pieces of good news.  The party was a success and I had a small tub of Sun-Dried Tomato Onion Jam to come home to.  But what to do with it?  If I served pork, it would probably be a good condiment but, as we all know, I don’t. There are no cheese plates in my immediate future.  So how about some pizza?

Now, I eat my cooking all the time.  I am delighted each time I make something of my own creation and it is good.  (Which, not to toot my own horn, it usually is.)  This pizza made me sit back and say, “Wow, this is good.  Isn’t this good Randy?  Do you love it?”  He was fairly busy stuffing his face but nodded enthusiastically.  Of course, I can’t take 100% credit here.  The jam recipe comes from a magazine and I used Mark Bittman’s pizza dough recipe (highly recommend), but the combo and idea is mine.

We have a relatively new market in Seattle called Melrose Market.  I like to think of it as a tiny tiny version of San Francisco’s Ferry Building.  There is a butcher, a cheese shop, a wine bar, two restaurants, and a flower shop.  It is a very charming place.  The cheese shop, Calf and Kid, sometimes has burrata and whenever I am in the neighborhood, I check in to see if they have it.  They did at my last visit and so I bought a small ball of it.  I didn’t have a specific plan for it but having burrata in your refrigerator is never a bad thing.

So yes, there was burrata on my pizza which I am sure contributed to its amazingness.  But a fresh mozzarella would still make it delicious.  I am very gentle with my cheese hand on pizza.  I like to taste the crust and the other toppings more than the cheese, but do what you like.

One Year Ago: Sautéed Tempeh with Coconut Milk and Snow Peas
Two Years Ago: Chocolate, Hazelnut, and Ginger Biscotti

Pizza with Sun-Dried Tomato Onion Jam and Broccoli Rabe
Dana Treat Original
Serves about 4

For the jam
3 medium onions, halved lengthwise and thinly sliced crosswise
3 tbsp. unsalted butter
1/3 cup sugar
½ tsp. salt
½ tsp. freshly ground black pepper
¼ tsp. red pepper flakes
½ cup dry white wine
1 tbsp. red wine vinegar
¼ cup packed dried apricots, thinly sliced
6.5 ounce jar sun-dried tomatoes packed in oil, drained and chopped

For the pizza
1 large bunch broccoli rabe, ends trimmed
1 recipe your favorite pizza dough (I used this one)
2 tbsp. olive oil
1 garlic clove
1 cup freshly grated Pecorino Romano cheese
1 4-ounce ball burrata or fresh mozzarella cheese

Make the jam
Cook onions, butter, sugar, salt, pepper, and red pepper flakes, covered in a large skillet over low heat, stirring occasionally, until onions are soft and pale golden, about 30 minutes.  Add wine, vinegar, apricots, and tomatoes, and simmer, uncovered, stirring occasionally, until thick, 20 to 30 minutes.  (Can be made up to 1 week ahead.  Cool completely, then cover and refrigerate.  Bring to room temperature before using.)

Make the pizza
Preheat the oven to 500°F with a pizza stone set on the lowest rack.  Pour the olive oil into a small bowl.  Using a garlic press, push the garlic into the oil, and allow to steep.  Lightly dust a pizza peel with cornmeal and shape your dough to fit the peel.

Bring a large pot of salted water to a boil.  Add the broccoli rabe and cook for 3 minutes.  Drain well.  When cool enough to handle, roughly chop the broccoli rabe.

Brush the dough with the garlic oil.  Sprinkle with the Pecorino Romano.  Scatter about ¾ of the Sun-Dried Tomato Jam over the surface of the pizza.  (Use the rest for a cheese plate.)  Scatter the broccoli rabe over top and finally, top with the burrata pulled into small pieces.

Carefully slide the pizza onto the stone.  Bake for 10-13 minutes, until the crust is browning and the cheese is melted.  Allow to sit for 5 minutes before slicing.


Sweet and Salty Popcorn

March 7, 2011

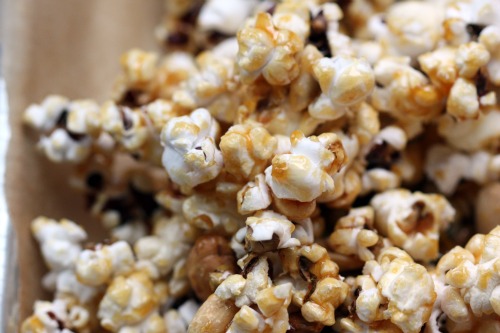
This is Sweet and Salty Popcorn with Orange Blossom Honey and I have three very good things to say about it.

1) It forced me to finally, finally, make real popcorn.  You know, like with kernels, oil, a pot, and a stove.  We eat a lot of popcorn in our house and I’m ashamed to say that it is of the microwave variety.  I know the real stuff is better and I can’t really explain why I never made it.  Let’s just say that I gave myself a giant palm to the forehead and move on.

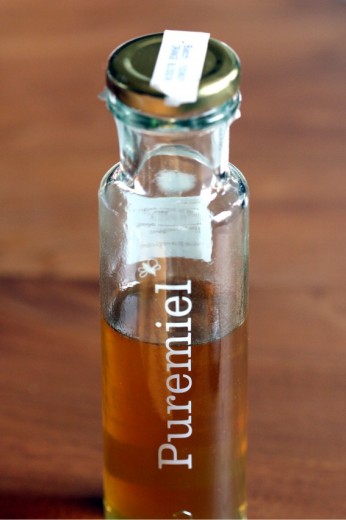
2) I discovered orange blossom honey.  I am a huge fan of honey and I buy all different kinds.  I didn’t expect to be able to find orange blossom honey here because we are far far away from the nearest orange tree.  There is a small cheese shop in the new-ish Melrose Building that carries some treasures and it was there that I unexpectedly found this beautiful bottle.   I’ve never met a honey I didn’t like but I might even venture to say this is my favorite.

3) This is one sweet and savory bowl of yum.  Like you eat several handfuls of it before you know what you are doing.  And then you eat some more.

Do you sense a “but” coming?  Not a “but”, maybe but an “I think you should know”.  This stuff is sticky.  Like really sticky.  Like it just wants to form itself into one giant popcorn ball which, come to think of it, wouldn’t be so bad.  After it cooled, I ran my hands through it  and separated it out into manageable pieces and put it in a bowl.  Then, about 10 minutes later, I had to do it again.  And again.  And again.  You might sense a pattern here.

Now, to be fair, I wasn’t super strict about the measurements.  I roughly 1½’ed the recipe and it could be that I actually used too much honey for the amount of popcorn.  Who knows.  I would just suggest you make this for people who you know – people who won’t mind you running your hands through their popcorn periodically.

This recipe comes from The Essential New York Times Cookbook.  Several months ago, Amanda Hesser was in Seattle promoting the book and I went to an event to hear her speak.  She is funny and self-deprecating and all in all delightful.  Afterward, she signed my book.  I told her that I have about 150 cookbooks and that her Cooking for Mr. Latte was on my high rotation shelf.  So she signed my copy “For Dana – hope this one finds a spot in your ‘high rotation’.  Enjoy!”  Cute, huh?

One Year Ago: Tofu Cauliflower Kahri
Two Years Ago: Butternut Squash and Apple Galette and Goat Cheese Ravioli with Roasted Red Pepper Sauce

Sweet and Salty Popcorn with Orange Blossom Honey
Adapted from The Essential New York Times Cookbook
Serves about 6

Hesser instructs you to keep your popcorn and nuts warm in a 250ºF oven which sounded weird to me, so I didn’t do it.  Maybe this is why mine was sticky.  She also instructs you to use the salt on the popcorn but in my experience, salt does not stick well to popcorn.  I added mine directly to the honey mixture and it came out great.

6 cups popped popcorn
1 cup salted roasted nuts (one kind, or a mixture; optional)
½ cup sugar
1/3 cup orange blossom honey
1 tsp. coarse salt

Place the popcorn and nuts in a large bowl.  Line a baking sheet with parchment paper.

Pour the sugar into a small heavy saucepan and place over medium-low heat.  When the sugar is melted and a light caramel color, add the honey and stir until smooth and liquid.  Stir in the salt and remove from the heat.

Pour the syrup over the popcorn mixture.  Using a rubber spatula and working quickly, stir the popcorn so the honey coats as much of it as possible.  Spread onto the prepared sheet and let cool.  Break into large or small pieces and store in an airtight tin.


Sweet Potato Tian

March 4, 2011

The other night, after dinner and while Randy and I were watching TV, a fast food ad came on.  Suddenly my husband’s eyes were glued to a hamburger.  This was not just a hamburger, it was one that had several patties, bacon – you know, meat.  And my husband, his belly full of plant-based goodness said, “Oh my god, that looks so good!”  Which gave me pause.  I mean, I know he eats meat, that he likes meat and I’m totally fine with that.  But if that triple stacked burger looked good to him, how would, say, a sweet potato tian look?

As it turns out, really good.  Randy loved this meal and so did I.  In fact, because it makes a generous portion, he has eaten it three times – willingly! – in the past two days.  And I think I finally got beyond Randy’s sweet potato prejudice.  You know, that “sweet potato = mushy dish with marshmallows on top” thing.  I use sweet potatoes often in my cooking and he always likes them but I do notice that his eyes glaze over a bit when I mention them.  Not anymore.  He declared this a “once a week” meal which is just about the highest praise I can expect from him.  He suggested that I tell you all that this dish is “addictive”.  Wow.  But it is pretty darn good.

You may look at the ingredients and think – really?  But the magic of the vegetable combination, the heat of the oven, and a fresh breadcrumb topping can do wonders.  I added to the recipe by using some herbs and some Parmesan in the bread crumbs and I think those are necessary additions.  I always have some kind of bread in my freezer and this time I was surprised to find my only option was one with kalamata olives.  I thought it would make strange breadcrumbs but truthfully, I think it added to the overall goodness.  And a hint of purple color.

Sweet Potatoes Previously on Dana Treat: Spicy Sweet Potatoes with Lime, Southwestern Sweet Potato Gratin
One Year Ago: Brownie Chunk Cookies and Honey Nut Squares
Two Years Ago: Smoky Cashews and Pappa al Pomodoro

Sweet Potato, White Bean, and Pepper Tian
Adapted from Vegetarian Classics
Serves 4-6

I’m not a huge green pepper fan, but it is very mellow after baking.  Substitute with another red or a yellow one if you prefer.  I tend to shy away from large amounts of garlic, but the heat is great here. I filed this under quick and easy.  It does spend a fair amount of time in the oven but it is so quick to put together, I think it is a good weeknight meal.  You could certainly make it ahead of time and just serve it room temperature.

3 medium-large sweet potatoes, peeled, quartered lengthwise, and sliced ¼-inch thick
1 15-ounce can white beans, rinsed and drained
1 red bell pepper, cut into 1-inch chunks
1 green bell pepper, cut into 1-inch chunks
1 medium red onion, cut into 2-inch chunks and sections separated
6 ounces cherry tomatoes, sliced in half
5 garlic cloves, thinly sliced
Kosher salt and freshly ground black pepper
1 tsp. dried thyme
1 tsp. dried sage
3 tbsp. olive oil

3 slices country bread
1 tbsp. olive oil
½ cup freshly grated Parmesan cheese

Preheat the oven to 375ºF.

Combine all the vegetables along with the garlic, beans, herbs, a large pinch of salt and a few grinds of pepper in a large bowl.  Drizzle with the 3 tablespoons of olive oil and toss well.  (The vegetables can be prepared to this point up to 4 hours in advance.)  Pack the mixture into a 2½ or 3 quart shallow baking dish and flatten the top surface.  Cover with foil and bake for 25 minutes.  Uncover, give everything a good stir and bake for another 20 minutes.

Meanwhile, make the fresh breadcrumbs.  Place the bread in a food processor and pulse until you have crumbs.  Turn them out into a bowl and drizzle with 1 tablespoon of olive oil.  Stir to coat the bread with the oil and then add the cheese.  Combine well.

Remove the tian from the oven.  Spread the crumbs all over the top.  Return the tian to the oven and bake 15 minutes more, or until the topping is a rich golden color.  Let sit 10 minutes before serving.


Trust the Expert

March 2, 2011

I’ve spent a lot of my adult life in the kitchen.  I’ve taught myself to cook and bake by reading good books and through practice.  Over time, I have learned to trust myself.  If something sounds wrong in a recipe, I trust my gut and I am usually right.  I have learned tricks and short cuts and generally accepted practices.  Once in a while, I get humbled.

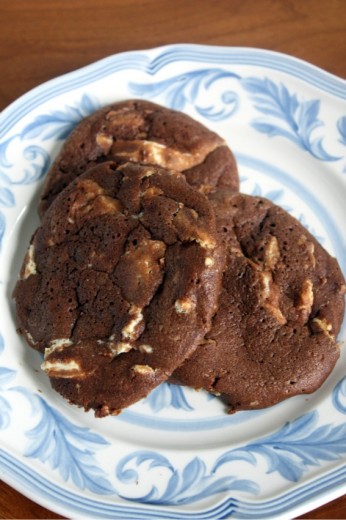
Nancy Bagget’s The All American Cookie Book is a book I turn to over and over for cookie inspiration.  Her recipes are incredibly well-researched and written with that perfect mixture of clarity but not condescension.  I have never made anything less than delicious from that book.  In looking for a new treat, I decided on Chocolate Espresso White Chocolate Chunk Cookies.  As I was making them, I started composing this post in my head.  (If you have a food blog, tell me you do this as well.)  I was planning on titling it “Pulling a Fast One” and talking about how something Randy hates (coffee) and something Randy loves (white chocolate) are in one cookie and that the white chocolate managed to disguise the coffee.  But then I ignored Bagget’s advice to allow three inches between each cookie on the sheet and I also ignored her advice to lay parchment paper on the baking sheets.  Which meant that many of the cookies stuck and many of them oozed into one another.

Did it matter?  Only in the looks department.  I know white chocolate is something that makes some chocolate lovers turn up their noses.  According to that kind, it’s not real chocolate.  I myself am not nearly so snobby.  Sure, I prefer the brown version, but I do think that white chocolate can play a nice role in a cookie – especially one that is so intense with the flavor of bittersweet chocolate held together with the just the smallest amount of flour.  The white stuff distracts you for a moment, takes away from the richness but in a good way.  Much the way that nuts would do, if I let nuts near my cookies.

Randy’s response?
“I know I say I don’t like chocolate, but this is a really good cookie.”
“There is coffee in there.”
“Hmmm.  Doesn’t matter, I don’t taste it.”

Fast one pulled.

One Year Ago: Cucumber Raita and Grilled Haloumi Cheese and Lemon
Two Years Ago: Rosemary Flatbread with Blue Cheese, Grapes and Honey

Chocolate Espresso White Chocolate Chunk Cookies
The All-American Cookie Book
Makes about 20 cookies

I actually doubled this recipe and got 36 large cookies.  It is essential here to use great chocolate.

5 ounces bittersweet or semisweet chocolate, broken or coarsely chopped
½ cup (1 stick) unsalted butter, cut into chunks
¼ cup plus 1 tbsp. flour
2 tbsp. unsweetened cocoa powder
¾ cup sugar
1/8 tsp. salt
2 large eggs
1 tbsp. plus 1 tsp. instant espresso powder or granules, dissolved in 1 tbsp. hot water
1½ tsp. vanilla extract
8 ounces top-quality white chocolate, coarsely chopped

In a medium, microwave-safe bowl, microwave the bittersweet or semi-sweet chocolate and butter on 100-percent power for 1 minutes. Stir well.  Continue microwaving on 50-percent power, stirring at 30-second intervals.  Stop microwaving before the chocolate completely melts and let the residual heat finish the job.  (Alternatively, in small, heavy saucepan, melt the chocolate and butter over lowest heat, stirring frequently; be very careful not to burn.  Immediately remove from the heat.)  Let cool to warm.

In a medium bowl, thoroughly stir together the flour and cocoa powder; set aside.  In a large bowl, with an electric mixer on medium then high speed, beat together the sugar, salt, eggs, espresso mixture, and vanilla for 2 to 3 minutes, or until well blended, slightly thick, and lightened.  Beat in the melted chocolate mixture, then the flour mixture, until well blended.  Stir in the white chocolate until evenly incorporated.  Refrigerate the dough for at least 1½ hours, or until firm enough to shape.

Preheat the oven to 350ºF.  Line several baking sheets with parchment paper.

Divide the dough into quarters.  Divide each quarter into 5 or 6 equal pieces.  Shape then into balls with lightly greased hands.  Place on baking sheets, spacing them about 3 inches apart.  Pat down the balls just slightly.

Bake the cookies, one sheet at a time, in the middle of the oven for 9 to 12 minutes, or until barely firm when pressed in the centers.  Reverse the sheet from front to back halfway thought baking to ensure even browning.  Transfer the sheet to a wire rack and let stand until the cookies firm up slightly, 2 to 3 minutes.  Slide the cookies, still attached to the parchment paper, onto a wire rack.  Let stand until completely cooled.  Carefully peel the cookies from the parchment.

These cookies are best when fresh but may be stored in an airtight container for up to 4 days or frozen up to 1 month.


« Older Posts Newer Posts »