Archive for March, 2009

Crowd Pleasing Cake

March 22, 2009

img_1680

There are many tastes I remember from childhood, but most of them are tastes I don’t taste anymore. My mom’s stuffed cabbage, her fried sole with a fresh squeeze of lemon, meatloaf eaten with lots of ketchup, barbecued chicken. All things she made regularly and made well. All things that are no longer a part of this vegetarian’s diet. (Or hers for that matter. She went veg a few years after I did.)

Like me, my mom likes cooking and baking equally well and she made lots of yummy treats over the 18 years I spent in her house. This cake was a staple and probably the thing she made most frequently. As a child, I had problems with it. And truthfully, as an adult I struggle with it a bit too. You see, I like nuts. I like them alone and I like them in savory things, but I don’t like them all that much in sweets. Never in ice cream, and I prefer them to be absent in cookies, brownies, cakes, what have you. I make an incredible nut tart around the holidays and the only reason I know it’s incredible is because people have told me so. I have never tried it.

img_1695

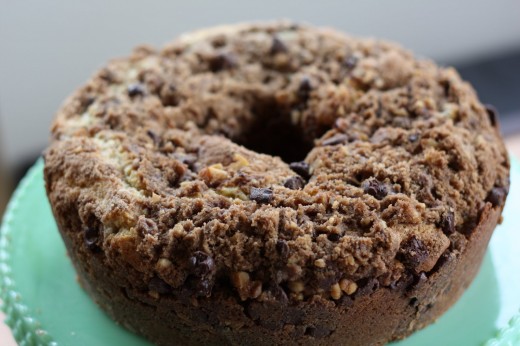
I make this cake because other people don’t seem to share in my uncertain feelings about nuts. People LOVE this cake. Everyone from the very young to the very old feels passionately that it is the best coffeecake. Who am I to argue? For me, it does have some very redeeming qualities. There are the chocolate chips of course and lots of struesel topping. The cake part has a full cup of sour cream in it so it is very moist. It can be made a day in advance and it also can be frozen for up to a month. Most of all, it is truly a crowd pleaser and it’s great to have a few of those in your cooking or baking arsenal.

What are your crowd pleasers?

img_1683

Chocolate Chip Coffee Cake
Serves 10-12

Cake:

1 cup sugar
1/2
cup (1 stick) unsalted butter, room temperature
1 cup sour cream

2 eggs

1 tsp. vanilla

2 cups flour

1 tsp. baking soda

1 tsp. baking powder

1/2
tsp. salt
1 cup chocolate chips

1/4
cup chopped walnuts

Struesel:

1/2 cup flour
1/2
cup packed light brown sugar
1
1/2 tsp. unsweetened cocoa
3/4
tsp. cinnamon
1/4
cup (1/2 stick) butter, chilled, and cut into small pieces
1/4
cup chopped walnuts
1/2
-1 cup chocolate chips

Preheat oven to 350 degrees.

Grease a tube pan (also called an angel food cake pan). In a large bowl, beat sugar and butter at medium speed until lightened in color and well-combined. Add eggs, vanilla, and sour cream, beat until mixed well. Add flour, baking soda, baking powder, and salt and mix until just combined. Mix in chocolate chips and nuts by hand. Scrape batter into pan.

For the struesel: In a medium bowl, combine flour, brown sugar, cinnamon, and cocoa. Using a pastry cutter, two knives, or your fingers, cut in the butter until the mixture resembles coarse crumbs. Stir in the nuts and chocolate chips, then sprinkle on top of the batter.

Bake for 50-60 minutes, until a toothpick inserted into the cake comes out clean. Place on rack for 10 minutes. Carefully turn cake out on to rack upside down, then using another rack placed on the bottom of the cake, re-invert to right side up. Allow to cool completely.


Pasta with a Side of Memories

March 19, 2009

img_1623

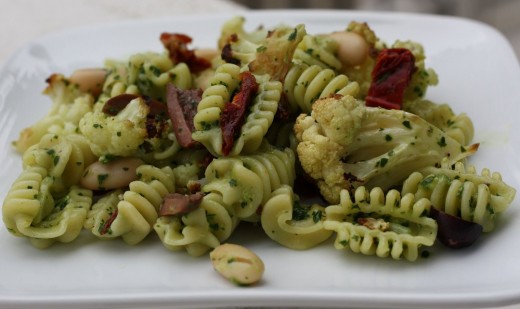
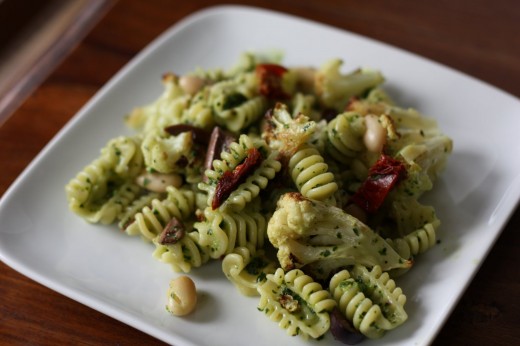
I made this pasta the other night to go with the garlic bread and roasted tomato caprese. Although this is only the second time I have made it, I can honestly say it is a favorite of mine. It has so many delightful flavors and textures and it is very versatile. Parts of it can be made in advance, and the whole dish can be made a day ahead without suffering any ill effects.

This dish comes from a cookbook called From the Earth to the Table which was written by John Ash, one of the pioneers of California wine country cooking. This cookbook is not vegetarian, although over half of the recipes are meat-free, and it is one that I turn to over and over, especially when I am craving exceptionally fresh and flavorful food. Ash has a fabulous restaurant in Santa Rosa – just north of the Napa Valley – where I was lucky enough to have a lovely, if solitary, meal.

I’m sure we all have some time in our lives that we would like to, if not forget, then to go back and live differently. Mid-1998 to the end of 2000 was like that for me. I went through a messy divorce, began a relationship with a not-so-good guy, and worked at a job that I hated. In March of 2000, I quit my job and took a road trip to clear my head. First, I went to Arizona to visit the not-so-good guy, but after that the trip got much better. I spent a few days in L.A. with my dear friend Karen, I flew to Mexico on a free ticket, and once back in the States, I slowly meandered my way up the West Coast enjoying the incredible scenery on offer.

For the most part, I ate very cheaply, but I did splurge at John Ash. I dressed up, brought my book, and treated myself to a nice dinner. I don’t remember what I ate, although I do remember that I was blown away by how fresh and tasty everything was. I remember that I was reading The Grapes of Wrath – savoring every word on the page – and I remember that I wished I had a date across the table from me. I did not wish it was the not-so-good guy.

A week or so later, I arrived back in Seattle. It took me another month or two, but I did break it off with the not-so-good guy. A few months later, I met my husband who has been a wonderful dinner date every since.

img_1629

A few words on the recipe. The first time I made it, I used fresh cranberry beans that I bought at the Farmer’s Market. Sadly, I don’t have any left in my freezer, so I just used good canned cannelini beans and they blended in beautifully. Ash suggests that the sun-dried tomatoes are optional, I think they are essential both for color and flavor. I made some changes that I won’t bore you with, just personal preferences. This pasta is really a beauty because it is great at room temperature as well as hot.

For the pesto, you will want to roast about 3 large cloves of garlic. To do so, place the unpeeled cloves on a small piece of foil, drizzle them with olive oil, fold them up in the foil packet and then put them in a 400 degree oven for about 20 minutes. A toaster oven is perfect for this if you have one. They should feel soft to the touch. Squeeze the garlic out of the skins and proceed with the recipe.

Pasta with Roasted Cauliflower and Parsley Pesto
Adapted from
From the Earth to the Table
Serves 6
generously

You can make the pesto five days and roast the cauliflower one day before you finish the pasta. Slicing the cauliflower (as opposed to just breaking it into florets) give you more surface area for caramelization – a good thing.

1 medium cauliflower (2 pounds or so), sliced 1/2 thick vertically
Olive oil

Kosher salt and freshly ground black pepper

1 lb. tubular shaped pasta, such as penne or rigatoni

Parsley Pesto (recipe follows)

3/4
cup pitted Kalamata olives
1/2
cup sun-dried tomatoes, thinly sliced
1 can cannelini beans, rinsed and drained

Thinly shaved or grated Parmesan cheese for garnishing

Preheat the oven to 425 degrees. Sprinkle both sides of the cauliflower lightly with olive oil, then liberally with pepper and salt. Arrange on a single layer on a baking sheet. Put in th eoven ad roast for 15 to 20 minutes or until the cauliflower is lightly browned and tender. Break into large irregular pieces and set aside.

In a large pot of lightly salted boiling cooking water, cook the pasta until just al dente. Drain, reserving 1/2 cup of the cooking water. Toss the hot pasta with the Parsley Pesto, cauliflower, olives, tomatoes, and beans, adding a bit of the reserved water if the mixture seems to dry. Top with cheese and serve warm or at room temperature. (Can be made one day ahead. Allow to cool completely and then store, covered, in the refrigerator. Bring to room temperature before serving or reheat until it is warm.)

Parsley Pesto
Makes a generous cup

4 cups packed fresh parsley leaves and tender stems, coarsely chopped
1 tbsp. roasted garlic

2 tbsp. pine nuts

2 tbsp. Parmesan or Asiago cheese

=”font-family:trebuchet ms;”>
Grated zest of 1 lemon

1/3
cup olive oil
Kosher salt and freshly ground black pepper

Combine the parsley, garlic, pine nuts, cheese, lemon zest, and olive oil in a food processor or blender, and process until smooth. Season to taste with salt and pepper.


An Ina Kinda Day

March 18, 2009

picnikcollage

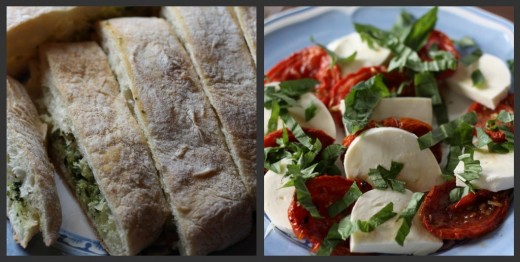
I have four of the Barefoot Contessa cookbooks in my collection and I use them with surprising regularity. If you are new here, I am a vegetarian – something Ina definitely is not. Like not even close. But I love her books and love her recipes. I use many of the dessert ones and also get a lot of mileage out of the soup, salad, and vegetable chapters.The dinner I made last night contained two recipes from her latest book, Back to Basics.

img_1585

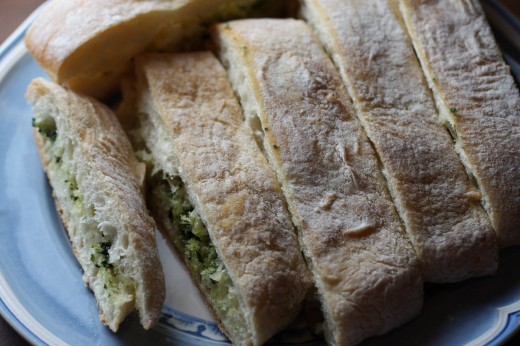
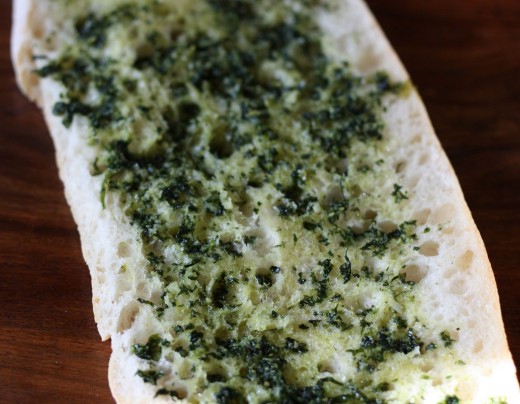
Do you remember the garlic bread from your childhood? The one I remember is from some “Italian” restaurant in the suburb of Seattle where I grew up. My parents are transplanted New Yorkers and I think the hardest part about moving West was the loss of good Italian food and good bagels. (It has gotten better, but we are by no means close to what NY has to offer.) We would go to this restaurant and my brothers and I would chow on garlic bread which consisted of styrofoam-like bread, slathered with butter, and liberally sprinkled with garlic salt. There may have even been some green can Parmesan cheese on there for good measure. Needless to say we loved it, but there is no way I would eat that now.

This is real garlic bread. Ciabatta bread, a heady concoction of lots of garlic, parsley, and fresh oregano sauteed with salt and pepper in a good amount of olive oil, and a very restrained amount of butter – especially for Ina. This is baked in the oven for only 10 minutes – just enough for the all the flavors to mingle and for the bread to get nice and warm – not enough to toughen the bread. In true Ina form, this recipe is found in the Vegetables section of the book!

img_1637

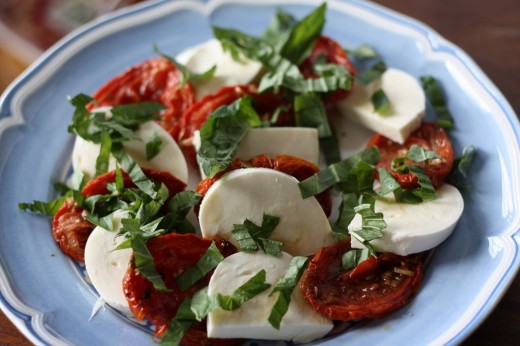
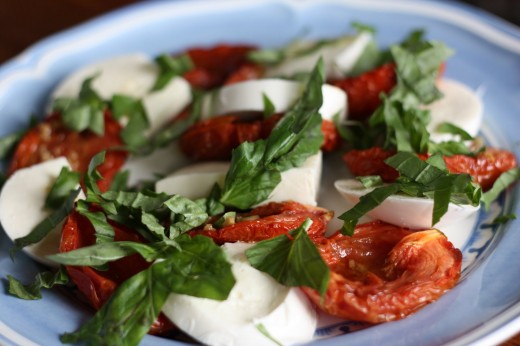
The other recipe I made yesterday was for this Roasted Tomato Caprese Salad. For me it was one of those – why didn’t I think of that?! – moments. Here in Seattle, we are fortunate to have amazing produce. We get incredible spring asparagus and peas, summer berries that people all over the country would pay a fortune for, and wild mushrooms all fall. We do not, however, get good tomatoes. If you grow them yourself, you can get a decent tomato now and then, but I have never experienced the New Jersey tomato. If I did, I think I would cry.

I love tomatoes so I eat them anyway. But Caprese salad never did much for me. Mozzarella doesn’t have that much flavor, so if your tomatoes are tasteless, why exactly would you eat it? Enter Ina and her good idea to roast the tomatoes. That way, you can concentrate the flavor and give it a little boost with olive oil, salt, pepper, a little sugar, and a little balsamic vinegar. Eating this last night really was a revelation and a recipe I will make again and again.

img_1574

Garlic Ciabatta Bread
Adapted from
Barefoot Contessa Back to Basics
Serves 8

To make my cooking healthier, I always add a minimal amount of oil when I am sauteing. For this recipe, you will want to add more – perhaps not the full 1/2 cup called for in the recipe, but at least 1/4 cup. You want the garlic and herbs nice and moist so they can be easily spread on the bread.

6 large garlic cloves, roughly chopped
1/4
cup fresh parsley
2 tbsp. fresh oregano leaves

1 tsp. kosher salt

1/2
tsp. freshly ground black pepper
1/2
cup olive oil
1 large ciabatta bread

2 tbsp. unsalted butter, at room temperature

Preheat the oven to 350 degrees.

Place the garlic, parsley, oregano, salt, and pepper in the bowl of a food processor fitted with the steel blade and process until finely minced. (DN: A mini food processor is perfect for this if you have one.) Heat the olive oil in a medium saute pan over low heat. Add the garlic and herb mixture and cook for 3 minutes, until the garlic is tender but not browned. Remove from the heat and set aside. (DN: You can leave this for several hours if need be.)

Cut the ciabatta in half horizontally, running a serrated knife parallel to the board. Spoon the garlic mixture onto the bottom half and spread the btuter on the top half and place together.

Bake the bread for 5 minutes, then unwrap and discard the foil. Bake for another 5 minutes. Slice crosswise and serve warm.

img_1639

Roasted Tomato Caprese Salad
Adapted from
Barefoot Contessa Back to Basics
Serves 6

This is essentially a simple salad so the components are very important. If you have access to very fresh mozzarella, now is the time to splurge. If you live in Seattle, DeLaurenti makes their own and it is amazing. Also, use your best olive oil and Balsamic vinegar, even your best sea salt. You will taste the difference.

12 plum tomatoes
1/4 cup quality olive oil, plus more for drizzling

1 1/2 tbsp. balsamic vinegar

2 garlic cloves, minced

2 tsp. sugar

Kosher salt and freshly ground black pepper

16 oz fresh mozzarella

12 basil leaves, julienned or chopped

Sea salt

Preheat oven to 275 degrees.

Arrange the tomatoes on a sheet pan, cut sides up, in a single layer. Drizzle with the olive oil and balsamic vinegar. Sprinkle with the garlic, sugar, 1 1/2 tsp. kosher salt, and 1/2 tsp. pepper. Roast for 2 hours until the tomatoes are concentrated and begin to caramelize. Allow the tomatoes to cool to room temperature. (DN: These can be made up to 1 day in advance. Allow to cool and then store in the refrigerator. Allow to come to room temperature before serving.)

Cut the mozzarella into slightly less than 1/2 inch thick. If the slices of mozzarella are larger than the tomatoes, cut the mozzarella slices in half. Layer the tomatoes alternately with the mozzarella on a platter and scatter the basil on top. Sprinkle lightly with sea salt and pepper and drizzle lightly with olive oil. Serve at room temperature.


Homemade Peanut Brittle

March 17, 2009

img_1562

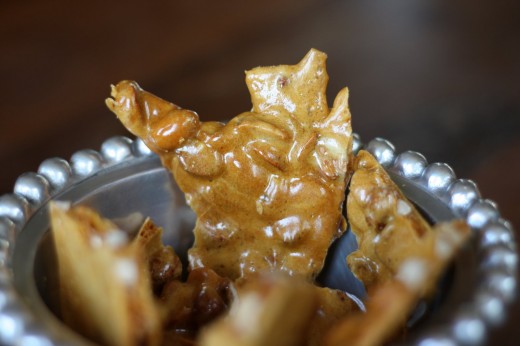
(Is it just me, or does this piece of brittle look like a reversed Minnesota?)

When I made the Peanut Brittle Caramel Crunch Ice Cream Pie the other night, I opted to make my own peanut brittle. This was partly because I feel compelled to do such things, partly because I wanted to have some left over, and partly because this recipe is so incredibly easy.

It may not be traditional, but it is fast and the results are incredible. I have no idea where I got this recipe – all I know is that I copied it out of one of my mom’s recipe books after eating it at her house. All you need is a bowl, a spoon, a baking sheet, and a microwave. Oh, and an oven mitt. You’ll definitely want one of those.

Peanut Brittle
Makes about 1 pound

1 1/2 cups unsalted dry roasted peanuts
1 cup sugar

1/2 cup light corn syrup

pinch of salt

1 tbsp. butter

1 tsp. vanilla

1 1/4 tsp. baking soda, measured into a small bowl

Butter or spray baking sheet. In microwave-proof bowl, combine peanuts, sugar, corn syrup, and salt. Microwave on high until mixture bubbles vigorously, about 6 minutes. Using and oven mitt, remove mixture and stir in vanilla and butter. Return to microwave for another 2 minutes. Again using oven mitt, remove bowl from microwave. Working quickly, add baking soda to candy and stir briskly – mixture will foam. Immediately pour onto prepared sheet and spread as thinly as possible with the back of the mixing spoon or a spatula. Let stand until cool, 30-45 minutes. Break into pieces.


Peanut Brittle and Caramel Crunch Ice Cream Pie

March 15, 2009

img_1590

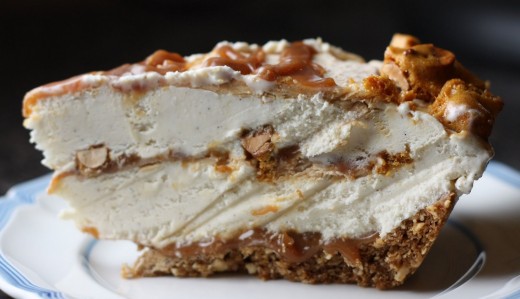
I could tell you a few things about this pie. For example, it weighed well over 6 pounds – I wouldn’t know exactly how much because my kitchen scale tops out at 6 and I was too lazy to carry it upstairs to the bathroom scale. Another thing I could tell you would be that making it reminded me of making bread. Time consuming but without a lot of hands-on time – just babysitting time.

But all you really need to know is in the title of the post.

img_1555

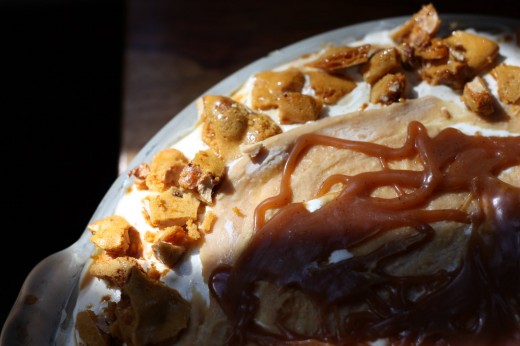
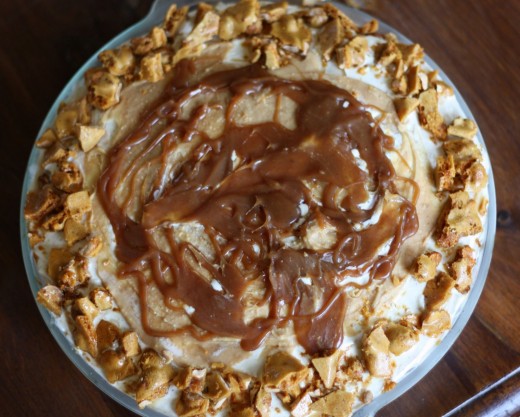
If you took a look at my “Desserts” notebook, recipes I have been cutting out of magazines for the past 16 years, you would notice a heavy bias toward chocolate. I do have those “other” recipes that jumped out at me for one reason or another and this is one of them. The crust is a basic graham cracker crust with some crushed peanuts thrown in. Then you have a layer of ice cream drizzled with peanut butter, homemade caramel sauce, and (my added touch) homemade peanut brittle. On top of that you have another layer of ice cream which is also drizzled with peanut butter, caramel sauce and peanut brittle around the edges.

img_1559

This pie typifies me as a baker. After I globbed the peanut butter and caramel sauce on the top, I realized that I could done it much more artfully. I could have smoothed the peanut butter better and could have piped the caramel on top in a crisscross pattern – how lovely that would have looked! Note to self for next time. Artisitc is not my game, delicious is, and this was truly extraordinary. No one complained about the gloppy looking top.

Peanut Brittle and Caramel Crunch Ice Cream Pie
Adapted from Bon Appetit

Serves 8-10

In shopping for the ice cream, I found out that Haagen Dazs has a new line of ice creams called “Five”. Each flavor only has five ingredients making the flavor more pure and actually lower in fat. I was thrilled with the vanilla – you could see the flecks from the bean throughout the ice cream.

Caramel Sauce

3/4 cup whipping cream
1 vanilla bean, split lengthwise

2 tbsp. (1/4 stick) unsalted butter

1/4 tsp. fine sea salt

3/4 cup sugar

1/3 cup water

1/4 cup light corn syrup

Pie

9 whole graham crackers
1/4 cup (packed dark brown sugar

5 tbsp. unsalted butter, melted

1 1/2 tsp. vanilla extract

1/2 cup roasted cocktail peanuts

3 pints premium vanilla ice cream, slightly softened

5 tbsp. natural style creamy peanut butter

1 cup coarsely chopped peanut brittle

For the caramel sauce:
Place cream in a small saucepan. Scrape in seeds from vanilla bean; add bean. Bring just to simmer. Mix in butter and sea salt; set vanilla cream aside.

Stir sugar, 1/3 cup water, and corn syrup in heavy medium saucepan over medium heat until sugar dissolves. Increase heat; boil without stirring until syrup turns deep amber, brushing down sides with wet pastry brush and swirling pan occasionally, about 12 minutes. Remove from heat. Whisk in vanilla cream (mixture will bubble). Set sauce aside.

For the pie:
Preheat oven to 375 degrees. Line 9-inch diameter pie dish with foil. Finely grind graham crackers and brown sugar in processor. Add butter and vanilla; blend until moist crumbs form. Add nuts; blend just until finely chopped. Using plastic wrap as aid, press crumbs firmly onto bottom and up sides of foil-lined pie dish. Freeze 15 minutes.

Bake crust until brown, about 15 minutes. Freeze 1 hour. Using foil, lift crust from dish; carfully peel off foil. Return crust to pie dish. Drizzle 1/2 cup caramel sauce over bottom of crust. Freeze 30 minutes. Spoon 1 1/2 pints ice cream into crust; smooth top. Drizzle 3 tbsp. peanut butter over, then 2 tbsp. sauce. Sprinkle with 1/2 cup brittle. Freeze 1 hour. Spoon remaining 1 1/2 pints ice cream over; smooth top. Drizzle 2 tbsp. peanut butter over, then 2 tbsp. sauce. Sprinkle edge of pie with 1/2 cup brittle. Freeze 4 hours.

(Do ahead: Pie can be made 3 days ahead; tent with foil and freeze. Cover and chill remaining sauce.)

Cut pie into wedges. Rewarm sauce and pass separately.


« Older Posts Newer Posts »